D-Link DCS-5605 Quick Install Manual
Wireless n /wired ptz h.264 network camera
Hide thumbs
Also See for DCS-5605:
- User manual (105 pages) ,
- Quick installation manual (41 pages) ,
- Specifications (2 pages)
Table of Contents
Advertisement
Quick Links
Download this manual
See also:
User Manual
Advertisement
Table of Contents

Related Manuals for D-Link DCS-5605

Summary of Contents for D-Link DCS-5605
-
Page 1: Network Camera
Quick Install Guide Wireless N /Wired PTZ H.264 Network Camera This document will guide you through the basic installation process for your new D-Link Network Camera. DCS-5605/5635 Documentation also available on CD and via the D-Link Website... -
Page 2: Installation Steps
This installation guide provides basic instructions for installing the DCS-5605/5635 Network Camera on your network. For additional information about how to use the camera, please refer to the User Manual which is located on the CD or from the D-Link support website. Installation Steps 1. -
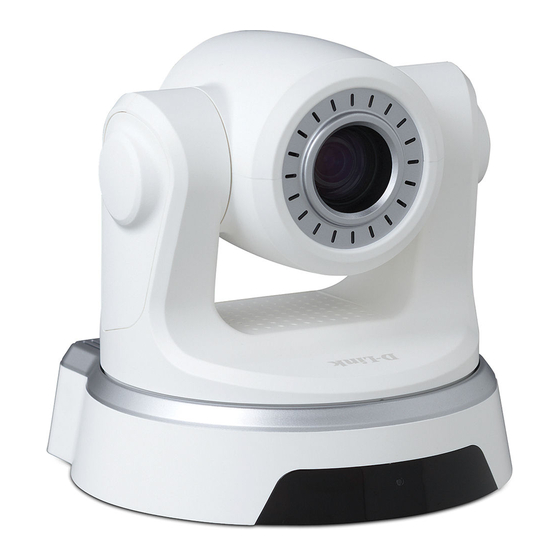
Page 3: Hardware Overview
Ethernet Port Ethernet port can also be used to power the camera using a Power over Ethernet (PoE) switch or router (DCS-5605 only). The camera provides a terminal block with two pairs of connectors situated on the back panel. One pair is for input and the other is for output. -
Page 4: Front Panel
The Link LED will illuminate green once a connection has been established. The built-in microphone can be used to capture audio from Microphone sources nearby the camera. The Power LED will illuminate red when the camera is Power LED receiving power. D-Link DCS-5605/5635 Quick Install Guide... -
Page 5: Hardware Installation
Note: Once power has been established, the Power LED will turn red. When the device has obtained an IP address and is accessible, the Link LED will turn green. D-Link DCS-5605/5635 Quick Install Guide... - Page 6 Insert the DCS-5605/5635 CD into your computer's CD-ROM drive to begin the installation. If the Autorun function on your computer is disabled, or if the D-Link Launcher fails to start automatically, click Start > Run. Type D:\autorun.exe, where D: represents the drive letter of your CD-ROM drive.
-
Page 7: Viewing Camera Via Web Browser
Configuration with Wizard Viewing Camera via Web Browser 1. Click on the D-Link Setup Wizard SE icon that was created in your Windows Start menu. Go to Start > D-Link > Setup Wizard SE. 2. Select the camera and click the Link button to access the web configuration. -
Page 8: Technical Support
Copyright ©2010 D-Link Corporation/D-Link Systems, Inc. All rights reserved. D-Link and the D-Link logo are registered trademarks of D-Link Corporation or its subsidiaries in the United States and other countries. Other trademarks are the property of their respective owners. Actual data throughput will vary. Network conditions and environmental factors, including volume of network traffic, building materials and construction, and network overhead lower actual data throughput rate.