Epson WF-2660 User Manual
Hide thumbs
Also See for WF-2660:
- User manual (305 pages) ,
- Start here (2 pages) ,
- Quick manual (17 pages)
Table of Contents
Advertisement
Quick Links
Advertisement
Table of Contents

Related Manuals for Epson WF-2660


Summary of Contents for Epson WF-2660
- Page 1 User's Guide NPD5055-01 EN...
- Page 2 Neither Seiko Epson Corporation nor its affiliates shall be liable to the purchaser of this product or third parties for damages, losses, costs, or expenses incurred by the purchaser or third parties as a result of accident, misuse, or abuse of this product or unauthorized modifications, repairs, or alterations to this product, or (excluding the U.S.)
- Page 3 EPSON EXCEED YOUR VISION or EXCEED YOUR VISION is a trademark of Seiko Epson Corporation. ❏ EPSON Scan software is based in part on the work of the Independent JPEG Group. ❏ libtiff Copyright © 1988-1997 Sam Leffler Copyright ©...
-
Page 4: Table Of Contents
Control Panel......14 Using Epson iPrint..... . . 54 Using AirPrint. - Page 5 Connecting to a Phone Line....68 Epson Connect Service..... .99 Making Basic Fax Settings.
- Page 6 Scanning Is Too Slow....128 Contacting Epson Support....143 Scanning Stops when Scanning to PDF/ Multi-TIFF.
-
Page 7: About This Manual
Descriptions Used in this Manual ❏ Screenshots of the printer driver and the EPSON Scan (scanner driver) screens are from Windows 8.1 or Mac OS X v10.9.x. The content displayed on the screens varies depending on the model and situation. -
Page 8: Operating System References
User's Guide About This Manual ❏ Illustrations of the printer used in this manual are examples only. Although there may be slight differences depending on the model, the method of operation is the same. ❏ Some of the menu items on the LCD screen vary depending on the model and settings. Operating System References Windows In this manual, terms such as "Windows 8.1", "Windows 8", "Windows 7", "Windows Vista", "Windows XP",... -
Page 9: Important Instructions
User's Guide Important Instructions Important Instructions Safety Instructions Read and follow these instructions to ensure safe use of this printer. Make sure you keep this manual for future reference. Also, be sure to follow all warnings and instructions marked on the printer. ❏... -
Page 10: Advisories And Warnings For Setting Up/Using The Printer
User's Guide Important Instructions Advisories and Warnings for Setting Up/Using the Printer ❏ Do not block or cover the vents and openings in the printer. ❏ Use only the type of power source indicated on the printer's label. ❏ Avoid using outlets on the same circuit as photocopiers or air control systems that regularly switch on and off. ❏... -
Page 11: Advisories And Warnings For Using The Printer With A Wireless Connection
User's Guide Important Instructions Advisories and Warnings for Using the Printer with a Wireless Connection ❏ Radio waves from this printer may negatively affect the operation of medical electronic equipment, causing them to malfunction. When using this printer inside medical facilities or near medical equipment, follow directions from the authorized personnel representing the medical facilities, and follow all posted warnings and directions on the medical equipment. -
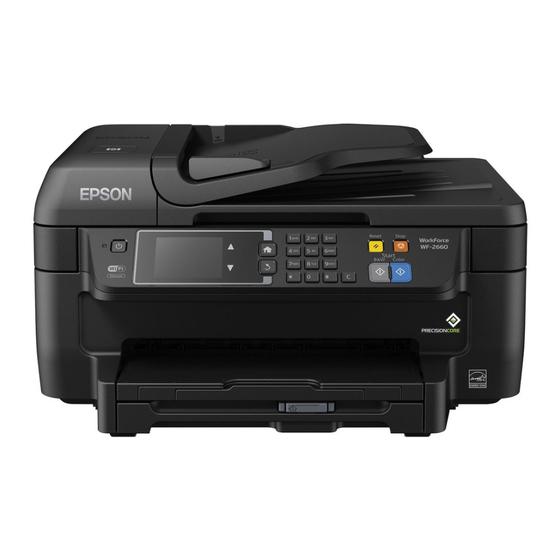
Page 12: Printer Basics
User's Guide Printer Basics Printer Basics Part Names and Functions NFC tag Pass a smart device over this tag to print or scan from the smart device directly. ADF (Automatic Document Feeder) cover Open when removing jammed originals in the ADF. ADF input tray Feeds originals automatically. - Page 13 User's Guide Printer Basics Output tray Holds the ejected paper. Edge guides Feeds the paper straight into the printer. Slide to the edges of the paper. Paper cassette Loads paper. Document cover Blocks external light while scanning. Scanner glass Place the originals. Control panel Operates the printer.
-
Page 14: Control Panel
User's Guide Printer Basics Ink cartridge holder Install the ink cartridges. Ink is ejected from the print head nozzles underneath. Rear cover Remove when removing jammed paper. LAN port Connects a LAN cable. USB port Connects a USB cable. AC inlet Connects the power cord. -
Page 15: Mode Icons Displayed On The Lcd Screen
Enters Scan mode. Enters Fax mode. Displays the setting screen for Eco mode. Displays the setting screen for Epson Connect services. Enters Setup mode. Icons Displayed on the LCD Screen The following icons are displayed on the LCD screen depending on the printer's status. Press the network icon to... -
Page 16: Icons Displayed On The Software Keyboard Of The Lcd Screen
User's Guide Printer Basics Press this icon to view operating instructions such as how to load paper, and how to place originals. Turns on when originals are placed in the ADF. Turns on when ink cartridges are running low. Select Setup > Ink Levels to check the status. -
Page 17: Menu Options
User's Guide Printer Basics Switches between upper case and lower case. Switches the character type. 123#: Enters numbers and symbols. ABC: Enters letters. ÁÄÂ: Enters special characters such as umlauts and accents. Changes the keyboard layout. Enters a space. Deletes a character to the left. Enters a character. -
Page 18: Scan Mode
Select the copy layout for multiple pages when you have selected 2-up as the Layout setting. Dry Time Select the drying time. Scan Mode Cloud Menu Settings and Explanations Destination Select a destination that has been registered in the Epson Connect Server. Format Select the format in which to save the scanned image. -
Page 19: Fax Mode
User's Guide Printer Basics Menu Settings and Explanations Settings Scan Area Select the scan area. Auto Cropping: Crops the white space around the text or image when scanning. Max Area: Scans at the maximum scan area of the scanner glass or the ADF. Document Type Select the type of your original. -
Page 20: Setup Mode
User's Guide Printer Basics Menu Settings and Explanations Fax Report Fax Settings List Prints the current fax settings. Fax Log Prints a transmission report automatically after you send a fax. You can set to print this report automatically using the following menu. Setup >... - Page 21 User's Guide Printer Basics Menu Settings and Explanations Printer Settings Paper Source A4/Letter Switching Enable this feature so that error messages are not Settings displayed even when the paper size setting for the print job and the paper loaded in the paper source do not match.
- Page 22 Advanced Setup See the Network Guide for more details. Epson Connect You can suspend or resume the Epson Connect or Google Could Print service, or cancel using the Services services (restore the default settings). See the Epson Connect portal website for more details.
-
Page 23: Fax Settings
User's Guide Printer Basics Menu Settings and Explanations Eco Mode The following Eco mode settings are available. When these settings are disabled, the settings made in Common Settings are applied. Configure Sleep Timer Select the time period before the printer enters sleep mode (energy saving mode) when no operations are performed. - Page 24 User's Guide Printer Basics Menu Settings and Explanations Output Settings Fax Output Saves received documents in the printer's inbox or on a computer. You need to make settings on FAX Utility before saving on a computer. Auto Reduction Reduces large received documents to fit on the paper in the paper source. Reducing may not always be possible depending on the received data.
- Page 25 User's Guide Printer Basics Menu Settings and Explanations Basic Settings Fax Speed Select the fax transmission speed. We recommend selecting Slow(9,600bps) when a communication error occurs frequently, when sending/receiving a fax to/from abroad, or when you are using an IP (VoIP) phone service. Automatically corrects errors in the fax transmission (Error Correction Mode), mostly caused by telephone line noise.
-
Page 26: Contacts Mode
User's Guide Printer Basics Contacts Mode Menu Description Menu Registers contacts and a contact group, or prints the contacts list. -
Page 27: Loading Paper
User's Guide Loading Paper Loading Paper Paper Handling Precautions ❏ Read the instruction sheets supplied with the paper. ❏ Fan and align the edges of the paper before loading. Do not fan or curl photo paper. Doing so may damage the printable side. -
Page 28: Available Paper And Capacities
Load one sheet of paper at a time if the paper does not feed correctly or if the printout has uneven colors or smears. Note: ❏ The availability of paper varies by location. For the latest information on paper available in your area, contact Epson support. -
Page 29: List Of Paper Types
Media Type Control Panel Printer Driver Copy paper, Plain paper plain papers plain papers Epson Bright White Ink Jet Paper Epson Ultra Glossy Photo Paper Ultra Glossy Epson Ultra Glossy Epson Premium Glossy Photo Paper Prem. Glossy Epson Premium Glossy Epson Premium Semigloss Photo Prem. - Page 30 User's Guide Loading Paper 2. Slide the edge guides to their maximum position. Note: When using paper larger than A4 size, extend the paper cassette. 3. Slide the front edge guide to the paper size you want to use. 4. With the printable side facing down, load paper against the front edge guide. Important: ❏...
- Page 31 User's Guide Loading Paper ❏ Envelopes ❏ Pre-punched paper Note: You can use pre-punched paper under the following conditions. Automatic 2-sided printing is not available for pre- punched paper. ❏ Loading capacity: One sheet ❏ Available size: A4, B5, A5, A6, Letter, Legal ❏...
- Page 32 User's Guide Loading Paper 8. Slide out the output tray. Related Information “Paper Handling Precautions” on page 27 & “Available Paper and Capacities” on page 28 &...
-
Page 33: Placing Originals
User's Guide Placing Originals Placing Originals Place originals on the scanner glass or the ADF. Use the scanner glass for originals that the ADF does not support. You can scan multiple originals at the same time with the ADF. Available Originals for the ADF Available Paper Sizes A4, Letter, Legal Paper Type... -
Page 34: Placing Originals On The Scanner Glass
User's Guide Placing Originals 3. Place the originals face up in the ADF. Important: ❏ Do not load originals above the line just under the symbol inside the ADF edge guide. ❏ Do not add originals while scanning. 4. Slide the ADF edge guide to the edge of the originals. Related Information “Available Originals for the ADF”... - Page 35 User's Guide Placing Originals 1. Open the document cover. 2. Remove any dust or stains on the scanner glass. 3. Place the original face-down and slide it to the corner mark. Note: ❏ A range of 1.5 mm from the edges of the scanner glass is not scanned. ❏...
-
Page 36: Managing Contacts
User's Guide Managing Contacts Managing Contacts Registering a contacts list allows you to easily enter destinations. You can register up to 60 entries in the contacts list and use it for faxing. Registering Contacts 1. Select Fax > Contacts from the home screen. 2. -
Page 37: Registration And Backup Of Contacts Using A Computer
Contacts data may be lost due to a printer malfunction. We recommend that you make a backup of the data whenever you update the data. Epson shall not be responsible for the loss of any data, for backing up or recovering data and/or settings even during a warranty period. -
Page 38: Printing
User's Guide Printing Printing Printing from a Computer Printing Basics - Windows Note: ❏ See the online help for explanations of the setting items. Right-click an item, and then click Help. ❏ Operations may differ depending on the application. See the application's help for details. 1. -
Page 39: Printing Basics - Mac Os X
User's Guide Printing ❏ Color: Select Grayscale when you want to print in black or shades of gray. Note: ❏ If you are printing high-density data on plain paper, letterhead, or preprinted paper, select Standard-Vivid as the Quality setting to make your printout vivid. ❏... - Page 40 When printing on envelopes, select landscape orientation. 5. Select Print Settings from the pop-up menu. Note: On Mac OS X v10.8.x or later, if the Print Settings menu is not displayed, the Epson printer driver has not been installed correctly. Select System Preferences from the menu >...
-
Page 41: Printing On 2-Sides
Printing on 2-Sides - Windows Note: ❏ Manual 2-sided printing is available when EPSON Status Monitor 3 is enabled. If EPSON Status Monitor 3 is disabled, access the printer driver, click Extended Settings on the Maintenance tab, and then select Enable EPSON Status Monitor 3. - Page 42 User's Guide Printing 4. Select Auto (Long-edge binding), Auto (Short-edge binding), Manual (Long-edge binding), or Manual (Short-edge binding) from 2-Sided Printing on the Main tab. 5. Click Settings, make the appropriate settings, and then click OK. Note: To print a folded booklet, select Booklet. 6.
-
Page 43: Printing Several Pages On One Sheet
User's Guide Printing Printing Several Pages on One Sheet You can print two or four pages of data on a single sheet of paper. Printing Several Pages on One Sheet - Windows Note: This feature is not available for borderless printing. 1. -
Page 44: Printing To Fit The Paper Size
User's Guide Printing 5. Set the number of pages in Pages per Sheet, the Layout Direction (page order), and Border. 6. Set the other items as necessary. 7. Click Print. Related Information “Loading Paper in the Paper Cassette” on page 29 &... -
Page 45: Printing Multiple Files Together (For Windows Only)
User's Guide Printing Related Information “Loading Paper in the Paper Cassette” on page 29 & “Printing Basics - Windows” on page 38 & Printing to Fit the Paper Size - Mac OS X 1. Load paper in the printer. 2. Open the file you want to print. 3. -
Page 46: Enlarged Printing And Making Posters (For Windows Only)
User's Guide Printing 4. Select Job Arranger Lite on the Main tab. 5. Click OK to close the printer driver window. 6. Click Print. The Job Arranger Lite window is displayed and the print job is added to the Print Project. 7. - Page 47 User's Guide Printing 7. Click Print. Related Information “Loading Paper in the Paper Cassette” on page 29 & “Printing Basics - Windows” on page 38 & Making Posters Using Overlapping Alignment Marks Here is an example of how to make a poster when 2x2 Poster is selected, and Overlapping Alignment Marks is selected in Print Cutting Guides.
- Page 48 User's Guide Printing 1. Prepare Sheet 1 and Sheet 2. Cut off the margins of Sheet 1 along the vertical blue line through the center of the top and bottom cross marks. 2. Place the edge of Sheet 1 on top of Sheet 2 and align the cross marks, then temporarily tape the two sheets together from the back.
- Page 49 User's Guide Printing 3. Cut the taped sheets in two along the vertical red line through the alignment markers (this time, the line to the left of the cross marks). 4. Tape the sheets together from the back. 5. Repeat steps 1 to 4 to tape Sheet 3 and Sheet 4 together.
- Page 50 User's Guide Printing 6. Cut off the margins of Sheet 1 and Sheet 2 along the horizontal blue line through the center of the left and right side cross marks. 7. Place the edge of Sheet 1 and Sheet 2 on top of Sheet 3 and Sheet 4 and align the cross marks, and then temporarily tape them together from the back.
- Page 51 User's Guide Printing 8. Cut the taped sheets in two along the horizontal red line through the alignment markers (this time, the line above the cross marks). 9. Tape the sheets together from the back.
-
Page 52: Printing Using Advanced Features
User's Guide Printing 10. Cut off the remaining margins along the outer guide. Printing Using Advanced Features This section introduces a variety of additional layout and printing features available on the printer driver. Related Information “Windows Printer Driver” on page 100 &... -
Page 53: Printing A Reduced Or Enlarged Document
Mac OS X Access the print dialog. Select Color Matching from the pop-up menu, and then select EPSON Color Controls. Select Color Options from the pop-up menu, and then select one of the available options. Click the arrow next to... -
Page 54: Printing From Smart Devices
Using Epson iPrint Epson iPrint is an application that allows you to print photos, documents, and Web pages from a smart device such as a smartphone or tablet. You can use either local print, printing from a smart device that is connected to the same wireless network as your printer, or remote print, printing externally over the internet. - Page 55 Displays photos and documents you selected. Starts printing. Note: To print from the document menu using iPhone, iPad, and iPod touch running iOS, start Epson iPrint after transferring the document you want to print using the file sharing function in iTunes.
- Page 56 ❏ Make sure that Wi-Fi Direct Simple AP mode is running. See the Network Guide for more details. ❏ Make sure that Epson iPrint is installed on your smart device. If not, touch the NFC tag antenna of the smart device to the printer's NFC tag and install it.
-
Page 57: Using Airprint
User's Guide Printing Using AirPrint AirPrint allows you to wirelessly print to your AirPrint-enabled printer from your iOS device using the latest version of iOS and from your Mac OS X v10.7.x or later. Note: See the AirPrint page of the Apple website for more details. 1. -
Page 58: Canceling Printing - Mac Os X
User's Guide Printing 3. Click Print Queue. 4. Right-click on the job you want to cancel and then select Cancel. Related Information “Windows Printer Driver” on page 100 & Canceling Printing - Mac OS X 1. Click the printer icon in the Dock. 2. -
Page 59: Copying
User's Guide Copying Copying 1. Load paper in the printer. 2. Place the originals. 3. Enter Copy from the home screen. 4. Enter the number of copies by using the numeric keypad. 5. Press Layout, and then select the appropriate layout. 6. -
Page 60: Scanning
❏ When the computer to which you want to save the scanned images is detected on the network, the initial 15 characters of the computer's name are displayed on the control panel. If you set a network scan name in Epson Event Manager, it is displayed on the control panel. -
Page 61: Scanning To A Computer (Wsd)
“Placing Originals” on page 33 & Scanning from a Computer Scan using the scanner driver "EPSON Scan". See the EPSON Scan help for an explanation of each setting item. Scanning in Office Mode You can scan many text documents quickly. - Page 62 User's Guide Scanning 3. Select Office Mode from the Mode list. 4. Make the following settings on the Main Settings tab. ❏ Document Source: Select the document source in which you placed your original. ❏ Size: Select the size of your original. ❏...
-
Page 63: Scanning In Professional Mode
Security tab, and then make settings. Related Information “Placing Originals” on page 33 & “EPSON Scan (Scanner Driver)” on page 103 & Scanning in Professional Mode You can scan images while adjusting the quality and color. This mode is recommended for advanced users. - Page 64 User's Guide Scanning 3. Select Professional Mode from the Mode list. 4. Make the following settings. ❏ Document Source: Select the document source in which you placed your original. ❏ Auto Exposure Type: Select the exposure type that suits your original. ❏...
-
Page 65: Scanning From Smart Devices
Scanning from Smart Devices Epson iPrint is an application that allows you to scan photos and documents from a smart device, such as a smartphone or tablet, that is connected to the same wireless network as your printer. You can save the scanned data on a smart device or to Cloud services, send it by email, or print it. -
Page 66: Scanning By Touching Smart Devices To The Nfc Tag
Displays the screen where you can send scanned data by email. Displays the screen where you can print scanned data. Related Information “Using Epson iPrint” on page 54 & Scanning by Touching Smart Devices to the NFC Tag Even if the printer and your smart device are not connected, you can connect them automatically and scan by touching the NFC antenna of a smart device running Android 4.0 or later and that supports NFC (Near Filed... - Page 67 ❏ Make sure that Wi-Fi Direct Simple AP mode is running. See the Network Guide for more details. ❏ Make sure that Epson iPrint is installed on your smart device. If not, touch the NFC tag antenna of the smart device to the printer's NFC tag and install it.
-
Page 68: Setting Up A Fax
User's Guide Faxing Faxing Setting Up a Fax Connecting to a Phone Line Compatible Telephone Lines You can use the printer over standard analogue telephone lines (PSTN = Public Switched Telephone Network) and PBX (Private Branch Exchange) telephone systems. You may not be able to use the printer with the following phone lines or systems. ❏... - Page 69 User's Guide Faxing Connecting to a Standard Phone Line (PSTN) or PBX Connect a phone cable from the telephone wall jack or PBX port to the LINE port on the back of the printer. Related Information “Making Settings for a PBX Phone System” on page 72 &...
- Page 70 User's Guide Faxing Connecting Your Phone Device to the Printer When using the printer and your telephone on a single phone line, connect the telephone to the printer. Note: ❏ If your phone device has a fax function, disable the fax function before connecting. See the manuals that came with the phone device for details.
-
Page 71: Making Basic Fax Settings
User's Guide Faxing Important: When sharing a single phone line, make sure you connect the phone device to the EXT. port of the printer. If you split the line to connect the phone device and the printer separately, the phone and the printer do not work correctly. - Page 72 User's Guide Faxing Note: ❏ Distinctive ring services, offered by many telephone companies (the service name differs by company), allows you to have several phone numbers on one phone line. Each number is assigned a different ring pattern. You can use one number for voice calls and another for fax calls.
-
Page 73: Sending Faxes
User's Guide Faxing 1. Enter Setup from the home screen. 2. Select Fax Settings > Basic Settings > Line Type. 3. Select PBX. 4. On the Access Code screen, select Use. 5. Press the Access Code field, enter the external access code used for your phone system, and then press the enter key at the bottom-right of the screen. - Page 74 User's Guide Faxing Note: ❏ You can send the same monochrome fax to up to 30 recipients. A color fax can only be sent to one recipient at a time. ❏ To add a pause (pause for three seconds) during dialing, enter a hyphen by pressing ❏...
-
Page 75: Various Ways Of Sending Faxes
User's Guide Faxing 2. Pick up the handset of the connected telephone, and then dial the recipient's fax number using the phone. 3. Press Start Fax on the printer's control panel, and then press Send. 4. Press Menu, select Fax Send Settings, and then make settings such as the resolution and the sending method as necessary. -
Page 76: Receiving Faxes
User's Guide Faxing Sending Many Pages of a Monochrome Document (Direct Send) When sending a fax in monochrome, the scanned document is temporarily stored in the printer's memory. Therefore, sending a lot of pages may cause the printer to run out of memory and stop sending the fax. You can avoid this by enabling the Direct Send feature, however, it takes longer to send the fax because the printer performs scanning and sending simultaneously. -
Page 77: Various Ways Of Receiving Faxes
User's Guide Faxing Settings for the Answering Machine You need settings to use an answering machine. ❏ Set the Receive Mode of the printer to Auto. ❏ Set the Rings to Answer setting of the printer to a higher number than the number of rings for the answering machine. -
Page 78: Saving Received Faxes
User's Guide Faxing 2. Select Fax Settings > Receive Settings > Remote Receive. 3. After enabling Remote Receive, enter a two digit code (0 to 9, *, and # can be entered) in the Start Code field. 4. Press OK. Using Remote Receive 1. - Page 79 User's Guide Faxing Once the received documents are saved on the computer, they are deleted from the printer. To print the documents automatically while saving them on the computer, select Yes and Print on the printer after finishing the FAX Utility settings. Note: When the computer is not turned on, the printer temporarily saves the received documents in its memory.
-
Page 80: Using Other Faxing Features
User's Guide Faxing Using Other Faxing Features Printing Fax Report and List Printing Fax Report Manually 1. Enter Fax from the home screen. 2. Select Menu > Fax Report. 3. Select the report to print, and then follow the on-screen instruction. Note: You can change the report format. -
Page 81: Reprinting Received Faxes
User's Guide Faxing 2. Select Fax Settings > Security Settings. 3. Select the menu, and then make the settings. Related Information “Fax Settings” on page 23 & Reprinting Received Faxes You can reprint received documents that you have already printed. All of the received documents saved in the printer's memory are printed in reverse chronological order. -
Page 82: Replacing Ink Cartridges
1. Access the printer driver window. 2. Click EPSON Status Monitor 3 on the Maintenance tab, and then click Details. Note: If EPSON Status Monitor 3 is disabled, click Extended Settings on the Maintenance tab, and then select Enable EPSON Status Monitor 3. Related Information “Windows Printer Driver”... -
Page 83: Ink Cartridge Handling Precautions
❏ Store ink cartridges at normal room temperature and keep them away from direct sunlight. ❏ Epson recommends using the ink cartridge before the date printed on the package. ❏ For best results, use up ink cartridge within six months of opening the package. - Page 84 User's Guide Replacing Ink Cartridges ❏ You must remove the yellow tape from the cartridge before installing it; otherwise, print quality may decline or you may not be able to print. Do not remove or tear the label on the cartridge; this can cause leakage. ❏...
-
Page 85: Replacing Ink Cartridges
User's Guide Replacing Ink Cartridges ❏ If you need to remove an ink cartridge temporarily, make sure you protect the ink supply area from dirt and dust. Store the ink cartridge in the same environment as the printer, with the ink supply port facing down or sideways. - Page 86 User's Guide Replacing Ink Cartridges Check which ink cartridge needs to be replaced, press Proceed, and then press Yes, replace now. ❏ When replacing ink cartridges before they are expended From the home screen, select Setup > Maintenance > Ink Cartridge Replacement, and then press the button.
- Page 87 User's Guide Replacing Ink Cartridges Important: ❏ Do not touch the sections shown in the illustration. Doing so may prevent normal operation and printing. ❏ Do not shake cartridges after opening the package, as they may leak. 4. Open the scanner unit with the document cover closed. 5.
-
Page 88: Temporarily Printing With Black Ink
Because this feature is only available for approximately five days, replace the expended ink cartridge as soon as possible. Note: ❏ If EPSON Status Monitor 3 is disabled, access the printer driver, click Extended Settings on the Maintenance tab, and then select Enable EPSON Status Monitor 3. ❏ The available period varies depending on the usage conditions. -
Page 89: Temporarily Printing With Black Ink - Windows
User's Guide Replacing Ink Cartridges Temporarily Printing with Black Ink - Windows 1. When the following window is displayed, cancel printing. Note: If you cannot cancel printing from the computer, cancel using the printer's control panel. 2. Access the printer driver window. 3. -
Page 90: Temporarily Printing With Black Ink - Mac Os X
User's Guide Replacing Ink Cartridges Related Information “Loading Paper in the Paper Cassette” on page 29 & “Printing Basics - Windows” on page 38 & Temporarily Printing with Black Ink - Mac OS X Note: To use this feature through a network, connect with Bonjour. 1. -
Page 91: Conserving Black Ink When The Black Ink Is Low (For Windows Only)
❏ EPSON Status Monitor 3: Enabled Note: ❏ If EPSON Status Monitor 3 is disabled, access the printer driver, click Extended Settings on the Maintenance tab, and then select Enable EPSON Status Monitor 3. ❏ Composite black looks slightly different from pure black. In addition, the print speed is reduced. -
Page 92: Improving Print And Scan Quality
We recommend to turn off the printer. If print quality has still not improved, contact Epson support. ❏ To prevent the print head from drying out, always turn the printer off by pressing the button. -
Page 93: Checking And Cleaning The Print Head - Windows
User's Guide Improving Print and Scan Quality ❏ There are broken lines or missing segments: The print head nozzles may be clogged. Go to the next step. 6. Select Clean the Print Head. 7. When cleaning is finished, select Print Nozzle Check Pattern to print the nozzle check pattern again. Repeat cleaning and printing the pattern until all lines are printed completely. -
Page 94: Aligning The Print Head - Windows
User's Guide Improving Print and Scan Quality 2. Enter Setup from the home screen. 3. Select Maintenance > Print Head Alignment. 4. Select Vertical Alignment or Horizontal Alignment, and then follow the on-screen instructions to print an alignment pattern. ❏ Vertical Alignment: Select this if your printouts look blurry or vertical ruled lines appear misaligned. ❏... -
Page 95: Aligning The Print Head - Mac Os X
User's Guide Improving Print and Scan Quality Aligning the Print Head - Mac OS X 1. Load A4-size plain paper in the printer. 2. Select System Preferences from the menu > Printers & Scanners (or Print & Scan, Print & Fax), and then select the printer. - Page 96 User's Guide Improving Print and Scan Quality 1. Open the ADF cover. 2. Use a soft, dry, clean cloth to clean the roller and the interior of the ADF. 3. Open the document cover.
-
Page 97: Cleaning The Scanner Glass
User's Guide Improving Print and Scan Quality 4. Clean the part that is shown in the illustration. Note: ❏ If the glass surface is stained with grease or some other hard-to-remove material, use a small amount of glass cleaner and a soft cloth to remove it. Wipe off all remaining liquid. ❏... - Page 98 User's Guide Improving Print and Scan Quality 1. Open the document cover. 2. Use a soft, dry, clean cloth to clean the surface of the scanner glass. Note: ❏ If the glass surface is stained with grease or some other hard-to-remove material, use a small amount of glass cleaner and a soft cloth to remove it.
-
Page 99: Applications And Network Service Information
Applications and Network Service Information Epson Connect Service Using Epson Connect, you can print from your smartphone, tablet PC, or laptop, anytime and practically anywhere. You can also send scanned images to the Cloud service. The following features are available for your printer. -
Page 100: Running Web Config On Windows
IPv6: http://[the printer's IP address]/ Examples: IPv4: http://192.168.100.201/ IPv6: http://[2001:db8::1000:1]/ Note: Using the smart device, you can also run Web Config from the maintenance screen of Epson iPrint. Related Information “Using Epson iPrint” on page 54 & Running Web Config on Windows 1. - Page 101 User's Guide Applications and Network Service Information Note: You can change the language of the printer driver. Select the language you want to use from the Language setting on the Maintenance tab. Accessing the printer driver from applications To make settings that apply only to the application you are using, access from that application. Select Print or Print Setup from the File menu.
-
Page 102: Mac Os X Printer Driver
See the online help for explanations of the setting items. 4. Click OK. Making Operation Settings for the Windows Printer Driver You can make settings such as enabling EPSON Status Monitor 3. 1. Access the printer driver window. 2. Click Extended Settings on the Maintenance tab. -
Page 103: Epson Scan (Scanner Driver)
“Temporarily Printing with Black Ink” on page 88 & EPSON Scan (Scanner Driver) EPSON Scan is an application for controlling scanning. You can adjust the size, resolution, brightness, contrast, and quality of the scanned image. Note: You can also start EPSON Scan from a TWAIN-compliant scanning application. -
Page 104: Epson Event Manager
Epson Event Manager Epson Event Manager is an application that allows you to manage scanning from the control panel and save images to a computer. You can add your own settings as presets, such as the document type, the save folder location, and the image format. -
Page 105: Fax Utility
Epson Easy Photo Print Epson Easy Photo Print is an application that allows you to easily print photos with various layouts. You can preview the photo image and adjust the images or position. You can also print photos with a frame. See the application's help for details. -
Page 106: Presto! Pagemanager
Select Go > Applications > Presto! PageManager > Presto! PageManager. EPSON Software Updater EPSON Software Updater is an application that checks for new or updated software on the internet and installs it. You can also update the printer's firmware and manual. -
Page 107: Uninstalling Applications
Click the start button, and select All Programs (or Programs) > EpsonNet > EpsonNet Config V4 > EpsonNet Config. Starting on Mac OS X Select Go > Applications > Epson Software > EpsonNet > EpsonNet Config V4 > EpsonNet Config. Uninstalling Applications Note: Log on to your computer as an administrator. -
Page 108: Uninstalling Applications - Mac Os X
6. Select the application you want to uninstall, and then click Uninstall. Important: The Uninstaller removes all drivers for Epson inkjet printers on the computer. If you use multiple Epson inkjet printers and you only want to delete some drivers, delete all of them first, and then install the necessary printer driver again. -
Page 109: Updating Applications And Firmware
Do not turn off the computer or the printer while updating. Note: If you cannot find the application you want to update in the list, you cannot update using the EPSON Software Updater. Check for the latest versions of the applications from your local Epson website. -
Page 110: Solving Problems
A printer's ink pad is nearing the end of its Contact Epson or an authorised Epson service provider to replace the service life. Please contact Epson Support. ink pad*. It is not a user-serviceable part. The message will be displayed until the ink pad is replaced. -
Page 111: Checking The Printer Status - Windows
The need for replacement of the pad does not mean that your printer has ceased to operate in accordance with its specifications. The printer will advise you when the pad requires replacing and this can only be performed by an authorised Epson Service provider. The Epson warranty does not cover the cost of this replacement. Related Information “Contacting Epson Support”... -
Page 112: Removing Jammed Paper From Inside The Printer
User's Guide Solving Problems Removing Jammed Paper from Inside the Printer Caution: ❏ Be careful not to trap your hand or fingers when opening or closing the scanner unit. Otherwise you may be injured. ❏ Never touch the buttons on the control panel while your hand is inside the printer. If the printer starts operating, it could cause an injury. -
Page 113: Removing Jammed Paper From The Paper Cassette
User's Guide Solving Problems Important: Do not touch the white flat cable or translucent part inside the printer. Doing so may cause a malfunction. 3. Close the scanner unit. Removing Jammed Paper from the Paper Cassette 1. Close the output tray. 2. -
Page 114: Removing Jammed Paper From The Rear Cover
User's Guide Solving Problems 3. Remove the jammed paper. 4. Align the edges of the paper and slide the edge guides to the edges of the paper. 5. Insert the paper cassette in the printer. Removing Jammed Paper from the Rear Cover 1. - Page 115 User's Guide Solving Problems 2. Remove the jammed paper. 3. Remove jammed paper from the rear cover. 4. Open the cover of the rear cover. 5. Remove the jammed paper.
-
Page 116: Removing Jammed Paper From The Adf
User's Guide Solving Problems 6. Close the cover of the rear cover, and then insert the rear cover in the printer. Removing Jammed Paper from the ADF Caution: Be careful not to trap your fingers when closing the document cover. Otherwise you may be injured. 1. - Page 117 User's Guide Solving Problems 3. Open the document cover. 4. Remove the jammed paper. 5. Close the document cover.
-
Page 118: Paper Does Not Feed Correctly
User's Guide Solving Problems 6. Raise the ADF input tray, and then remove the jammed paper. 7. Close the ADF cover. Paper Does Not Feed Correctly Check the following if the paper jams, paper feeds at a slant, several sheets of paper feed at a time, no paper feeds, or paper is ejected. -
Page 119: Power And Control Panel Problems
User's Guide Solving Problems ❏ Clean the inside of the ADF. ❏ Do not load above the line just under the symbol inside the ADF edge guide. ❏ Check that the ADF icon appears on the control panel. If it does not appear, place the originals again. Related Information “Available Originals for the ADF”... -
Page 120: Printout Problems
User's Guide Solving Problems ❏ In Windows, click Print Queue on the printer driver's Maintenance tab, and then check the following. ❏ Check if there are any paused print jobs. Cancel printing if necessary. ❏ Make sure the printer is not offline or pending. If the printer is offline or pending, clear the offline or pending setting from the Printer menu. -
Page 121: Copy Quality Is Poor
❏ Try to use genuine Epson ink cartridges. This product is designed to adjust colors based on the use of genuine Epson ink cartridges. The use of non-genuine ink cartridges may cause print quality to decline. -
Page 122: An Image Of The Reverse Side Of The Original Appears In The Copied Image
User's Guide Solving Problems ❏ Clean the scanner glass and the document cover. ❏ Clean the roller in the ADF. ❏ Do not press too hard on the original or the document cover when you are placing the originals on the scanner glass. -
Page 123: Paper Is Smeared Or Scuffed
User's Guide Solving Problems ❏ If margins still appear even during borderless printing, try the following settings. ❏ Windows Click Extended Settings on the printer driver's Maintenance tab, and then select Remove white borders. ❏ Mac OS X Select System Preferences from the menu >... -
Page 124: The Printed Image Is Inverted
User's Guide Solving Problems The Printed Image Is Inverted Clear any mirror image settings in the printer driver or the application. ❏ Windows Clear Mirror Image on the printer driver's More Options tab. ❏ Mac OS X Clear Mirror Image from the print dialog's Print Settings menu. The Printout Problem Could Not be Cleared If you have tried all of the solutions and have not solved the problem, try uninstalling and then reinstalling the printer driver. -
Page 125: Cannot Start Scanning
❏ If you cannot scan using any TWAIN-compliant applications, uninstall and then reinstall the TWAIN- compliant application. ❏ For Mac OS X with an Intel processor, if other Epson scanner drivers except for EPSON Scan, such as Rosetta or PPC are installed, uninstall them and EPSON Scan, and then reinstall EPSON Scan. -
Page 126: Scanned Image Problems
& Characters Are Blurred ❏ In Office Mode in EPSON Scan, select Image Option on the Image Adjustment tab, and then select Text Enhancement. ❏ In Professional Mode in EPSON Scan, select Document as the Auto Exposure Type in the Original settings. -
Page 127: Moiré (Cross-Hatch) Patterns Appear In The Scanned Image
❏ When using the thumbnail preview for a large original in Professional Mode, the scanning area may not be correct. When previewing in EPSON Scan, create marquees of the area you want to scan on the Normal tab in the Preview window. -
Page 128: Other Scanning Problems
Scanning Stops when Scanning to PDF/Multi-TIFF ❏ When scanning using EPSON Scan, you can scan up to 999 pages in PDF format and up to 200 pages in Multi- TIFF format. When scanning using the control panel, you can scan up to 50 pages in PDF format and in Multi- TIFF format. -
Page 129: Cannot Send Faxes
❏ In Windows, make sure the printer (fax) is displayed in Devices and Printers, Printer, or Printers and Other Hardware. The printer (fax) is displayed as "EPSON XXXXX (FAX)". If the printer (fax) is not displayed, uninstall and then re-install the FAX Utility. See the following to access Devices and Printers, Printer, or Printers and Other Hardware. -
Page 130: Cannot Send Faxes To A Specific Recipient
User's Guide Solving Problems Related Information “Fax Settings” on page 23 & “Cannot Send or Receive Faxes” on page 128 & Cannot Send Faxes to a Specific Recipient Check the following if you cannot send faxes to a specific recipient due to an error. ❏... -
Page 131: Sent Fax Quality Is Poor
User's Guide Solving Problems ❏ Even though the memory is full, you can send a monochrome fax by using the Direct Send feature. Or divide your originals into two or more to send them in several batches. ❏ If the printer cannot print a received fax due to a printer error, such as a paper jam, the memory full error may occur. -
Page 132: Received Faxes Are Not Printed
User's Guide Solving Problems ❏ Reprint the received fax. Related Information “Fax Settings” on page 23 & “Reprinting Received Faxes” on page 81 & Received Faxes Are Not Printed ❏ If an error has occurred on the printer, such as a paper jam or expended ink cartridges, the printer cannot print received faxes. -
Page 133: Other Problems
> Printers & Scanners (or Print & Scan, Print & Fax), and then select the printer. Click Options & Supplies > Options (or Driver). Select On as Quiet Mode. ❏ EPSON Scan Click Configuration, and then set Quiet Mode on the Other tab. -
Page 134: Appendix
User's Guide Appendix Appendix Technical Specifications Printer Specifications Print Head Nozzle Placement Black ink nozzles: 400 Color ink nozzles: 128 for each color Weight of Paper Plain Paper 64 to 90 g/m2(17 to 24lb) Envelopes Envelope #10, DL, C6: 75 to 90 g/m2 (20 to 24 lb) Printable Area Print quality may decline in the shaded areas due to the printer's mechanism. -
Page 135: Scanner Specifications
User's Guide Appendix Envelopes 3.0 mm (0.12 in.) 5.0 mm (0.20 in.) 18.0 mm (0.71 in.) 47.0 mm (1.85 in.) Scanner Specifications Scanner Type Flatbed Photoelectric Device Effective Pixels 10200 × 14040 pixels (1200 dpi) Maximum Document Size 216 × 297 mm (8.5 × 11.7 in.) A4, Letter Scanning Resolution 1200 dpi (main scan) -
Page 136: Wi-Fi Specifications
User's Guide Appendix Supported Lines Standard analogue telephone lines, PBX (Private Branch Exchange) telephone systems Speed Up to 33.6 kbps Resolution Monochrome ❏ Standard: 8 pel/mm × 3.85 line/mm (203 pel/in. × 98 line/in.) ❏ Fine: 8 pel/mm × 7.7 line/mm (203 pel/in. × 196 line/in.) ❏... -
Page 137: Security Protocol
Power Consumption (with USB Standalone copying: Approx. 14 W (ISO/IEC24712) Connection) Ready mode: Approx. 4.7 W Sleep mode: Approx. 1.5 W Power off: Approx. 0.2 W For European users, see the following Website for details on power consumption. (FAX-equipped printers only) http://www.epson.eu/energy-consumption... -
Page 138: Environmental Specifications
Note: ❏ Check the label on the printer for its voltage. ❏ For users in Belgium, power consumption when copying may vary. Check http://www.epson.be for the latest specifications. Environmental Specifications Operation Use the printer within the range shown in the following graph. -
Page 139: Regulatory Information
Manufacturer: Askey Computer Corporation Type: WLU6320-D69 (RoHS) This product conforms to Part 15 of the FCC Rules and RSS-210 of the IC Rules. Epson cannot accept responsibility for any failure to satisfy the protection requirements resulting from a non-recommended modification of the product. Operation is subject to the following two conditions: (1) this device may not cause harmful interference, and (2) this device must accept any interference received, including interference that may cause undesired operation of the device. -
Page 140: Restrictions On Copying
Netherlands, Italy, Portugal, Spain, Denmark, Finland, Norway, Sweden, Iceland, Croatia, Cyprus, Greece, Slovenia, Malta, Bulgaria, Czech, Estonia, Hungary, Latvia, Lithuania, Poland, Romania, and Slovakia. Epson cannot accept responsibility for any failure to satisfy the protection requirements resulting from a non- recommended modification of the products. - Page 141 User's Guide Appendix Caution: Be careful not to trap your hand or fingers when opening or closing the scanner unit. Otherwise you may be injured. Important: ❏ When storing or transporting the printer, avoid tilting it, placing it vertically, or turning it upside down; otherwise ink may leak.
-
Page 142: Where To Get Help
Technical Support Web Site If you need further help, visit the Epson support website shown below. Select your country or region and go to the support section of your local Epson website. The latest drivers, FAQs, manuals, or other downloadables are also available from the site. -
Page 143: Contacting Epson Support
Depending on the product, the dial list data for fax and/or network settings may be stored in the product’s memory. Due to breakdown or repair of a product, data and/or settings may be lost. Epson shall not be responsible for the loss of any data, for backing up or recovering data and/or settings even during a warranty period. -
Page 144: Help For Users In Singapore
To obtain technical support as well as other after-sales services, users are welcome to contact Epson Hong Kong Limited. Internet Home Page Epson Hong Kong has established a local home page in both Chinese and English on the Internet to provide users with the following information: ❏ Product information ❏...