Table of Contents
Advertisement
Quick Links
Advertisement
Table of Contents

Related Manuals for Nokia MEDIAMASTER 9902 S


Summary of Contents for Nokia MEDIAMASTER 9902 S
- Page 1 Owner’s Manual MEDIAMASTER 9902 S...
- Page 2 Nokia intygar härmed att denna digitala mottagare, Mediamaster 9902 S, uppfyller kraven enligt direktiv 1999/5/EC. Denna mottagare kan anslutas till ett analogt telefonnät (Public Switched Telephone Networks , PSTN), under förutsättning att uppkoppling sker enligt tonvalsprincipen DTMF (Dual Tone Multiple Frequency).
-
Page 3: Table Of Contents
MEDIAMASTER 9902 S Contents General Information For your safety Service information Remote control Front and rear panel Viaccess smartcard CA module with its smartcard Preparing the remote control Connecting the Mediamaster to the dish Connecting to the TV Connecting a TV and VCR Connecting an analogue satellite receiver and a VCR Nokia smart switch... -
Page 4: General Information
GENERAL INFORMATION ABOUT THE MEDIAMASTER Throughout this manual you will notice that the everyday operation of your Mediamaster is based on a series of user friendly on-screen displays and menus. These menus will help you get the most from your Mediamaster, guiding you through instal- lation, channel selection, viewing and many other functions. -
Page 5: Remote Control
REMOTE CONTROL This section describes how to operate the Mediamaster using the buttons on the remote control. Some of the functions can also be carried out using the buttons on the front panel. Switch the Mediamaster in and out of standby mode. EXIT TV Return to the viewing mode from a menu without storing any settings (in menu mode). -
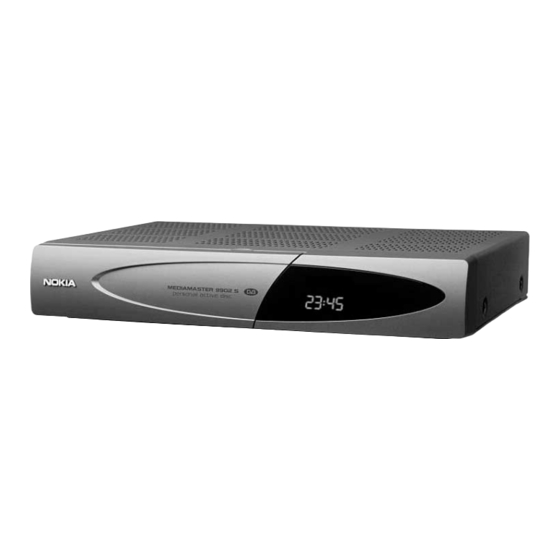
Page 6: Front And Rear Panel
FRONT AND REAR PANEL Front panel Slot Slot for a Viaccess for a CA module Smartcard with a Smartcard Rear panel DIGITAL AUDIO AUX SCART phono connector for connection to a VCR, S/PDIF digital out- or an analogue satellite put for connection receiver to a HiFi system Mains lead... -
Page 7: Viaccess Smartcard
ABOUT THE SMARTCARD AND CA MODULE To be able to receive scrambled digital satellite channels you will need a Smartcard and/or a Common Interface CA (Conditional Access) module* from the Service Provider of your choice. The Service Provider is the programme distributor. If you are subscribing to services from more than one Service Provider, you might have to change between different Smart- cards and/or CA modules. -
Page 8: Preparing The Remote Control
INSTALLATION OF THE MEDIAMASTER The box for your Mediamaster should contain the following items: • the Mediamaster • remote control with 2 AAA batteries • SCART cable (fully featured 1,0 metre) • aerial/RF cable (double screened 1,5 metres) • owner’s manual and software license agreement About the SCART sockets The rear panel of the Mediamaster is equipped with 2 SCART sockets (see diagram). -
Page 9: Connecting To The Tv
INSTALLATION OF THE MEDIAMASTER General There are many different types of TV/VCR and other equipment that you can connect to the Mediamaster. In this manual you will see some of the most common ways to connect your equipment. If you use RF cables you will have to tune your TV and VCR to the Mediamaster output channel (see page 11). -
Page 10: Connecting An Analogue Satellite Receiver And A Vcr
INSTALLATION OF THE MEDIAMASTER Connecting an analogue satellite receiver and a VCR • Connect a SCART cable between the main SCART socket on the TV and the TV SCART socket on the Mediamaster. • Connect a SCART cable between the VCR and the AUX SCART socket on the Mediamaster. -
Page 11: Switching On For The First Time With Scart Connections
INSTALLATION OF THE MEDIAMASTER Switching on for the first time with SCART connections • Plug in your Mediamaster • Now you will see the ”Welcome” menu on the screen. • Press OK on the Mediamaster remote control to start the In- stallation procedure. -
Page 12: First Time Installation
FIRST TIME INSTALLATION General information Once you have correctly connected the Mediamaster, you also have to perform a “First Time Installation.” During this procedure, helpful information is displayed at the bot- tom of the menus. Please note! The OK button always confirms a selection within these menus, and pressing it will take you to the next step in the installation process. -
Page 13: Rf Modulator Type
FIRST TIME INSTALLATION RF modulator type If the Mediamaster is connected to the TV with a RF cable, you must select the right RF modulator alternative, which is depend- ent on the country where the Mediamaster is being used. Select “Normal (PAL B/G)” for all countries except the UK. Select “UK (PAL I)”... - Page 14 FIRST TIME INSTALLATION Line through lite selection menu Select one of the alternatives ASTRA, HOTBIRD, SIRIUS or THOR when you have a single LNB pointed towards any of these satel- lites. Pressing OK from the selected alternative will display the “An- tenna adjustment”...
- Page 15 FIRST TIME INSTALLATION Line on the antenna satellite selection menu Select one of these alternatives when you have a single antenna equipped with 2 LNBs, or two antennas with one LNB on each, and want to watch channels from ASTRA/HOTBIRD or THOR/ SIRIUS.
-
Page 16: Antenna/Satellite Selection
FIRST TIME INSTALLATION Line 7 on the antenna satellite selection Menu This selection is necessary only when your satellite choice dif- fers from the preprogrammed satellite alternatives in the follow- ing ways; • if you do not use an universal LNB •... - Page 17 FIRST TIME INSTALLATION For each LNB you connect to the DiSEqC switch, the fol- lowing configuration has to be performed. As an example the following part will describe how the LNB in- tended for Astra 1 will be configured to the DiSEqC input A on the switch and the LNB intended for Hotbird to DiSEqC input B.
- Page 18 FIRST TIME INSTALLATION Multisatellite/four port DiSEqC Select this alternative if your antenna system has four LNBs and when you are not using any of the alternatives on the lines 5 - 6 from the menu “Antenna/satellite selection” on page 13. The selection of the different LNBs must be controlled by an external switch.
-
Page 19: Antenna Motor Installation
FIRST TIME INSTALLATION Manual search When you perform a Manual search you first need to enter some parameters for the channel search to work. The information you need to enter in this menu is available in magazines covering satellite TV reception, on the Internet or from your Service Provider. - Page 20 FIRST TIME INSTALLATION Type of motor • Select SATSCAN if it is a Nokia SatScan motor. • Select DiSEqC in case the motor you use is controlled by DiSEqC commands. LNB type • Select Universal, one of the fixed frequencies or enter the LNB frequency with the numeric buttons on the remote control.
- Page 21 FIRST TIME INSTALLATION • Select one of the Predefined channels and press OK to..start the main search procedure for (in this case) the ASTRA channels. The search procedure will take a while. Please refer to page 22. When the channel search from ASTRA is finished you can search for channels from other satellites if you have a motor antenna.
-
Page 22: Channel Search Progress
FIRST TIME INSTALLATION The position of 22 satellites are preprogrammed in the SatScan motor. As long as you select satellite positions from the line “Automatic search” you also have access to preprogrammed TV channels that makes it easy to check the signal quality. •... -
Page 23: Viewing Mode
VIEWING MODE General information The following describes the basic functions of your Mediamaster while watching satellite TV or listening to satellite radio. Some of the functions described here are dependent on the Service Provider and can only be used if they are included in the transmitted programme information. -
Page 24: The "I" (Information) Button
VIEWING MODE The “i” (information) button The Mediamaster has the ability to display information about pro- grammes currently being broadcast as well as those being broad- cast next. This procedure is the same for both TV and radio mode. By pressing the “i” button while watching TV you will get a spe- cial “Programme information”... -
Page 25: List Of Tv And Radio Channels
VIEWING MODE List of TV and radio channels At the channel search procedure, three channel lists are created. One list named “All TV” containing all channels, another named “Free TV” containing only free channels and “Viasat” containing channels distributed by Viasat. In the “All TV”... -
Page 26: Tv Release (0)
VIEWING MODE TV release (0) With the 0 button you can toggle between analogue terrestrial TV, video, analogue and digital satellite TV signals. (This is only valid if the units are connected via SCART cables, and not by a RF connection.) The TEXT button (teletext) Pressing the TEXT button will open a teletext page (if teletext is transmitted.) Select teletext pages with the numeric buttons on... -
Page 27: Recording To An External Analogue Video
VIEWING MODE Recording on an external analogue Video recorder Please note, that during the recording of a programme, every- thing shown on the screen will be registered! For example, if you call up a menu from the Mediamaster on the screen, the menu will be recorded! When recording digital channels from the Mediamaster and the Videorecorder is connected with a SCART cable: put the video... -
Page 28: Hard Disk Recording
HARD DISK RECORDING About hard disk recording As you probably already know this box is equipped with a built in Personal Active Disc. This is a hard disk, similar to those in or- dinary Personal Computers (PCs). On this hard disk it is possible to record about 15-20 hours of TV and radio programmes. -
Page 29: Different Ways Of Making Recordings
HARD DISK RECORDING Different ways of making recordings There are three ways of making a recording. In this manual they are separated in the following way: 1 A Pause recording This function is useful when you make a break while watch- ing TV. -
Page 30: The Pause Recording
HARD DISK RECORDING The Pause ( ) Recording To describe this, let us say that the phone starts to ring while you are watching TV. You do not want to miss anything of the pro- gramme, so you decide to make a pause recording. To start it you only have to press two buttons on the remote control. -
Page 31: The Pause Recording
HARD DISK RECORDING What is happening during playback of a pause recording that is still in progress? When the playback starts, a few other things also happen at the same time. • Although the pause recording is still going on, the display now will start to show “PLAY”... -
Page 32: The Normal Recording
HARD DISK RECORDING The Normal recording When you want to perform what we call a Normal recording. • Press on the remote control to pick up the recording menu. • Step down to “ ” in the menu. • Start the recording by pressing OK. •... -
Page 33: To Start Playback Of A Recording
HARD DISK RECORDING To start playback of a recording You find a finished recording in the List of recordings which you reach by • Pick up the recording menu to the screen by pressing • Select from the menu to pick up the List of recordings to the screen •... -
Page 34: Watch The Playback At A Different Speed
HARD DISK RECORDING Watch the playback at a different speed To speed up a playback or to find a certain position in a record- ing, you can use functions such as • Fast forward • Rewind • Slow motion The functions can be performed not only during a normal play- back, but also during a pause recording in progress. -
Page 35: Small Steps During Playback
HARD DISK RECORDING The Slow Motion function The Slow Motion function is a way to watch a playback in a slower way than the normal playback speed. This function is the same for all types of recordings. It only works in the forward di- rection, never backwards. -
Page 36: The Edit Function
HARD DISK RECORDING The Edit ( ) function It sometimes happen that some extra minutes from the pro- gramme that starts after or before the one you want to save also will be recorded. If so, you can use the you the opportunity to erase parts in the beginning and at the end of a recording. -
Page 37: List Of Recordings
HARD DISK RECORDING List of recordings ( As mentioned earlier, all recordings will be stored in the List of recordings. To reach it, select “ ” from the recording menu. In addition to the recordings, the List also contains an important information about the disk: •... - Page 38 HARD DISK RECORDING Rename You can give the recording a new name. Note that the first lines contains only channel information and are not possible to rename. • Step to the last line and press OK. • To enter the new name, please follow the instructions for “Re- name Channels”...
-
Page 39: Save A Recording As Erasable/Permanent
HARD DISK RECORDING Save a recording as Erasable or Permanent To avoid that a Pause or Normal recording will be erased, it is a good idea to change its property from erasable to Permanent. Default property for a pause recording When a pause recording is created, in the List of recordings it will automatically get the extension (...Pause) at the end of its name. -
Page 40: Main Menu
MAIN MENU General information Many of the functions of the Mediamaster are available from the Main menu. Press MENU to open it. You can always leave a menu at any time you want, without af- fecting any settings, by pressing the EXIT button. TV and radio channels Please refer to “List of TV and radio channels”... - Page 41 MAIN MENU Create list From here you create your own favourite lists, containing the channels you watch most frequently. You must give each list a specific name, e.g. “Sport” or “Films.” When a favourite list is selected, you see only those channels defined in the list.
- Page 42 MAIN MENU Select channels From this menu you add and remove the channels in your Favour- ite lists. You use the “All TV” or “All radio” list as basis to select the channels from. A channel is added or removed by pressing the OK button. The square to the right on a line will be empty for removed channels, and will contain an “x”...
-
Page 43: Edit Channels
MAIN MENU Rearrange channels From here you can arrange the sequence for the channels within your favourite lists. • With , mark the channel you want to move to a new posi- tion within the list. • Press again and the right side of the marked channel will change to •... -
Page 44: Update Channels
MAIN MENU Update channels When new TV and radio channels are added to the different sat- ellites, you can check and automatically update the channel lists. New channels will be marked with a star After each download, check the channel lists for new channels marked with During the search procedure the old channels will be coloured light blue, and new channels found will be coloured black in the... -
Page 45: System Configuration
MAIN MENU System configuration You will be asked to enter your access code before you can en- ter this menu. The code is preset to 1234 from the factory. (The code can be changed from the Parental control menu. Re- fer to page 50.) If you want to customize the system to suit you better, you can specify some settings from the submenus in the “System con-... - Page 46 MAIN MENU • Adjust the antenna towards the new satellite. Look at the Sig- nal strength (AGC) and Signal quality (SNR) bar indications to check the levels. Please note: In this case, (a brand-new sat- ellite), you do not get a TV picture in the background on the screen, even when the SNR indication is good! When both indication bars (AGC and SNR) are good: •...
-
Page 47: Antenna/Satellite Configuration
MAIN MENU View attributes Chech position and orientation for different satellites by select- ing the line “View attributes”. Delete satellite You can also delete an added satellite. (This is not possible for the factory preprogrammed satellites.) If you want to delete the satellite from which you right now are watching a channel, you will get a screen message about how to proceed. -
Page 48: Time Adjustment
MAIN MENU TV signal If the teletext function does not work when watching channels from an analogue satellite receiver connected to the Media- master, change this setting from RGB to PAL. RF channel Select this alternative if you have to change the RF channel. If you change the RF channel number, you must also change it to the same value on the TV. -
Page 49: Erase Hard Disk
MAIN MENU Information about the modem This equipment has been approved pursuant to Council Decision 98/482/EC [CTR 21] for pan-European single terminal connection to the Public Switched telephone Network (PSTN). However, due to differences between the individual PSTNs provided in differ- ent countries, the approval does not, of itself, give an uncondi- tional assurance of successful operation on every PSTN termina- tion point. -
Page 50: User Preferences
MAIN MENU User preferences From here you can change the menu language. You also have access to the Parental Control, the Appearance and Recording Preferences menus. Language preferences Menu language Here you may select in which language the menus will be shown . Main and alternative audio Ianguage If more than one audio language is transmitted, you may select the main and an alternative language. -
Page 51: Appearance Preferences
MAIN MENU Application download (“Open TV” applications) From some channels it is possible to download specific pro- gramme applications such as games and various information. When you select the alternative ”Manual” below, channels which provide these services will show a symbol in the upper left cor- ner of the screen. -
Page 52: Recording Preferences
MAIN MENU Recording preferences Changes made here will be the new default settings and will af- fect recordings made to the disk. Make new recordings The settings made here will affect Normal and Timer recordings only. Pause recordings are always erasable. Recordings with the Erasable property will automatically be erased in order to make space for new recordings. - Page 53 MAIN MENU • If you select “No” on line 5: A few seconds before the live programme is caught up, the “fast forward” will slow down to normal speed. Due to the fact that the recording is still going on, you will now still be watching the recorded programme, but with just a few sec- onds delay from the live version.
-
Page 54: Receiver Number
MAIN MENU The following extreme example will show what might happen when the setting does not corre- spond with the reality, and the disk is getting filled up. You are going to visit a concert, but do not want to miss the foot- ball championship that will be shown during your visit. -
Page 55: Conditional Access
MAIN MENU Release info The alternative “Release info” will only be available when the new downloaded software contains information. If so, by pressing the i button you will get a message describing the new functions in the latest software release you have downloaded to the Mediamaster. -
Page 56: Smartcard Settings
MAIN MENU Smartcard settings Age rating control This is an age rating control function which is connected to your smartcard. It will only affect the channels you have subscribed to. Choose “On” if you want to activate the age rating. This means that you have to enter your smartcard PIN code to be able to watch the age rated channels. - Page 57 MAIN MENU Important information related to the timer recording If you program the box to perform a timer recording e.g. in the middle of the night (or at any other unsuitable time), be sure to turn the TV set off with the mechanical switch located on the TV! If you turn the TV set off by just putting it into standby mode with the remote controll, it will be turned on at the time for the record- ing!
-
Page 58: Glossary
GLOSSARY OF TERMS Access Authorisation to use the coding system to purchase / order TV programmes. Automatic Gain Control. Conditional Access. A system to control subscriber ac- cess to services, programmes and events. CA module A device for the decoding of scrambled signals. Common Interface Describes a DVB standard hardware and software archi- tecture for Conditional Access systems. - Page 59 PROBLEM SOLVING Problem The display on the front panel does not light up/is not lit. No sound or picture, but the front panel shows the time or - - : - -. No sound or picture. No sound or picture on horizontal modulated transponder.
-
Page 60: Problem Solving
PROBLEM SOLVING Problem The remote control is not working. You see the on-screen message. Viewing card error. You have forgotten your secret PIN code. CA Module is not working. Black picture. What to do if you can’t solve the problem If you have tried all of the actions suggested above, without solving the problem, please contact your dealer or Service Provider. -
Page 61: Technical Specifications
TECHNICAL SPECIFICATIONS Transmission standards DVB, MPEG 2 LNB / Tuner input Connector 1x F-type (LNB) RF input frequency 950-2150 MHz RF input power level -25 to -65 dBm Supply voltage 13 /18 V 5% Max. current 500 mA, overload protected Control voltage 22 kHz, 0,65 V DiSEqC... - Page 62 Important Information Wiring the plug (UK and Eire only) The mains lead on this product is already fitted with a non-rewireable (moulded) plug incorpo- rating a fuse, the value of which is indicated on the pin face of the plug. Should the fuse need to be replaced, an ASTA or BSI approved BS 1362 of the same rating fuse must be used.