Table of Contents
Advertisement
Quick Links
Advertisement
Table of Contents

Related Manuals for LG MP-9289VSD


Summary of Contents for LG MP-9289VSD
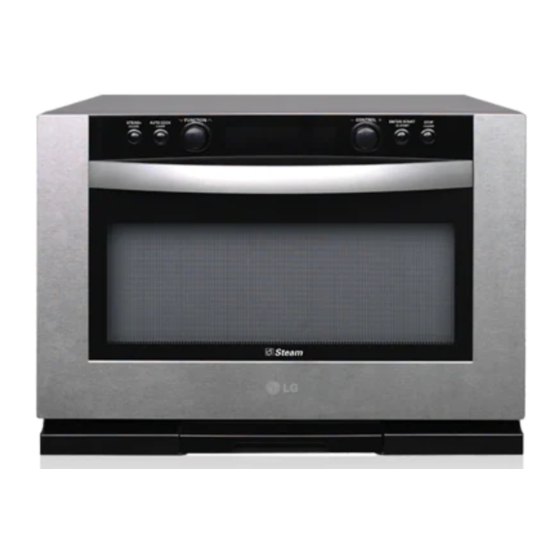
- Page 1 OWNER’S MANUAL LIGHTWAVE OVEN “Steam SolarDOM” Please read this owner's manual thoroughly before operating. The manufacturers are not liable for any problems caused by the user's failure to observe these instructions. MP-9289VSD www.lg.com P/No.: MFL65219802...
-
Page 2: Table Of Contents
Contents Contents _____________________________________________________2 How the Microwave Function Works Important safety instructions ____________________________________3 ~ 7 Precautions __________________________________________________8 Microwaves are a form of energy similar to radio and television waves and Unpacking & Installing _________________________________________9 ~ 10 ordinary daylight. Normally, microwaves spread outwards as they travel Control Panel_________________________________________________11 through the atmosphere and disappear without effect. -
Page 3: Important Safety Instructions
Important Safety Please keep for future reference. Read and follow all instructions before using your oven to prevent the risk of fire, electric shock, personal injury, or damage when using the oven. Instructions This guide do not cover all possible conditions that may occur. Always contact your service agent or manufacturer about problems that you do not understand. -
Page 4: Important Safety Instructions
Important Safety Please keep for future reference. Read and follow all instructions before using your oven to prevent the risk of fire, electric shock, personal injury, or damage when using the oven. Instructions This guide do not cover all possible conditions that may occur. Always contact your service agent or manufacturer about problems that you do not understand. - Page 5 Important Safety Please keep for future reference. Read and follow all instructions before using your oven to prevent the risk of fire, electric shock, personal injury, or damage when using the oven. Instructions This guide do not cover all possible conditions that may occur. Always contact your service agent or manufacturer about problems that you do not understand.
- Page 6 Important Safety Please keep for future reference. Read and follow all instructions before using your oven to prevent the risk of fire, electric shock, personal injury, or damage when using the oven. Instructions This guide do not cover all possible conditions that may occur. Always contact your service agent or manufacturer about problems that you do not understand.
- Page 7 Important Safety Please keep for future reference. Read and follow all instructions before using your oven to prevent the risk of fire, electric shock, personal injury, or damage when using the oven. Instructions This guide do not cover all possible conditions that may occur. Always contact your service agent or manufacturer about problems that you do not understand.
-
Page 8: Precautions
Precautions Precautions to avoid possible exposure to excessive microwave energy. You cannot operate your oven with the door open due to the safety interlocks When heating liquids, e.g. soups, sauces and beverages in your oven with built into the door mechanism. These safety interlocks automatically switch off microwave function, delayed eruptive boiling can occur without evidence of any cooking activity when the door is opened;... -
Page 9: Unpacking & Installing
Unpacking & By following the basic steps on these two pages you will be able to quickly check that your oven is operating correctly. Please pay particular attention to the guidance on where to install your oven. When unpacking your Installing oven make sure you remove all accessories and packing. - Page 10 Plug your oven into a standard household socket. Make Press the STOP/CLEAR button, and press sure your oven is the only appliance connected to the the ENTER/START/Q-START button one socket. If your oven does not operate properly, unplug it time to set 30 seconds of cooking time. from the electrical socket and then plug it back in.
-
Page 11: Control Panel
Control Panel 1. DISPLAY WINDOW: You can show time of day, cooking time, power level 5. CONTROL: and cooking categories. • You can set cooking times, temperature, weight and cooking categories. • While cooking with auto and manual function, you can lengthen or 2. -
Page 12: Setting The Clock
Setting the You can set either12 hour clock or 24 hour clock. Clock In the following example I will show you how to set the time for 10:30 when using the 24 clock. Make sure that you have removed all packaging from your oven. Make sure that you have correctly installed your oven as described earlier in this book. -
Page 13: Child Lock
Child Lock Press STOP/CLEAR. Press and hold STOP/CLEAR until “L” appears on the display and BEEP Your oven has a safety feature that sounds. prevents accidental running of the oven. The CHILD LOCK is now set. Once the child lock is set, you will be unable to use any functions and no The time will disappear on the display but will reappear on the display cooking can take place. -
Page 14: Micro Power Cooking
Micro Power In the following example I will show you how to cook some food on 450W power for 5 minutes. Cooking Make sure that you have correctly installed your oven as described earlier in this book. Press STOP/CLEAR. Turn FUNCTION selection dial to select Microwave. Your oven has five microwave Power The following indication is displayed: “... -
Page 15: Micro Power Level
Micro Power This oven is equipped with 5 power levels to give you maximum flexibility and control over cooking. Level The table below shows the examples of food and their recommended cooking power levels for use with this oven. OUTPUT ACCESSORY POWER LEVEL HIGH... -
Page 16: Grill Cooking
Grill Cooking In the following example I will show you how to use the Grill to cook some food for 12 minutes. Press STOP/CLEAR. This feature will allow you to brown and Turn FUNCTION selection dial to select Grill. crisp food quickly. The following indication is displayed: “... -
Page 17: Grill Combi Cooking
Grill combi In the following example I will show you how to programme your oven with micro power 300W and grill for Cooking a cooking time of 25 minutes. Press STOP/CLEAR. Your oven has a combination cooking feature which allows you to cook food with heater and microwave. -
Page 18: Convection Preheat
Convection In the following example I will show you how to preheat the oven at a temperature of 200°C. Preheat Press STOP/CLEAR. Turn FUNCTION selection dial to select Conv. The convection oven has a temperature range of 40°C and 100°C~230°C The following indication is displayed: “... -
Page 19: Convection Cooking
Convection In the following example I will show you how to preheat the oven first, then cook some food at a temperature of Cooking 230°C for 50 minutes. Press STOP/CLEAR. Turn FUNCTION selection dial to select Conv. If you do not set a temperature your The following indication is displayed: “... -
Page 20: Convection Combi Cooking
Convection combi In the following example I will show you how to programme your oven with micro power 300W Cooking and at a temperature 200°C for a cooking time of 25 minutes. Press STOP/CLEAR. Turn FUNCTION selection dial to select Conv. Combi. The following indications are displayed: “... -
Page 21: For Steam+ Cooking
For Steam+ Cooking In case of Steam cooking, Set the time at least 2 min. When cooking with steam often, you might see scale in a cavity because of calcium, magnesium included in water, this does not harm human body. In this situation, you can remove it effectively, if you wipe it with wet towel with vinegar. -
Page 22: Micro Power Steam+ Cooking
Micro Power Steam+ In the following example I will show you how to use the Micro Power Steam+ Cooking mode to Cooking cook some foods on 450W power for 5 minutes. Make sure that you have correctly installed your oven as described earlier in this book. -
Page 23: Micro Power Steam+ Cooking
Cooking Guide This table shows recommended settings and time for Micro Power Steam+ Cooking. The times are only a guide. Allow for difference in individual tastes and preferences. The times may also vary due to the shape, cut, and composition of the food. Cook time (minutes) Utensil Food... -
Page 24: Convection Steam+ Cooking
Convection Steam+ In the following example I will show you how to use the Convection Steam+ Cooking mode to Cooking cook some foods for 50 minutes at 230°C temperature. Press STOP/CLEAR. If you do not set a temperature your oven will automatically select 180°C, the cooking temperature can be changed by turning Control dial. - Page 25 Cooking Guide This table shows recommended settings and time for Convection Steam+ Cooking. The times are only a guide. Allow for difference in individual tastes and preferences. The times may also vary due to the shape, cut, and composition of the food. Food Utensil Level...
-
Page 26: Steam
Steam+ In the following example I will show you how to use the Steam+ mode to cook some foods for 25 minutes. Press STOP/CLEAR. Press STEAM+/CLOCK This feature allows you to steam food such as vegetables, seafood, fish and The following indication is displayed: “ “... - Page 27 Cooking Guide This table shows recommended time for Steam+. The times are only a guide. Allow for difference in individual tastes and preferences. The times may also vary due to the shape, cut, and composition of the food. Amount Utensil Instructions Food Level...
-
Page 28: Auto Cooking
Auto In the following example I will show you how to cook 0.4kg of chicken skewers Cooking Press STOP/CLEAR. Press AUTO COOK. Auto Cooking menus are programmed. Auto Cooking allows you to cook most of The following indication is displayed: “ “... - Page 29 Weight Category Instructions Function Utensil Food Temp. Level Limit Ac 1 Jacket 0.2-1.0kg Rack on the Room Choose medium sized potatoes. (200-220g per each) Auto Potatoes Metal tray Wash and dry potatoes. Pierce potatoes several times with a fork. Cooking Place food on the rack on the metal tray.
- Page 30 Weight Category Instructions Function Utensil Food Temp. Level Limit Ac 4 Fresh 0.3-0.6kg Metal tray Room Auto For example of 0.4kg pizza Pizza Cooking Ingredients For Dough : 120g all-purpose or bread flour 1 teaspoon active dry yeast 1/3 teaspoon salt 1 teaspoon sugar 70ml warm water 1 teaspoon extra-virgin olive oil,...
- Page 31 Weight Category Instructions Function Utensil Food Temp. Level Limit Auto Ac 7 Pork Chops 0.2-0.8kg Rack on the Refrigerated Choose pork chops of 200g weight and 2.5cm thickness each. Metal tray Season with salt and pepper or as desired. Cooking Place food on the rack on the metal tray.
- Page 32 Weight Instructions Category Function Utensil Level Food Temp. Limit Auto Ac 11 Lasagna 26x17cm Room Ingredients baking dish Cooking 9 lasagna sheets on the Rack 500g spaghetti sauce on the Metal 600g cheese sauce tray 300g grated mozzarella cheese 30g grated parmesan cheese For Cheese sauce : 60g butter 50g plain flour...
- Page 33 Weight Instructions Category Function Utensil Food Temp. Level Limit Ac 12 Roast 0.2-0.4kg Metal tray Refrigerated Auto Ingredients Vegetables Cooking Eggplants, cut into 1-2cm thickness Zucchinis, cut into 1-2cm thickness Onions, cut into wedges Sweet peppers, cut in half lengthwise and discard seeds Whole cherry tomatoes Mushrooms, cut in half Slice vegetables into large pieces.
- Page 34 Weight Instructions Category Function Utensil Food Temp. Level Limit Ac 14 Meat Pie 20cm Room Auto Ingredients pie tin on the Cooking 600-650g meat mixture Rack on the 2 puff pastry sheets, thawed (180~200g/sheet) Metal tray 1 egg, lightly beaten For Meat mixture : 1 onion, chopped 500g steak, finely chopped...
- Page 35 Weight Instructions Category Function Utensil Food Temp. Level Limit Auto Ac 15 Meat Loaf 23x13cm Refrigerated Ingredients Cooking loaf pan on 1kg lean minced beef breadcrumbs the Rack on 2 eggs, lightly beaten 1 tablespoon flour the Metal tray 1 onion, chopped 1 tablespoon curry powder 300g tomato sauce 1/4 cup water...
- Page 36 Weight Instructions Category Function Utensil Food Temp. Level Limit Ac 17 Rice/ 0.1-0.3kg microwave- Room Place rice/pasta and boiling water with 1/4 to 1 teaspoon salt in a deep Auto Pasta safe bowl and large bowl(3L). Place bowl on the rack on the metal tray. Cooking (deep glass Choose the menu and weight, press start.
-
Page 37: Steam+ Auto Cooking
Steam+ In the following example I will show you how to cook 0.5kg of potatoes. Auto Cooking Press STOP/CLEAR. Press AUTO COOK. The following indication is displayed: “ “ Steam+ Auto Cooking menus are programmed. Steam+ Auto Cooking allows you to cook most of your favorite food by selecting the food type and the weight of the food. - Page 38 Weight Instructions Category Function Utensil Food Temp. Level Limit Steam+ St 1 Broccoli 0.2-0.4kg microwave- Room Fill water vessel with purified water up to Max. Auto safe dish on Cut broccoli into small florets. (12-15g/piece) Cooking the Rack on Place food in a microwave-safe dish on the rack on the metal tray. the Metal tray Choose the menu and weight, press start.
-
Page 39: Steam+ Auto Cooking
Weight Instructions Category Function Utensil Food Temp. Level Limit St 8 Mussels 0.5-1.0kg Metal tray Refrigerated Steam+ Ingredients Auto Mussels Cooking 300ml dry white wine 1 teaspoon chopped parsley 2 garlic cloves, crushed Fill water tank with fresh water up to maximum level. Clean mussels and discard any broken shell or dead mussels. - Page 40 Weight Instructions Category Function Utensil Food Temp. Level Limit St 13 Roast 0.5-1.5kg Rack on the Refrigerated Fill water vessel with purified water up to Max. Steam+ Beef Metal tray Brush beef with melted butter or oil and season as desired. Auto Place food on the rack on the metal tray.
- Page 41 Weight Instructions Category Function Utensil Level Food Temp. Limit Steam+ St 17 Risotto 01-0.3kg microwavesafe Room Rice, short-grain 100g 200g 300g Auto bowl (deep Onion, chopped 1 ea 11/2 ea 2 ea Cooking glass pot) on Oil ,liquid 2 tablespoons 3 tablespoons 4 tablespoons the Rack on...
- Page 42 Weight Instructions Category Function Utensil Level Food Temp. Limit Steam+ St 19 Butter 20cm Room Ingredients for marinade Auto Cake cake pan 250g plain flour, sifted Cooking on the rack 220g caster sugar on the Metal 120g butter, softened tray 120ml milk 2 eggs, lightly beaten 2 teaspoons baking powder...
-
Page 43: Defrost
Defrost The temperature and density of food varies, I would recommend that the food be checked before cooking commences. Pay particular attention to large joints of meat and chicken, some foods should not be completely thawed before cooking. For example fish cooks so quickly that it is sometimes better to begin cooking while still slightly frozen. -
Page 44: Defrosting Guide
Defrosting Guide * Food to be defrosted should be in a suitable microwave proof container and place uncovered on the rack. * If necessary, shield small areas of meat or poultry with flat pieces of aluminum foil. This will prevent thin areas becoming warm during defrosting. Ensure the foil does not touch the oven walls. -
Page 45: Defrost Steam
Defrost Steam+ The temperature and density of food varies, I would recommend that the food be checked before cooking commences. Pay particular attention to large joints of meat and chicken, some foods should not be completely thawed before cooking. For example fish cooks so quickly that it is sometimes better to begin cooking while still slightly frozen. -
Page 46: Defrost Steam+ Guide
Defrost Steam+ Guide * Food to be defrosted should be in a suitable microwave proof container and place uncovered on the rack. * If necessary, shield small areas of meat or poultry with flat pieces of aluminum foil. This will prevent thin areas becoming warm during defrosting. Ensure the foil does not touch the oven walls. -
Page 47: Steam Multi Clean
Steam multi clean In the following example I will show you how to use multi-clean function. Press STOP/CLEAR. Press STEAM+/CLOCK. Turn FUNCTION selection dial to select Multi clean. The following indication is displayed: “ “ Cleaning inside the cavity stained with oil or something. -
Page 48: Quick Start
Quick In the following example I will show you how to set 2 minutes of cooking on high power (700W). Start Press STOP/CLEAR. Press ENTER/START/Q-START four times to select 2 minutes on HIGH The Quick Start feature allows you to set power (700W). -
Page 49: More Or Less Cooking
More or Less In the following example I will show you how to change the preset AUTO COOK programmes for a longer or Cooking shorter cooking time. Press STOP/CLEAR. If you find that your food is over or Set the required AUTO COOK programme. undercooked when using the Auto Cook *See AUTO COOK (page. -
Page 50: How To Clean
How To Clean To Clean Your Oven To Clean the Cavity Cavity front side 1. Keep the inside of the oven clean Food spatters or spilled liquids stick to oven walls and between seal and door After cooking greasy food like fried chicken, wipe the surface. -
Page 51: Microwave - Safe Utensils
Microwave-safe Utensils Never use metal or metal trimmed utensils in using microwave function Paper Microwaves cannot penetrate metal. They will bounce off any metal object in Paper plates and containers are convenient and safe to use in using the oven and cause arcing, an alarming phenomenon that resembles microwave function, provided that the cooking time is short and foods to be lightning. -
Page 52: Food Characteristics & Microwave Cooking
Food characteristics & Microwave cooking Keeping an eye on things Density of food The recipes in the book have been formulated with great care, but your Light, porous food such as cakes and breads cook more quickly than heavy, success in preparing them depends on how much attention you pay to the dense foods such as roasts and casseroles. -
Page 53: Food Characteristics & Microwave Cooking
Food characteristics & Microwave cooking Covering Placing thicker portions facing outwards A cover traps heat and steam which causes food to cook more quickly. Use a Since microwaves are attracted to the outside portion of food, it makes sense to lid or microwave cling film with a corner folded back to prevent splitting. -
Page 54: Questions & Answers
Questions & Answers Q What’s wrong when the oven light will not glow? Q Why doesn’t my oven always cook as fast as the cooking guide says? A There may be several reasons why the oven light will not glow. A Check your cooking guide again to make sure you’ve followed directions Light bulb has blown correctly, and to see what might cause variations in cooking time. -
Page 55: Technical Specifications
Technical Specifications Technical Specification MP-9289VSD Power Input 240 V~ 50 Hz Output 700 W (IEC60705 rating standard) Microwave Frequency 2450 MHz Outside Dimension 527 mm(W) X 390 mm(H) X 472 mm(D) Microwave 1200 watt Power 2000 watt Grill Consumption 2300 watt Convection max. - Page 56 FOR CUSTOMER SERVICE PLEASE CONTACT LG Service on 1300 LG CARE (1300 54 2273) AUSTRALIA or 0800 LG CARE (0800 54 2273) NEW ZEALAND www.lg.com LG Electronics Australia 2 Wonderland Drive Eastern Creek NSW 2766 (ABN : 98 064 531 264) Printed in Korea...