Table of Contents

Related Manuals for Miele CM 5200


Summary of Contents for Miele CM 5200
-
Page 1: Operating Instructions
Operating instructions Freestanding coffee machine CM 5200 en - GB To avoid the risk of accidents or damage to the machine, it is essential to read these instructions before it is installed and used for the first time. M.-Nr. 09 201 320... -
Page 2: Table Of Contents
Contents Packing material / Disposal of old machine ......5 Description of the machine ......... . 6 Machine overview . - Page 3 Contents Coffee the way you like it ......... . 30 Grinder setting .
- Page 4 Contents Descaling ............61 Descaling following display reminder .
-
Page 5: Packing Material / Disposal Of Old Machine
Please do not therefore dispose of it The original packaging will also be with your household waste. useful should you wish to return the coffee machine to Miele for servicing. Please dispose of it at your local community waste collection/recycling centre, or contact your Dealer for advice. -
Page 6: Description Of The Machine
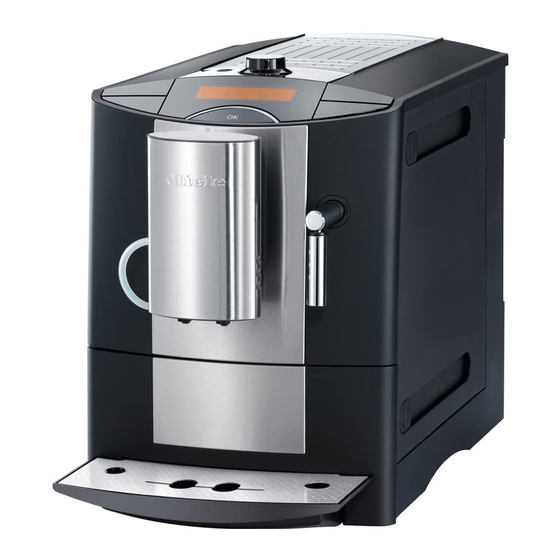
Description of the machine Machine overview a Cup heating surface g Drip tray b Bean container, ground coffee chute h Drip tray cover and rotary control for selecting i Milk tube aperture fineness of ground coffee j Master switch c Display and controls k Compartment for short instructions d Hot water spout l Water container... -
Page 7: Display And Controls
Description of the machine Display and controls Rotary control d Drinks buttons Press to prepare your chosen drink. You can select from the different menu options using the rotary control. Symbols: On/Off button - c Espresso b The On/Off button - switches the Coffee a coffee machine on and off (Standby), if Latte Macchiato g... -
Page 8: Button Illumination
Description of the machine Button illumination Calling up a menu ^ You can call up menus by holding When the drinks buttons are illuminated, you are in the main menu the OK button for more than and can prepare drinks. If drink 2 seconds. -
Page 9: Warning And Safety Instructions
They contain important information on its safety, installation, use and The coffee machine can only be maintenance. Miele cannot be held used by people with reduced physical, liable for damage caused by sensory or mental capabilities, or lack... -
Page 10: Technical Safety
Warning and Safety instructions Safety with children Technical safety A damaged coffee machine could The spouts present a danger of be dangerous. Before installing the burning or scalding. Children's skin machine, check it for any externally is very sensitive and reacts to hot visible damage. -
Page 11: Correct Use
Miele replacement parts – The spouts can spray hot liquid or are used. Faulty components must only steam. Ensure that the be replaced by genuine Miele original cappuccinatore is clean and spare parts. correctly fitted. The machine must be disconnected –... - Page 12 Warning and Safety instructions If using animal milk, use only Danger of injury. Do not reach pasteurised milk. into the brew unit or grinding Do not use coffee beans which have mechanism if the machine is been treated with caramel, sugar or connected to the electricity supply.
- Page 13 Descale the coffee machine For machines with a stainless steel regularly using the appropriate number front: of Miele descaling tablets for the water Do not use sticky notes, transparent hardness level in your area. Descale adhesive tape, masking tape or other...
-
Page 14: Preparing The Coffee Machine For Use
^ Set up the coffee machine and – Time of day remove any protective film (see ^ Press the On/Off button -. "Installation"). The welcome message MIELE - Clean the coffee machine thoroughly WILLKOMMEN will appear in the (see "Cleaning and Care") before display briefly. -
Page 15: Water Hardness
Preparing the coffee machine for use Water hardness To set the time of day ^ Turn the rotary control until the The water hardness indicates how current hour appears. Press the OK much calcium is dissolved in the water. button. The higher the calcium content, the harder the water, and the harder the ^ Turn the rotary control until the... - Page 16 Preparing the coffee machine for use – Level 4 (very hard): Setting the water hardness level Local water hardness range 3-4 SELECT TYPE OF DRINK will appear in 21 °dH (3.8 mmol/l) or more the display. Water flow rate: approx. 20 l ^ Press the OK button until MENU Steam flow rate: approx.
-
Page 17: Filling The Water Container
Filling the water container The quality of the water plays an important part in the overall quality of the coffee. The water container should therefore be emptied and filled with fresh tap water every day. Warning. Bacteria can cause infection. It is important to empty and fill the container with fresh tap water every day to avoid the risk of bacteria... -
Page 18: Filling The Coffee Bean Container
Filling the coffee bean container If you want to use freshly ground coffee beans for each cup of espresso or coffee, fill the coffee bean container with roasted coffee beans. Alternatively, you can make coffee or espresso with ready ground coffee (see "Preparing coffee or espresso using ready ground coffee"). -
Page 19: Switching On And Off
Switching on and off You can use the On/Off button - Switching off (standby) to switch the coffee machine ^ Press the On/Off button -. on and off, if the master switch at the back of the machine is switched on. The coffee machine rinses the coffee pipework before switching off. -
Page 20: Pre-Heating Cups
Pre-heating cups To switch cup heating on or off Cups should always be pre-heated to allow the flavour of the coffee to SELECT TYPE OF DRINK will appear in develop and be retained. the display. The smaller the volume of ^ Press the OK button until MENU coffee/espresso and the thicker the cup, the more important it is to pre-heat... -
Page 21: Adjusting The Central Spout To The Correct Cup Height
Adjusting the central spout to the correct cup height You can adjust the central spout to suit the height of the cup you are using so that the coffee or espresso will not cool down as quickly and the crema will have a better consistency. -
Page 22: Cancelling Preparation
Cancelling preparation Milk preparation can be cancelled while STOP? is showing in the display. To cancel the preparation of Coffee or Espresso ^ press the OK button. Drink preparation will be cancelled. When preparing Coffee with milk or two portions of a drink you can –... -
Page 23: Espresso Or Coffee
Espresso or coffee Making coffee or espresso To make two portions When the / or . button is pressed, the You can request two portions of coffee machine grinds the beans and espresso or coffee at once in one cup then uses the freshly ground beans to or in two separate cups simultaneously. -
Page 24: Espresso Or Coffee From Ground Coffee
Espresso or coffee from ground coffee To make espresso or coffee using ready ground coffee, add a portion of ground coffee to the ground coffee chute. This gives you the option of preparing a cup of decaffinated coffee, for example, even though the coffee bean container is filled with roasted coffee beans. -
Page 25: Preparing Coffee Or Espresso Using Ready Ground Coffee
Espresso or coffee from ground coffee Preparing coffee or espresso using ready ground coffee You can now select whether you want to dispense a coffee or an espresso made with ground coffee. If no button is pressed within approx. 15 seconds, the ground coffee is emptied into the waste container. -
Page 26: Coffees With Milk
Coffees with milk Stainless steel milk flask You can choose from a variety of milky coffees. (depending on model) Cappuccino consists of two thirds milk The stainless steel milk flask helps keep froth and a third espresso. the milk cold for longer. Cold milk gives Latte macchiato consists of a third hot best results for milk froth milk, milk froth and espresso. -
Page 27: Making Coffees With Milk
Coffees with milk Making coffees with milk Caffè latte, milk froth or hot milk SELECT TYPE OF DRINK will appear in Caution. Danger of burning and the display. scalding from hot steam coming out ^ Place a suitable container of the spout. The liquids and steam dispensed are very hot. -
Page 28: Coffees Made With Ready Ground Coffee
Coffees with milk Coffees made with ready After dispensing milk ground coffee Warning. Bacteria can cause You can also make cappuccino, latte infection. macchiato or caffè latte from ready It is important to rinse the milk ground coffee. system regularly to avoid the risk of bacteria building up. -
Page 29: Dispensing Hot Water
Dispensing hot water You can make hot drinks or warm cups To stop dispensing water using the hot water function ^ press the OK button. Caution. Danger of burning and Preparation will be cancelled. scalding from hot steam coming out of the hot water spout. -
Page 30: Coffee The Way You Like It
Coffee the way you like it You can customise the coffee machine To avoid damaging the grinder: to suit your exact requirements. You only ever adjust the grinder by one setting at a time. Grind the coffee – adjust the grinder setting, beans again if you want to adjust the grinder to the next setting. -
Page 31: Amount Of Coffee
Coffee the way you like it Amount of coffee You can alter the amount of coffee by selecting a different setting. There is a The coffee machine can grind and choice of three settings: brew 6-14 g of coffee per cup. The greater the quantity, the stronger the –... -
Page 32: Pre-Brewing The Coffee
Coffee the way you like it Pre-brewing the coffee Brewing temperature When the pre-brewing function is The ideal brewing temperature will switched on, the freshly ground coffee depend on is first moistened with a little hot water. – the type of coffee, Then the remaining water is forced –... - Page 33 Coffee the way you like it SELECT TYPE OF DRINK will appear in the display. ^ Press the OK button until MENU appears in the display. ^ Turn the rotary control until SETTINGS appears in the display. Press the OK button. SETTINGS TEMPERATURE ^ Select TEMPERATURE and press the...
-
Page 34: Setting The Portion Sizes
Setting the portion sizes Setting the portion size when You can programme the amount of water used for each portion of making a drink espresso, coffee or hot water to suit Press the ., /, H or k button for at least your taste and your cups. - Page 35 Setting the portion sizes Setting portion size for cappuccino Setting portion size for caffè latte, and latte macchiato milk froth, hot milk and hot water ^ Place the desired cup under the SELECT TYPE OF DRINK will appear in central spout. the display.
-
Page 36: Setting The Portion Size From The Settings Menu
Setting the portion sizes Setting the portion size from the SETTINGS menu SELECT TYPE OF DRINK will appear in the display. ^ Press the OK button until MENU appears in the display. ^ Turn the rotary control until SETTINGS appears in the display. Press the OK button. -
Page 37: The Settings Menu
The SETTINGS menu You can use the SETTINGS menu to customise the coffee machine to suit your personal requirements. Calling up the SETTINGS menu ^ Press the OK button for more than 2 seconds. MENU SETTINGS ^ Turn the rotary control until SETTINGS appears in the display. -
Page 38: Possible Setting Options
The SETTINGS menu Possible setting options The factory setting for the current relevant option is shown in bold. Option Available settings Language German, English and other languages Time of day Clock display (available in Comfort mode) 12 H / 24 H Timer (available in Comfort mode) switch on at / switch off after (1:00) / switch off at... - Page 39 The SETTINGS menu Option Available settings Info Total portions Coffee drinks Espresso Coffee Cappuccino Latte Macchiato Caffè Latte Milk froth Hot milk Hot water No. portions until descaling Water hardness Soft 1 Medium 2 Hard 3 Very hard 4 System lock Yes / No Cup heating Yes / No...
-
Page 40: Language
The SETTINGS menu Language Time of day and clock display SELECT TYPE OF DRINK will appear in If you are operating the coffee machine the display. in Comfort mode you can set the time of day and the clock display in the ^ Press the OK button until MENU SETTINGS menu. -
Page 41: To Set The Time Of Day
The SETTINGS menu Timer functions ^ Select 24 H, if you want the time to be shown as a 24 hour clock. The timer is only available if you are operating the coffee machine in ^ Select 12 H, if you want the time to Comfort mode. -
Page 42: To Set The Timer
The SETTINGS menu To set the timer The timer function must be activated for the coffee machine to switch on at SELECT TYPE OF DRINK will appear in the desired time (see " To activate and the display. deactivate the timer"). ^ Press the OK button until MENU If the coffee machine has switched appears in the display. -
Page 43: To Activate And Deactivate The Timer
The SETTINGS menu ^ Select TIMER and press the OK Switch off after: button. If none of the buttons have been pressed or no drink has been TIMER prepared, the coffee machine will ACTIVATE switch itself off after one hour to save ^ Turn the rotary control until energy. -
Page 44: Operating Modes
The SETTINGS menu Operating modes To select the operating mode You can operate the coffee machine in SELECT TYPE OF DRINK will appear in Eco mode or Comfort mode. the display. ^ Press the OK button until MENU The Eco Mode is an energy-saving mode. -
Page 45: To Display Information
The SETTINGS menu To display information To lock the coffee machine In the menu option INFO the number of You can lock the coffee machine to portions prepared for each individual prevent it being used without your drink can be displayed. knowledge, by children, for example. -
Page 46: To Deactivate The System Lock Temporarily
The SETTINGS menu Factory default When the coffee machine is switched off it is locked and drinks cannot be You can reset the settings back to the dispensed. ones which were set when the coffee machine was delivered - the factory To deactivate the system lock default settings. -
Page 47: Demo Mode
The SETTINGS menu Demo mode The demo mode is active. Do not activate this setting for To deactivate demo mode domestic use! ^ Switch the coffee machine off with the mains switch. Wait a short while The coffee machine can be and then switch it back on again. -
Page 48: Cleaning And Care
Cleaning and care Quick guide Clean the coffee machine every day to prevent a build-up of bacteria. Recommended frequency What do I have to do? Each time milk is prepared, if more Rinse the milk pipes than one hour has passed since the last time milk was prepared Every day Clean the water container... - Page 49 Cleaning and care In the MAINTENANCE menu you can Danger of burning and scalding on call up the different care programmes hot components or by hot liquids! and alter care settings. Always allow the coffee machine to cool down before cleaning. Caution. Calling up the MAINTENANCE menu The water in the drip tray can be ^ Press the OK button for more than...
-
Page 50: Rinsing The System
Cleaning and care Rinsing the system Rinsing the milk system The coffee machine rinses itself when it Warning. Milk naturally contains is switched on which means that the bacteria. If the milk system is not pipes are pre-heated with warm water cleaned properly the bacteria will ready for you to prepare a delicious multiply with potentially harmful... -
Page 51: Cleaning The Milk System
– or clean the milk system with the CLEAN MILK SYSTEM programme ^ Then press the OK button. and Miele milk pipe cleaner. The milk system is rinsed out. The coffee machine will remind you to clean the milk system at the correct time. - Page 52 Cleaning and care Dismantling and cleaning the milk system The milk system can be cleaned in the dishwasher or by hand using hot water and a little washing-up liquid. Place the individual components in the dishwasher for thorough cleaning. ^ Pull the central spout all the way down.
- Page 53 ^ Replace the cover and then push the central spout back up into position. Cleaning the milk system with Miele ^ Place the milk tube into the container milk pipe cleaner when prompted to do so in the The milk system cleaner was display.
-
Page 54: Cleaning The Stainless Steel Milk Flask
Cleaning and care Cleaning the stainless steel Water container milk flask Change the water every day to prevent a build-up of bacteria. (depending on model) The milk flask should be taken apart Make sure that the valve, the and cleaned every day. underside of the water container and the surface the water container sits ^ Clean all parts by hand only using... -
Page 55: Drip Tray Cover
Cleaning and care Drip tray cover Drip tray and waste container ^ Remove the drip tray cover from the Clean the drip tray and waste drip tray. container every day to avoid ^ The drip tray cover can be cleaned in unpleasant smells and mildew. - Page 56 Cleaning and care Waste container Make sure that the metal contact The waste container will usually contain discs on the drip tray are cleaned some residual water from the rinsing and dried properly. The discs will process. not be able to detect that the drip ^ Push the central spout all the way up.
-
Page 57: Bean Container And Ground Coffee Chute
Cleaning and care Bean container and ground Brew unit coffee chute Clean the brew unit by hand only using hot water. Do not use Disconnect the coffee machine from washing-up liquid. The moving parts the electricity supply before of the brew unit are lubricated. cleaning. - Page 58 Cleaning and care ^ Carefully pull the brew unit out of the To replace the brew unit proceed in the coffee machine. reverse order: ^ Push the brew unit back into the If you cannot remove the brew unit or can only do so with difficulty, the brew coffee machine, making sure it is unit is not in the correct position (see...
- Page 59 Cleaning and care Cleaning the brew unit When DROP CLEANING TAB IN GROUND COFFEE CHUTE appears: Depending on the natural oil content of ^ Open the lid on the right hand side of the coffee used, the brew unit can become blocked quite quickly.
-
Page 60: Housing
^ Switch the machine off using the On/Off button -. ^ Clean the housing with a clean, soft sponge and warm water with a little washing-up liquid. TIP You can also use a Miele microfibre cloth to clean the housing. -
Page 61: Descaling
NO. PORTIONS UNTIL DESCALING: 50 will appear in Only use the Miele descaling the display. The remaining number of tablets. Other types of descaling drinks that can be made before... -
Page 62: Selecting The Descale Option In The Maintenance Menu
Descaling Selecting the Descale option in Follow the instructions on the packet the MAINTENANCE menu carefully. It is important that you fill ^ Press the OK button until MENU the water container with enough appears in the display. water. Too little water will cause the descaling programme to be ^ Turn the rotary control until cancelled prematurely. -
Page 63: Problem Solving Guide
Problem solving guide Warning. Do not open the outer casing of the machine. Maintenance and repairs should only be carried out by a suitably qualified and competent person in strict accordance with local and national safety regulations. Maintenance and repairs done by unqualified persons could be dangerous and the manufacturer will not be held liable. - Page 64 FAULT - 82 ^ If the fault message appears in the display again, contact the Miele Service Department. There is too much ready ground coffee in the ground FAULT - 28 coffee chute.
- Page 65 ^ Switch the coffee machine off and then back on again using the master switch. ^ If the fault message appears in the display again, contact the Miele Service Department. You can hear the The coffee machine is attempting to draw in water although noise of the pump the water container is empty.
- Page 66 ^ Fill the water container with fresh tap water and push it into the machine. If, after doing this, the message still shows in the display, contact the Miele Service Department. Dispensing stops There is not enough water in the water container.
- Page 67 Problem solving guide Message Possible cause and remedy The coffee machine needs descaling and/or the brew The message unit filters are blocked. SYSTEM FILLING UP - START ^ Switch the machine off with the On/Off button -. appears in the display ^ Press the OK button for 2 seconds and call up again.
- Page 68 Problem solving guide Unsatisfactory results Problem Possible cause and remedy Only water is The ground coffee chute lid has been opened and then closed again without any ready ground coffee being added dispensed when to the chute. Then the YES option was selected when coffee has been GROUND COFFEE appeared in the display.
- Page 69 Problem solving guide Problem Possible cause and remedy The cup has not been pre-heated. The coffee or espresso is not hot ^ Pre-heat the cups (see "Pre-heating cups"). enough. The brewing temperature has been set too low. ^ Set a higher brewing temperature (see "Brewing temperature).
- Page 70 Problem solving guide Unusual performance of the coffee machine Problem Possible cause and remedy Only very little The filters in the brew unit are blocked. coffee or nothing at ^ Clean the brew unit (see "Cleaning the brew unit") all is dispensed, ^ Degrease the brew unit (see "Cleaning the brew unit") although a drink has been selected.
- Page 71 The main fuse has tripped due to a problem with the coffee machine, the electricity supply or another machine. ^ Switch off at the wall socket and unplug it. ^ Contact a qualified electrician or Miele. The display lights up The demo setting has been activated. but the coffee ^ Deactivate the demo mode (see "The Settings menu"...
- Page 72 Problem solving guide Problem Possible cause and remedy The coffee machine The system lock is activated. does not switch itself ^ Deactivate it (see "To lock the coffee machine"). on, although the Switch on at setting has been activated The machine was not used after being switched on for the timer.
- Page 73 Problem solving guide Problem Possible cause and remedy The brew unit cannot The brew unit or the brew unit motor is not in the correct be removed. position. This can happen if the brew unit or the drip tray is pulled out while brewing is taking place. ^ Switch the machine off with the On/Off button -.
-
Page 74: After Sales / Guarantee
In the event of a fault which you cannot correct yourself, or if the machine is under guarantee, please contact: – your Miele Dealer – Miele (see back cover for contact details). When contacting your Dealer or Miele, please quote the model and serial... -
Page 75: Accessories
Accessories The following accessories are supplied Miele offers a range of useful with the machine depending on mo- accessories as well as cleaning and del: conditioning products for your machine. – Measuring spoon – Microfibre cloth for ground coffee for removing finger marks and light soiling –... -
Page 76: Saving Energy
Saving energy Eco mode Switching the coffee machine off with the master switch Using the coffee machine in Eco mode saves energy. If you are not going to be using the coffee machine for a long period of The coffee machine will switch to time, switch it off with the master switch energy saving mode if it has not been at the back of the machine. -
Page 77: Transporting The Machine
Transporting the machine If you are not going to use the coffee Caution. Danger of burning and machine for a long period of time and it scalding from hot steam coming out needs to be moved, e.g. when moving house: of the hot water spout. -
Page 78: Electrical Connection
Electrical connection All electrical work should be carried out Do not connect the machine to an by a suitably qualified and competent inverter such as those used with an person only, in strict accordance with autonomous energy source e.g. Solar current national and local safety power. -
Page 79: Installation
Installation Please note: If the coffee machine is installed in a niche, the minimum dimensions for the Danger of overheating. niche are as follows: Ensure that there is sufficient ventilation around the coffee height 508 mm machine. width 450 mm Make sure that the vents on the top of the machine are not covered depth... -
Page 80: Coffee Machine Dimensions
Coffee machine dimensions... - Page 84 Alteration rights reserved / 3912 M.-Nr. 09 201 320 / 02 CM 5200...