Table of Contents
Advertisement
For visually-impaired users
You can read this User's Guide with Screen Reader 'text-to-speech'
software.
You must set up the hardware and install the driver before you can use the printer.
Please use the Quick Setup Guide to set up the printer. You can find a printed copy in the box.
Please read this User's Guide thoroughly before you use the printer. Keep the CD-ROM in a
convenient place so you can use it quickly if you need to. You can also read the User's Guide with
HTML format by visiting our web site at http://solutions.brother.com or accessing it from the CD-ROM
directly.
Please visit our web site at http://solutions.brother.com where you can get answers to Frequently
Asked Questions (FAQs), Product Support and Technical Questions, and the latest Driver Updates
and Utilities.
Brother Laser Printer
HL-2030
HL-2040
HL-2070N
User's Guide
Version 4
Advertisement
Table of Contents

Related Manuals for Brother 2040


Summary of Contents for Brother 2040
- Page 1 You must set up the hardware and install the driver before you can use the printer. Please use the Quick Setup Guide to set up the printer. You can find a printed copy in the box. Please read this User’s Guide thoroughly before you use the printer. Keep the CD-ROM in a convenient place so you can use it quickly if you need to.
-
Page 2: Laser Printer
Electrical Hazard icons alert you to a possible electrical shock. Hot Surface icons warn you not to touch machine parts that are hot. Cautions specify procedures you must follow or avoid to prevent possible damage to the printer or other objects. -
Page 3: To Use The Printer Safely
Cleaning the outside of the printer: ■ Make sure you have turned off the power switch and unplugged the printer from the AC power outlet. ■ Use neutral detergents. Cleaning with volatile liquids such as thinner or benzine will damage the outside surface of the printer. - Page 4 Epson is a registered trademark and FX-80 and FX-850 are trademarks of Seiko Epson Corporation. Hewlett Packard is a registered trademark and HP LaserJet 6P, 6L, 5P, 5L, 4, 4L 4P, III, IIIP, II, and IIP are trademarks of Hewlett-Packard Company.
-
Page 5: Table Of Contents
BRAdmin Professional... 2-16 Driver Deployment Wizard... 2-16 Network Print Software... 2-16 Web BRAdmin ... 2-16 Automatic Emulation Selection... 2-17 Remote Printer Console ... 2-17 How to use and install the Remote Printer Console software ... 2-17 ® ... 2-14 ® ... 2-15... - Page 6 Network factory default setting (For HL-2070N) ... 3-11 Network factory default setting with APIPA protocol disabled (For HL-2070N)... 3-11 Options ...4-1 Wireless print server (NC-2200w)... 4-1 Print server (NC-2100p) (For HL-2040) ... 4-2 Routine maintenance ...5-1 Replacing the consumable items... 5-1 Toner cartridge ... 5-2 Toner Low message ...
- Page 7 Appendix ... A-1 Printer specifications... A-1 Symbol and character sets (For HL-2070N) ... A-9 How to use the Web browser ... A-9 How to use the Remote Printer Console ... A-9 ® For Windows ... A-9 ® For Macintosh ... A-9 Symbol and character sets list...
-
Page 8: About This Printer
About this printer What is in the box? When you unpack the printer, check that you have all of the following parts. Note The AC power cord may be slightly different than the one in the illustration above, depending on which country you bought the printer in. -
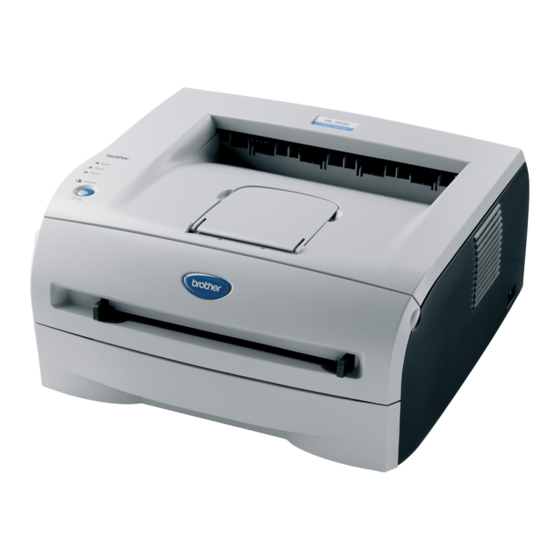
Page 9: Front View
Power Switch Front Cover Face-down Output Tray Back Cover AC Power Connector 10/100BASE-TX Port (HL-2070N) Parallel Interface Connector (HL-2040 and HL-2070N) Side Cover LED (Light-emitting Diode) (HL-2070N) USB Interface Connector The printer illustration is based on HL-2070N. About this printer... -
Page 10: Positioning The Printer
(4 in.) between the ventilation hole and the wall. ■ Do not put the printer in direct sunlight. If you have to put it near a window, use a blind or a heavy curtain to protect the printer from direct sunlight. -
Page 11: What Kind Of Paper Can I Use
Type and size of paper The printer loads paper from the installed paper tray, or the manual feed slot. The names for the paper trays in the printer driver and this guide are as follows: Paper tray Manual feed slot While looking at this page on the CD-ROM, you can jump to the page for each printing method by clicking in the table. -
Page 12: Recommended Paper
Do not use ink jet paper, because it might cause a paper jam or damage your printer. Note If you use paper other than the ones recommended, a paper jam or misfeeding may occur in the printer. To help you choose which paper to use with this printer, see Important information for choosing your paper on page A-6. -
Page 13: Printable Area
4.23 mm (0.16 in.) (0.16 in.) (0.16 in.) 5.0 mm 5.08 mm 5.0 mm (0.19 in.) (0.2 in.) (0.19 in.) About this printer 4.23 mm 4.23 mm (0.16 in.) (0.16 in.) 6.01 mm 6.01 mm (0.24 in.) (0.24 in.) 4.23 mm 4.23 mm... -
Page 14: Printing Methods
Do not put more than 10 transparencies in the paper tray, if you print on transparencies. Select the Paper Size, Media Type, Paper Source and other settings in the printer driver. Pull the paper tray completely out of the printer. - Page 15 (blank side) face down, with the top of the paper at the front of the tray. Put the paper tray firmly back in the printer. Check that it is completely in the printer. About this printer...
- Page 16 If you choose not to lift up the output tray support flap, we recommend that you remove printed pages immediately after they come out of the printer. Send the print data to the printer. Note If you print on transparencies, remove each transparency immediately.
-
Page 17: Printing On Plain Paper, Bond Paper Or Transparencies From The Manual Feed Slot
Printing on plain paper, bond paper or transparencies from the manual feed slot Note The printer automatically turns on the Manual Feed mode when you put paper in the manual feed slot. Select the Paper Size, Media Type, Paper Source and other settings in the printer driver. - Page 18 Do not put more than one piece of paper in the manual feed slot at any one time, as it may cause a jam. • If you put any Media (paper, transparency and so on) in the manual feed slot before the printer is in the Ready state, the media may be ejected without being printed on.
- Page 19 After the printed page comes out of the printer, put in the next sheet of paper or the transparency as in Step 5 above. Repeat for each page that you want to print. Note If you print on transparencies, remove each transparency immediately after printing. Stacking the printed transparencies may cause a paper jam or the transparency to curl.
-
Page 20: Printing On Thick Paper, Labels And Envelopes
Printing on thick paper, labels and envelopes Note The printer automatically turns on the Manual Feed mode when you put paper in the manual feed slot. When you select the paper you want to use, see What kind of paper can I use? on page 1-4. - Page 21 Send the print data to the printer. Note A No paper fed manual feed slot status is shown by the control panel LEDs until you put a sheet of paper or an envelope in the manual feed slot. Lift up the support flap to prevent paper from sliding off the face-down output tray.
- Page 22 Ready state, the media may be ejected without being printed on. After the printed page comes out of the printer, put in the next sheet of paper or the envelope as in Step 5 above. Repeat for each page that you want to print.
-
Page 23: Types Of Envelopes To Avoid
You should buy quality envelopes from a supplier who understands that you will be using the envelopes in a laser printer. Before you print a lot of envelopes, test one to make sure that the print results are what you want. -
Page 24: Duplex Printing
Paper Source to be Auto Select or Tray1. The printer will automatically print all the even-numbered pages on one side of the paper first. Remove the printed even-numbered pages from the output tray and put them back in the paper tray, placing the paper with the side that is going to be printed on (blank side) face down. -
Page 25: Manual Duplex Printing From The Manual Feed Slot
The printer will now automatically print all the odd-numbered pages on the other side of the paper. Note When you put paper in the paper tray, first empty the tray then put the printed pages in the tray, with the printed side face up. -
Page 26: Paper Orientation For Manual Duplex Printing
Paper orientation for manual duplex printing The printer prints the second page first. If you print 10 pages on 5 sheets of paper, it will print page 2 then page 1 on the first sheet of paper. It will print page 4 then page 3 on the second sheet of paper. -
Page 27: Driver And Software
Driver and software Printer driver A printer driver is software that translates data from the format used by a computer to the format that a particular printer needs. Typically, this format is a printer command language or page description language. - Page 28 True Type Mode ■ Error Message Printout These settings are not available with Brother Laser driver for Macintosh These settings are not available with Windows NT These settings are not available for HL-2030 and HL-2040. ® ® ® 4.0 and Windows 2000/XP.
-
Page 29: For Windows
For Windows Features in the printer driver You can download the latest printer driver or get other information by accessing the Brother Solutions Center at http://solutions.brother.com You can also change settings by clicking the illustration on the left side of the Basic tab in the Properties dialog box. - Page 30 ® If you are using Windows 2000 or XP, you can access the Advanced tab by clicking Printing Preferences... in the General tab of the Printer Properties screen. ® If you are using Windows NT 4.0, you can access the Advanced tab by clicking Document Defaults in the file menu of the Printers and Faxes folder.
- Page 31 When you use text as a watermark, you can change the font, darkness and angle settings. Page Setting You can change the print image scaling and select Mirror / Reverse print options. ® 2000/XP users: Printer Halftone, System Halftone, Improve gray Driver and software 2 - 5...
- Page 32 Device Options You can set the following Printer Function modes in this tab: (You can jump to the page for each Printer Function by clicking the function name in the list below.) • Job Spooling • Quick Print Setup •...
- Page 33 Mode is selected, it is automatically adjusted to the most suitable time-out setting depending on how often you use your printer. While the printer is in sleep mode, all the LEDs are off, but the printer can still receive data from the computer. Receiving a print file or document automatically wakes up the printer to start printing.
- Page 34 Macro (For HL-2070N) You can save a page of a document as a macro to the printer memory. Moreover, you can execute the saved macro - in other words, you can use the saved macro as an overlay on any document. This will save time and increase printing speed for often used information such as forms, company logos, letterhead formats or invoices.
- Page 35 Increase or decrease the print density. Error Message Printout You can choose whether the printer reports problem by printing error page or not. About the errors, see Error message printout on page 6-3. Selections are Printer Default (ON), ON and OFF.
- Page 36 Driver and software Tray Settings tab Paper Source Setting This feature recognizes the paper size in each paper tray. 2 - 10...
- Page 37 You can see the printer driver version. ■ You can check the current driver settings. ■ You can print the printer settings page and the internal fonts list. (The internal fonts list is available for HL-2070N only.) Driver and software 2 - 11...
-
Page 38: For Macintosh
® This printer supports Mac OS 9.1 to 9.2 and Mac OS X 10.2.4 or greater. You can download the latest printer driver by accessing the Brother Solutions Center at http://solutions.brother.com Note ® The screens in this section are from Mac OS X 10.3. - Page 39 Print settings Set the Resolution, Media Type, Toner Save and other settings. You can change settings by selecting the setting in the Printer Settings list: ■ Quality ■ Media Type ■ Toner Save Mode Quality You can change the resolution as follows: •...
-
Page 40: Uninstalling The Printer Driver
You can uninstall the printer driver that you installed with the following steps. Note • This instruction is not available if you installed the printer driver from Windows Add Printer function. • After uninstalling, we recommend that you restart your PC to remove files that were in use during uninstall. -
Page 41: Brother Laser Driver For Macintosh
Delete button. Click on the name of your printer in the printer list. From the Finder menu, delete the Printer. Drag the HL-MFLPro folder (from the Mac OS X 10.X > Library > Printers > Brother) into the Trash bin and then empty the trash bin. -
Page 42: Software
This installer includes the Windows If the administrator installs the printer driver and port driver using this software, the administrator can save the file to the file server or send the file by E-mail to users. Then, each user just clicks that file to have the printer driver, port driver, IP address, and so on, automatically copied to their PC. -
Page 43: Automatic Emulation Selection
Remote Printer Console is software to change many of the printer settings independently of your software application. For example, you can change the settings for printer margin, sleep mode, character set and so on. These settings are then remembered and used by the printer. -
Page 44: Control Panel
The LED indications shown in the table below are used in the illustrations in this chapter. Note When the power switch is off or the printer is in Sleep mode, all the LEDs are off. LED is off LED is on... - Page 45 Data remaining in memory Print data is left in the printer memory. If the Ready LED blinks for a long time and nothing has printed, press the Go button to print the data that is still in memory.
- Page 46 Cartridge position error The toner cartridge is not installed correctly. Take out the toner cartridge and put it back into the printer again. Drum life end soon The drum unit is near the end of its life. We recommend that you get a new drum unit to replace the current one.
- Page 47 1-10 or Printing on thick paper, labels and envelopes from the manual feed slot on page 1-13. Memory full The printer memory is full and the printer cannot print full pages of a document. See Solving print problems on page 6-15. Print overrun A print overrun occurred and the printer cannot print full pages of a document.
-
Page 48: Service Call Indications
Control panel Service call indications If there is an error that cannot be cleared by the user, the printer will show that a service call is needed by lighting up all the LEDs as shown below. If you see the service call indication above, turn off the power switch, wait a few seconds, and then turn it back on and try to print again. - Page 49 If this error occurs, turn the power switch off, wait a few seconds, and then turn it on again. Leave the printer for 10 minutes with the power on. If the error occurs again, consult your dealer or Brother authorized service representative.
-
Page 50: Control Panel Button (Go Button)
Go button to clear the error, and then continue to use the printer. Form feed If the green Ready LED blinks for a long time, press the Go button. The printer will print any data that is left in the printer memory. -
Page 51: Print A Test Page
Print a test page You can use the Go button or the printer driver to print a test page. Using control panel button Turn off the printer. Make sure that the front cover is closed and the power cord is plugged in. -
Page 52: Print A Printer Settings Page
Make sure that the front cover is closed and the power cord is plugged in. Turn on the printer and wait until the printer is in the Ready state. Press the Go button three times within 2 seconds. The printer will print the current printer settings page. Using the printer driver If you are using Brother’s Windows... -
Page 53: Print Fonts (For Hl-2070N)
Print Fonts (For HL-2070N) You can print a list of the internal fonts using the control panel button or printer driver. Using the control panel button Turn off the printer. Make sure that the front cover is closed and the power cord is plugged in. -
Page 54: Network Factory Default Setting (For Hl-2070N)
If you wish to reset the print server back to its default factory settings (resetting all information such as the password and IP address information), please follow these steps: Turn off the printer. Make sure that the front cover is closed and the power cord is plugged in. -
Page 55: Options
Options This printer has the following optional print servers. Click the symbol each item. Model HL-2030 HL-2040 HL-2070N Wireless print server (NC-2200w) An optional network print server (NC-2200w) allows you to print in a wireless environment through the USB interface. The NC-2200w is compatible with Windows The Brother NC-2200w wireless print server supports the IEEE 802.11b wireless networking standard and... -
Page 56: Print Server (Nc-2100P) (For Hl-2040)
Print server (NC-2100p) (For HL-2040) An optional network print server (NC-2100p) allows you to connect to your network through the parallel interface. Network interface Printer Interface Support Protocol Management Features Note HL-2070N already has a built-in 10/100BASE-TX Ethernet Print Server. -
Page 57: Routine Maintenance
Routine maintenance You will need to replace certain parts and clean the printer regularly. WARNING WARNING When you replace certain parts or clean the printer regularly, pay attention to the following: ■ If your clothes are smeared with toner, wipe off the toner with a dry cloth and immediately wash the clothes in cold water to avoid stains. -
Page 58: Toner Cartridge
Toner cartridge The life of the original toner cartridge that came with the printer may be either a starter cartridge, and depends on the model and country you bought the printer in. The starter toner cartridge will print up to 1,500 A4 or Letter-size single-sided pages at 5% coverage. -
Page 59: Toner Life End Message
Toner Life End message If the LED shows the message below, the printer has run out of toner or the toner is not evenly distributed inside the cartridge. Replacing the toner cartridge Note • To ensure high quality printing, make sure you use quality Brother toner cartridges. When you want to buy toner cartridges, call the dealer you bought the printer from or Brother Customer Service. - Page 60 • To prevent damage to the printer from static electricity, do not touch the electrodes shown in the illustrations. Push down the blue lock lever and take the toner cartridge out of the drum unit.
- Page 61 CAUTION • Wait to unpack the toner cartridge until immediately before you put it in the printer. If toner cartridges are left unpacked for a long time the toner life will be shortened. • If an unpacked drum unit is put in direct sunlight or room light, the unit may be damaged.
- Page 62 Return the tab to the home position (▲) before you put the drum unit back in the printer. If you do not, printed pages may have a vertical stripe.
-
Page 63: Drum Unit
• While removing the drum unit, handle it carefully because it may contain toner. • Every time you replace the drum unit, you should clean the inside of the printer. See Cleaning on page 5-11. with one drum unit. Routine maintenance... -
Page 64: Replacing The Drum Unit
Replacing the drum unit Note We recommend that you clean the printer when you replace the drum unit. See Cleaning on page 5-11. Follow these steps to replace the drum unit. Make sure that the printer is turned on and the Drum LED is blinking. - Page 65 Unpack the new drum unit. CAUTION Wait to unpack a drum unit until immediately before you put it in the printer. Exposure to direct sunlight or room light may damage the drum unit. Put the toner cartridge firmly into the new drum unit until you hear it lock into place.
- Page 66 Put the drum unit and toner cartridge assembly in the printer. Close the front cover. Make sure that the Drum LED is now off. Routine maintenance 5 - 10...
-
Page 67: Cleaning
Clean the outside and inside of the printer regularly with a dry, lint-free cloth. When you replace the toner cartridge or the drum unit, make sure you clean the inside of the printer. If printed pages are stained with toner, clean the inside of the printer with a dry, lint-free cloth. -
Page 68: Cleaning The Inside Of The Printer
Wipe the outside of the printer with a soft cloth to remove dust. Remove anything that is stuck inside the paper tray. Wipe the inside of the paper tray with a soft cloth to remove dust. Put the paper tray firmly back in the printer. - Page 69 Pull out the drum unit and toner cartridge assembly. HOT SURFACE After you have just used the printer, some internal parts of the printer are extremely hot! Wait for the printer to cool down before you touch the internal parts of the printer.
-
Page 70: Cleaning The Corona Wire
• To prevent damage to the printer from static electricity, do not touch the electrodes shown in the illustrations. Routine maintenance... - Page 71 Return the tab to the home position (▲) before you put the drum unit back in the printer. If you do not, printed pages may have a vertical stripe.
-
Page 72: Troubleshooting
FAQs and troubleshooting tips. Visit us at http://solutions.brother.com. Identifying your problem First, check the following: ■ The AC power cord is connected properly and the printer is turned on. ■ All of the protective parts have been removed. ■... -
Page 73: Error Messages In The Status Monitor
Reduce the print resolution or reduce the complexity of your document. Press the Go button to print the data left in the printer. Cancel the print job if you want to delete the data remaining in the printer, see Cancel printing on page 3-7. -
Page 74: Error Message Printout
Error message printout The printer will report problems by printing an error message as defined in the following table. Take the corrective actions for the error message. Error message Action ■ MEMORY FULL ■ ■ PRINT OVERRUN ■ ■ ■... -
Page 75: Paper Handling
Reduce the amount of paper in the paper tray, and then try again. Check that manual feed mode is not selected in the printer driver. Re-insert the paper firmly, one sheet at a time. -
Page 76: Paper Jams And How To Clear Them
If the printer does not start printing automatically, press the Go button. If the printer still does not start printing, please check that all the remaining jammed paper has been removed from the printer. Then try printing again. - Page 77 Pull the jammed paper up and out of the printer. Open the front cover. Pull out the drum unit and toner cartridge assembly slowly. The jammed paper will be pulled out with the drum unit and toner cartridge assembly. CAUTION...
- Page 78 Open the back cover. Pull the tab toward you to open the rear chute cover. Pull the jammed paper out of the fuser unit. If the jammed paper cannot be pulled out easily, push down the tab with one hand as you gently pull the paper out with other. Troubleshooting Rear Chute Cover 6 - 7...
- Page 79 HOT SURFACE After you have just used the printer, some internal parts of the printer are extremely hot! Wait for the printer to cool down before you touch the internal parts of the printer. Close the back cover. Push the lock lever down and take the toner cartridge out of the drum unit.
- Page 80 Put the drum unit and toner cartridge assembly back in the printer. Put the paper tray firmly back in the printer. Close the front cover. Make sure that the Paper LED is now off and the printer is ready. Troubleshooting 6 - 9...
-
Page 81: Other Problems
If you have a print quality problem, print a test page first (see page 3-8). If the printout looks good, the problem is probably not the printer. Check the interface cable or try the printer on another PC. This section provides information on the following topics:... - Page 82 See What kind of paper can I use? on page 1-4. Make sure that you choose the appropriate media type in the printer driver. See What kind of paper can I use? on page 1-4.
- Page 83 Examples of poor print Recommendation quality ■ Clean the drum unit as follows: 75 mm (3.0 in.) 75 mm (3.0 in.) White Spots on black text and graphics at 75 mm (3.0 in.) intervals 75 mm (3.0 in.) 75 mm (3.0 in.) Black Spots at 75 mm (3.0 in.) intervals...
- Page 84 The drum unit may be damaged. Put in a new drum unit. See Replacing the toner cartridge on page 5-3. Clean the inside of the printer and the primary corona wire in the drum unit. See Cleaning on page 5-11.
- Page 85 See What kind of paper can I use? on page 1-4. If you don’t use the printer very often, the paper may have been in the paper tray too long. Turn over the stack of paper in the paper tray. Also, try fanning the paper stack and then rotating the paper 180°...
-
Page 86: Solving Print Problems
Turn off Printer Status Monitor in the Device Options tab in the printer driver. Press the Go button to print the data left in the printer. Cancel the print job if you want to delete the data remaining in the printer, see Cancel printing on page 3-7. -
Page 87: Appendix
Windows 2000/XP ® Mac OS Linux From paper tray HL-2030 HL-2040 Electrophotographic Up to 17 ppm (Letter Up to 20 ppm (Letter size) size) Up to 20 ppm (A4 size) Up to 16 ppm (A4 size) Less than 10 sec... - Page 88 (NC-2200w) 10/100BASE-TX (NC-2100p) TCP/IP TCP/IP, NetBEUI ® ® 95 or Windows NT 4.0. ® management utility Appendix HL-2040 HL-2070N Fujitsu SPARClite 133MHz 16 MB Full-Speed USB 2.0 IEEE 1284 Parallel, 10/100BASE-TX IEEE 802.11b wireless (NC-2200w) TCP/IP BRAdmin Professional Web Based...
- Page 89 Manual feed slot Paper tray Paper Output* Face-down Duplex Instructional animations for problem solving The Driver Deployment Wizard automates the installation of a printer in a peer-to-peer network. Calculated with 80 g/m (21 lb) paper HL-2040 ® GDI Driver for Windows ®...
- Page 90 Dimensions (W × D × H) Weights Up to 10 sheets Legal paper is not available in some regions. Depends on the model and country you bought the printer in. HL-2030 Plain paper, Bond paper, Recycled paper, Envelope, Labels, and Transparencies...
- Page 91 128 MB All base models 32 MB meet minimum 128 MB requirements ® ® 95 or Windows NT 4.0. Appendix HL-2040 HL-2070N Average 7 W Recommended Available Hard Disk Space 16 MB 40 MB 32 MB 50 MB 128 MB...
- Page 92 This section provides information to help you choose paper to use with this printer. Note If you use paper other than the ones recommended, a paper jam or misfeeding may occur in the printer. See Recommended paper on page 1-5.
- Page 93 Print surface The characteristics may differ a little between the face side and reverse side of a sheet of paper. Usually, the opening side of the ream of paper package is the print side. Follow any indication of the print side on the paper package.
- Page 94 Paper size Paper size Letter Legal Executive Envelope Monarch Envelope #9 Envelope #10 Envelope #11 Envelope DL Envelope C5 Envelope C6 B5 (JIS) B5 (ISO) Folio 210 × 297 mm 148 × 210 mm 105 × 148 mm 110 × 220 mm 162 ×...
-
Page 95: Symbol And Character Sets (For Hl-2070N
Symbol and character sets (For HL-2070N) For the HP LaserJet, IBM Proprinter XL, and EPSON FX-850 emulation modes, you can select the symbol and character sets using a Web browser or the Remote Printer Console software. How to use the Web browser To use the Web browser, follow the steps below. -
Page 96: Hp Laserjet Mode
HP LaserJet mode ABICOMP Brazil / Portugal (13P) Desktop (7J) HP German (0G) ISO Latin1 (0N) ISO Latin5 (5N) ISO2 IRV (2U) ISO5 ASCII (0U) ISO11 Swedish (0S) ISO15 Italian (0I) ISO17 Spanish (2S) ISO25 French (0F) ISO60 Norwegian1 (0D) -
Page 97: Ibm Mode
Windows Baltic (19L) Windows Greek (9G) Windows Latin2 (9E) Wingdings (579L) IBM mode PC8 Turkish PC852 East Europe PC863 Canadian French Epson mode Danish I Dutch French II Italian Japanese PC8 D/N PC850 Multilingual PC860 Portugal PC865 Nordic Spanish UK ASCII I US ASCII Windows Cyrillic (9R) Windows Latin1 (19U) -
Page 98: Appendix (For Europe And Other Countries
Frequently asked questions (FAQs) The Brother Solutions Center is our one-stop resource for all your Printer needs. You can download the latest drivers, software and utilities, read FAQs and troubleshooting tips to learn how to get the most from your Brother product. -
Page 99: Important Information: Regulations
Important information: Regulations Radio interference (220 to 240 volt model only) This printer follows EN55022 (CISPR Publication 22)/Class B. Before you use this product, make sure that you use the following interface cables. 1. A shielded parallel interface cable with twisted-pair conductors and that it is marked "IEEE 1284 compliant". -
Page 100: Iec 60825-1 Specification (220 To 240 Volt Model Only
IEC 60825-1 specification (220 to 240 volt model only) This printer is a Class 1 laser product as defined in IEC 60825-1 specifications. The label shown below is attached in countries where it is needed. This printer has a Class 3B laser diode which produces invisible laser radiation in the scanner unit. You should not open the scanner unit under any circumstances. -
Page 101: Important - For Your Safety
Disconnect device You must install this printer near a power outlet that is easily accessible. In case of an emergency, you must disconnect the power cord from the power outlet to shut off the power completely. Caution for LAN connection (For model HL-2070N only) Connect this product to a LAN connection that is not subjected to overvoltages. - Page 102 Appendix (For Europe and Other Countries) B - 5...
-
Page 103: Appendix (For Usa And Canada
Frequently asked questions (FAQs) The Brother Solutions Center is our one-stop resource for all your Printer needs. You can download the latest software and utilities, read FAQs and troubleshooting tips to learn how to get the most from your Brother product. -
Page 104: Service Center Locator (Usa Only
Service center locator (USA only) For the location of a Brother authorized service center, call 1-800-284-4357. Service center locations (Canada only) For the location of a Brother authorized service center, call 1-877-BROTHER Brother fax back system (USA only) Brother has installed an easy to use fax back system so you can get instant answers to common technical questions and product information. -
Page 105: Important Information: Regulations
Bridgewater, NJ 08807-0911 Telephone: (908) 704-1700 declares, that the products Product name: Laser Printer HL-2040 and HL-2070N Model number: HL-20 complies with Part 15 of the FCC Rules. Operation is subject to the following two conditions: (1) This device may not cause harmful interference, and (2) this device must accept any interference received, including interference that may cause undesired operation. -
Page 106: Laser Notices
Laser Safety (100 to 120 volt model only) This printer is certified as a Class 1 laser product under the U.S. Department of Health and Human Services (DHHS) Radiation Performance Standard according to the Radiation Control for Health and Safety Act of 1968. -
Page 107: Important - For Your Safety
Disconnect device You must install this printer near a power outlet that is easily accessible. In case of an emergency, you must disconnect the AC power cord from the AC power outlet to shut off the power completely. -
Page 108: Index
Print quality ... 6-10 Print server ...4-1, 4-2 Print test page ... 3-8 Printable area ... 1-6 Printer driver ... 2-3, 2-14, A-3 Printer settings ... 3-9 Processor ...A-2 Register your product ...B-1, C-1 Remote Printer Console ... 2-17, A-9 Reprint ...2-7, 3-7... - Page 109 Index Scanner window ... 5-13 Service call ... 3-5 Service centers (USA/Canada) ... C-2 Service centres (Europe and other countries) B-1 Software ... 2-16 Specifications ...A-1 Support tab ... 2-11 Symbol ...A-9 System requirements ...A-5 Toner cartridge ... 5-2, A-4 Toner life end ...