Table of Contents
Advertisement
Quick Links
Advertisement
Table of Contents

Related Manuals for Acer I110


Summary of Contents for Acer I110
- Page 1 AasdfasdUser’s Manual...
- Page 2 © 2013 All Rights Reserved Acer Liquid C1 Smartphone User’s Manual Model: I110 First issue: 03/2013 Acer Liquid C1 Smartphone Model number: __________________________________ Serial number: ___________________________________ Date of purchase: ________________________________ Place of purchase: ________________________________...
-
Page 3: Table Of Contents
Table of contents Table of contents......................3 Setting up ........................5 Unpacking your smartphone...................5 Getting to know your smartphone................5 Installing a SIM or microSD card ................6 To cancel the SIM lock, contact your network provider..........6 Installing or removing the battery................6 Using your smartphone ....................8 Locking your smartphone ..................8 Using the touchscreen ....................9 The Home screen ....................11... - Page 4 Inserting a microSD Card ..................42 Appendix ........................43 FAQ and troubleshooting..................43 Other sources of help ...................44 Warnings and precautions ..................44 Emergency calls ....................47 Taking care of your smartphone ................47 Specifications......................48 Safety........................50 End User License Agreement..................56...
-
Page 5: Setting Up
Your new smartphone comes packed in a protective box. Carefully unpack the box and remove the contents. If any of the following items is missing or damaged, contact your dealer immediately: • Acer Liquid C1 Smartphone • Battery • Quick Guide •... -
Page 6: Installing A Sim Or Microsd Card
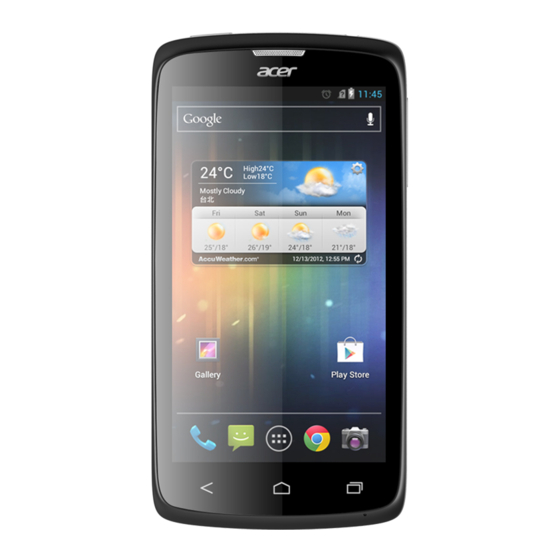
Item Description Phone speaker Emits audio from your smartphone; suitable for holding to your ear. Front camera A front camera for video calls. Touchscreen 4.3-inch, 960 x 540 pixel capacitive touchscreen to display data, phone content and enter information. Microphone Internal microphone. -
Page 7: Installing The Battery
Installing the battery Insert your fingernail into the cutout between the battery cover and the phone. Unclip the cover and lift off the battery cover. Place the battery into the battery compartment, lining up the battery connectors with those at the top of the compartment. -
Page 8: Using Your Smartphone
Using your smartphone Turning on for the first time To turn on your smartphone for the first time, press and hold the power button until the screen turns on. You will then be asked to configure some settings before you can use your smartphone. -
Page 9: Using The Touchscreen
Waking your smartphone If the screen is off and the smartphone does not react to any taps on the screen or front panel button, then it has been locked and is in sleep mode. Press the power button to wake your smartphone. Unlock your smartphone by dragging the lock icon to the right side of the screen towards the unlock icon. -
Page 10: Changing The Text Input Method
icon on the right side of Android keyboard. From here you can enable or disable the several keyboard related settings, including the following: Function Description Auto correction Spacebar and punctuation automatically correct mistyped words. Show correction Shows suggested words while you are typing. suggestions Changing the text input method To change the input method, in the Application menu tap Settings >... -
Page 11: The Home Screen
Text assistance The Swype keyboard has various features that assist you to enter correct text. In the Application menu, tap Settings > Language & input > Swype. You can also tap and hold the Swype key . From here you can enable or disable the following: Function Description How to Swype... -
Page 12: Changing The Wallpaper
the Home screen, tap and drag the icon from the Home screen to Remove that appears at the top of the screen. Adding or removing widgets To add widgets, press the Application icon and then tap WIDGETS. Resizing widgets Some widgets can be resized. As soon as you place a widget on the Home screen, you can resize it by dragging the corners. -
Page 13: Recent Apps
Multitasking You can have multiple applications open at the same time. To open a new application, press the Home button to return to the Home screen, then start the new application. To view your recently used applications, press and hold the Home button. -
Page 14: Connection Icons
This area contains a variety of icons to inform you of your phone’s status. The left side of the Notification area displays event icons that indicate a new event (such as a new message). The icons on the right side indicate signal strength, connection, battery status and the time. - Page 15 Icon Description Icon Description Speakerphone is on Vibrate mode New Gmail message Ringer is silenced New/unread SMS/MMS Phone microphone is off Problem with sending SMS/MMS Application update available New Google Talk message System update available New voicemail Missed call Upcoming event Song is playing Syncing data More notifications...
-
Page 16: Managing Contacts
Managing contacts Managing your contacts Your smartphone features an address book that allows you to save contacts to either the internal memory or onto your SIM card. Open the People application from the APPS menu or tap the People tab from the Dialer to view your contacts. If you don’t have any contacts stored on your phone, you can import your Google account contacts, add a new contact or import contacts from your SIM or SD card. - Page 17 Tip: You may also create a contact from an already dialed or received number, see "Saving a dialed number to contacts" on page 19.
-
Page 18: Making Calls
Making calls This chapter shows you how to make phone calls, and the various options available to you during your call. Before making a call Check that the phone function is on before you make a call. You can confirm the phone status from the icon on the right-hand side of the Notification area. -
Page 19: The Voice Call Screen
2. Select the call from the list and tap view the call in your Call Log. You can save phone numbers to your contacts list from the Call Log. Please refer to "Adding a contact" on page 16 for further details. Saving a dialed number to contacts You can save a number you have dialed to your contacts for future use. -
Page 20: Answering Or Declining A Call
Answering or declining a call When you have an incoming call, the number will be shown on the screen. To accept or decline the call, drag the phone icon to the appropriate icon. To decline the call with a text message, drag the phone icon up to the icon and then select a message. -
Page 21: Messaging
Messaging This chapter shows you how to set up and use the Phone messages, Social messages and Social events functions of your smartphone. All SMS and MMS messages are accessed via Messaging. Messaging automatically arranges received and sent messages into threads. To access Messaging tap Messaging on the Home screen. -
Page 22: Mms Messages
Replying to a message When a new text message arrives a message icon appears in the Notification area and the message icon on the top of the phone lights up. Tap Messaging on the Home screen to view the message list or expand the Notification area to see a summary of the message. - Page 23 3. Tap the message to view the content. 4. To reply to the message, enter your text in the text box labeled Type message and tap the Send icon. Simple text replies will be sent as SMS messages. If you wish to attach a file, tap You will be presented with a menu of options.
-
Page 24: Going Online
Going online Browsing the Internet In order to browse the Internet with your smartphone, you must be connected to a data or wireless network. Using the browser To start browsing, tap the Chrome icon on the Home screen, or open the Application menu and select Chrome. To open a new website, tap the address box at the top of the page. -
Page 25: Setting Up Email
3. Tap 4. Enter the recipient's email address, the subject and message. 5. When you are finished composing your message, tap Setting up Email Your smartphone enables you to access your email. Most popular ISPs can be set up in two steps. In the Applications menu tap Email to start setting up your email account. -
Page 26: Maps, Navigation, Places And Latitude
Certain applications provide both an App and widget, or only provide a widget (with no application icon). See “The Home screen” on page 11. Uninstalling downloaded applications Once you’ve downloaded and installed an application, you may uninstall the application by tapping Settings from the Applications menu. In the Settings menu select Apps >... -
Page 27: Acercloud Setup
AcerCloud setup for Windows 7 To install AcerCloud on a PC without AcerCloud, you can download the AcerCloud setup program from the AcerCloud website (https://www.cloud.acer.com/ops/ downloads) and select AcerCloud Installer in the Windows part. After download, double-click on the installer and follow the instructions to install AcerCloud. - Page 28 Sign in using your Acer ID Start the AcerCloud program from the desktop or Start Menu. If you already have an Acer ID, use your email address and password to sign in to your AcerCloud account. Create an AcerCloud ID If you do not have an AcerCloud ID, you first need to sign up for an AcerCloud account, which you can do from your smartphone.
- Page 29 AcerCloud options When you install AcerCloud, you have several options. Select the options that are useful on your PC and click Next to complete the setup: PicStream - Take holiday snapshots on your smartphone and share them with other smart devices. Photos will be backed up permanently on your Cloud PC (see below), and temporarily accessible for 30 days in your personal cloud and on other devices.
-
Page 30: Using The Camera
Using the camera Your smartphone features a 8-megapixel digital camera mounted on the rear, with a VGA front-facing camera function. This section will take you through all the steps in taking photos and videos with your smartphone. To activate the camera, tap Camera on the Home screen, or open the Applications tab and tap Camera. -
Page 31: Taking A Photo
Icon Description Set the color effect. Camcorder settings To adjust the settings, tap while the camcorder is active. The menu options are: Icon Description Display additional camcorder settings. Set white balance. Set the flash on or off. Set the video quality. 1080p 720p 480p... -
Page 32: Supported Formats
Supported formats Type Formats Image JPEG Video MPEG-4, H.263, H.264 Viewing and sharing photos and videos After you have taken your photo or video, it is automatically saved. Once you have taken a photo or video, you can view it in Gallery or share it on various services by tapping the thumbnail icon in the lower right corner. -
Page 33: Advanced Settings
Advanced settings Putting your smartphone in Airplane mode You can enter Airplane mode (also known as flight mode) to turn off telephone and Bluetooth functions and use your smartphone as a handheld device during a flight. Check with your airline to make sure this is permitted onboard. -
Page 34: Adjusting Bluetooth Settings
Important: If your phone is in Airplane mode, the option to turn Bluetooth on will be disabled. Please refer to "Putting your smartphone in Airplane mode" on page 33 for instructions on turning Airplane mode on or off. Adjusting Bluetooth settings You can use Bluetooth to exchange information between your smartphone and other mobile devices. -
Page 35: Network Operators
Tip: When you are traveling, manually selecting a network may help to reduce your roaming charges. Check with your home service provider for the network offering the most competitive rates at your destination. 1. Open the Applications menu and tap Settings > More... > Mobile networks > Network operators. -
Page 36: Connecting To A Pc
Display To adjust your phone’s display settings, in the Application menu tap Settings > Display. Item Description Brightness Adjust screen brightness. Wallpaper Change the Home screen’s wallpaper Auto-rotate screen Enable rotation of the screen when device is tilted. Sleep Adjust the delay before the screen automatically turns off. Font size Change the default font size for the UI. -
Page 37: Fm Radio
Synchronization You can sync your calendar, email and contacts on your phone and never worry about losing them again. Sync in real time or adjust it as you please. In the Applications menu tap Settings > Accounts & sync to access the synchronization settings. To have your smartphone auto-sync, make sure Accounts &... -
Page 38: Adjusting The Volume
You will need to enable Share Contents before you can start using the service. Adjusting the volume Adjust the volume of your phone using the volume button on the side of the phone. Alternatively, you can set the Ringer volume and Media volume by opening the Applications menu and tapping Settings >... -
Page 39: Restoring To Factory Settings
Moving applications to the installed memory card Once an application is installed, it may be possible to move it to the installed memory card to free up more space on the device’s internal storage. To move an application to the installed memory card: 1. - Page 40 If your phone is responding to screen input, then open Settings from the Applications menu. Tap Backup & reset > Factory data reset; click Reset phone and then Erase everything to format your phone.
-
Page 41: Accessories And Tips
Accessories and tips This chapter shows you how to use accessories with your smartphone, as well as provide useful tips for when you are using your smartphone. Using the headset Your smartphone comes packaged with a headset with built-in microphone for handsfree use when making calls. -
Page 42: Inserting A Microsd Card
Inserting a microSD Card Your smartphone features a memory expansion slot that accepts a microSD Card to expand memory and storage capacity. Please refer to "Installing a SIM or microSD card" on page 6 for instructions on installing a microSD Card. -
Page 43: Appendix
Appendix FAQ and troubleshooting This section lists frequently asked questions that may arise during the use of your smartphone, and gives easy answers and solutions to these questions. Aspect Question Answer Audio Why is there no sound If the headset is plugged into the device, the coming from the device? speaker is automatically shut off. -
Page 44: Other Sources Of Help
It is also normal for the phone to heat up during long periods of use, such as watching a video or a long phone conversation. Other sources of help For information on: Refer to: Up-to-date information regarding your www.acer.com smartphone mobile.acer.com Service enquiries www.acer.com/support Warnings and precautions •... -
Page 45: Replacing The Battery Pack
The battery can be charged and discharged hundreds of times, but it will eventually wear out. When the talk and standby times are noticeably shorter than normal, buy a new battery. Use only Acer approved batteries, and recharge your battery only with Acer approved chargers designated for this device. -
Page 46: Medical Devices
Remember to follow any special regulations in force in any area, and always switch off your device when its use is prohibited or when it may cause interference or danger. Use the device only in its normal operating positions. To successfully transmit data files or messages, this device requires a good quality connection to the network. -
Page 47: Emergency Calls
explosion or fire resulting in bodily injury or even death. Switch off the device at refueling points such as near gas pumps at service stations. Observe restrictions on the use of radio equipment in fuel depots, storage, and distribution areas; chemical plants; or where blasting operations are in progress. -
Page 48: Specifications
Specifications Performance • Intel Atom Processor Z2420 • System memory: • 1 GB of RAM • 4 GB of ROM • Android operating system Display • 4.3" qHD IPS LCD, capacitive multi-touch screen • 960 x 540 resolution Multimedia Formats supported: Type Formats Audio playback... - Page 49 • Rechargeable high density 2000 mAh Lithium-ion battery (replaceable) Note: Length of battery operation will depend on power consumption which is based on system resource use. For example, constantly using the backlight or using power- demanding applications will shorten battery life between charges. Dimensions Height 127.3 mm...
-
Page 50: Safety
Safety Battery information This product uses a Lithium-ion battery. Do not use it in a humid, wet and/or corrosive environment. Do not put, store or leave your product in or near a heat source, in a high temperature location, in strong direct sunlight, in a microwave oven or in a pressurized container, and do not expose it to temperatures over 60 °C (140 °F). -
Page 51: Disposal And Recycling Information
Do not throw this electronic device into the trash when discarding. To minimize pollution and ensure utmost protection of the global environment, please recycle. For more information on the Waste from Electrical and Electronics Equipment (WEEE) regulations, visit www.acer- group.com/public/Sustainability EEE yönetmeligine uygundur. - Page 52 List of National Codes This equipment may be operated in the following countries: Country ISO 3166 Country ISO 3166 2 letter code 2 letter code Austria Malta Belgium Netherlands Cyprus Poland Czech Republic Portugal Denmark Slovakia Estonia Slovenia Finland Spain France Sweden Germany...
- Page 53 The closer you are to a base station, the lower the transmission output of your mobile telephone. The tested SAR of this device is as follows: Head (W/kg) Head (W/kg) Body (W/kg) 0.375 0.369 0.702 NCC warning 警語 經型式認證合格之低功率射頻電機,非經許可,公司、商號或使用者均不得擅自變更頻率、加 大功率或變更原設計之特性及功能。 低功率射頻電機之使用不得影響飛航安全及干擾合法通信;經發現有干擾現象時,應立即停...
- Page 54 Lithium-ion battery warning ATTENZIONE! Rischio di esplosione della batteria se sostituita in modo errato. Sostituire la batteria con un una di tipo uguale o equivalente consigliata dalla fabbrica. Non disperdere le batterie nell’ambiente. VORSICHT! Explosionsgefahr bei unsachgemäßen Austausch der Batterie. Ersatz nur durch denselben oder einem vom Hersteller empfohlenem ähnlichen Typ.
-
Page 55: Declaration Of Conformity
The technical documentation relevant to the above equipment will be held at: Acer Incorporated 8F., No. 88, Sec. 1, Xintai 5th Rd., Xizhi Dist, New Taipei City, 22181, Taiwan Authorized person: Name: Harriot SL Lee For the address/telephone number of Acer service center, please refer to the warranty card. -
Page 56: End User License Agreement
Sublicense or otherwise make the Software available to third parties, except that you may, after prior written notification to Acer, transfer the Software as a whole to a third party so long as you do not retain any copies of the Software and such third party accepts the terms of this Agreement. -
Page 57: Privacy Policy
Third Party Software in any manner that could interfere with any other party's use and enjoyment of the Third Party Services, or the services and products of Acer's licensors' or suppliers' third party licensors. Your use of the Third Party Software and Third Party Services is also subject to additional terms and conditions and policies which can be accessed through our global website.