Panasonic NA-140VG4 Operating Instructions & Installation Instructions
Front-loading washing machine
Hide thumbs
Also See for NA-140VG4:
- Operating instructions & installation instructions (40 pages) ,
- Service manual (14 pages) ,
- Settings manual (2 pages)
Table of Contents
Advertisement
Quick Links
Thank you for purchasing this appliance.
- For optimum performance and safety, please read these instructions
carefully.
- Before connecting, operating or adjusting this appliance, please read the
instructions completely. Please keep this manual for future reference.
NA-140VG4_English_UK.indb
1
Operating Instructions
& Installation Instructions
Washing Machine
NA - 140VG4
NA - 168VG4
NA - 148VG4
Read Before Using
SAFETY PRECAUTIONS
Washing Instructions
Optional Functions
Troubleshooting
Installation Instructions
®
(Domestic use)
Model No.
02
04
12
20
Maintenance
22
25
30
2012-6-13
18:45:08
Advertisement
Table of Contents

Related Manuals for Panasonic NA-140VG4


Summary of Contents for Panasonic NA-140VG4
- Page 1 ® Operating Instructions & Installation Instructions Washing Machine (Domestic use) Model No. NA - 140VG4 NA - 168VG4 NA - 148VG4 Read Before Using SAFETY PRECAUTIONS Washing Instructions Optional Functions Maintenance Troubleshooting Installation Instructions Thank you for purchasing this appliance. - For optimum performance and safety, please read these instructions carefully.
-
Page 2: Republic Of Ireland Only)
Electrical Connection (UK and Republic of Ireland only) How to replace the fuse For your safety, please read the following text carefully. The location of the fuse differs according This appliance is supplied with a molded to the type of AC mains plug (figures A and three pin mains plug for your safety and convenience. -
Page 3: Table Of Contents
Contents Read Before Using Maintenance Electrical Connection (UK and Maintenance ....22 Cleaning the outside of the Republic of Ireland only) ..2 appliance. -
Page 4: Read Before Using
SAFETY PRECAUTIONS Please read and follow these safety Keep sources of ignition, such as precautions. candles or cigarettes, away from the appliance. WARNING They may cause a fire or damage to the appliance. This describes issues which could Keep flammable materials away from cause death or serious injury. - Page 5 SAFETY PRECAUTIONS To Prevent Injury Do NOT put any electrical equipment, for example, TVs, radios or battery The installation of the appliance should chargers, on or near the appliance. be done by the manufacturer’s dealer or service agent. Do NOT put too much laundry or If the installation, test run and inspection detergent into the appliance.
-
Page 6: Checking Your Washing Machine
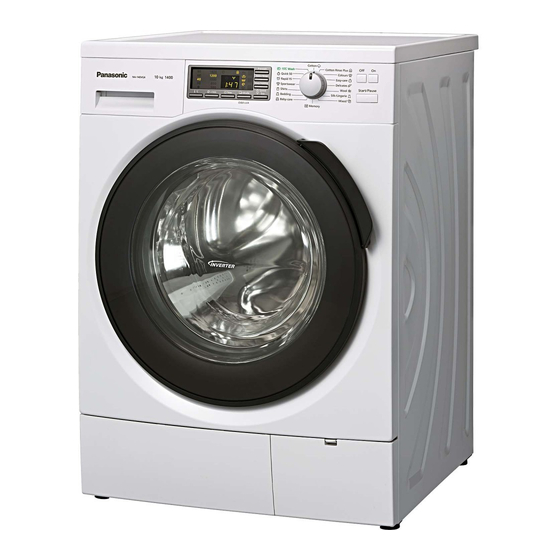
Checking Your Washing Machine Your washing machine Detergent drawer (see page 10) Drum (Washing/ spin-drying tub) Door seal Door Mains lead/ Mains plug Water-drain hose Drain filter cover Adjustable stands (see page 23) (see page 33) Caution Do NOT bend the mains lead when the appliance is running. Accessories Cover cap (x4) (see pages 32-33) Make sure that all the accessories are... -
Page 7: Before You Start Washing
Before You Start Washing Checking before use You should put bras with metal wires, tights, lace clothing and small items of For the appliance’s initial operation or clothing into a laundry net to prevent after a prolonged period of non-operation, them or the appliance from getting perform the following procedures: damaged. -
Page 8: Using The Buttons
Using the Buttons Model NA-140VG4 Cotton Cotton 15ºC Wash 15ºC Wash Cotton Rinse Plus Cotton Rinse Plu Colours Colour Quick 50 Quick 50 Rapid 15 Rapid 15 Easy-care Easy-care Sportswear Sportswear Delicates Delicate Start/Pause Wool Shirts Shirts Speed Bedding Bedding... -
Page 9: Unlocking The Door
Using the Buttons Unlocking the door Display on NA-140VG4 The door automatically locks while in use, and the symbol is shown while the door is locked. A click will be heard when the door locks or unlocks. Note While the door is locked, if the... -
Page 10: Adding Detergent And Other Chemicals
Adding Detergent and Other Chemicals Pull out the detergent drawer and add detergent or softener to the correct compartment. Check the packages for the appropriate recommended amounts. Caution Do NOT use the appliance when the detergent drawer is removed. This may result in a water leak. Prewashing compartment Softener compartment Detergent compartment... -
Page 11: Softener Compartment
Adding Detergent and Other Chemicals Then, add detergent and start washing Fabric Softener again. To prevent static, add softener before you start washing. It will be automatically added To prevent powdered detergent from in the final rinse cycle. remaining in the drawer, perform the Dilute concentrated softeners before you following: add them. -
Page 12: 12 - Washing Instructions
Washing Setting washing Model NA-140VG4 Cotton Cotton 15ºC Wash 15ºC Wash Cotton Rinse Plus Cotton Rinse Plu Colours Colour Quick 50 Quick 50 Rapid 15 Rapid 15 Easy-care Easy-care Sportswear Sportswear Delicates Delicate Start/Pause Wool Shirts Shirts Speed Bedding Bedding... -
Page 13: Required Time
Washing Press the Start button. The displayed times include the time The appliance starts supplying water. needed for the water to fill up and to After the appliance has started, the drain out, thus they vary depending on laundry is weighed. After about 5 water pressure, drainage and amount of seconds, a new wash time will be laundry. -
Page 14: Selecting The Programme
Selecting the Programme 148VG4 140VG4 Programme Description 168VG4 Max load Max load Daily washing for cotton, linen and Cotton cotton blend items (For examples, 10 kg 8 kg T-shirts, underwear, towels, tablecloths) Washing takes longer overall but rinsing Cotton Rinse is more thorough than the Cotton 10 kg 8 kg... - Page 15 Selecting the Programme 148VG4 140VG4 Programme Description 168VG4 Max load Max load For items with mixed fabrics, for Mixed example, cotton, linen and synthetic 10 kg ― fibres For lightly soiled cottons, and linen 15°C Wash 5 kg 4 kg blends.
-
Page 16: Details Of Programmes
Details of Programmes Available Auto setting programme Programme Approximate Number 148VG4 Spin-dry 140VG4 Temperature 168VG4 revolutions 140VG4 rinses Cotton 40 °C 1200 1:10 - 2:05 1:10 Cotton 40 °C 1200 1:22 - 2:12 1:22 Rinse Plus ... - Page 17 Details of Programmes Manual setting Additional functions mate time Spin-dry revolutions Extra Easy 148VG4 Temperature 140VG4 Prewash 168VG4 Speed Rinse Ironing 168VG4 148VG4 1:10 - 1:50 Cold - 90 °C 500 - 1600 500 - 1400 ...
-
Page 18: Washing Delicates
Washing Delicates Wool, Silk/Lingerie, and Hanging the laundry Delicates programmes Hang out white or light-coloured wool and nylon items away from direct heat or The drum spins gently in these sunlight. programmes. For details about washing instructions, see After washing, lay out wool and nylon pages 12-13. -
Page 19: Wear
Washing Bedding and Outdoor Wear Bedding programme Note Make su re that the label of each item Avoid using blanket nets. They prevent to be washed shows either the wash or the laundry from spinning properly. handwash symbol ( ash only one blanket at a time. Outdoor programme Washable 100 % syn... -
Page 20: Optional Functions
Optional Functions Individual washing functions Additional functions (Process selection) Depending on the programme, you can combine different additional functions. You can select a single process, or Note combine several processes by selecting individual washing functions. Some additional functions cannot be used with certain programmes. -
Page 21: Preset Timer
Optional Functions You can activate or deactivate the Extra Changing a preset time Rinse and Easy Ironing functions during Press the Off button, and then press a washing process but not after it has the On button. finished. Choose the desired programme and Some additional functions cannot be used optional functions. -
Page 22: 22 - Maintenance
Maintenance Cleaning the outside of the Cleaning the detergent appliance drawer Clean the outside of the appliance with a Detergent residue soon builds up if the soft cloth and mild detergent, for example, detergent drawer is not cleaned regularly. kitchen detergent, and soapy water. Detergent build up may develop mould. -
Page 23: Cleaning The Door Seal And Window
Maintenance Align the hole of the softener cover Pull out the pump hose and remove with the click of the detergent drawer the cap to drain the water. to replace the softener cover back to the original position. Then, insert the detergent drawer back to the main unit. -
Page 24: Cleaning The Water-Supply Filter
Maintenance Cleaning the water-supply Reconnect the water-supply hose. filter Tighten the plastic joint firmly. Clean the filter if water is not supplied Turn on the tap, then check for leaks. properly. Preventing a frozen Turn the tap off. water-supply hose Switch on the appliance. -
Page 25: Troubleshooting
Fault Checklist Problem Cause Buttons do not work. The programme, temperature and process settings cannot be changed while washing is in progress (the rinse or spin settings can be changed). Child safety lock may be activated. (See page 21.) Door does not open. Door lock may be activated. - Page 26 Fault Checklist Problem Cause No water flows into Before rinsing, the appliance spins to drain out remaining the appliance during water. The water will fill up after that. the rinsing process. Rinsing begins The appliance may have detected an unbalanced load, before the spin which is caused by the laundry shifting to one side of process finishes.
- Page 27 Fault Checklist Problem Cause There is no foam or The amount of foam varies, depending on the hardly any foam. temperature, level and softness of the water. You may have put powdered detergent directly into the drum; you must put it in the detergent drawer. You may not be using enough detergent.
- Page 28 Fault Checklist Problem Cause The electricity supply The appliance will stop, and will not start by itself when the cuts out while the power comes back on. You have to select a programme appliance is on. and start it again. A circuit breaker trips The appliance stops, and will not start by itself when you the electricity supply.
-
Page 29: Error Display
Error Display What to do Check the drain hose for any of following problems. It clogs up. Its tip is immersed in water. It extends further than 3 m. Unable to drain The water is frozen. Clean the drain filter if it clogs up. (See page 23.) After correcting the problem, open the door, close it, and then start the wash again. -
Page 30: 30 - Installation Instructions
Choosing the Right Location Carrying the appliance Caution The appliance must be carried by 2 or Install the appliance on a flat, more people. stable surface to avoid excessive vibration and noise. Do NOT install the appliance in direct sunlight or in a place where temperatures reach freezing. -
Page 31: Installing A Built-In Washing Machine
Choosing the Right Location Installing a built-in washing machine You need a space at least 60 cm wide. At least 2 mm of clearance on the sides, and 3 mm of clearance above and behind the appliance are required. The counter above the appliance must be firmly fixed to the adjoining cupboards. -
Page 32: Moving And Installing
Moving and Installing Removing the anchor bolts Remove the screws, which are next to the bolt holes. Four anchor bolts keep the interior of the appliance in place while the appliance is being moved. Remove them before installation, using the spanner that is supplied with the appliance. -
Page 33: Levelling The Appliance
Moving and Installing Levelling the appliance Installing the anchor bolts Unscrew and remove the cover caps. Using a level facilitates the making of adjustments. To adjust the stands, use the ‘A’ end of the spanner. Pull the bolts out until their tips are level with the tips of the sleeves. -
Page 34: Supply
Connecting Hoses and Power Supply Follow the instructions in this section to prevent water leaks. If you are unsure, ask a service agent to connect the hoses. Hoses and cable lengths Left side connections Right side connections ~ 105 cm ~ 135 cm ~ 130 cm ~ 90 cm... -
Page 35: Water-Drain Hose
Connecting Hoses and Power Supply Leak-proof System Caution The appliance is installed with the Do NOT block the basin, where system that is designed to prevent water the drain outlet is. Make sure leaks. The system includes the following that drainage into the drain is components. -
Page 36: Checking After Installation
Checking After Installation Installation checklist 5) Adjustable stands 1) Anchor bolts Have you removed them and attached Are they bolted securely to the the cover caps properly? appliance? 2) Location 6) Stand cushions Is the appliance on a flat, stable Are they standing flat? surface? If the appliance is not level, there may... -
Page 37: Test Run After Installation
Checking After Installation Test run after installation Check the following: Is there any abnormal noise? Check for water leakage, abnormal noise, If so, make sure that the appliance is and proper drainage. level. Perform the following procedures Is there any water leakage? WITHOUT laundry in the drum. -
Page 38: Power And Water Consumption
Power and Water Consumption Additional Power Water Time Programme Temperature Load function consumption consumption (mins) Cotton 10 kg 1.05 kWh 90 L 2:05 40 °C ― 8 kg 0.88 kWh 72 L 1:50 5 kg 0.57 kWh 50 L 2:45 40 °C 4 kg 0.48 kWh... -
Page 39: Consider The Environment
Consider the Environment Disposing of packaging Information on disposal in other countries outside the European Union The packaging used to protect the This symbol is only valid in the European washing machine from damage during Union. transportation is all recyclable. For information on recycling, contact your local If you wish to discard this product, please authority. -
Page 40: Specifications
9:30 - 17:30 01-289-8333 (For Republic of Ireland) Web Site: http://panasonic.net Pursuant to the directive 2004/108/EC, article 9(2) Panasonic Testing Centre Panasonic Marketing Europe GmbH Printed in China Winsbergring 15, 22525 Hamburg, Germany July 2012 W9901-8FF30 © Panasonic Corporation 2012 40 - Installation Instructions NA-140VG4_English_UK.indb...