Table of Contents
Advertisement
Advertisement
Table of Contents

Related Manuals for Siemens Serie IQ


Summary of Contents for Siemens Serie IQ
- Page 1 Instruction Manual and Installation Instructions Serie IQ...
-
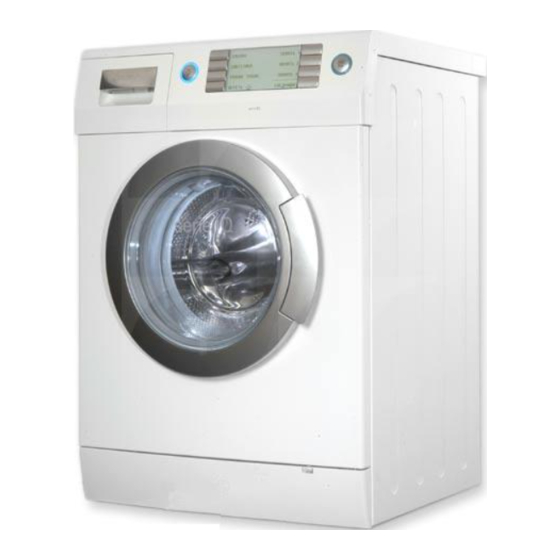
Page 3: Your Siemens Washing Machine
Your Siemens washing machine With the purchase of your new Siemens Further information and a selection of our washing machine you have decided on products can be found on our Internet pa a modern, high quality domestic applian http://www.siemens international.com... -
Page 4: Protection Of The Environment / Hints And Tips
Protection of the environment / Hints and tips Your washing machine uses water, ener q Do not use prewash for lightly to nor gy and detergent efficiently, thereby pro mally soiled washing. tecting the environment and reducing q Dose detergent, load amount of laun your household costs. -
Page 5: Introducing Your Washing Machine
Introducing your washing machine Adding detergent/cleaning pro duct Dispenser I: Detergent for prewash or starch. Dispenser II: Detergent for main wash, soa king agent, water softener, bleach or stain remover. Dispenser 2: Cleaning product, e.g. fabric sof tener or fabric conditioner (do not fill above the lower edge of the insert 1). -
Page 6: Control Panel
Control panel Display panel Displays the settings to be changed or selected well as the programme sequence. on/off" button with illuminated ring start/stop" button with illuminated ring For switching on/off the washing machine. For starting or interrupting the washing pro cess (programme must be selected). -
Page 7: Selecting The Language
Before using your washing machine for the first time Warning Selecting the language The washing machine must be properly When you switch on the washing machine installed and connected; see from for the first time, you are prompted to Page 52. select the language in which the texts are to be indicated on the display panel. -
Page 8: Setting The Time
Setting the time To be able to use all the functions of your washing machine, we recommend that you set the time before washing for the first time. q Select any programme, e.g. press the Cottons/Clrds" button. The start/stop" illuminated ring flashes. - Page 9 q Select the minute display by pressing the Minutes +" or Minutes - button, e.g. press the Minutes +" button. i The Minutes +" button increases the minutes, the Minutes - button reduces the minutes. The minute display can be increased or reduced quickly by holding down the Minutes +"...
-
Page 10: Preparing Your Washing Machine
Preparing your washing The washing machine was tested before leaving the factory. To remove any resi machine dual test water, wash the first time without any washing. q Do not load any washing. q Close the door. q Turn on the tap. q Pull out the detergent drawer all the way. - Page 11 q Press the start/stop" button. The start/stop" illuminated ring lights The programme starts. i The individual steps of the programme sequence, e.g. Wash", are indicated on the display panel. Display panel: Remove washing". When the programme has ended q Press the on/off" button. q Open the door.
-
Page 12: Preparing And Sorting The Washing
Preparing and sorting the washing Preparing the washing Sorting the washing Warning Warning Foreign objects (e.g. coins, paper clips, Washing may become discoloured. needles, nails) may damage the laundry Do not wash new coloured washing items or components of the washing with other washing. - Page 13 Normally soiled Typical stains Visible soiling and/or a few light stains. - Skin grease, cooking oil/fat, sauces, - T shirts, shirts, blouses soaked in mineral oil, wax (containing fat/oil). sweat or worn several times. - Tea, coffee, red wine, fruit, vegetables - Underpants, briefs worn for one day.
- Page 14 Sorting washing according to the instructions on the care labels Only wash laundry items which bear the following care labels. Cottons 95 C, 90 C c b a Coloureds 60 C, 40 C, 30 C h g f Easy care 60 C, 40 C, 30 C l g k f Delicates 40 C, 30 C l g k f...
-
Page 15: Detergents And Cleaning Products
Detergents and cleaning products Dosing detergent Too much detergent: Impact on the environment, intensive d Risk of poisoning! foam formation, low washing agitation, Keep detergents and cleaning products unsatisfactory washing and rinsing out of the reach of children. results. Dose detergent according to Addingdetergent/cleaning q the water hardness. -
Page 16: Programmes And Functions
Programmes and functions Programme Cottons/coloureds 80, 90 C The programmes which can be selected on the display panel: on your washing machine are described Cottons/Clrds" or Ct/Cl" below. Energy intensive programme for Cottons/coloureds heat resistant textiles, e.g. made of cotton cold, 30, 40, 50, 60, 70 C or linen. - Page 17 Easy care Woollens cold, 30, 40, 50, 60 C cold, 30, 40 C on the display panel: Easy care"/ on the display panel: Easy" Wool" For easy care textiles, e.g. made of For hand and machine washable wool cotton, linen, synthetic or blended fabrics. and rich wool textiles, e.g.
- Page 18 Outdoor wear cold, 30, 40 C cold, 30, 40 C on the display panel: on the display panel: Mix" Outdoor wear" or Micro" For easy care textiles and laundry made of cotton - different types of laundry can For modern textiles made of micro fibres be washed together.
-
Page 19: Additional Programmes
Curtains Additional programmes cold, 30, 40 C Rinse cold, 30, 40 C on the display panel: on the display panel: Curtains" or Rinse" Curt." Rinse cycle with subsequent spin cycle For curtains and textiles made of blended for rinsing hand washed items or for fabrics. - Page 20 Additional options - Extras No final spin on the display panel: Prewash No final spin" or on the display panel: Prewash" or Anticrease on the display panel: Stains Anti crease" or on the display panel: Stains" or Rinse Plus on the display panel: Rinse Plus"...
- Page 21 Detection and control Load adjust systems "Load adjust" adjusts the water and power consumption to each programme Load sensor - according to the amount of laundry and type of textiles. When the door is open, the load sensor indicates the amount of loaded laundry Therefore, if small amounts of washing are as a %, depending on the selected washed, water and energy consumption...
- Page 22 Fully depress the on/off button The first programme page is indicated in the display panel after the Siemens logo. i You can leaf between the programme pages by pressing the More" or Back"...
- Page 23 Do not insert the washing until the first programme page is indicated after the Siemens logo. q Do not exceed the maximum load (100%). Overfilling the washing machine reduces the washing result and causes creasing.
- Page 24 q Close the washing machine door. Do not wedge laundry items between the washing machine door and the rubber seal. The start/stop" illuminated ring flashes. The description of the selected programme is indicated on the display panel, e.g. Coloureds eco". i If the clock has not been set, Set clock"...
-
Page 25: Changing The Settings Of The Selected Programme
Changing the settings of the selected programme You can adjust the washing temperature Overview at a glance and the spin speed to sutt your require The procedure for changing the settings ments, switch on additional options and of a selected programme is summarised preselect the end of the programme. -
Page 26: Washing Temperature
Overview You can select an overview of the settings which can be changed for a selected pro gramme. q Press and hold down the Programme" button, e.g. Coloureds eco". i The settings which can be changed are indicated on the display panel until the Coloureds eco"... -
Page 27: Spin Speed
Spin speed You can change the displayed spin speed. The maximum displayed spin speed de pends on the selected programme. q Press the button for spin speed until the desired spin speed - e.g. 1000 4", is indicated on the display panel. i If the button for spin speed is held down, the selectable spin speeds are displayed quickly in succession. - Page 28 i Press and hold down the Extras: ..." button. An overview of the symbols for the individual additional options is then displayed. Specifying the end of the Make sure that the time has been set - see Page 8. programme - Delayed start"...
-
Page 29: Changing Standard Settings
Changing standard settings You can change the standard settings for Following each change you can signal, childproof lock and time whenever q change another standard setting a programme has been selected. Any changes are saved until another change is made. q return to the programme page by pressing the Back"... - Page 30 Childproof lock / Appliance lock Activate the childproof lock / appliance lock...
- Page 31 Temporarily deactivate q Press and hold down the start/stop" childproof lock / appliance lock button (4 seconds) until the start/stop" illuminated ring flashes. i When Pause" is displayed, the childproof lock / appliance lock is temporarily deactivated. i Childproof lock / appliance lock is re activated by pressing the start/stop"...
- Page 32 Resetting standard You can reset standard settings which have been changed (exception: time). settings There are two options available for reset ting standard settings. i Settings cannot be reset while a programme is running. Option 1 Changes to the childproof lock and si gnal are cleared, the childproof lock is deactivated and the memory locations are deleted.
-
Page 33: Changing The Programme Sequence
Changing the programme sequence Changing selected settings While the selected programme is running, the spin speed can be changed and addi tional options (exception: Prewash") can be switched on or off. q Press the Change" button. q Press the Spin speed" button until the desired spin speed is displayed. -
Page 34: Cancelling The Programme
If Childproof lock: ON" preselected If Childproof lock: ON" preselected q Press the start/stop" button for ap q Press the start/stop" button for prox. 4 seconds. approx. 4 seconds. The start/stop" The start/stop" illuminated ring flas illuminated ring flashes. hes. q Make changes as described. -
Page 35: After Washing
After washing The start/stop" illuminated ring goes out. Remove washing" is indicated on the dis play panel. Programme summary You can display a programme summary of the last wash cycle: i Before opening the door, select the wash report! q Press the Programme summary" button. -
Page 36: Removing The Washing
q Open the washing machine door. Removing the washing q Press the on/off" button. The on/off" illuminated ring goes out. i Always switch off the washing machine, otherwise the load sensor will not detect the amount of laundry in the next wash programme. q Remove the washing. - Page 37 No final spin" preselected? Display panel: Continue programme with Spin Drain" q Press the Spin" button. q If required, change settings, e.g. press the Anti crease" button. q Press the start/stop" button. The start/stop" illuminated ring lights The programme starts. Press the Drain"...
- Page 38 Childproof lock: ON" preselected? The start/stop" illuminated ring goes out. Display panel: Deactivate childproof lock". q Press the start/stop" button for approx. 4 seconds. Remove washing" is indicated on the display panel. q Open the washing machine door. The start/stop" illuminated ring goes out.
-
Page 39: Saving Your Favourite Programmes
Saving your favourite programmes Programmes which you use frequently i Washing temperature, spin speed and with changed settings can be saved additional options are saved. The end under the Memory1", Memory2" and of the programme is not saved. Memory3" memory locations. Your saved favourite programme can then be selected by pressing the respective button. -
Page 40: Demo Programmes
Demo programmes The demo programmes, intended for pre q Press the start/stop" button. sentation purposes, show you the selec The short demo begins. tion and the sequence of the Cottons/ i When a cycle ends, the short demo Clrds" programme with changed settings. can be started by pressing the start/ There are two demo programmes availa stop"... -
Page 41: Special Applications
Special applications Soaking Dyeing Warning Starching Bleaching Warning... -
Page 42: Cleaning And Servicing The Appliance
Cleaning and servicing the appliance d Risk of electric shock! Detergent drawer First, always disconnect the appliance If there are detergent or cleaning product from the power supply. residues in the detergent drawer: Never clean the washing machine with a water jet. d Risk of explosion! Never clean the appliance with solvents. -
Page 43: Pump
Pump d Risk of scalding! -
Page 44: Filter In The Water Inlet Hose
Filter in the water inlet hose Descaling the washing ma chine If no water or insufficient water is running into the washing machine: Warning First, reduce the water pressure in the Descaling agents contain acids which inlet hose: may corrode the components of the was hing machine and discolour the washing. -
Page 45: What To Do If
What to do if ... d Risk of electric shock! q Switching off the appliance. Repairs may be carried out by customer q Disconnect the washing machine from service or authorised technicians only. the power supply. If a repair is necessary or if you are unable q Turn off the tap. - Page 46 Fault Possible cause Remedial action Load is not displayed. Washing was already in the drum Switch off the appliance, take the before the appliance was switched washing out of the drum and switch on the appliance again. Insert washing again. Programme continues Childproof lock / appliance lock is Press the start/stop"...
- Page 47 Fault Possible cause Remedial action...
- Page 48 Fault Possible cause Remedial action Spin cycle actuated Not a fault. Always wash large and small items several times. Unbalanced load detection system is together. attempting to compensate the attempting to compensate the imbalance by spinning the washing several times. The washing has not Large laundry items have become Always wash large and small items...
-
Page 49: Fault Displays
Fault displays Text on display panel Possible cause Remedial action Tap not turned on. Turn the tap on. Programme will "Tap closed?" continue automatically. Inlet hose kinked or pinched. Eliminate cause. Filter blocked in water inlet hose. Clean filter, see Page 44. Water pressure too low. -
Page 50: Consumption Values
Consumption values Additional Load up to Consumption values ** option Programme Power Water Duration... -
Page 51: Customer Service
Customer service Before you call customer service, please check whether you can eliminate the fault E Nr. yourself (see from Page 45). A technician who is called out to give advice will charge you, even if the Product number Production number appliance is still under guarantee. -
Page 52: Installing, Connecting And Transporting The Appliance
Installing, connecting and transporting the appliance d Risk of injury! Safety instructions The washing machine is very heavy. Lift with caution. Warning Frozen hoses may tear/burst. Do not in stall the washing machine in an area whe re there is a risk of frost or outdoors. The washing machine may be damaged. - Page 53 Standard accessories Useful tools...
- Page 54 Dimensions Installation surface...
-
Page 55: Transportationprotection Devices
Transportationprotection q Remove complete transportation pro tection device 3 (bolt with spring, devices washer and bush), holding the open d Warning washing machine door with one hand Before using the washing machine for and pulling the drum slightly forwards. the first time, completely remove the transportation protection devices. -
Page 56: Hose And Cable Lengths
Hose and cable lengths Connecting the water d Risk of electric shock! Connection on left side Do not immerse the Aqua Stop safety device in water (contains an electrically operated valve). approx. To prevent leaks or water damage, it is 100 cm essential to follow the instructions in this approx. -
Page 57: Aligning The Washing Machine
After connecting the water inlet hose: Aligning the washing machine q Turn on fully. q Check the connection points for leaks. Align the washing machine with the aid of the four height adjustable feet and a spirit Water drainage hose level: Warning Do not kink or stretch the drainage hose. -
Page 58: Connecting The Power
Connecting the power - Drain off any residual water (see Pa ge 43). Warning - Disconnect the washing machine from Connect the washing machine only to an the power supply. alternating current via a correctly installed - Remove the hoses. earthed socket. -
Page 59: Aqua Stop Warranty
Aqua Stop warranty In addition to warranty claims made against the vendor based on the sales contract and in addition to our appliance warranty we shall provide compensation under the following conditions: If damage is caused by water due to a fault of our Aqua Stop system, we shall compensate the private user for the damage. - Page 60 0303 en SIEMENS ELECTROGERÄTE GMBH 5500 014710...