Miele CVA 610 Operating Instructions Manual
Coffee system
Hide thumbs
Also See for CVA 610:
- Technical information (107 pages) ,
- Operating instructions manual (64 pages) ,
- Operating instructions manual (20 pages)

Related Manuals for Miele CVA 610


Summary of Contents for Miele CVA 610
-
Page 1: Operating Instructions
Operating instructions CVA 610 Coffee System Read these ]ö operating instructions before installing or using the machine, to prevent accidents and machine damage. M.-Nr. 05 438 530... - Page 2 Contents ......... 4 .
-
Page 3: Table Of Contents
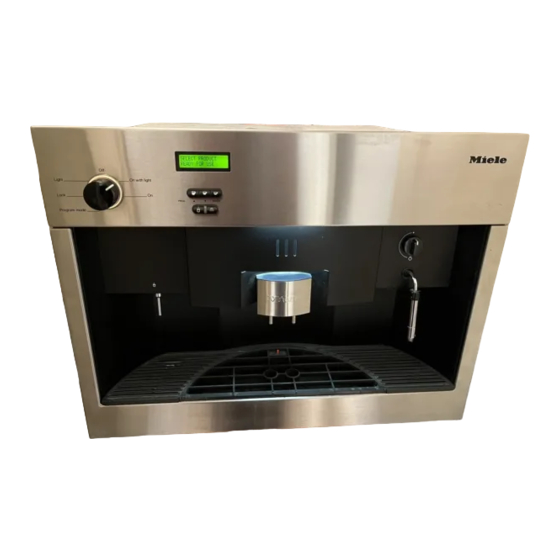
........40 Grinding the coffee ..........40 Setting the quantity . - Page 4 Description of the appliance Hot water spout Coffee dispensers, height-adjustable Handle to open appliance front Steam selector Steam spout with milk foamer Drip catch Program selector Display window Coffee serving buttons Rinse/ pre-warm button Hot water button...
- Page 5 Coffee bean container Slide control to select fineness of ground coffee Slide control to select quantity of ground coffee Water container Waste unit Brew unit For a better understanding of the language of coffee, please read the glossary of coffee terms at the end of this instruction booklet.
- Page 6 Caring for the environment The transport and protective packing Old appliances contain materials which materials are environmentally friendly can be recycled. Before discarding an for disposal and may be recyclable, appliance, please make it child resis- please recycle. tant by removing the power cord and any doors.
- Page 7 Warning and safety instructions This appliance complies with cur- rent safety requirements. Improper Before connecting the appliance to use of the appliance can cause per- the electrical supply, make sure sonal injury and material damage. that the rating on the data plate corre- sponds to the voltage and frequency of Before installation and before using the household electrical supply.
- Page 8 Please contact the near- The Coffee System must be est Miele Dealer or the Miele Technical cleaned daily to prevent the growth Service Department with specific re- of harmful bacteria and mold.
- Page 9 The hot water and steam dis- Depending on the fat content of pensed could cause scalding. the coffee used, the brew unit These functions must be used carefully. could become blocked. Clean it every Never direct the steam spout towards 2 to 4 months.
- Page 10 Brief description Unlike standard coffee machines, this can be turned on inde- appliance has a container for pendently of operation. so that they can be freshly As a safety feature, power is turned off ground for each cup for the best flavor. as soon as the front of the appliance is First the ground coffee is moistened opened.
- Page 11 Programming the appliance The appliance can be programmed to suit your pref- erences. The following programming options are available: German, Dutch, Portuguese, Spanish, English, Italian, French on, off hardness 1, hardness 2, hardness 3, hardness 4 minimum, low, medium, high, maximum minimum, low, medium, high, maximum minimum, low, medium, high, maximum...
- Page 12 To program the appliance, turn the program selector to “Program mode”. The appliance is now in programming mode and will respond according to the symbols shown under the buttons. By pressing the button – a programming option in the display window can be highlighted with an asterisk.
- Page 13 The language for the commands in the display win- dow can be selected before the machine is used for the first time. Turn the program selector counterclockwise to “Program mode”. The appliance can now be programmed and will respond according to the symbols shown under the buttons.
- Page 14 It is extremely important to run a rinse cycle before the coffee machine is used for the first time. If the Rinse/Pre-warm button is pressed, the program will start automatically if the machine is cold, and the pro- gram selector is in either of the “On” positions. Simul- taneously, the brew unit will be pre-warmed with the hot water.
- Page 15 @UM_SEITE = For easy operation of the coffee machine, and to en- sure that the descaling indicator comes on at the ap- propriate time, it is important to program the water hardness. The water hardness indicates how much calcium is dissolved in the water. The higher the cal- cium content, the harder the water is.
- Page 16 Use programming option “Water hardness” to pro- gram the water hardness. There are four programmable levels: (appliance) (tap water) Hardness 1 1 (soft) 0 - 3 0 - 1.3 approx. 500 Hardness 2 1 (soft) 4 - 7 1.3 - 2.5 approx.
- Page 17 Press ENTER to this setting, or turn the program selector to “0ff” to if a mistake has been made. This will bring you out of the sub-menu. The appliance can be set at different tem- peratures to suit varying coffee drinking preferences.
- Page 18 Press the button to set the temperature to mini- mum, low, medium, high or maximum. Press ENTER to this setting, or turn the program selector to “0ff” to if a mistake has been made. This will bring you out of the sub-menu. When the pre-brewing feature is turned on, the freshly ground coffee is first moistened with a little hot water.
- Page 19 Press the button to highlight programming option “Pre-brewing” with an asterisk. Press ENTER to confirm this programming option. The sub-menu is shown in the display window as follows: Press the button to set the pre-brewing process on, off or to “long” (an extra long pre-brew). Press ENTER to this setting, or turn the program selector to “0ff”...
- Page 20 When the pre-grinding feature is on, a new portion of beans will be ground immediately after each cof- fee is dispensed, so there is always a portion of ground coffee ready. This saves time and is particu- larly useful when making coffee for a number of guests.
- Page 21 When the feature “Programmed hot water” is turned on, the machine will dispense a precise, pre-pro- grammed quantity of hot water when the hot water button d is pressed. (See section below on pro- gramming in the quantity of hot water.) When the fea- ture is turned off, the machine will dispense hot water freely if the hot water button d is pressed, and con- tinue to do so until the button d is pressed again.
- Page 22 Select feature “Total coffee” and press ENTER to dis- play the number of cups of coffee (espresso, coffee, long coffee) that have been dispensed to date. Press ENTER again to bring you out of the sub- menu. To ensure that the coffee machine does not use un- necessary electricity but is always ready for oper- ation, it can be set to an energy-saving mode via programming option “Timer”.
- Page 23 Press the button to highlight programming option “Timer” with an asterisk. Press ENTER to confirm this programming option. The sub-menu is shown in the display window as follows: Press the button to select the required length of time ( counts down, counts up).
- Page 24 System lock The machine can be locked so that it can not be oper- ated by unsupervised children or those not familiar with the operating instructions. Turn the program selector counterclockwise to the "Lock" position. The following will appear in the display window: Press the button until the following appears in the display window:...
- Page 25 Filling the water and coffee bean containers Please clean the machine thoroughly before fill- ing the water container and the coffee bean con- tainer, (see the Section on Cleaning and care). The quality of the water is important in the overall quality of the coffee.
- Page 26 Open the lid and fill the container with cold, clean drinking water to within about 1” (2 cm) of the top. A valve in the base of the container will ensure that no water can escape. Close the lid and place the container in the ma- chine, pushing it straight to the back.
- Page 27 Setting the serving sizes The flavor of the coffee produced depends on the type of coffee, how finely the beans are ground and the quantity of water used. Espresso, coffee and tea cups vary in size. To ensure the machine uses exactly the amount of water to suit your taste and your cups, there is a choice of four different serving sizes (max.
- Page 28 Turn the program selector clockwise to the “On” position (with or without lighting). The following will appear in the display window: If the machine is cold and the rinse program has been selected, the following message will be dis- played once the water is hot: Once the water is hot, it will automatically be ex- pelled from the coffee dispensers.
- Page 29 The procedure is the same for the other two cof- fee serving buttons. The volumes of water programmed in will now be dispensed every time. To program in the volume of water for a tea cup, feature “Prog. hot water” must be turned on.
- Page 30 Press the hot water button d. There will be a few seconds delay before water is dispensed. When the cup is as full release the hot water but- ton d. The following will appear in the display window during this procedure: The volume of hot water programmed in will now be dispensed every time.
- Page 31 Making coffee It is extremely important to run a rinse cycle be- fore the coffee system is used for the first time. This will occur automatically if the rinse feature is turned “on” in the Programming mode and the machine is still cold. When warming up the appliance, the display win- dow will show: Once hot, water will flush out of the coffee dispen-...
- Page 32 The smaller the volume of coffee/espresso, the more important it is to pre-warm the cup. Place the cup under the hot water spout. Press the hot water button d and half fill the cup. Press the hot water button d again to stop. Leave the cup for a few seconds to warm, then pour the water away.
- Page 33 Press ENTER to start the rinsing process. Hot water will be dispensed from both spouts, warm- ing the system. The display window will read: Place the empty, pre-warmed cup under the two coffee dispensers, and prepare the coffee. The serving dispensed by each of the coffee serv- ing buttons can be programmed according to indi- vidual taste (see the section on “Setting the serving sizes”).
- Page 34 The following will appear in the display window: Wait until the following appears in the display win- dow: Place a cup under the two coffee dispensers. The coffee is always dispensed simultaneously from spouts. Press the desired coffee serving button once. The coffee will be prepared.
- Page 35 Place a cup under each of the coffee dispensers. Press the desired coffee serving button twice in quick succession to bring up two cups g in the display window. The machine will fill the cups in two stages with a slight pause in between.
-
Page 36: Cappuccino
To make cappuccino, a china or porcelain cup, a heat resistant pitcher, and milk are needed. Cold, low-fat milk (1.5% fat) is best for cre- ating foam. Ideally it should be prepared in a cold, stainless steel pitcher that nar- rows towards the top. - Page 37 Position the steam spout just below the surface of the milk in the pitcher and turn the steam selector counterclockwise. Move the pitcher in circles until a thick foam ap- pears, then lower the spout deeper into the milk to heat the rest. The milk must not be allowed to boil or the foam will collapse and a skin will form.
-
Page 38: Hot Water
When turned on, the machine will dispense hot water at any time for tea or other drinks. Turn the program selector clockwise to the On po- sition (with or without lighting). If the program selector is already in this position with the message “... -
Page 39: Rinse/Pre-Warm Button
Before turning the machine off for an ex- tended period, the coffee dispensers and the brew unit must be flushed cleaned with fresh water. Press the Rinse/pre-warm button. The display window will read: Press ENTER and the display will change to: Hot, fresh water will flow through the brew unit and out of the coffee dispensers, cleaning them in the process. - Page 40 Programming the coffee grinder A good espresso with a thick, even foam depends not only on the quality, pressure and temperature of the water and the quality of the coffee beans, but also on the quantity of beans and how finely they are ground.
- Page 41 To adjust the grinder setting push the upper slide control to the left (for finer grinding) or to the right (for coarser grinding). You should be able to feel the notches clearly when moving the slide control. If the slide control will not move, close the machine and dispense a cup of coffee.
- Page 42 Cleaning and care Danger - always allow the machine to cool be- fore cleaning. Danger of scalding. Do not clean the appliance with a steam cleaner. Steam could penetrate electrical components and cause a short circuit. Never use a detergent containing sand, soda, acid or chlorine as these will damage the sur- face.
-
Page 43: Water Container
Clean the front and the interior of the machine with a mild solution of hot water and liquid dish soap. Dry with a cloth. Stainless steel exteriors can be polished with a stainless steel cleaner. On the inside of the front there is a drip catch, and underneath this there is a small sponge to absorb drips. -
Page 44: Brew Unit
If the “Empty wasteunit” message appears in the display window after you have just cleaned out the unit you will need to reposition the waste unit and then press the ENTER button. Otherwise the machine will not operate. This is a safety feature to prevent the waste unit from overflowing. - Page 45 Clean the brew unit thoroughly under hot running water without soap. Wipe any remaining coffee off the steel filters. There is a filter inside the funnel and a second one to the left of it. The second can be removed for cleaning (see the section on “Cleaning the fil- ters”).
- Page 46 Remove the brew unit and place a cleaning tablet in the funnel. Replace the brew unit in the appliance and close the door. Place a liter sized container under both coffee dis- pensers. Press the m button. Make sure the machine is turned on and has had a chance to warm up.
- Page 47 Wipe any remaining coffee to keep the machine working smoothly. can be removed for thorough cleaning. This filter should be checked regularly to see if it needs to be cleaned. Remove the brew unit. Fit the Allen wrench supplied to the connection point in the brew unit, turn counterclockwise while gripping the filter firmly.
- Page 48 Remove the brew unit carefully. When lubricating the brew unit make sure it is properly positioned. For this the funnel must be set a little higher and the socket standing vertically (see the illustration, or the prob- lem solving guide). Smear a little silicone lubricant on the joints the axle , in the tracks...
-
Page 49: Drip Catch
At the rear of the drip catch is a float that will pro- trude when the tray is full. Remove the tray and empty and clean it. To avoid a build-up of odor the drip catch should be cleaned daily. Remove the grills from the drip catch. -
Page 50: Milk Foamer
The milk foamer should be washed after every use. Milk is more difficult to clean once dried. Pull the steam spout cover downwards. Clean the cover with a mild solution of hot water and liquid dish soap or in the dishwasher. Dry thoroughly. - Page 51 Descaling the machine The machine should be descaled regularly (depending on the hardness of the water) to ensure that it works properly. The message “Descaling” will appear in the display window when descaling becomes necessary. To prevent damage, descaling must be done as soon as the “Descaling”...
- Page 52 Turn the program selector to the “Program mode” position. Press the to highlight programming option “Descaling” with an asterisk. Press ENTER to confirm this option. The following will appear in the display window: Place a large container (approximately 1.5 liter) under the hot water spout.
- Page 53 The descaling process will start automatically. The fol- lowing will appear in the display window: The descaling process will automatically stop if the program selector is turned to “0ff” or if the front of the appliance is opened. It will restart when the front is closed or the program selector turned to another position.
- Page 54 Allow all the water to empty out of the machine via the spouts. The system is now rinsed, removing any descaling agent residue. When the water container is empty, the following will appear in the display window: Turn the steam selector clockwise back to the position and press ENTER.
- Page 55 Place a large container under the steam spout and turn the steam selector counterclockwise. Press the hot water button d. Dispense a small quantity of descaling agent from the hot water spout and the steam spout. Then turn the water off. Leave the descaling agent for approximately two minutes to take effect.
- Page 56 The appliance is in energy-saving Press ENTER. Press ENTER mode. The lighting is off. Watersystem There is water in the base of the Call the Miele Technical Service fault appliance. Department. Fill water tank The water tank (container) is empty or Fill the container with cold, fresh missing.
- Page 57 The machine is not plugged in. Is the front of the machine closed properly? Check the circuit breaker. If it has tripped, call the Miele Technical Service Department. Is the front of the machine open? Is the machine in standby timer mode?
- Page 58 Close the light cover. If the steam spout is blocked Carefully push a short, thin skewer into the open- ing. There could be stones among the coffee beans. Turn the machine off immediately. Call the Miele Technical Service Department.
- Page 59 20 seconds to prevent damage. – Call the Miele Technical Service Department. Was the coffee grinder set to the finest grind se- lection or to the maximum quantity of coffee selec-...
- Page 60 The coffee is ground too fine. Set the grinder on a coarser setting. Have the cups and system been pre-warmed? The smaller the cup, the more important it is to pre-warm it. Check the temperature setting of each drink op- tion.
- Page 61 The steel filters are dirty. Clean the steel filters. Close the front of the appliance and dispense a cup of espresso. The slide control will now move. This is not a fault. The water is left over from the cleaning process. The brew unit is not seated correctly.
- Page 62 The brew unit is not seated correctly. For this the fun- nel must be set a little higher and the socket stand- ing vertically. To position the brew unit correctly: With your finger, press on the snap lock push the funnel downwards Push the socket over to the left as far as possible Press once on PRESS.
- Page 63 In there is a problem that you can not easily fix, please contact – your Miele dealer – the nearest Miele Technical Service Department. See addresses on the back cover. When contacting the Technical Service Department, please quote the model and serial number of your appliance given on the data plate inside the ap- pliance.
-
Page 64: Installation
Electrical connection USA, CDN All electrical work should be performed by an electri- cian, in accordance with national and local safety regulations. The Coffee System comes equipped with a 3ft (0.9 m) power cord with a NEMA 5-15P molded plug for connection to a 208 - 240 V, 15A, 60Hz power supply. - Page 65 The coffee system can be installed above another appliance but, there must be a solid, closed shelf between the base of the coffee machine and the top of the appliance below (The shelf is not necessary when installation is in combination with the Miele Built-in plate warmer).
- Page 66 Make sure power is not supplied to the ap- pliance while installation or maintenance work is performed. The coffee system must be installed into cabi- netry before being operated. Plug the appliance into the electrical outlet. Push it all the way back into the cabinet, until there is a resistance.
- Page 67 To adjust the door in direction , turn screw To adjust the height of the door (direction ), turn screw To adjust the door forwards or backwards, (direc- tion ), turn screw...
- Page 68 Glossary is a high quality coffee bean. is espresso with foamed It is long and flat with a groove running milk. It is one third espresso, one third around it. The caffeine content is ap- hot milk and one third foam. To obtain proximately 0.8 - 1.3%.
- Page 69 is a double is a cheaper coffee bean. It strength, bitter tasting espresso. is round and convex with an almost straight groove. The caffeine content is - the success of the es- around 2 to 2.5%. It is more bitter than presso depends on how coarse or fine the Arabica bean.
- Page 72 Alteration rights reserved / 44 / 005 CDN / USA - 3901 This paper consists of cellulose bleached without the use of chlorine.