Advertisement
Table of Contents
- 1 Table of Contents
- 2 Finding Information
- 3 Safety
- 4 Installation
- 5 Removing the Doors
- 6 Installing Door Handles
- 7 Controls
- 8 Automatic Ice & Water Maker/Dispenser
- 9 Automatic Ice Maker - Freezer
- 10 Storage Features
- 11 Changing the Water and Air Filters
- 12 Care and Cleaning
- 13 Solutions to Common Problems
- 14 Warranty
- Download this manual
Advertisement
Table of Contents

Related Manuals for Electrolux EI23BC35KS4


Summary of Contents for Electrolux EI23BC35KS4
- Page 1 Electrolux EN FREEZER / REFRIGERATOR USE AND CARE GUIDE FR REFRIGERATEUR / CONGELATEUR GUIDE D'UTILISATION ET D'ENTRETJEN ES REFRIGERADOR CON CONGELADOR GUJA DE USO Y CUIDADO 242090205 March 2012...
-
Page 2: Table Of Contents
Finding information Table of contents Please read and save this guide Thank you for choosing Electrolux, our new premium Finding Information ........... 2 brand in home appliances. This Use & Care Guide is part of our commitment to customer satisfaction and product Safety ................ - Page 3 Proper Disposal of Refrigerators/Freezers i_i!_!_i!i_ii_!i!_...
-
Page 4: Safety
i!i!i;i:!i:;iiiiiiii!il;!iii:iiiii:i!ii_ii!i!i_i_!iiiiiii;i!:i;iiii _ili_i_iiii!ii!;!_ili_i!i;!i!!ii_i!ii!i!ii_i;iii!il ¸i!i!:ii!:ili_ii:i_:_i_! Safety Emectrical information The refrigerator must be plugged into its own dedicated 115 Volt, 60 Hz, AC-only non-GFCl electric outlet. The power cord of the appliance is equipped with a three-prong grounding plug for your protection against electrical shock hazards. It must be plugged directly into a properly grounded three-prong receptacle. -
Page 6: Installation
Installation Required Tools You will need the following tools: Tools Necessary: Components Provided: Top Hinge Top Hinge Cover Front Cover Rear S ..Phillips'" Head Sg_w _ _oow_ #2 Square Drive Socket 3/8" Fixed Screw_ Head Wrench Set Wrench This Use &... - Page 7 5 Recheck g asket s eal. contacts t hefloor. Push A a st Freezer _ran_r .._i-_-i ° Door Door ° Install the...
- Page 8 installation To adjust the door stop: Retighten screw. Door stop is adjustable between 85 to 145 degrees. Screw Retighten Screw Ensure door stops in desired location before resuming normal use. To level the doors using the adjustable lower hinge (select models}: Remove all food items from door bins on door Adjustable Door Stop being adjusted.
- Page 9 i_i!_!_i!i_ii_!i!_ Re,tighten screw...
-
Page 10: Removing The Doors
!_i_i_i!i!!i!i!!i!i!!_i;_ii!_i;ii_;_!_;_!_;_!_iiii_i_i!ii!_ii!_i_i_:`_iii_i_!_i_!_i_ii!!_iii!!_iii!!_iii!!_i_i_ ,i _i_iiiiiiii!_i;i!i_i_ili! Removing the Doors Gettin throu h narrow s aces To_e_ovethe _ef_ge_ato_doo_s- If your refrigerator will not fit through an entrance area, 1 Trace lightly around the door's top hinges with a you can remove the doors. Check first by measuring pencil. - Page 11 Removing the Doors Installing Freezer Drawer 1 With lower slides pulled out, hang drawer onto slide brackets ensurinc pins on each side are fully inserted into slots on each side. Unscrew the three (3) lower hinge screws and i _ .._iii hinge if necessary.
-
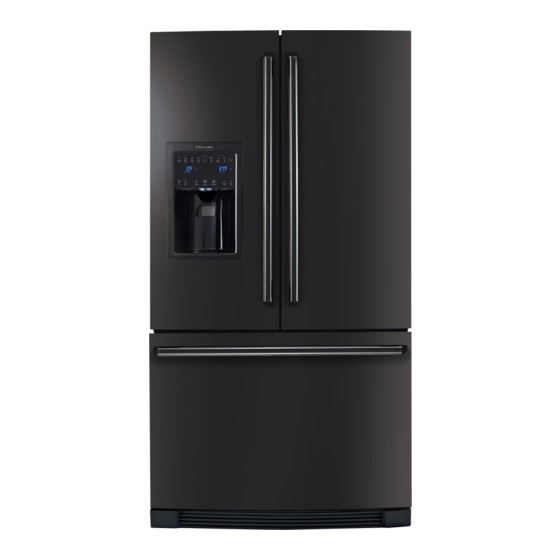
Page 12: Installing Door Handles
!_iiii!i!ii!i!ii!i!ii!i!@@@;i!_ii!i_!i_!;!;!ii!ili!_iiii!ili!;i;ili Installing Door Handles Door Handle tions 1 Remove handlesfrom protective packaging, Position fresh food handle - @'_ i ("_._ / i/ end caps (A)over upper and Iowerpre-installedshoulder "_ bolts (B)that are fastened ..into door, ensuringthe holes _"==1 for the set facing screws -- XI... - Page 13 about21/2 turns,behind refrigerator asshown i_i!_!_i!i_ii_!i!_ v,v,v,v,v,v,v,v,v,v,v,v,v,v ¸...
-
Page 14: Controls
Controls i!_!_i!i_ii_!i!_!_i!i_ii_!i!_!_i!i_ii_!i!_!_i!i_ii_!i!_!_i!i_ii_!i!_!_i!i_ii_!i!_!_i!i_ii_!i!_!_i!i_ii_!i!_!_i!i_ii_!i!_!_ii_i i!_!_i!i_ii_!i!_!_i!i_ii_!i!_!_i!i_ii_!i!_!_i!i_ii_!i!_!_i!i_ii_!i!_!_i!i_ii_!i!_!_i!i_ii_!i!_!_i!i_ii_!i!_!_i!i_ii_!i!_!_ii_i... - Page 15 i:ii_P£: ;b:,:::Ni !6 :,: Controls ....S!!",i_:!i;i i i_,! ilii ..... _ .... _..... J _.o_ Wave-Touch (select models) Your refrigerator is equipped with a Wave-Touch control panel display. It is only necessary to gently touch the @ass.
- Page 16 Controls Setting cooling temperatures "Sabbath Mode" Touch the glass panel to illuminate the 2 ndlevel of display. The Sabbath Mode is a feature that disables portions of Select the options icon. the refrigerator and its controls for both Wave-Touch Plus (+)and minus (-) and IQ-Touch in accordance with observance of indicators will appear on...
- Page 17 Contro IQ-Touch TM (seJect modeJs} Sabbath Mode and the Perfect Temp TMDrawer The Perfect Drawer should be turned off for the Temp TM Sabbath/Holidays. Before putting the refrigerator into the Sabbath mode, turn the Perfect Drawer off Temp TM by pressing the drawer on/off button. The display will show "OFF"...
- Page 18 Controls Alarms temp display Touch to toggle the freezer and fridge temp display on and off. Touch and hold temp display to toggle display from Fahrenheit to Celsius. mute sounds Tones emitted by each key press can be turned off based on user preference. The sounds are muted when the red indicator is lit.
-
Page 19: Automatic Ice & Water Maker/Dispenser
Automatic ice & Water Maker/Dispenser Primin9 the water supply system Begin filling the tank by pressing and holding a drinking glass against the water dispenser paddle. Keep the glass in this position until water comes out of the dispenser. It may take about 11/2minutes. - Page 20 Automatic ice & Water Maker/Dispenser maker/dispenser tips • If your refrigeratoris not connected to a water supply Removethe ice bin and shake to loosen the cubes or clean or the water supply is turned off, turn off the ice as explained above. maker by holding the On/Off soft-touch icon for three (3) seconds.
-
Page 21: Automatic Ice Maker - Freezer
Automatic ice Maker- Freezer • The following sounds are normal when the ice Ice maker operation & care maker is operating: (select models} - Motor running After the refrigerator is installed properly, the ice maker - Ice dropping into ice bin can produce ice within 24 hours. - Page 22 Ah_lf f_t-m< Crisper drawers include a sliding control for adjusting the ..humidity inside the crisper. Leafy vegetables keep best when stored with the Humidity Control set on Higher Humidity. Fresh fruits keep best when stored with the Humidity Control set on Lower Humidity.
- Page 23 !;:I_;I_¸ _ij!ij;_i_;_!;ill !F_Ii li ; ¸::¸_¸¸ iii:!:i!ii[i t]iiL_'_ii ..lerl/p © r'a_e v,v,v,v,v,v,v,v,v,v,v,v,v,v ¸...
-
Page 24: Storage Features
_i_i_;_i;!ii_ii!i!i!_!_!ii!i!i_i!_!i!i!i!_i_!_!_i_iii!!i!_i_!i!_i!_i_ :I¸iii:ii!il;ii_i_i!iiii!_!iiii_!ii%i Storage Features TO change the position of an adjustable door bin- ii_i R m v f_ m in ... e o e a [N_: 8_ct: Grpthebnfrmywthbothhandsand upward R_lllUV_ Lne oln, Place the bin just above desired position, Lowerthebnontosu ortsunt ockedn .... - Page 25 Storage Features To reinstall upper and middle baskets (select models), Dairy compartment position basket onto the retainer clips making sure Use the dairy compartment, at the top of the fresh food the front of the basket rests in the retainer clips on the compartment door, for short-term storage of cheese, stabilizer bar.
- Page 26 Storage Features Dividers Removal Lift up on the front of the middle divider and pull out. Middle BaSket :{etainers Middle Basket Divider Lift up on the rear of the lower divider and pull out. Spill Guard i!_!_i!i_ii_!i!_!_i!i_ii_!i!_!_i!i_ii_!i!_!_i!i_ii_!i!_!_i!i_ii_!i!_!_i!i_ii_!i!_!_i!i_ii_!i!_!_i!i_ii_!i!_!_i!i_ii_!i!_!_ii_i i!_!_i!i_ii_!i!_!_i!i_ii_!i!_!_i!i_ii_!i!_!_i!i_ii_!i!_!_i!i_ii_!i!_!_i!i_ii_!i!_!_i!i_ii_!i!_!_i!i_ii_!i!_!_i!i_ii_!i!_!_ii_i...
- Page 27 (2) daysshould befrozen. run longer and use more energy. i_i!_!_i!i_ii_!i!_ Frozen food storage...
- Page 28 _;_i_i_i;_!ii_ii!i!i!_!_!_!!i!i!_i_i!i_i_ii_i!i_!_!_i!_!i!ii_!:!%i!@_ii_i_i_i_!ii_i_!:!! Understanding the sounds may hear Your new high-efficiency refrigerator may introduce unfamiliar sounds, These sounds normally indicate ..FBe_g e_ aB_fosm B QU_ re_ geraint 8 your refngerator is operating correctly. Some surfaces on floors walls and kitchen cabinets may make these sounds more not ceab e The fo owng s a st of major components n your refrigerator and the sounds they can cause:...
- Page 29 i_i!_!_i!i_ii_!i!_ o Maximum Rated Pressure - 100pounds per...
-
Page 30: Changing The Water And Air Filters
Changing The Water and Air Filters Air filter The air filter is located under the utility bin and/or on the inside of the left door above the ice maker chute. Replacing your PureAdvantage air filter To ensure optimal filtering of refrigerator odors, you should change the air filter every six (6) months (the filter status light on the Touch Panel prompts you to replace the filter after six (6) months). -
Page 31: Care And Cleaning
Care and Cleaning Protecting your investment Keeping your refrigerator clean maintains its appearance and prevents odor build-up. Wipe up any spills immediately and clean the freezer and fresh food compartments at least twice a year. • Never use metallic scouring pads, brushes, abrasive cleaners, or strong alkaline solutions on any surface. Never use CHLORIDE or cleaners with bleach to clean stainless steel. - Page 32 J_;_i_i_i_i_!_:_i_!_i_ii!ii_ii_!_i_!_!_i_i!_i_i_:i_! :32 CareandCleaning Careand leaning tps Interior & Door • S0ap and • Use two (2)tablespoons of baking soda in one (1) quart of warm water. Liners water _, Be sure to wring excess water out of sponge or cloth before cleaning around Baking soda controls light bulb or any electrical part.
-
Page 34: Solutions To Common Problems
Solutions to Common Problems Before you ca[[... If you experience a problem with your refrigerator or notice a product behavior or condition that you do not understand, you can usually avoid a call to your service representative by referring to this section for an answer. Beginning with the following table, this information includes common concerns, causes, and suggested solutions. - Page 35 regenerative phase. i_i!_!_i!i_ii_!i!_...
- Page 36 of time. efficiency, variable-speed compressor. i!_!_i!i_ii_!i!_!_i!i_ii_!i!_!_i!i_ii_!i!_!_i!i_ii_!i!_!_i!i_ii_!i!_!_i!i_ii_!i!_!_i!i_ii_!i!_!_i!i_ii_!i!_!_i!i_ii_!i!_!_ii_i...
- Page 37 Solutions to Common Problems Temperatures Are Too Warm Concern Potential Cause Common Solution Freezer/ , Doors are opened too frequently or • Warm air enters the refrigerator whenever the door is RefNgerator too long. opened. Open the door less often. temperature is •...
-
Page 38: Warranty
Warranty Information Your appliance is covered by a one year limited warranty. For one year from your original date of purchase, Electrolux will repair or replace any parts of this appliance that prove to be defective in materials or workmanship...