Table of Contents
Advertisement
Advertisement
Table of Contents

Related Manuals for Electrolux ESF2450


Summary of Contents for Electrolux ESF2450
- Page 1 user manual Dishwasher ESF2450...
-
Page 2: Table Of Contents
2 electrolux Electrolux. Thinking of you. Share more of our thinking at www.electrolux.com Contents Safety information Setting and starting a washing programme Product description Control panel Care and cleaning Use of the appliance Technical data Setting the water softener What to do if…... -
Page 3: Product Description
3 Installation – if the mains cable or water hoses are damaged, • Make sure that the appliance is not dam- – if the control panel, worktop or plinth aged because of transport. Do not con- area are damaged, that you can get ac- nect a damaged appliance. -
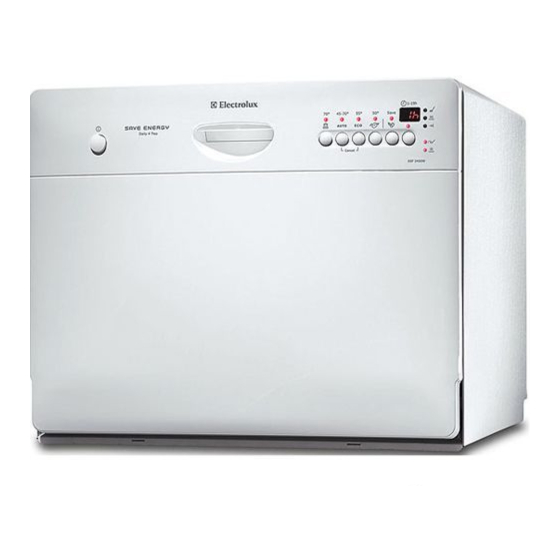
Page 4: Control Panel
4 electrolux The rating label is on the back of appli- ance. Control panel On/off button Programme selection buttons Save energy button /(Saver) Delay start button Indicator lights Digital display Function buttons Indicator lights The indicator light comes on when the washing phase or the rinsing phase operates. -
Page 5: Use Of The Appliance
5 Indicator lights The indicator light comes on when it is necessary to fill the rinse aid. Refer to the chapter 'Use of rinse aid'. 1) The indicator light is off when a washing programme operates. Delay start button The save energy function has no effect on some programmes. -
Page 6: Use Of Dishwasher Salt
6 electrolux • mmol/l (millimol per litre - international unit Adjust the water softener to the water hard- for the hardness of water). ness in your area. If necessary, contact your • Clarke. local water authority. Water hardness Water hard-... -
Page 7: Use Of Rinse Aid
7 It is normal that water overflows from the When you set the water softener to level 1, salt container when you fill it with salt the salt indicator light does not stay on. Use of rinse aid 1. Press the release button (A) to open the Caution! Only use branded rinse aid for rinse aid dispenser. -
Page 8: Use Of Detergent
8 electrolux • While you load cutlery and dishes, do Cutlery basket these steps: Warning! Do not put long-bladed knives – Load hollow items (e.g. cups, glasses in a vertical position to prevent injury. and pans) with the opening down. -
Page 9: Washing Programmes
9 Fill with detergent 1. Make sure that the detergent tablets are applicable for your water hardness. Refer Do these steps to fill the detergent dispenser: to the instructions from the manufacturer. 2. Set the lowest levels of water hardness and rinse aid dosage. -
Page 10: Setting And Starting A Washing Programme
10 electrolux Energy Degree Type of Save op- Programme Programme description of soil load tion Selectable, Normal Crockery Main wash up to 50°C no impact or light and cut- 1 intermediate rinse on washing soil lery Final rinse pro- gramme. -
Page 11: Care And Cleaning
11 Fill the detergent dispenser with detergent You can select the washing programme before you set a new washing programme. and delay start also with the door closed. When you press a programme button Interrupting a washing programme you have only 3 seconds to select a dif- Open the door. -
Page 12: Technical Data
12 electrolux Do these steps to remove the spray arm: 1. Turn the nut anticlockwise. 2. Remove the spray arm. 3. Fully clean the holes. External cleaning Clean the external surfaces of the appliance and control panel with a damp soft cloth. - Page 13 13 Fault code and malfunction Possible cause and solution • digital display shows • The water tap is blocked or furred with limescale. Clean the water tap. The dishwasher does not fill with wa- • The water tap is closed.
-
Page 14: Installation
14 electrolux The cleaning results are not satisfactory Dry water drop signs on • Increase rinse aid dosage. glasses and dishes • The detergent can be the cause. Installation Warning! Make sure that mains plug is Make sure that the dimensions of the recess disconnected from the mains socket agree with the given dimensions. - Page 15 15 Connect the inlet hose to a water tap with an external thread of 3/4”. If the water inlet hose is too short, replace the water inlet hose with an applicable, longer high-pressure hose. Do not connect an ex- tension hose.
-
Page 16: Electrical Connection
16 electrolux Electrical connection Do not use multi-way plugs, connectors Warning! The manufacturer is not responsible if you do not follow these and extension cables. There is a risk of safety precautions. fire. Do not replace the mains cable yourself. - Page 17 17...
- Page 18 18 electrolux...
- Page 19 19...
- Page 20 156985870-00-052009...