Table of Contents
Advertisement
Advertisement
Table of Contents

Related Manuals for AEG LAVATHERM 57760 electronic


Summary of Contents for AEG LAVATHERM 57760 electronic
- Page 1 LAVATHERM 57760 electronic Condenser Dryer Operating Instructions...
-
Page 2: Dear Customer
Dear customer, Please read these operating instructions through carefully, before using the appliance. Please ensure you fully understand the safety instructions on the first pages of these operating instructions! Retain this instruction book for future reference, and pass on to any future owners. The warning triangle and/or the key words (Warning!, Caution!, Important!), emphasize information which is important for your safety or the correct functioning of the appliance. -
Page 3: Table Of Contents
Content Important Safety Information ........5 General Safety . - Page 4 Content Programme tables ..........22 A small glossary of textile information .
-
Page 5: Important Safety Information
1 Important Safety Information Your safety is of paramount importance, please ensure you read these warnings before installing or using the appliance. If you are unsure about any of the meanings of these warnings, contact the Customer Care Department. General Safety •... -
Page 6: Child Safety
Important Safety Information • Do not use the mains cable to pull the plug out of the socket. • Repairs to the appliance should only be carried out by qualified personnel. Repairs carried out by inexperienced persons may cause injury or serious malfunction. Contact your local AEG Service Force Centre for repair. -
Page 7: General Information
3 General Information • To prevent creasing do not exceed the maximum load stated in the programme table. • When using fabric conditioning sheets, we recommend the conditioning sheet is pinned (using a safety pin) to an article of laundry and placed in the tumble dryer. •... -
Page 8: Environmental Protection Tips
2 Environmental protection tips • Your laundry will become light and soft in the laundry dryer even without a soft rinsing agent. • Loosen your laundry before loading it into the dryer. This helps to prevent lengthy running times and creasing. •... - Page 9 • Choose the right drying programme for the type and quantity of laun- dry. The dryer will then operate as economically as possible. Some typi- cal consumption values: Drying programme COTTONS STORAGE DRY COTTONS HAND IRON EASY CARES STORAGE DRY 1) spun at 800 revolutions per minute 2) spun at 1000 revolutions per minute If the amount of laundry is not enough for a particular degree of dry-...
-
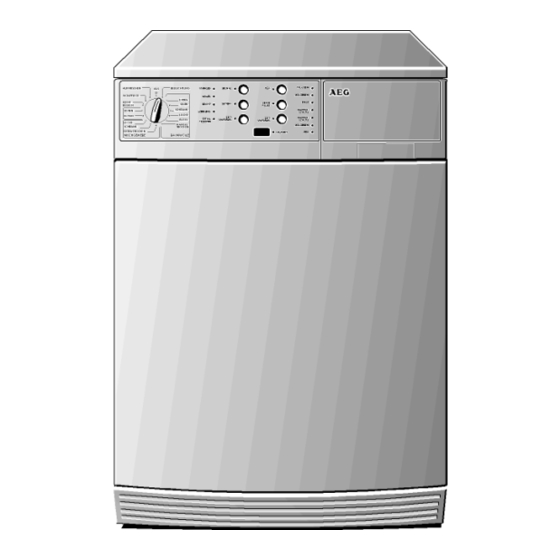
Page 10: Description Of The Appliance
Description of the appliance Front view Control panel Interior Light Rating plate Vent (all height-adjustable) Water Reservoir with handle flap Feet Heat exchanger Unit behind Removable Plinth Fluff filter Reversible door... -
Page 11: Control Panel
Control panel A Programme selector: To select the drying programme B Drying degree indicator: Shows the achieved extent of drying; this enables you to take-out individual pieces of laundry at the right time during the drying process. C Buttons and display block –... - Page 12 Description of the appliance D Programme run display: In each case the display for the current phase of the drying process is lit. E Instructions for the user: – HEAT EXCHANGER: Clean the heat exchanger – EMPTY WATER: Empty the water container –...
-
Page 13: The Programme Selector Positions
The programme selector positions • OFF: The tumble dryer is switched off. • LIGHT: The drum light switches on when the door is opened. • Programme group COTTONS: Programmes for drying cotton and linen fabrics; maximum load 6 kg. • Programme group EASY CARES: Programmes for drying mixed fabrics and synthetics;... -
Page 14: Brief Operating Instructions
Brief operating instructions • Ensure the laundry is well spun before tumble drying. • Prepare the laundry. • Open the door and load the laundry. • Shut the door. Attention! Do not catch washing in the door. • Select the drying programme on the programme selector. •... -
Page 15: Drying
Drying Prepare the laundry • To prevent tangled bundles of laundry: Close zip fasteners; button-up bed linen and pillow cases; tie-together loose tapes, e.g. aprons. • Empty all pockets. • Remove all metal objects (i.e. paper clips, pins, etc.). • Turn clothing consisting of double-layer fabric inside out (such as cotton-lined anoraks with the cotton layer facing outwards). - Page 16 Drying 0 If required, select the buttons AUDIBLE SIGNAL, SPECIAL CARE or QUICK. • AUDIBLE SIGNAL button During the crease-protection phase (immediately after the drying phase), an acoustic signal is sounded at intervals (see "End of drying process"). • SPECIAL CARE button This programme operates with reduced heat.
-
Page 17: Start Delay Timer
Start DELAY TIMER With the DELAY TIMER function you can delay the start of the drying programme by 1 to 19 hours. 0 Setting the programme. 0 Hold the DELAY TIMER button pressed until the desired number of hours of delay of the programme start appears in the display field for PROGR. -
Page 18: Start The Drying Programme
Drying Start the drying programme 0 Press the START button. The drying programme starts. The programme progress is indicated on programme phase dis- play. Removing laundry or loading laundry when necessary You can interrupt the drying process at any time to remove some of the laundry or to add more laundry. -
Page 19: Empty The Water Reservoir
Empty the water reservoir Caution! The condensed water is not suitable for drinking or for use with foodstuffs. The water reservoir should be emptied completely after every drying programme. This avoids interruption of a programme when the water reservoir is full. 0 Grasp the handle flap of the water reser- voir and pull out completely. -
Page 20: Clean The Fluff Filter
Drying Clean the fluff filter To ensure efficient operation of the tumble dryer, clean the fluff filter after each drying programme. Also check whether there are any remnants or fluff from the washing in the drum; remove immediately. 0 Press the catch of the filter lid down- wards. -
Page 21: Cleaning The Heat Exchanger
Cleaning the heat exchanger Important! When the HEAT EXCHANGER display illuminates, it is essen- tial to clean the heat exchanger. Otherwise your dryer might suffer damage. In addition energy consumption will be increased if the heat exchanger unit is covered with fluff. 0 Open the door. -
Page 22: Programme Tables
Programme tables Programme group COTTONS care symbols R, Q; maximum load 6 kg Programme EXTRA DRY INTENSIVE DRY STORAGE DRY DAMP HAND IRON MACHINE IRON Programme group EASY CARES care symbols R, S Programme EXTRA DRY STORAGE DRY DAMP 1) Press the SPECIAL CARE button! Laundry Type Heavy weight or multi- layered fabrics... - Page 23 Time programmes care symbols R, S , Q; loads less than 1kg You can select 20 and 40 minutes programme duration for additional drying of individual pieces of laundry or to dry small quantities. 1) Press the SPECIAL CARE button! EASY IRON programme care symbols R, S , Q;...
-
Page 24: A Small Glossary Of Textile Information
A small glossary of textile information Care symbols Ensure articles to be dried are suitable for tumble drying. If they are one of the following symbols should be present on the care label: Normal drying Drying with special care (press the SPECIAL CARE button!) This fabric can be tumble dried. -
Page 25: Cleaning And Maintenance
Cleaning and maintenance Cleaning the filter area Important! When the FILTER display illuminates, it is essential to clean the fluff filter. Otherwise your dryer might suffer damage. A small amount of fluff may reach the area around the filter in spite of the fluff filter. -
Page 26: Cleaning The Panel And Operating Parts
Cleaning and maintenance Cleaning the panel and operating parts Warning ! Do not use household furniture polish or aggressive deter- gents. 0 Wipe over the panel and operating parts with a damp cloth. Only use warm water. Cleaning the door seal 0 Rub the door seal with a damp cloth immediately after the drying pro- cedure. -
Page 27: Programming Possibilities
Programming possibilities The electronic control system of your laundry dryer provides you with the possibility to adapt some functions of the dryer permanently to your requirements. Purpose "Laundry protection": If you want to "lock" the selected drying programme (the selected programme setting cannot be changed during the drying process with the... - Page 28 Programming possibilities Purpose Adjusting the drying result: If at the end of the pro- gramme you always want the washing to be somewhat drier or somewhat damper than with the standard set- ting and you want to adjust the tumble dryer’s recognition of the degree of dryness accordingly:...
-
Page 29: What To Do If
What to do if ... If the tumble dryer is not working correctly please carry out the follow- ing checks before calling out an engineer. Symptom The tumble dryer will not start The results are unsatisfactory Possible cause The appliance is not Plug in the appliance plugged in The fuse has blown... - Page 30 What to do if ... Symptom The drying result is unsatis- factory; the washing is still damp. The drum illumination does not work The drying process takes unusually long The door cannot be opened with the DOOR button The door cannot be closed EMPTY WATER indicator is illuminated EMPTY WATER indicator illu-...
- Page 31 Symptom The remaining running time display changes rapidly. The drying process takes unusually long. 4.5 hours after the beginning of the drying process: - END display is illuminated - acoustic signal sounds - discontinuation of the drying process - programme run display is flashing - error code C6 is displayed If after these checks, the tumble dryer still does not work, contact your...
-
Page 32: Replacing The Interior Light
What to do if ... Replacing the interior light 0 A replacement bulb can be purchased through your local AEG Service Force Centre (Part No: 899647072580/6). Warning! Never use standard light bulbs in your Lavatherm. 0 Isolate the appliance from the mains supply. 0 Unscrew the bulb cover. -
Page 33: Service & Spare Parts
Service & Spare Parts In the event of your appliance requiring service, or if you wish to pur- chase spare parts, please contact Service Force by telephoning: 08705 929 929 Your telephone call will be automatically routed to the Service Force Centre covering your post code area. -
Page 34: Guarantee Conditions
Guarantee Conditions Standard guarantee conditions We, AEG, undertake that if within 12 months of the date of the purchase this AEG appliance or any part thereof is proved to be defective by reason only of faulty workmanship or materials, we will, at our discretion repair or replace the same FREE OF CHARGE for labour, materials or carriage on condition that: •... -
Page 35: European Guarantee
European Guarantee If you should move to another country within Europe then your guarantee moves with you to your new home subject to the following qualifications: • The guarantee starts from the date you first purchased your product. • The guarantee is for the same period and to the same extent for labour and parts as exist in the new country of use for this brand or range of products. -
Page 36: For The Installer - Safety Information
For the installer - Safety information • Check the appliance for transportation damage before installation. • If the tumble dryer has to be carried, first remove the plinth! • Any electrical work required to install this appliance should be carried out by a qualified electrician or competent person. -
Page 37: Technical Data
Technical data Height x Width x Depth 85x60x60cm Depth with the door open 117cm Height adjustable from 1.0/–0.4cm Empty weight approx. 46kg Load (depending on the programme) max. 6kg Power consumption in acc. with IEC 1121 s.e. 4.2kWh (6 kg Cotton, spun at 800 revolutions per minute, programme COTTONS STORAGE DRY) Area of use Household... -
Page 38: Electrical Connection
Electrical Connection Any electrical work required to install this appliance should be carried out by a qualified electrician or competent person. WARNING - THIS APPLIANCE MUST BE EARTHED. The manufacturer declines any liability should these safety measures not be observed. Before switching on, make sure the electricity supply voltage is the same as that indicated on the appliance rating plate. -
Page 39: Permanent Connection
• The wire coloured green and yellow must be connected to the terminal marked with the letter “E“ or by the earth symbol coloured green and yellow • The wire coloured blue must be connected to the terminal “N“ or coloured black. -
Page 40: Door Reversal Instructions
Door Reversal Instructions The door opening direction can be changed if required. Warning! Before reversing the door, isolate the appliance from the mains supply. Proceed as follows to reverse the door opening direction: 0 Unscrew the screws A on the front panel of the appliance. 0 Take off the door by sliding it out horizontally. - Page 41 0 Take out the latched catch covering J and pull off the plug. 0 Connect the door catch H and the catch covering J on the respective opposite side to the plug, insert into the holes and screw or latch into position.
-
Page 42: Special Accessories
Special accessories You can obtain the following special accessories from your retailer. Drainage kit A drainage kit (TRZ955, E-No. 916 019 000) can be purchased to adapt the dryer to drain the condensed water into an existing drain, sink etc with a maximum feed height of 1m above the floor on which the dryer is standing (3m Length). -
Page 43: Index
Index Acrylate ......16 Acrylic ......24 Anorak . - Page 44 From the Electrolux Group. The world´s No.1 choice. The Electrolux Group is the world´s largest producer of powered appliances for kitchen, cleaning and outdoor use. More than 55 million Electrolux Group products (such as refrigerators, cookers, washing machines, vacuum cleaners, chain saws and lawn mowers) are sold each year to a value of approx. USD 14 billion in more than 150 countries around the world.