Table of Contents
Advertisement
Quick Links
OWNER'S MANUAL
ROBOT CLEANER
Before beginning installation, read these instructions
carefully. This will simplify installation and ensure that the
product is installed correctly and safely. Leave these
instructions near the product after installation for future
reference.
ENGLISH
R5T-AUTO
MFL71751926
Rev.00_082423
Copyright © 2023 LG Electronics Inc. All Rights Reserved.
www.lg.com
Advertisement
Table of Contents

Related Manuals for LG R5T-AUTO


Summary of Contents for LG R5T-AUTO
- Page 1 This will simplify installation and ensure that the product is installed correctly and safely. Leave these instructions near the product after installation for future reference. ENGLISH R5T-AUTO www.lg.com MFL71751926 Rev.00_082423 Copyright © 2023 LG Electronics Inc. All Rights Reserved.
-
Page 2: Table Of Contents
This manual is subject to revision by the manufacturer. SAFETY INSTRUCTIONS READ ALL INSTRUCTIONS BEFORE USE............3 WARNING ......................3 CAUTION ......................8 BEFORE USING Parts and Specifications ..................10 Charging......................12 OPERATION Control Panel ....................15 Cleaning ......................15 SMART FUNCTIONS Using LG ThinQ Application................18 MAINTENANCE Regular Cleaning....................21 TROUBLESHOOTING Before Calling for Service................25... -
Page 3: Safety Instructions
Technical Safety • Read all safety warnings and instructions. Use only manufacturer’s recommended attachments. • If the power supply cord is damaged, it must be replaced by an LG Electronics service center or dealer in order to avoid a potential hazard. - Page 4 • For your safety, do not remove the battery from the appliance. If you need to replace the battery of the appliance, take it to an authorized LG Electronics service centre or dealer for assistance. • Do not stare into the laser beam.
- Page 5 Do not subject the battery to mechanical shock. • Have the battery replaced when it is no longer able to hold a charge. For replacement, contact an authorized LG Electronics service centre for alternative battery options. • When disposing of this appliance, follow regulations for disposal of rechargeable lithium-ion batteries.
- Page 6 • Never attempt to operate this appliance if it is damaged, malfunctioning, partially disassembled, or has missing or broken parts, including a damaged cord or plug. Take it to an authorized LG Electronics service centre or dealer for assistance. • Do not apply excessive force to the power cord to bend it, or place it under a heavy object as this will damage it.
- Page 7 LG Electronics customer information centre. • Only qualified technicians or service personnel from LG Electronics may disassemble, repair or modify the appliance. • Never insert a sharp metal object such as a pin, nail or knife in a hole or gap in the product body or the home station.
-
Page 8: Caution
SAFETY INSTRUCTIONS • In the event of a gas leak (natural gas, propane gas, etc.), do not operate this or any other appliance. Open a window or door to ventilate the area immediately. • Never allow any water, beverage or detergent to get inside the battery. - Page 9 • Ensure that liquids do not seep into the appliance. If liquid gets inside of the appliance, turn off the power supply and take it to the authorized LG Electronics service center or dealer for assistance. • Remove thin mats or carpets that may be damaged.
-
Page 10: Before Using
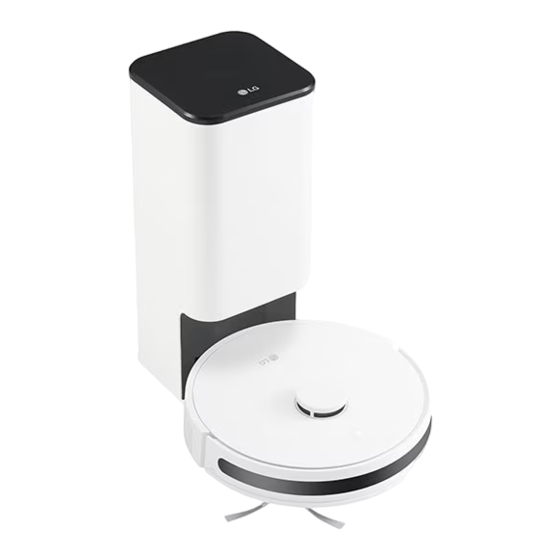
BEFORE USING BEFORE USING Parts and Specifications Bottom View Front View LIDAR Sensor Control Panel Infrared sensor for charging Cliff Detection Sensors Charging Terminals Side View Side Brush Brush Brush Cover Release Buttons Rear View Bumper Ventilation Port Dust Bin and Water Tank Release Button Main Power Switch... - Page 11 This product is a Class I laser device of which conformity assessment is conducted in accordance with the IEC 60825-1. Robot Cleaner • Model: R5T-AUTO • Maximum Physical Dimensions: 342 mm (Width) × 342 mm (Depth) × 94.5 mm (Height) • Power Consumption - 30 W (Mid level) •...
-
Page 12: Charging
BEFORE USING - Up to 140 minutes (Low level) Remove the protective film attached to the - Up to 110 minutes (Mid level) charging station and the Robot Cleaner. - Up to 80 minutes (High level) • If the protective film is not removed, it may be difficult for the Robot Cleaner to find the - Up to 60 minutes (General mode with Turbo charging station or product performance... - Page 13 BEFORE USING Place the robot cleaner on the home station, NOTE align the centre of the robot cleaner with the • If two robot cleaners are used together, there centre of the home station and push the robot should be at least 1.5 m distance between home cleaner from behind.
- Page 14 BEFORE USING NOTE • When the main power switch is turned off, the battery % display in the ThinQ app does not change when charging. Turn on the main power switch on the back of the robot vacuum cleaner. Charging is possible even when the main power switch is turned off.
-
Page 15: Operation
• Press and hold button for 3 seconds to Remove the Water Inlet cap and fill the water connect the robot cleaner to the LG ThinQ application. tank from a filtered or potable water source. Do not use other liquids or chemicals as they... - Page 16 OPERATION can cause property damage and product Insert the mop holder into the bottom of the malfunction. robot cleaner until you hear a click. Re-install the dustbin and water tank in place. CAUTION • If the mop is excessively wet, the floor may become slippery and cause people to slip.
- Page 17 OPERATION With the water tank in an upright position, attach a paper towel or a cloth to the outlet and remove remaining water. Remove as much water from the water tank as possible, tilt the water tank towards the water tank stopper so as to collect the water, and then dry it by laying it upside down on a paper towel or a cloth.
-
Page 18: Smart Functions
Smart Turbo settings can be turned on and off in the LG ThinQ app. If the suction level is Turbo, NOTE detecting the carpet does not increase the suction power. - Page 19 WEP, network setup may fail. Change the security protocol (WPA2 is recommended), and register the product again. • If the connection with the LG ThinQ is lost while Connect your smartphone to the wireless using the product, press and hold the power router.
- Page 20 LG Electronics will also provide open source code to you on CD-ROM for a charge covering the cost of performing such distribution (such as the cost of...
-
Page 21: Maintenance Regular Cleaning
MAINTENANCE MAINTENANCE Regular Cleaning Remove the filter, and clean filters with a cleaning brush. WARNING • Unplug the appliance before cleaning to avoid the risk of electric shock. Failure to follow this warning can cause serious injury, fire, electric shock, or death. CAUTION •... - Page 22 MAINTENANCE performance filter material and make it Remove the roller at one end of the brush and ineffective.) clean the hair entangled on the roller. Reassemble the air-dried water tank, dustbin and filter, and install them back into the robot. Cleaning the Brush After cleaning, re-install the brush in place.
- Page 23 MAINTENANCE Cleaning the Charging Dock NOTE Please clean regularly, and wipe dust off them with • It is recommended to replace side brush every 3- a soft dry cloth or sweep brush. 6 months to ensure cleaning results. Cleaning the Front Wheel Hair or dust particles tend to affix to the universal wheel.
- Page 24 MAINTENANCE NOTE • Clean the cliff detection sensors regularly with a soft brush. Failing to clean the sensors can cause the cleaner to fall froma ledge due to a dusty or contaminated sensor not being able to detect the drop.
-
Page 25: Troubleshooting
• When the robot vacuum main power switch is turned off, the battery % display in the LG ThinQ app does not change when charging. Turn on the main power switch on the back of the robot vacuum cleaner. Charging is possible even when the main power switch is turned off. - Page 26 TROUBLESHOOTING Symptoms Possible Cause & Solution Suction power Filter is blocked. becomes weak. • Clean the filter. The product is noisy Dust bin is not attached to the robot cleaner correctly. when it’s running. • Attach the dust bin correctly. Filter is not attached to the dust bin correctly.
- Page 27 TROUBLESHOOTING Symptoms Possible Cause & Solution The water tank gives The water tank was not emptied after cleaning. off an odour. • After cleaning, be sure to empty the water tank and store it after drying it completely. If the water tank gives off a strong odour, wash it using a neutral detergent diluted with water, pouring diluted neutral detergent into the water tank and shaking the tank.
- Page 28 Your home appliance Battery is fully discharged. and smartphone are • Charge the battery, then register your appliance on LG ThinQ. not connected to the Wi-Fi network. The password for the Wi-Fi that you are trying to connect to is incorrect.
- Page 29 Memo...
- Page 30 Memo...
- Page 31 Memo...