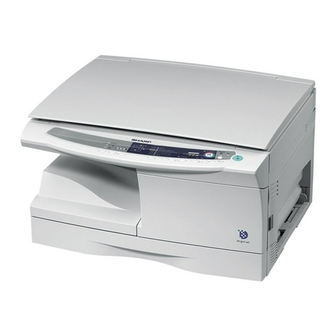
Sharp AL-1000 Operation Manual
Sharp al-1000: operation manual
Hide thumbs
Also See for AL-1000:
- Operation manual (169 pages) ,
- Service manual (93 pages) ,
- Operation manual (34 pages)
Table of Contents
Advertisement
Quick Links
FOR YOUR PROTECTION...
To aid in reporting this compact copier in case of loss or theft, please record below the model
number and serial number located on the back of the unit. We also suggest you record all the
information listed and retain for future reference.
MODEL NUMBER
DATE OF PURCHASE
Dealer
Address
State
Service Station
Address
State
For location of the nearest Sharp Authorized Service, or to
obtain product literature, accessories, supplies or customer
assistance,
please call
For product information or customer assistance, please visit
http://www.sharp-usa.com on the World Wide Web or call
1-800-BE-SHARP.
City
Zip
City
Zip
1 - 800 - BE-SHARP
SERIAL NUMBER
Telephone
Telephone
Advertisement
Table of Contents

Related Manuals for Sharp AL-1000


Summary of Contents for Sharp AL-1000
- Page 1 Address State Service Station Address State For location of the nearest Sharp Authorized Service, or to obtain product literature, accessories, supplies or customer assistance, please call For product information or customer assistance, please visit http://www.sharp-usa.com on the World Wide Web or call 1-800-BE-SHARP.
-
Page 2: Table Of Contents
CONTENTS GETTING STARTED INTRODUCTION CAUTIONS MAIN FEATURES PART NAMES OPERATION PANEL INSTALLATION COPIER INSTALLATION CAUTIONS ON HANDLING CHECKING PACKED COMPONENTS AND ACCESSORIES UNPACKING REMOVING PROTECTIVE PACKING MATERIALS INSTALLING THE TD CARTRIDGE LOADING COPY PAPER (installing the paper tray) POWER TO COPIER POWER ON –... - Page 3 CONTENTS TD CARTRIDGE REPLACEMENT DRUM CARTRIDGE REPLACEMENT USER MAINTENANCE – Cabinet – Original table and original cover – Transfer charger – When copier is not in use – Copier lens cleaning MISFEED REMOVAL – Misfeed in the paper feed area –...
-
Page 4: Getting Started
GETTING STARTED This chapter provides basic information for using the copier. INTRODUCTION This copier has been designed to provide intuitive operating ease while requiring a minimum amount of space. To get full use of all copier features, be sure to familiarize yourself with this manual and the copier. -
Page 5: Main Features
CAUTIONS SAFETY PRECAUTIONS This Digital Copier is rated Class 1 and complies with 21 CFR 1040.10 and 1040.11 of the CDRH standards. This means that the copier does not produce hazardous laser radiation. For your safety, observe the precautions below. Do not remove the cabinet, operation panel or any other covers. - Page 6 t Printer feature This copier can be used as a laser printer by installing an optional printer upgrade kit. y Environmentally friendly design Paper output tray is housed in the copier for space saving. Preheat mode and auto power shut-off mode are provided to reduce power consumption in standby mode.
-
Page 7: Part Names
PART NAMES Original table Operation panel Paper tray Front cover TD cartridge lock release button TD cartridge Paper feed roller Fusing unit release lever Original cover Side cover Manual bypass Paper guides Side cover Handle open button Power cord socket Power switch Drum cartridge Drum cartridge handle... -
Page 8: Operation Panel
OPERATION PANEL q Exposure mode selector key and indicators Use to sequentially select the exposure modes: AUTO, MANUAL or PHOTO. Selected mode is shown by a lit indicator. (p. 20) w Light and dark keys and exposure indicators Use to adjust the MANUAL or PHOTO exposure level. -
Page 9: Installation
INSTALLATION Follow the installation procedure below to use the copier properly. COPIER INSTALLATION Improper installation may damage the copier. Please note the following during initial installation and whenever the copier is moved. If the copier is moved from a cool place to a warm place, condensation may form inside the copier. -
Page 10: Cautions On Handling
Be sure to allow the required space around the machine for servicing and proper ventilation. A small amount of ozone is produced within the copier during operation. The emission level is insufficient to cause any health hazard. NOTE: The present recommended long term exposure limit for ozone is 0.1 ppm (0.2 mg/m calculated as an 8 hr. -
Page 11: Checking Packed Components And Accessories
Open the carton and check if the following components and accessories are included. Operation manual If anything is not included or is damaged, contact your Sharp dealer. Save the carton and packing materials. These can be re-used for transporting the machine, should it be necessary. -
Page 12: Removing Protective Packing Materials
REMOVING PROTECTIVE PACKING MATERIALS Remove pieces of tape the original cover and remove protective materials Use a coin (or suitable object) to remove the screw. Store the screw in the paper tray because it will be used if the copier has to be moved. - Page 13 INSTALLING THE TD CARTRIDGE Remove the CAUTION tape from the front cover and remove the two protective pins from the fusing unit by pulling the strings upward one at a time. Push gently on both sides of the front cover to open the cover. Remove the TD cartridge from the bag.
-
Page 14: Loading Copy Paper (Installing The Paper Tray)
Gently insert the TD cartridge until it locks in place. Close the front cover and then the side cover by pressing the round projections near the side cover open button. When closing the covers, be sure to close the front cover securely and then close the side cover. - Page 15 LOADING COPY PAPER Remove the pressure plate lock. Rotate the pressure plate lock in the direction of the arrow to remove it while pressing down the pressure plate of the paper tray. Store the pressure plate lock which has been removed in step 2 and the screw which has been removed when unpacking (see page 11, step 2 of REMOVING PROTECTIVE PACKING MATERIALS) in the front of the paper tray.
-
Page 16: Power To Copier
Gently push the paper tray back into the copier. After loading copy paper, to cancel the blinking "P" without restarting copying, press the clear ( ) key. The "P" in the display will go out and the ready ( indicator will light up. POWER TO COPIER Ensure that the power switch of the copier is in the OFF position. -
Page 17: Power On
POWER ON Turn the power switch on the left side of the copier to the "ON" position. The ready ( indicator will light up and other indicators which show the initial settings of the operation panel will also light up to indicate the ready condition. For the initial settings, see the "Initial settings of operation panel"... -
Page 18: Making Copies
MAKING COPIES This chapter describes basic copying functions and some other copying functions using the manual bypass. PAPER For best results, use only paper recommended by SHARP. Type of paper Type of media feeding Paper tray Standard paper Manual bypass... -
Page 19: Normal Copying
NORMAL COPYING Ensure that paper of the desired size is set in the paper tray. See page 13, LOADING COPY PAPER. When copying onto 8-1/2" x 11" paper or a larger size, pull out the paper output tray extension. Turn the power switch on. Open the original cover. -
Page 20: Setting A Large Original
Set the number of copies using the two copy quantity ( Press the clear ( A single copy can be made with the initial setting, i.e., when “0” is displayed. ZOOM Tens digit Unit digit Press the print ( ) key. To display the number of copies made in a continuous run, press the left copy quantity key. -
Page 21: Exposure Adjustment/Photo Copying
EXPOSURE ADJUSTMENT/PHOTO COPYING Copy density adjustment is not required for most originals in the automatic exposure mode. To adjust the copy density manually or to copy photographs, the exposure level can be adjusted in five steps manually. Set the original and check the copy paper size. Press the exposure mode selector key to select the manual ( )mode. -
Page 22: Bypass Feed (Special Paper)
To select a preset copy ratio: Preset reduction and enlargement ratios are: 50%, 64%, 78%, 129%, and 200% To decrease or increase the zoom ratio rapidly, press and hold down the key. However the value will stop at the preset reduction or enlargement ratios. -
Page 23: Two-Sided Copying
TWO-SIDED COPYING Two-sided copying can be made on this copier using the manual bypass. Example: The following two originals will be copied onto two sides of copy paper. First original Place the first original on the original table and make a copy. The first copy can be made using either the paper tray or the manual bypass. -
Page 24: Special Functions
SPECIAL FUNCTIONS DESCRIPTION OF SPECIAL FUNCTIONS This chapter describes the special functions of this copier. Use these functions as needed. Toner save mode (page 23) Reduces toner consumption by approximately 10%. Power save modes (page 24) The copier has two power save modes of operation: preheat mode and auto power shut-off mode. -
Page 25: User Programs
TONER SAVE MODE Press and hold down the exposure mode selector key for approximately 5 seconds. The manual ( blink. The exposure indicator marked “5” will light up, indicating the standard toner mode is active. To enter the toner save mode, press the light ( The exposure indicator marked “1”... - Page 26 Press the print ( ) key. The entered program number will be steadily lit and the currently selected parameter number for the program will blink on the right side of the display. Select the desired parameter using the right copy quantity ( parameter number will blink on the right of the display.
-
Page 27: Supplies And User Maintenance
SUPPLIES AND USER MAINTENANCE This chapter describes how to replace the TD cartridge and the drum cartridge and how to check the total number of copies. TD CARTRIDGE REPLACEMENT The TD cartridge replacement required ( ) indicator will light up when toner is needed. For more information on purchasing the TD cartridge, see OPTION AND SUPPLY PART NUMBERS AND STORAGE on page 38. -
Page 28: Drum Cartridge Replacement
Install a new TD cartridge. To install the new cartridge, see page 11, INSTALLING THE TD CARTRIDGE. Close the front cover and then the side cover by pressing the round projections near the side cover open button. The will light up. When closing the covers, be sure to close the front cover securely and then close the side cover. -
Page 29: User Maintenance
USER MAINTENANCE Proper care is essential in order to get clean, sharp copies. Be sure to take a few minutes to regularly clean the copier. Do not use thinner, benzene or other volatile cleaning agents. Doing so may cause deformation, discoloration, deterioration or malfunction. -
Page 30: Transfer Charger
Transfer charger If copies start becoming streaky or blotchy, the transfer charger may be dirty. Clean the charger using the following procedure. Turn the power switch off. Open the side cover while pressing the side cover open button. Take the charger cleaner out by holding the tab. Set the charger cleaner onto the transfer charger and gently slide the cleaner back and forth two or three times. -
Page 31: Copier Lens Cleaning
USER MAINTENANCE Copier lens cleaning If white lines appear on copies in the direction of paper travel, make a reduction or enlargement copy and check to see if the position of the white lines change on the copy paper. If the lines appear in the same position, clean the copier lens using the following procedure. When you open the front cover to clean the lens, be sure to finish cleaning and close the front cover as soon as possible in order to minimize exposure of the drum cartridge to external light. -
Page 32: Copier Trouble
COPIER TROUBLE? This chapter describes misfeed removal and troubleshooting. MISFEED REMOVAL When the misfeed ( ) indicator blinks or because of a misfeed. Open the side cover while pressing the side cover open button. Check the misfeed location. Remove the misfed paper following the instructions for each location in the illustration below. -
Page 33: Misfeed In The Fusing Area
MISFEED REMOVAL Close the side cover by pressing the round projections near the side cover open button. The misfeed ( B Misfeed in the fusing area Lower the fusing unit release lever. Gently remove the misfed paper from under the fusing unit as shown in the illustration. If the paper cannot be removed, proceed to “C Misfeed in the transport area”. -
Page 34: Misfeed In The Transport Area
Raise the fusing unit release lever and then close the side cover by pressing the round projections near the side cover open button. The misfeed ( go out and the ready ( C Misfeed in the transport area Lower the fusing unit release lever. Fusing unit release lever Push gently on both sides of the front cover to open the cover. -
Page 35: Troubleshooting
TROUBLESHOOTING If any problem occurs, check the list below before contacting the Sharp Service Center. Problem Copier does not operate. Blank copies Power save ( indicator on. Copies are too dark or too light. Dust, dirt, smudges appear on copies. -
Page 36: Status Indicators
STATUS INDICATORS When the following indicators light up or blink on the operation panel or the following alphanumeric codes appear in the display, solve the problem immediately referring to both the table below and the relevant page. Indication Steadily Drum replacement required indicator Blinking Steadily... -
Page 37: Automatic Exposure Adjustment
AUTOMATIC EXPOSURE ADJUSTMENT The automatic exposure level can be adjusted to suit your copying needs. Press the exposure mode selector key to select the photo ( Press and hold down the exposure mode selector key for approximately 5 seconds. The photo ( or two exposure indicators corresponding to the automatic exposure level which has been selected will light up. -
Page 38: Appendix
First-copy time may differ depending on operating conditions, such as power-supply voltage and room temperature. As a part of our policy of continuous improvement, SHARP reserves the right to make design and specification changes for product improvement without prior notice. The performance specification figures indicated are nominal values of production units. -
Page 39: Option And Supply Part Numbers And Storage
OPTION AND SUPPLY PART NUMBERS AND STORAGE When ordering supplies and option, please use the correct part numbers as listed below. Be sure to use only genuine SHARP parts and supplies. Supply list Supply TD cartridge Drum cartridge * Based on copying onto letter-type paper at 5% toned area (The life of the TD cartridge which has been included in the copier at the factory is approximately 2,000 sheets.) -
Page 40: Moving Instructions
MOVING INSTRUCTIONS When moving this copier, follow the procedure below. When moving this copier, be sure to remove the TD cartridge in advance. Turn the power switch off and disconnect the power cord. q Open the side cover while pressing the side cover open button. w Push gently on both sides of the front cover to open the cover. -
Page 41: Index
INDEX Auto clear ....23, 24 Automatic exposure adjustment ..36 Auto power shut-off mode ..23, 24 Cautions . - Page 42 Print key ......18 Protective packing materials ..11 Ready indicator .
- Page 43 MEMO...
- Page 44 MEMO...
- Page 45 MEMO...
- Page 46 WARNING: FCC Regulations state that any unauthorized changes or modifications to this equipment not expressly approved by the manufacturer could void the user’s authority to operate this equipment. Note: This equipment has been tested and found to comply with the limits for a Class B digital device, pursuant to Part 15 of the FCC Rules.
-
Page 47: Sharp Corporation
SHARP ELECTRONICS CORPORATION Sharp Plaza, Mahwah, New Jersey 07430-2135. SHARP CORPORATION © 1995 SHARP CORPORATION PRINTED IN JAPAN TINSE0067QSZZw...