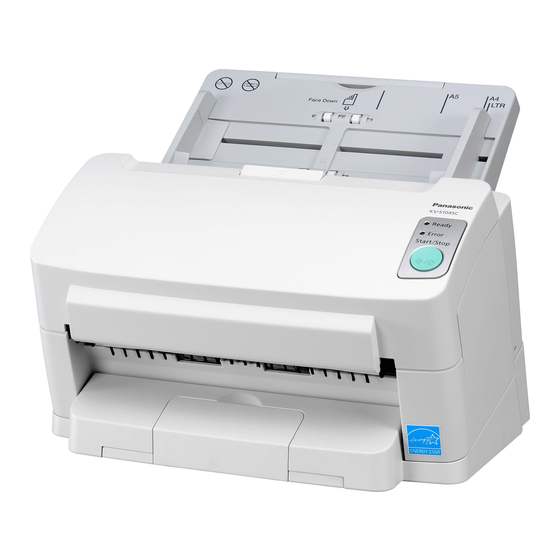
Panasonic KV-S1045C Operating Manual
High speed color scanner
Hide thumbs
Also See for KV-S1045C:
- Installation manual (20 pages) ,
- Specifications (2 pages) ,
- Manual (14 pages)
Table of Contents
Advertisement
Operating Manual
High Speed Color Scanner
KV-S1045C
Model No.
These instructions contain information on operating the scanner. Before reading these instructions, please read
the installation manual enclosed with this unit.
Please carefully read these instructions and the enclosed installation manual. Keep all documentation in a safe
place for future reference.
Advertisement
Table of Contents

Related Manuals for Panasonic KV-S1045C


Summary of Contents for Panasonic KV-S1045C
- Page 1 KV-S1045C Model No. These instructions contain information on operating the scanner. Before reading these instructions, please read the installation manual enclosed with this unit. Please carefully read these instructions and the enclosed installation manual. Keep all documentation in a safe...
-
Page 2: About The Documentation
Introduction Introduction Thank you for purchasing a Panasonic High Speed Color Scanner. About the documentation The scanner documentation consists of 2 manuals: the Installation Manual and the Operating Manual. In addition, 3 software reference manuals are included. Installation Manual (printed documentation) -
Page 3: System Requirements
Due to the slower speed of USB 1.1, it is recommended to use a USB 2.0 interface. • If you connect the scanner to a USB hub, it is not guaranteed to work. ® Partner, Panasonic has determined that this product meets... - Page 4 This device is not intended for use in the direct field of view at visual display workplaces. To avoid incommoding reflexions at visual display workplaces this device must not be placed in the direct field of view. Operating Manual Panasonic KV-S1045C Panasonic Corporation of North America One Panasonic Way Secaucus, NJ 07094 U.S.A. Telephone No.: 1-800-726-2797...
-
Page 5: Table Of Contents
Safety Information (For United Kingdom only) ...8 Precautions ...9 Location of Controls ...11 Main Unit ...11 Operation ...13 Turning on the Scanner Power ...13 Starting the Scanner Applications Automatically ...14 Setting the event ...14 Preparing Documents ...16 Acceptable Documents ...16 Acceptable cards ...16... -
Page 6: Before You Start
Before You Start For Your Safety To prevent severe injury and loss of life, read this section carefully before using the unit to ensure proper and safe operation of your unit. • This section explains the graphic symbols used in this manual. WARNING CAUTION This symbol is used to alert... -
Page 7: Roller Cleaning Paper
Stop operation immediately if the unit emits smoke, excessive heat, abnormal smell, or unusual noise. These conditions can cause fire or electric shock. Immediately turn the unit off, and unplug the power cord, and contact your dealer for service. When disconnecting the unit, grasp the plug instead of the cord. -
Page 8: Safety Information (For United Kingdom Only)
Before You Start Operating Safeguards If the unit falls down or gets damaged, turn the unit off, and unplug the power cord. Otherwise, it may cause fire or electric shock. Do not place any liquids or heavy items on the unit. Accidental spillage of liquid into the unit may cause severe damage. -
Page 9: Precautions
• For details about the roller cleaning paper, please refer to the Material Safety Data Sheet (MSDS). Please ask your Panasonic sales company about obtaining the Material Safety Data Sheet. KEEP AWAY FROM FIRE. Others •... - Page 10 • Make sure you have the same number of pages for important documents both before and after scanning, and take care not to leave any pages in the scanner. • Periodically back up important data. • When having your computer or hard disk serviced, or when disposing of your computer or hard disk, completely erase any stored image data.
-
Page 11: Location Of Controls
During scanning, pushing this key stops scanning. Security slot (for security cable) LED (Red) Shows the scanner’s status. For details, see "About LED" (page 13). LED (Green) Shows the scanner’s status. For details, see "About LED" (page 13). Feed tray Feed extension tray For details on "Manual Feed Mode", refer to the RTIV Reference Manual or PIE Reference Manual. - Page 12 Location of Controls Rear Mixed batch card guide Power connector Power switch AC adaptor Power cord Plugs may vary in shape depending on country/area. USB cable USB connector Operating Manual...
-
Page 13: Operation
• The LED (Green) will blink for about 30 seconds, and then it will become steady. About LED The status of the scanner can be established by the condition of the two LED indicators shown in the table below: Ready... -
Page 14: Starting The Scanner Applications Automatically
Operation Starting the Scanner Applications Automatically The scanner application can be configured to start automatically when pressing the Start / Stop button, and/ or placing documents on the feed tray. To accomplish this, follow the steps below. Setting the event Click [Start], and then click [Control Panel]. - Page 15 Applications" list. After an application has been selected, it starts. If only one application is selected, that application will be launched automatically. In Windows 2000, the "Event on device: KV-S1045C" dialog box will display instead of the "Choose Application" dialog box.
-
Page 16: Preparing Documents
Operation Preparing Documents Acceptable Documents The acceptable documents for this scanner are as follows. Document size: 48–216 mm (1.9–8.5 in.) 70–2540 mm (2.8–100 in.) Acceptable cards ISO format card: Size: 85.6 x 54 mm (3.4 x 2.1 in.) Thickness: 0.76 mm (0.03 in.) Embossed card is also acceptable. -
Page 17: Unacceptable Documents
Unacceptable Documents The following types of documents may not scan properly: • Curled, wrinkled or folded documents Documents must also meet the following conditions Curl Folding • Carbon paper • Thick or irregular documents such as envelopes • Perforated or punched paper •... -
Page 18: Notes About Documents For Scanning
Change the scanning resolution. Notes about double feed detection • This scanner is equipped with an ultrasonic sensor to detect double feeding. The width of documents that can be detected is A5 or larger (148 mm (5.8 in.)). Operating Manual... -
Page 19: Scanning Documents
Scanning Documents Notice • Make sure to remove paper clips and staples from documents before scanning. Failing to do so can damage the unit, document, or both. • Curled documents may cause a paper jam or damaging the document, therefore, set the document flat before scanning. - Page 20 Operation Adjust the document guides (A) slightly larger than the actual size of the documents. Carefully align the documents. • The documents feed better when the leading edges are aligned slantwise as shown in the illustration. Operating Manual...
- Page 21 Adjust the document guides (A) to the size of the documents to be scanned. Open your scanning application The software RTIV and QuickScan Pro demo, included with the scanner, can be used for scanning the documents. and scan the documents.
-
Page 22: Care And Maintenance
Care and Maintenance Clearing Paper Jams If a paper jam occurs, the message "A paper jam has occurred" and an error code (Uxx) is displayed in the User Utility application. Remove the jammed sheet according to the following instructions. CAUTION •... - Page 23 Remove the jammed document. • If the document is jammed in the feed tray area, pull it backwards as shown in the illustration. • If the document is jammed in the exit area, pull it forward as shown in the illustration. Care and Maintenance Operating Manual...
- Page 24 Care and Maintenance Close the ADF door. • Push both sides of the ADF door down slowly until it clicks into place. Operating Manual...
-
Page 25: Mixed Batch Card Guide
Mixed Batch Card Guide No adjustment to the document guide is required when using the mixed batch card guide. The mixed batch card guide prevents a card from skewing when scanning paper documents and a card simultaneously. Installing the mixed batch card guide Install the mixed batch card guide as shown in the following illustration. -
Page 26: Using Control Sheets
Care and Maintenance Using Control Sheets By using control sheets, you can change the scanning conditions in the middle of scanning. Placing a control sheet in the middle of a document lets you change the scanning conditions for all pages scanned after the control sheet. -
Page 27: About Printing Control Sheets
If the program does not start automatically, from [My Computer] ([Computer] in Windows Vista), select the CD/DVD drive, and then double-click "CDRun.exe". Select your scanner. Select [Control Sheet] from the "Manuals" list on the right side of the screen. Print the control sheets at the same size as your document. -
Page 28: Cleaning The Scanner
Do not use thinner, benzine, or cleaners containing abrasives or surfactants, for cleaning the outside of the scanner. • Clean the scanner at least once a month. Turn OFF the scanner power. Clean the cover with a soft cloth. Operating Manual... -
Page 29: Inside Of The Scanner
Inside of the Scanner • Clean the scanner at least once a week or when 2,000 sheets have been scanned, whichever comes first. • Clean the rollers and sensors if paper jamming or double feeding occurs frequently. • If double feed detection does not function properly, clean the double feed detectors. -
Page 30: Cleaning The Rollers
The scanning glasses area may be very hot. When the scanning glass is hot, work after waiting to get cold without touching around it. Turn OFF the scanner power. Press the door open button (A), and open the ADF door (B). - Page 31 Use the roller cleaning paper (KV-SS03) to remove the dirt from the surface of all rollers. • When wiping off dirt from the roller surface, hold the roller to prevent it from rotating. Wipe the roller from one end to the other in the direction indicated by the arrow, all the way around, as shown in the illustration.
- Page 32 Care and Maintenance Use the roller cleaning paper to clean the surface of the double feed prevention roller. • Wipe the roller from one end to the other (in the direction of the arrow) all the way around them, as shown in the illustration.
- Page 33 Push both sides of the ADF door down slowly until it clicks into place. Reset the roller cleaning counter in User Utility to 0. • Turn ON the scanner power. • Start User Utility, and in the window, click the [Clear Counter] button for "After Clean Roller" to reset to counter to 0.
-
Page 34: Cleaning The Scanning Glass, Reference Area, And Double Feed Detectors
The scanning glasses area may be very hot. When the scanning glass is hot, work after waiting to get cold without touching around it. Turn OFF the scanner power. Press the door open button (A), and open the ADF door (B). - Page 35 Remove dust on the double feed detectors (A) with a cotton swab. Close the ADF door. • Push both sides of the ADF door down slowly until it clicks into place. Care and Maintenance Operating Manual...
-
Page 36: Replacement Parts
(KV-SS035)", and replace each roller periodically. The usable life of each roller is as follows. • Paper feed roller / Double feed prevention roller: 100,000 sheets The scanner counter can be confirmed by using the User Utility. Operating Manual Part Name Part Number KV-SS035... -
Page 37: Replacing Parts
When the scanning glass is hot, work after waiting to get cold without touching around it. Replacing the Rollers Turn OFF the scanner power. Press the door open button (A), and open the ADF door (B). Open the double feed prevention roller cover (green) (A). - Page 38 Replacement Parts Remove the double feed prevention roller (A). Take out the new double feed prevention roller in the optional "Roller exchange kit (KV-SS035)". Install the new double feed prevention roller into the metal holder with the longer groove facing to the right-side (rear view).
- Page 39 Close the double feed prevention roller cover (green) (A) firmly. Notice • Be sure to close the double feed prevention roller cover until it clicks into place. Open the paper feed roller cover (green) (A). Replacement Parts Operating Manual...
- Page 40 Replacement Parts Remove the paper feed roller (A). Take out the new paper feed roller in the optional "Roller exchange kit (KV-SS035)". Install the new paper feed roller with the gear on the left side. Operating Manual...
- Page 41 Push both sides of the ADF door down slowly until it clicks into place. Reset the roller replacing counter in User Utility to 0. • Turn ON the scanner power. • Start User Utility, and in the window, click the [Clear Counter] button for "After Replace Roller" to reset the counter to 0.
-
Page 42: Appendix
Troubleshooting If a problem occurs while the scanner is being used, check the following items and check the scanner status with User Utility. If the unit still malfunctions, turn it OFF, unplug the power cord from the AC outlet, and call for service. - Page 43 Symptom Double feeding occurs frequently or the scanner stops loading while scanning. Paper jams occur frequently. Scanned image is skewed. The scanned document is blank. Vertical lines appear on the scanned document. The scanning density is uneven. Possible Cause The rollers are dirty.
- Page 44 Appendix Symptom The color of the scanned document is extremely different from the original document. Dark spots or noise appear on the scanned documents. If you still experience problems after following these suggestions, please contact our Technical Support Department at 1-800-726-2797 for further assistance (U.S.A. only). Operating Manual Possible Cause The settings of the computer monitor...
-
Page 45: Repacking Instructions
Remove the feed tray from the scanner. • Lift up the feed tray to unlock, and then pull the left (A) and right (B) sides out of the scanner in that order. Put the mixed batch card guide into the accessory box. - Page 46 Appendix Pack the scanner. Installation Manual AC adaptor USB cable Drivers & Utilities / Manuals CD-ROM Feed tray Power cord Mixed batch card guide Operating Manual...
-
Page 47: Specifications
48 ´ 70 mm (1.9 ´ 2.8 in.) to 216 ´ 2540 mm (8.5 ´ 100 in.) Size 0.05–0.2 mm (2.0–7.9 mils) Thickness Note: 1 mil = 0.001 in. 40–209 g/m² (11–55 lb.) Weight 85.6 ´ 54 mm (3.4 ´ 2.1 in.) Size Thickness 0.76 mm (0.03 in.) Appendix KV-S1045C Operating Manual... -
Page 48: Operating Environment
Although you can spicy other paper sizes, scanning quality cannot be guaranteed. The life of the scanner and the rollers is the estimated value when using the A4 or Letter sized standard paper [64 g/m² or 80 g/m² (20 lb.)]. It may vary depending on the kinds of paper, usage and cleaning intervals. -
Page 49: Index
Index AC adaptor 12, 46 ADF door Card Cleaning Cleaning outside of the scanner Cleaning the rollers Scanning glass, reference area, and Double feed detectors Cleaning the scanner Compression Computer Control sheets Document guides Documents Acceptable documents Scanning documents Unacceptable documents Door open button Drivers &... - Page 50 Index Weight Operating Manual...
- Page 51 Web Site: http://www.panasonic.net/ © Panasonic System Networks Co., Ltd. 2009 PJQXC0285YA KK0409YR1010...