Table of Contents
Advertisement
Quick Links
.
Head Mounted Display
HMD-VS1W
HMD-VS1DW
Thank you for purchasing this JVC product.
Please read this "INSTRUCTIONS" prior to use to ensure proper use of this unit.
Be sure to read the (pages P. 4 to P. 8) especially for safe use of this unit.
For Customer use :
Enter below the serial No. which is located
on the body.
Retain this information for future reference.
Model No.
HMD-VS1W, HMD-VS1DW
Serial No.
.
INSTRUCTIONS
B5A-3763-30
Advertisement
Table of Contents

Related Manuals for JVC HMD-VS1DW


Summary of Contents for JVC HMD-VS1DW
- Page 1 HMD-VS1W HMD-VS1DW Thank you for purchasing this JVC product. Please read this “INSTRUCTIONS” prior to use to ensure proper use of this unit. Be sure to read the (pages P. 4 to P. 8) especially for safe use of this unit.
-
Page 2: Table Of Contents
Servicing of the HMD Unit ........27 Replacement of Consumable Parts ....... 28 Forehead and Face Pads ........28 Rear Pad ............28 Nose Pad ............29 Adjustment Band ..........29 Protect Filter (HMD-VS1DW) ......30 Disinfection of Product .......... 32 Long-term Storage ..........33... -
Page 3: Accessories
Accessories Check the Accessories AC adapter ................1 piece Power cord (for use in the U.S.) ..........1 piece Power cord (for use in Europe) ..........1 piece This product also comes with a safety precautions guide. Be sure to read the “Safety Precautions” before using this equipment. -
Page 4: Safety Precautions
Safety Precautions These are general Important Safety Instructions and certain items may not apply to all appliances. Important Safety Instructions Read these instructions. Keep these instructions. Heed all warnings. Follow all instructions. Do not use this apparatus near water. Clean only with dry cloth. Do not block any ventilation openings. - Page 5 Ces informations sont des CONSIGNES DE SÉCURITÉ IMPORTANTES et certains points peuvent ne pas s’appliquer à tous les appareils. CONSIGNES DE SÉCURITÉ IMPORTANTES Lire ces instructions. Conserver ces instructions. Tenir compte de tous les avertissements. Respecter toutes les instructions. Ne pas utiliser cet appareil à proximité de l’eau. Ne nettoyer qu’avec un chiffon sec.
- Page 6 CAUTION ATTENTION RISK OF ELECTRIC RISQUE SHOCK D’ELECTROCUTION DO NOT OPEN NE PAS OUVRIR CAUTION: ATTENTION: TO REDUCE THE RISK OF ELECTRIC POUR EVITER TOUT RISQUE SHOCK. D’ELECTROCUTION NE PAS OUVRIR LE BOITER. AUCUNE PIECE INTERIEURE N’EST DO NOT REMOVE COVER (OR BACK). A REGLER PAR L’UTILISATEUR.
- Page 7 CAUTION: Attention: The mains plug shall remain readily La prise secteur doit être opérationnelle. operable. Débranchez immédiatement la fiche Remove the mains plug immediately if secteur si le produit ne fonctionne pas the product functions abnormally. normalement. WARNING: TO PREVENT FIRE OR AVERTISSEMENT : POUR EVITER SHOCK HAZARD, DO NOT LES RISQUES D’INCENDIE OU...
-
Page 8: Warning
Warning As the power plug (main plug) is used to disconnect the unit from the wall outlet (mains), connect the unit to an easily accessible AC outlet. Should you notice an abnormality in the unit, disconnect the power plug (main plug) from the AC outlet (mains) immediately. - Page 9 Changes or modifications not Des changements ou modifications approved by JVC could void the non approuvés par JVC peuvent user’s authority to operate the annuler le droit de l’utilisateur de faire equipment. This equipment has been fonctionner l’appareil.
- Page 10 JVCKENWOOD Corporation is: électromagnétique et à la sécurité JVCKENWOOD Deutschland GmbH électrique. Konrad-Adenauer-Allee 1-11 Représentant européen de la société 61118 Bad Vilbel JVC KENWOOD Corporation: GERMANY JVCKENWOOD Deutschland GmbH Konrad-Adenauer-Allee 1-11, 61118 Bad Vilbel, Sehr geehrter Kunde, sehr geehrte ALLEMAGNE Kundin, dieses Gerät stimmt mit den...
- Page 11 ENGLISH Information for Users on Disposal of Old Equipment and Batteries [European Union only] These symbols indicate that equipment with these symbols should not be disposed of as general household waste. If you want to dispose of the product or battery, please consider the collection systems or facilities for appropriate recycling.
-
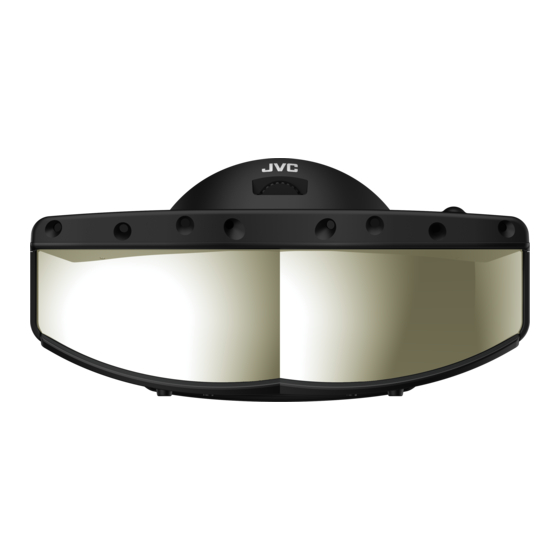
Page 12: Name Of Parts
Name of Parts Front A Half-mirror B Sensor Cover C Cable D Smoke Panel E Rear Pad... -
Page 13: Rear
Rear F Sensor Unit G Forehead Pad H Face Pad I Nose Pad J Rear Cover K Side Belt L Adjustment Band M Cable Hook N Belt Adjustment Dial O Power Switch P Audio Output Terminal Q Forehead Adjustment Dial R Firmware Update Button... -
Page 14: Putting On
Putting on Precautions during Use This unit is a precision device. Please refrain from using it at locations that are subject to humidity, dust or oily smoke. Otherwise, it may cause fire or malfunction. Putting on the Head-mounted Display Loosen by turning the belt adjustment dial and forehead adjustment dial in the anti- clockwise direction. - Page 15 Lower the rear cover until the side belt is level as illustrated in the diagram. Turn to adjust the belt adjustment and forehead adjustment dials until the headset fits snugly. Adjust the hook-and-loop fastener of the adjustment band until it fits snugly on the top of the head.
- Page 16 MEMO If you are wearing glasses, open the face pad slightly wider as illustrated in the diagram for greater comfort when wearing the unit. Although the design of this product has taken the use of glasses into consideration, it does not guarantee compatibility with all types of glasses.
-
Page 17: Connection
Connection The connection procedures differ according to the device used. For details, please refer to the instruction manual of the device to be connected. Some cables cannot be connected to this unit due to the size of their connector cover. Connecting with a PC PC, etc. -
Page 18: Initial Configuration
Initial Configuration Download and install the software programs The following software programs are needed for the use of this unit. NVIDIA GeForce driver Download and install NVIDIA GeForce Game Ready Driver 461.72 or a later version from the official NVIDIA website. - Page 19 Installing SteamVR Base Station 2.0 As illustrated in the diagram below, install two SteamVR Base Station 2.0 units at a height of 2 m and a distance of 2 m from each other at the two corners in front of the space for using the system. Use this unit at a seated position (height of approx.
-
Page 20: Viewing Videos
Viewing Videos Initialization of the settings is needed before using this unit. Before using this unit, refer to “Initial Configuration” (P. 18) to initialize the settings. Turn on the power Turn on the power switch of this unit. Launch the SteamVR app Room setup is needed during the first startup. - Page 21 Put on this unit Refer to “Putting on” (P. 14) to put on this unit. Turn off the power After using, exit the SteamVR app before turning off the power switch. *1 Do not power on or off by disconnecting the AC adapter. *2 To power on again after turning off the power, allow a time interval of at least 5 seconds before doing so.
-
Page 22: About The Software
About the Software The IPD adjustment software and HMD configuration software will also be installed together with the HMD-VS1W driver. (Refer to P. 18 “Initial Settings”) Before using the software, make sure to refer to “Initial Settings” (P. 18) and initialize the settings. IPD Adjustment Software Below are the functions for adjusting the interpupillary distance (IPD). -
Page 23: Hmd Configuration Software
HMD Configuration Software Use the HMD configuration software after connecting this unit to a PC and turning on the power. Brightness Below are the functions for configuring the brightness. A Brightness/System Tab For switching between Brightness and System. B Brightness Settings Display/Preset Switching Displays the brightness settings of the left and right panels on the head-mounted display. - Page 24 Predetermined settings Below are the functions for configuring the name of the preset brightness. G Preset Name Settings For configuring the name for each of the presets from 1 to 4. The brightness configured for each of the presets is displayed in the respective fields. Pressing Set reflects the configured preset name.
- Page 25 VR applications. Turn on the Direct Mode when using SteamVR. When using other VR apps, follow the instruction manual to configure the Direct Mode accordingly. To display Windows images on the HMD-VS1W/HMD-VS1DW, turn off the Direct Mode. K Information Displays information on the head-mounted display.
- Page 26 Information N version Displays the version of this software. O Serial number Displays the serial number of this unit. P No. of startups Displays the number of times the power of this unit has been turned on. Q Illumination time Displays the panel display time of this unit.
-
Page 27: Servicing Of The Hmd Unit
Servicing of the HMD Unit Always keep the product clean. Because lenses such as half mirrors are coated, rubbing with a hard object may cause scratches. If the product becomes dirty, follow the procedure below. 1) Blow off the dust on the surface Use a manual pump-type air blower or a soft-bristle brush for lenses to remove dust on the surface. -
Page 28: Replacement Of Consumable Parts
Replacement of Consumable Parts Forehead and Face Pads The forehead and face pads can be attached to this unit using a fastener. Lift the pad carefully at the edge of the soft portion to detach it from the unit. To attach a new forehead or face pad, press gently while ensuring that the fastener on the pad coincides with the fastener on the unit. -
Page 29: Nose Pad
Nose Pad The nose pad can be attached to this unit using a hook. Lift the pad carefully at the edge of the soft portion to detach it from the unit. To attach a new nose pad, hook the protruded part of the nose pad to the hole on the unit. Adjustment Band To replace the adjustable band, do so after removing the forehead pad. -
Page 30: Protect Filter (Hmd-Vs1Dw)
After attaching the new adjustment band, press the forehead pad and turn the forehead adjustment dial clockwise to attach it. Protect Filter (HMD-VS1DW) Removing the Protect Filter Push the edge of the Protect Filter in the direction indicated by the arrow. - Page 31 Attaching the Protect Filter Align the indentation on the Protect Filter with the protrusion on the main unit. Bend the Protect Filter and insert both edges of it into the guide of the main unit. Guide Guide Guide Guide Align the indentation and protrusion.
-
Page 32: Disinfection Of Product
Disinfection of Product “Alcohol (ethanol) disinfectants” and “alcohol-type (ethanol) wet tissues” available commercially can be used if the following precautions are complied with. Do not wet the openings (external connection terminals, vents, etc.), gaps inside this unit and the interior face of the rear cover with disinfectants. -
Page 33: Long-Term Storage
Long-term Storage For prolonged storage of the unit at a place with an indoor temperature of 35°C and humidity of 60% or higher, it is recommended that you keep it in an airtight bag together with desiccants. Replace the desiccants once a year. The desiccants will need to be replaced at shorter intervals if the storage environment is extremely humid. -
Page 34: Troubleshooting
Turn on the Direct Mode when using SteamVR. When P. 25 configured? using other VR apps, follow the instruction manual to configure the Direct Mode accordingly. To display Windows images on the HMD-VS1W/HMD-VS1DW, turn off the Direct Mode. Video image is dark or blurry Reference Check... - Page 35 No sound is heard Reference Check Action Page Are the headphones correctly connected? Connect the headphones or earphones correctly to the P. 20 audio output terminal. Are the correct signals being output from the Configure the devices (PC, etc.) correctly. P.
-
Page 36: Use Of Commands
Use of Commands It is possible to control this unit by connecting it to a PC using a USB cable. Required environment Windows10 Terminal software Connect this equipment and PC with USB cable For the first connection, the driver will be installed automatically. (For Windows10) Make sure you have “USB Serial Device (COMx)”... -
Page 37: List Of Commands
Over 60,000 hours will be displayed as 60000h +. Displays the number of times the power is turned on. count It is displayed as 5000000+ after 5 million times. version ver.0.0.0 Displays the HMD-VS1W/HMD-VS1DW firmware version. name HMD-VS1W/HMD-VS1DW Displays the product name. serialnumber 00000000 Shows the serial number. -
Page 38: Specifications
Specifications Product Name Head Mounted Display Model Name HMD-VS1W, HMD-VS1DW Display Device/Resolution 5.5", 2560 × 1440 × 2 Refresh Rate 60 Hz / 72 Hz Color Gamut sRGB 100% (area ratio) Optical System Half-mirror + Combiner Angle of View H: 120° V: 45° (V: 72° with open view) -
Page 39: About Trademarks And Copyrights
About Trademarks and Copyrights Intel and Intel Core are trademarks of Intel Corporation in the United States and/or other countries. NVIDIA and GeForce RTX are trademarks or registered trademarks of NVIDIA Corporation. HTC Vive is a trademark or registered trademark of HTC Corporation. Steam and SteamVR are trademarks of Valve Corporation in the United States and/or other countries. -
Page 40: Index
Index A AC adapter..............3 N No. of startups............26 Accessories...............3 Nose Pad..............13 Adjust the volume level..........20 NVIDIA GeForce driver..........18 Adjustment Band............. 13 O Offset Value +/- Display...........22 Airtight Bag..............33 P Power Cord............... 3 Audio Output Terminal..........13 Power Switch............13 B Belt Adjustment Dial..........13 Predetermined settings........23, 24 Brightness............... - Page 41 1222KSH-SW-XX © 2021...