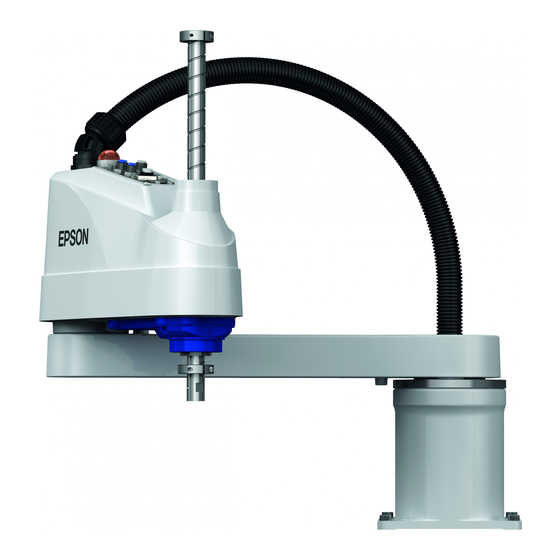
Epson LS-B Series Manual
Industrial robot: scara robot
Hide thumbs
Also See for LS-B Series:
- Safety and installation (126 pages) ,
- Maintenance manual (364 pages)

Related Manuals for Epson LS-B Series


Summary of Contents for Epson LS-B Series
- Page 1 Industrial Robot: SCARA ROBOT LS-B series MANUAL Rev.5 ENM226R5382F Original instructions...
- Page 3 Industrial Robot: SCARA ROBOT LS-B series Manual Rev.5 Seiko Epson Corporation 2021-2022 LS-B series Rev.5...
- Page 4 Please notify us if you should find any errors in this manual or if you have any comments regarding its contents. MANUFACTURER CONTACT INFORMATION Contact information is described in “SUPPLIERS” in the first pages of the following manual: Robot System Safety Manual Read this manual first LS-B series Rev.5...
- Page 5 Please separate used batteries from other waste streams to ensure that it can be recycled in an environmentally sound manner. For more details on available collection facilities please contact your local government office or the retailer where you purchased this product. LS-B series Rev.5...
- Page 6 Controller : RC90-B Software : LS6-B : EPSON RC+ 7.0 Ver.7.4.3 or later LS6-B602S-V1* : EPSON RC+ 7.0 Ver.7.5.0 R3 or later * LS6-B602S-V1 is high speed model manipulator of LS6-B602S. This manual describes information on LS6-B602S-V1 which is different from LS6-B602S.
- Page 7 Manipulator. Unless special instruction is provided, the specifications of Standard-model and Cleanroom-model are the same. Pictures in this Manual Pictures and illustrations of the manipulator in this manual may differ from using manipulator depending on the shipment date and the specifications. LS-B series Rev.5...
- Page 8 The manual is primarily intended for people who design robot systems or do programming. RC90 series Maintenance Manual (PDF) LS-B series Maintenance Manual (PDF) This manual describes the details of maintenance etc. The manual is intended for people who perform maintenance.
- Page 9 EPSON RC+ 7.0 User’s Guide (PDF Manual) This manual describes general information about program development software. EPSON RC+ 7.0 SPEL+ Language Reference (PDF Manual) This manual describes the robot programming language “SPEL+”. Other Manual (PDF Manual) Manuals for each option are available.
- Page 10 LS-B series Rev.5...
-
Page 11: Table Of Contents
4.1 Attaching an End Effector............... 39 4.2 Attaching Cameras and Valves .............. 41 4.3 Weight and Inertia Settings ..............42 4.3.1 Weight Setting ................42 4.3.2 Inertia Setting ................46 4.4 Precautions for Auto Acceleration/Deceleration of Joint #3 ....51 LS-B series Rev.5... - Page 12 5.2.1 Setting the Mechanical Stops of Joints #1 and #2 ...... 58 5.2.2 Setting the Mechanical Stop of Joint #3 ........60 5.3 Setting the Cartesian (Rectangular) Range in the XY Coordinate System of the Manipulator ................... 61 5.4 Standard Motion Range ................62 LS-B series Rev.5...
- Page 13 4.1 Attaching an End Effector............... 99 4.2 Attaching Cameras and Valves ............101 4.3 Weight and Inertia Settings ..............102 4.3.1 Weight Setting ................102 4.3.2 Inertia Setting ................104 4.4 Precautions for Auto Acceleration/Deceleration of Joint #3 ....109 LS-B series Rev.5...
- Page 14 5.2.1 Setting the Mechanical Stops of Joints #1 and #2 ....114 5.2.2 Setting the Mechanical Stop of Joint #3 ........116 5.3 Setting the Cartesian (Rectangular) Range in the XY Coordinate System of the Manipulator ................. 118 5.4 Standard Motion Range ................ 119 LS-B series Rev.5...
- Page 15 4.1 Attaching an End Effector..............157 4.2 Attaching Cameras and Valves ............158 4.3 Weight and Inertia Settings ..............159 4.3.1 Weight Setting ................159 4.3.2 Inertia Setting ................162 4.4 Precautions for Auto Acceleration/Deceleration of Joint #3 ....167 LS-B series Rev.5 xiii...
- Page 16 5.2.2 Setting the Mechanical Stop of Joint #3 ........174 5.3 Setting the Cartesian (Rectangular) Range in the XY Coordinate System of the Manipulator (for Joints #1 and #2) ..........176 5.4 Standard Motion Range ................ 177 LS-B series Rev.5...
- Page 17 3. Regular Inspection for LS20-B Manipulator 3.1 Inspection ..................... 193 3.1.1 Schedule for Inspection ............193 3.1.2 Inspection Point ................ 194 3.2 Overhaul (Parts Replacement) ............. 195 3.3 Greasing ....................195 3.4 Tightening Hexagon Socket Head Bolts ..........198 LS-B series Rev.5...
- Page 18 ......................223 LS6-B Stopping time and Stopping distance When Safeguard Is Opened ......................225 LS10-B Stopping time and Stopping distance When Safeguard Is Opened ......................229 LS20-B Stopping time and Stopping distance When Safeguard Is Opened ......................232 LS-B series Rev.5...
-
Page 19: Ls3-B Ls6-B Manipulator
LS3-B LS6-B Manipulator This volume contains information for setup and operation of the Manipulators. Please read this volume thoroughly before setting up and operating the Manipulators. -
Page 21: Safety
WARNING This symbol indicates that a danger of possible harm to people or physical damage to equipment and facilities exists if the associated instructions are not followed properly. CAUTION LS-B series Rev.5... -
Page 22: Design And Installation Safety
To ensure safety, a safeguard must be installed for the robot system. For details on the safeguard, refer to the Installation and Design Precautions in the Safety chapter of the EPSON RC+ User’s Guide. The following items are safety precautions for design personnel: ■... -
Page 23: Strength Of The Ball Screw Spline
[Allowable bending moment] LS3-B:M=13,000 N·mm LS6-B:M=27,000 N·mm [Moment] M=F·L 100·100 10,000 N·mm = = Example: End of the If 100 N (10.2kgf) load is applied spline nut at 100 mm from the end of the spline nut LS-B series Rev.5... -
Page 24: Operation Safety
ON. Connecting or disconnecting the motor connectors with the power ON is extremely hazardous and may result in serious bodily injury as the Manipulator may move abnormally, and also may result in electric shock and/or malfunction of the robot system. LS-B series Rev.5... - Page 25 (Speed: approx. 5 to 20%) depending on combination of Arm orientation and end effector load. Vibration arises from natural vibration frequency of the Arm and can be controlled by following measures. Changing Manipulator speed Changing the teach points Changing the end effector load LS-B series Rev.5...
-
Page 26: Emergency Stop
Whether or not the reduction gear is damaged Whether or not the joints are in their proper positions If there is a position gap, perform calibration by referring to the LS-B series Maintenance Manual – LS3-B LS6-B Manipulator – 13. Calibration. -
Page 27: Safeguard
Hand weight WEIGHT Setting ACCEL Setting Workpiece weight SPEED Setting Posture etc. For stopping time and stopping distance of the Manipulator, refer to “Appendix C: Stopping Time and Stopping Distance When the Safeguard is Opened”. LS-B series Rev.5... -
Page 28: Emergency Movement Without Drive Power
Joints #3 and #4 are released simultaneously. Be careful of the shaft falling and rotating while the brake release switch is pressed because the shaft may be lowered by the weight of an end effector. LS-B series Rev.5... -
Page 29: Accels Setting For Cp Motions
Z-axis height 0 (Origin position) If the Manipulator is operated in CP motion with the wrong set values, make sure to check the following. - Whether or not the ball screw spline shaft is deformed or bent LS-B series Rev.5... -
Page 30: Warning Labels
Location Signature label NOTE Indicates Product name, Model name, Manipulator’s serial No., Local codes information, Specification, Manufacturer, Importer, Date of manufacture, Country of manufacture, etc. For details, refer to the attached label. LS-B series Rev.5... - Page 31 LS3-B LS6-B Manipulator 1. Safety LS3-B LS6-B LS-B series Rev.5...
-
Page 32: Response For Emergency Or Malfunction
Shaft Joint #4 (Figure: LS6-B602S) (Rotating) ■ While pressing the break release switch, not only Joint #3 but also Joint #4 may move due to its own weight. Be careful of the shaft falling or rotating. CAUTION LS-B series Rev.5... -
Page 33: Specifications
: 3 kg : 6 kg * High speed model for standard environment only. The information on LS3-B401S-V1 describes only the parts that differ from LS3-B401S. The information on LS6-B602S-V1 describes only the parts that differ from LS6-B602S. LS-B series Rev.5... - Page 34 LS3-B401C Standard 200 mm LS6-B502S 500 mm Cleanroom 170 mm LS6-B502C Standard 200 mm LS6-B602S 6 kg 600 mm Standard 200 mm LS6-B602S-V1 Cleanroom 170 mm LS6-B602C Standard 200 mm LS6-B702S 700 mm Cleanroom 170 mm LS6-B702C LS-B series Rev.5...
-
Page 35: Part Names And Outer Dimensions
- While the LED lamp is ON, current is being applied to the manipulator. Performing any work with the power ON is extremely hazardous and it may result in electric shock and/or improper function of the robot system. Make sure to turn OFF the controller power before the maintenance work LS-B series Rev.5... - Page 36 LS3-B LS6-B Manipulator 2. Specifications Standard Model (LS3-B401S) LS-B series Rev.5...
- Page 37 LS3-B LS6-B Manipulator 2. Specifications Cleanroom Model (LS3-B401C) The following figures show the additional parts and specifications for Cleanroom-model when compared with the Standard-model in appearance. Upper bellows Exhaust port Lower bellows LS-B series Rev.5...
- Page 38 LS3-B LS6-B Manipulator 2. Specifications Cleanroom Model (LS3-B401C) LS-B series Rev.5...
-
Page 39: Ls6-B
- While the LED lamp is ON, current is being applied to the manipulator. Performing any work with the power ON is extremely hazardous and it may result in electric shock and/or improper function of the robot system. Make sure to turn OFF the controller power before the maintenance work. LS-B series Rev.5... - Page 40 LS3-B LS6-B Manipulator 2. Specifications Standard Model (LS6-B*02S) LS6-B502S LS6-B602S LS6-B602S-V1 LS6-B702S LS-B series Rev.5...
- Page 41 LS3-B LS6-B Manipulator 2. Specifications Cleanroom Model (LS6-B*02C) The following figures show the additional parts and specifications for Cleanroom-model when compared with the Standard-model in appearance. Upper bellows Lower bellows Exhaust port LS-B series Rev.5...
- Page 42 LS3-B LS6-B Manipulator 2. Specifications Cleanroom Model (LS6-B*02C) LS6-B502C LS6-B602C LS6-B702C LS-B series Rev.5...
-
Page 43: Specifications
The custom specifications may require a different configuration procedure; check the custom specifications number (MT***) and contact the supplier of your region when necessary. The Manipulator model can be set from software. Refer to the chapter Robot Configuration in the EPSON RC+ User’s Guide. LS-B series Rev.5... -
Page 44: Environments And Installation
In such a case, it is recommended to warm up for about 10 minutes. LS-B series Rev.5... - Page 45 Prepare the earth leakage breaker that pertains the Controller you are using. WARNING For details, refer to the Controller manual. ■ When cleaning the Manipulator, do not rub it strongly with alcohol or benzene. It may lose luster on the coated face. CAUTION LS-B series Rev.5...
-
Page 46: Base Table
For environmental conditions regarding space when placing the Controller on the base table, refer to the Controller manual. ■ To ensure safety, a safeguard must be installed for the robot system. For details on the safeguard, refer to the EPSON RC+ User’s Guide. WARNING LS-B series Rev.5... -
Page 47: Mounting Dimensions
The minimum bend radius of the power cable is 90 mm. When installing the cable, be sure to maintain sufficient distance from obstacles. In addition, leave enough space for other cables so that they are not bent forcibly. Ensure distance to the safeguard from the maximum motion range is more than 100 mm. LS-B series Rev.5... -
Page 48: Unpacking And Transportation
■ Stabilize the Manipulator with your hands when hoisting it. ■ When transporting the Manipulator for a long distance, secure it to the delivery equipment directly so that the Manipulator never falls. If necessary, pack the Manipulator in the same style as it was delivered. LS-B series Rev.5... -
Page 49: Installation Procedure
: M4 ties removed in step (2). Remove the protection sheet for Bolt: M4 transportation which is attached to Wire tie the arm. NOTE Make sure to remove the wire tie for protection of mechanical stop. LS-B series Rev.5... -
Page 50: Cleanroom-Model
Wipe off the dust on the Manipulator with a little alcohol or distilled water on a lint- free cloth. Transport the Manipulator to the clean room. Refer to the installation procedure of each Manipulator model and install the Manipulator. Connect an exhaust tube to the exhaust port. LS-B series Rev.5... -
Page 51: Connecting The Cables
For the Manipulator of Cleanroom-model, use it with an exhaust system. For details, refer to Appendix A Specifications. Cable Connections Connect the power cable and the signal connector of the M/C cable to the Controller as shown below. Signal connector Power connector LS-B series Rev.5... -
Page 52: User Wires And Pneumatic Tubes
In LS3-B/LS6-B series, you can connect and disconnect the M/C cable to/from the manipulator easily. For details, refer to LS-B series Maintenance Manual LS3-B LS6-B Manipulator 4.3 Replacing M/C Cable. 3.7 User Wires and Pneumatic Tubes ■ Only authorized or certified personnel should be allowed to perform wiring. - Page 53 Fitting (blue) Detail view from B for ø4 mm pneumatic tube Exhaust port Fitting (blue) (Cleanroom-model only) for ø6 mm pneumatic tube RJ45 connector EtherNet Fitting (white) User connector for ø6 mm pneumatic tube (15-pin D-sub connector) LS-B series Rev.5...
-
Page 54: Relocation And Storage
Transport and store the Manipulator in the range of Temperature: −20 to +60°C, Humidity: 10 to 90% (no condensation). When condensation occurs on the Manipulator during transport or storage, turn ON the power only after the condensation dries. Do not shock or shake the Manipulator during transport. LS-B series Rev.5... -
Page 55: Relocation
Cover the arm with a sheet so that the arm will not be damaged. Refer to the following figure and fix the arm. Example of Arm Fixed Posture Bolt : M4 Bolt: M4 Wire tie (Figure: LS6-B) LS-B series Rev.5... - Page 56 Hold the bottom of Arm #1 by hand to unscrew the anchor bolts. Then, remove the Manipulator from the base table. LS3-B401* Center of gravity Center of gravity LS6-B502* Center of gravity Center of gravity LS6-B602* Center of gravity Center of gravity LS6-B702* Center of gravity Center of gravity LS-B series Rev.5...
-
Page 57: Setting Of End Effectors
Controller and move the joint up/down while pressing the brake release switch. Be careful of the shaft while the brake release switch is being pressed because the shaft may be lowered by the weight of the end effector. LS-B series Rev.5... - Page 58 Manipulator because of the outer diameter of the end effector, the size of the work piece, or the position of the arms. When designing your system layout, pay attention to the interference area of the end effector. LS-B series Rev.5...
-
Page 59: Attaching Cameras And Valves
Use M3 screw holes on the top for attaching Ethernet cables, and other equipment. Use M4 screw holes on the bottom for attaching cameras, valves, and other equipment. [Unit: mm] LS3-B Top view Bottom view LS6-B Top view Bottom view *: From base installation surface LS-B series Rev.5... -
Page 60: Weight And Inertia Settings
■ The total weight of the end effector and the workpiece must not exceed LS3-B: 3kg, LS6-B: 6 kg. The LS-B series Manipulators are not designed to work with loads exceeding LS3-B: 3kg, LS6-B: 6 kg. Always set the Weight parameters according to the load. - Page 61 Joint #2) with a load weight of “1 kg”. Shaft Weight of L 2 =275 camera L M =375 M=1kg Joint #2 W M =1×375 /275 =1.85 → 1.9 (round up) W+W M =1+1.9=2.9 W=1kg Enter “2.9” for the Weight Parameter. =275 mm =375 mm LS-B series Rev.5...
- Page 62 (kg) by Weight (%) LS6-B * The percentage in the graph is based on the speed at rated weight (2 kg) as 6 (kg) Weight setting End effector Automatic speed setting weight (kg) by Weight (%) LS-B series Rev.5...
- Page 63 Weight (%) LS6-B * The percentage in the graph is based on the acceleration/ deceleration at rated weight (2 kg) as 100%. 6 (kg) Weight setting End effector Automatic acceleration/deceleration setting weight (kg) by Weight (%) LS-B series Rev.5...
-
Page 64: Inertia Setting
Manipulator. Also, the life cycle of parts is shortened and positional gap due to belt tooth bumping occurs. The acceptable moment of inertia of load for a LS-B series Manipulator is LS3-B: Default rating: 0.005 kg·m Maximum: 0.05 kg·m LS6-B: Default rating: 0.01 kg·m... - Page 65 0.005 0.01 0.02 0.05 LS6-B ·m 0.02 0.04 0.06 0.08 0.10 0.12 (kg Moment of inertia setting Moment of inertia Automatic acceleration/deceleration setting of setting (kg·m Joint #4 by Inertia (moment of inertia) 0.01 0.02 0.08 0.12 LS-B series Rev.5...
- Page 66 Eccentric Quantity and the Inertia Setting ■ The eccentric quantity of load (weight of the end effector and workpiece) must be LS3-B: 100mm, LS6-B: 150 mm or less. The LS-B series Manipulators are not designed to work with eccentric quantity exceeding LS3-B: 100mm, LS6-B: 150 Always set the Weight parameters according to the load.
- Page 67 LS6-B * The percentage in the graph is based on the acceleration / deceleration at rated eccentricity (0 mm) as 100%. 150 (mm) Eccentricity setting Eccentric quantity Automatic acceleration/deceleration parameter (mm) setting by Inertia (eccentric quantity) (%) LS-B series Rev.5...
- Page 68 Calculate the total moment of inertia using the basic formulas. (a) Moment of inertia of a rectangular parallelepiped Rectangular parallelepiped’s center of gravity Rotation center + m × L (b) Moment of inertia of a cylinder Cylinder’s center of gravity Rotation center + m × L LS-B series Rev.5...
-
Page 69: Precautions For Auto Acceleration/Deceleration Of Joint #3
Joint #3 up and down. Adjust the position of Joint #3 for the Manipulator motion after considering the relation between the current position and the destination position. The upper limit of Joint #3 during horizontal motion using Jump command can be set by the LimZ command. LS-B series Rev.5... - Page 70 -100 -150 (mm) Shaft height NOTE When moving the Manipulator horizontally while the shaft is being lowered, it may cause over-shoot at the time of final positioning. Shaft height (mm) Acceleration/Deceleration −75 −120 −150 LS-B series Rev.5...
- Page 71 NOTE When moving the Manipulator horizontally while the shaft is being lowered, it may cause over-shoot at the time of final positioning. Shaft height (mm) Acceleration/Deceleration −70 −180 −200 LS-B series Rev.5...
-
Page 72: Motion Range
Manipulator does not move. The pulse range can be set on the [Range] panel shown by selecting [Tools]-[Robot EPSON Manager]. (You may also execute the Range command from the [Command Window].) LS-B series Rev.5... -
Page 73: Max. Pulse Range Of Joint #1
(+) and the clockwise pulse value is defined as the negative (-). 0 pulse − A − B A: Max. Motion Range B: Max. Pulse Range LS3-B ± 141° ± 320854 pulse LS6-B ± 150° ± 341334 pulse LS-B series Rev.5... -
Page 74: Max. Pulse Range Of Joint #3
(+) and the clockwise pulse value is defined as the negative (-). Counterclockwise (+value) Clockwise (-value) A: Max. Motion Range B: Max. Pulse Range LS3-B 0 ± 186778 pulse ± 360° LS6-B 0 ± 245760 pulse LS-B series Rev.5... -
Page 75: Motion Range Setting By Mechanical Stops
(Lower limit mechanical stop) Mechanical stop of Joint #2 (Adjustable) Mechanical stop of Joint #1 (Fixed) (Do not move the Mechanical stop of Joint #2 position of upper limit (Fixed) mechanical stop.) Mechanical stop of Joint #1 (Adjustable) LS-B series Rev.5... -
Page 76: Setting The Mechanical Stops Of Joints #1 And #2
Pulse Value (pulse) −72818 ° Setting Angle ( −115 LS6-B 746382 Pulse Value (pulse) −91022 Joint #2 Mechanical Stops Views from the top of Arm #1 ° Setting Angle ( −125 LS3-B LS6-B 284444 Pulse Value (pulse) −284444 LS-B series Rev.5... - Page 77 If the arm is hitting the mechanical stops or if an error occurs after the arm hits the mechanical stops, either reset the pulse range to a narrower setting or extend the positions of the mechanical stops within the limit. *: For LS3-B401S-V1 and LS6-B (For LS3-B401*, pulse value: 204800) LS-B series Rev.5...
-
Page 78: Setting The Mechanical Stop Of Joint #3
(9) Calculate the lower limit pulse value of the pulse range using the formula shown below and set the value. The result of the calculation is always negative because the lower limit Z coordinate value is negative. LS-B series Rev.5... -
Page 79: Setting The Cartesian (Rectangular) Range In The Xy Coordinate System Of The Manipulator
The maximum physical range is based on the position of the mechanical stops. Set the XYLim setting on the [XYZ Limits] panel shown by selecting [Tools]-[Robot EPSON Manager]. (You may also execute the XYLim command from the [Command Window].) LS-B series Rev.5... -
Page 80: Standard Motion Range
333.5 Standard m (Joint #3 motion range) Cleanroom (Distance from the base Standard mounting face) Cleanroom (Joint #3 mechanical stop Standard area upper end) Cleanroom 10.5 (Joint #3 mechanical stop Standard 11.8 area lower end) Cleanroom 10.5 LS-B series Rev.5... - Page 81 LS3-B LS6-B Manipulator 5. Motion Range Standard Model Cleanroom Model LS-B series Rev.5...
- Page 82 LS3-B LS6-B Manipulator 5. Motion Range Standard Model LS6-B*02S LS-B series Rev.5...
- Page 83 LS3-B LS6-B Manipulator 5. Motion Range Cleanroom Model LS6-B*02C LS-B series Rev.5...
- Page 84 LS3-B LS6-B Manipulator 5. Motion Range LS-B series Rev.5...
-
Page 85: Ls10-B Manipulator
LS10-B Manipulator This volume contains information for setup and operation of the Manipulators. Please read this volume thoroughly before setting up and operating the Manipulators. -
Page 87: Safety
WARNING This symbol indicates that a danger of possible harm to people or physical damage to equipment and facilities exists if the associated instructions are not followed properly. CAUTION LS-B series Rev.5... -
Page 88: Design And Installation Safety
To ensure safety, a safeguard must be installed for the robot system. For details on the safeguard, refer to the Installation and Design Precautions in the Safety chapter of the EPSON RC+ User’s Guide. The following items are safety precautions for design personnel: ■... -
Page 89: Strength Of The Ball Screw Spline
[Allowable bending moment] M=50,000 N·mm [Moment] M=F·L 100·200 20,000 N·mm = = Example: If 100 N (10.2kgf) load is applied End of the spline nut at 200 mm from the end of the spline nut LS-B series Rev.5... -
Page 90: Operation Safety
ON. Connecting or disconnecting the motor connectors with the power ON is extremely hazardous and may result in serious bodily injury as the Manipulator may move abnormally, and also may result in electric shock and/or malfunction of the robot system. LS-B series Rev.5... - Page 91 (Speed: approx. 5 to 20%) depending on combination of Arm orientation and end effector load. Oscillation arises from natural oscillation frequency of the Arm and can be controlled by following measures. Changing Manipulator speed Changing the teach points Changing the end effector load LS-B series Rev.5...
-
Page 92: Emergency Stop
Whether or not the reduction gear is damaged Whether or not the joints are in their proper positions If there is a position gap, perform calibration by referring to the LS-B series Maintenance Manual – LS10-B Manipulator Calibration. Before using the Emergency Stop switch, be aware of the followings: The Emergency Stop (E-STOP) switch should be used to stop the Manipulator only in case of emergencies. -
Page 93: Safeguard
Hand weight WEIGHT Setting ACCEL Setting Workpiece weight SPEED Setting Posture etc. For stopping time and stopping distance of the Manipulator, refer to “Appendix C: Stopping Time and Stopping Distance When the Safeguard is Opened”. LS-B series Rev.5... -
Page 94: Emergency Movement Without Drive Power
Joints #3 and #4 are released simultaneously. Be careful of the shaft falling and rotating while the brake release switch is pressed because the shaft may be lowered by the weight of an end effector. LS-B series Rev.5... -
Page 95: Accels Setting For Cp Motions
Z-axis height 0 (Origin position) If the Manipulator is operated in CP motion with the wrong set values, make sure to check the following. - Whether or not the ball screw spline shaft is deformed or bent LS-B series Rev.5... -
Page 96: Warning Labels
Location Signature label NOTE Indicates Product name, Model name, Manipulator’s serial No., Local codes information, Specification, Manufacturer, Importer, Date of manufacture, Country of manufacture, etc. For details, refer to the attached label. LS-B series Rev.5... - Page 97 LS10-B Manipulator 1. Safety LS10-B LS-B series Rev.5...
-
Page 98: Response For Emergency Or Malfunction
− Joint #4 (Figure: LS10-B702S) (Rotating) ■ While pressing the break release switch, not only Joint #3 but also Joint #4 may move due to its own weight. Be careful of the shaft falling or rotating. CAUTION LS-B series Rev.5... -
Page 99: Specifications
270 mm LS10-B603C 200 mm LS10-B702S Standard 300 mm LS10-B703S 10 kg 700 mm 170 mm LS10-B702C Cleanroom 270 mm LS10-B703C 200 mm LS10-B802S Standard 300 mm LS10-B803S 800 mm 170 mm LS10-B802C Cleanroom 270 mm LS10-B803C LS-B series Rev.5... -
Page 100: Part Names And Outer Dimensions
- While the LED lamp is on, current is being applied to the manipulator. Performing any work with the power ON is extremely hazardous and it may result in electric shock and/or improper function of the robot system. Make sure to turn OFF the controller power before the maintenance work. LS-B series Rev.5... - Page 101 LS10-B Manipulator 2. Specifications LS10-B***S (Standard-Model) LS10-B602S LS10-B702S LS10-B802S LS10-B603S LS10-B703S LS10-B803S LS-B series Rev.5...
-
Page 102: Cleanroom-Model (Ls10-B***C)
LS10-B Manipulator 2. Specifications 2.2.2 Cleanroom-Model (LS10-B***C) The following figures show the additional parts and specifications for Cleanroom-model when compared with the Standard-model in appearance. Upper bellows Exhaust port Lower bellows LS-B series Rev.5... - Page 103 LS10-B Manipulator 2. Specifications LS10-B***C (Cleanroom-Model) LS10-B602C LS10-B702C LS10-B802C LS10-B603C LS10-B703C LS10-B803C LS-B series Rev.5...
-
Page 104: Specifications
The custom specifications may require a different configuration procedure; check the custom specifications number (MT***) and contact the supplier of your region when necessary. The Manipulator model can be set from software. Refer to the chapter Robot Configuration in the EPSON RC+ User’s Guide. LS-B series Rev.5... -
Page 105: Environments And Installation
In such a case, it is recommended to warm up for about 10 minutes. LS-B series Rev.5... - Page 106 Prepare the earth leakage breaker that pertains the Controller you are using. WARNING For details, refer to the Controller manual. ■ When cleaning the Manipulator, do not rub it strongly with alcohol or benzene. It may lose luster on the coated face. CAUTION LS-B series Rev.5...
-
Page 107: Base Table
For environmental conditions regarding space when placing the Controller on the base table, refer to the Controller manual. ■ To ensure safety, a safeguard must be installed for the robot system. For details on the safeguard, refer to the EPSON RC+ User’s Guide. WARNING LS-B series Rev.5... -
Page 108: Mounting Dimensions
The minimum bend radius of the power cable is 90 mm. When installing the cable, be sure to maintain sufficient distance from obstacles. In addition, leave enough space for other cables so that they are not bent forcibly. Ensure distance to the safeguard from the maximum motion range is more than 100 mm. LS-B series Rev.5... -
Page 109: Unpacking And Transportation
■ Stabilize the Manipulator with your hands when hoisting it. ■ When transporting the Manipulator for a long distance, secure it to the delivery equipment directly so that the Manipulator never falls. If necessary, pack the Manipulator in the same style as it was delivered. LS-B series Rev.5... -
Page 110: Installation Procedure
(2). Bolt Remove the fixing sheet for : M4 transportation which is attached to the arm. Bolt: M4 Wire tie NOTE Make sure to remove the wire tie for protection of mechanical stop. LS-B series Rev.5... -
Page 111: Cleanroom-Model
For details on the connection, refer to the Controller manual. When the Manipulator is a Cleanroom-model, be aware of the followings. For the Manipulator of Cleanroom-model, use it with an exhaust system. For details, refer to Appendix A: Specifications. LS-B series Rev.5... - Page 112 Power connector Connect and disconnect M/C cable NOTE In LS10-B series, you can connect and disconnect the M/C cable to/from the manipulator easily. For details, refer to: LS-B series Maintenance Manual- LS10-B Manipulator Replacing M/C Cable. LS-B series Rev.5...
-
Page 113: User Wires And Pneumatic Tubes
Detail view from B Fitting (blue) Fitting (blue) for ø4 mm pneumatic tube for ø6 mm pneumatic tube Exhaust port (Cleanroom-model only) Fitting (white) RJ45 connector for ø6 mm pneumatic tube EtherNet User connector (15-pin D-sub connector) LS-B series Rev.5... -
Page 114: Relocation And Storage
Transport and store the Manipulator in the range of Temperature: −20 to +60 °C, Humidity: 10 to 90% (no condensation). When condensation occurs on the Manipulator during transport or storage, turn ON the power only after the condensation dries. Do not shock or shake the Manipulator during transport. LS-B series Rev.5... -
Page 115: Relocation
Mechanical Stops. Cover the arm with a sheet so that the arm will not be damaged. Refer to the following figure and fix the arm. Example of Arm Fixed Posture Bolt : M4 Bolt: M4 Wire tie LS-B series Rev.5... - Page 116 Hold the bottom of Arm #1 by hand to unscrew the anchor bolts. Then, remove the Manipulator from the base table. LS10-B60** Center of gravity Center of gravity LS10-B70** Center of gravity Center of gravity LS10-B80** Center of gravity Center of gravity LS-B series Rev.5...
-
Page 117: Setting Of End Effectors
Otherwise, when “Jump motion” is performed, the upper limit mechanical stop may hit the Manipulator, and the robot system may not function properly. - Use a split muff coupling with an M4 bolt or larger to attach the end effector to the shaft. LS-B series Rev.5... - Page 118 Manipulator because of the outer diameter of the end effector, the size of the work piece, or the position of the arms. When designing your system layout, pay attention to the interference area of the end effector. LS-B series Rev.5...
-
Page 119: Attaching Cameras And Valves
4.2 Attaching Cameras and Valves The bottom of the Arm #2 has threaded holes as shown in the figure below. Use these holes for attaching cameras, valves, and other equipment. [Unit: mm] *: From base installation surface LS-B series Rev.5... -
Page 120: Weight And Inertia Settings
The load (weight of the end effector and work piece) on the shaft can be set by Weight parameter. Enter a value into the [Weight:] text box on the [Weight] panel ([Tools]-[Robot Manager]). EPSON (You may also execute the Weight command from the [Command Window].) LS-B series Rev.5... - Page 121 * The percentage in the graph is based on the speed at rated weight (5 kg) as 100%. LS10-B60** LS10-B70** LS10-B80** 12 (kg) Weight setting Automatic speed setting by Weight (%) End effector weight (kg) LS10-B60** LS10-B70** LS10-B80** LS-B series Rev.5...
-
Page 122: Inertia Setting
When the moment of inertia of the load exceeds the rating, change the setting of the moment of inertia parameter of the Inertia command. After the setting is changed, the maximum acceleration/deceleration speed of Joint #4 at PTP motion corresponding to the “moment of inertia” value is set automatically. LS-B series Rev.5... - Page 123 Automatic acceleration/deceleration setting of Joint #4 by Inertia (moment of inertia) 0.05 0.1 0.15 0.2 0.25 0.3 (kg·m Moment of inertia setting Moment of inertia Automatic acceleration/deceleration setting of setting (kg·m Joint #4 by Inertia (moment of inertia) 0.01 0.02 0.05 LS-B series Rev.5...
- Page 124 The eccentric quantity of load (weight of the end effector and work piece) on the shaft can be set by “eccentric quantity” parameter of Inertia command. Enter a value into the [Eccentricity:] text box on the [Inertia] panel ([Tools]-[Robot EPSON Manager]). (You may also execute the Inertia command from the [Command Window].) LS-B series Rev.5...
- Page 125 Joint #3 shaft End effector (a) Work piece (c) Work piece (b) Whole moment Moment of inertia Moment of inertia Moment of inertia of inertia of end effector (a) of work piece (b) of work piece (c) LS-B series Rev.5...
- Page 126 + m × L (b) Moment of inertia of a cylinder Cylinder’s center of gravity Rotation center + m × L (c) Moment of inertia of a sphere Sphere’s center of gravity Rotation center + m × L LS-B series Rev.5...
-
Page 127: Precautions For Auto Acceleration/Deceleration Of Joint #3
-300 (mm) Shaft height NOTE When moving the Manipulator horizontally while the shaft is being lowered, it may cause over-shoot at the time of final positioning. Acceleration/Deceleration Shaft height LS10-B60** (mm) LS10-B80** LS10-B70** −100 −200 −300 LS-B series Rev.5... -
Page 128: Motion Range
Manipulator does not move. The pulse range can be set on the [Range] panel shown by selecting [Tools]-[Robot EPSON Manager]. (You may also execute the Range command from the [Command Window].) LS-B series Rev.5... -
Page 129: Max. Pulse Range Of Joint #1
With the 0 pulse as a starting point, the counterclockwise pulse value is defined as the positive (+) and the clockwise pulse value is defined as the negative (-). 0 pulse − A − B A: Max. Motion Range B: Max. Pulse Range LS10-B ± 150 ± 341334 pulse ° LS-B series Rev.5... -
Page 130: Max. Pulse Range Of Joint #3
Arm #2. With the 0 pulse as a starting point, the counterclockwise pulse value is defined as the positive (+) and the clockwise pulse value is defined as the negative (-). Counterclockwise (+value) +X 0 ± 215040 pulse Clockwise (-value) LS-B series Rev.5... -
Page 131: Motion Range Setting By Mechanical Stops
(Lower limit mechanical stop) Mechanical stop of Mechanical stop of Joint #2 (Adjustable) Joint #1 (Fixed) Mechanical stop of (Do not move the position of Joint #2 (Fixed) upper limit mechanical stop.) Mechanical stop of Joint #1 (Adjustable) LS-B series Rev.5... -
Page 132: Setting The Mechanical Stops Of Joints #1 And #2
Views from the bottom of Arm #1 Setting Angle (°) −115 LS10-B 746382 Pulse Value (pulse) −91022 Joint #2 Mechanical Stops Views from the top of Arm #1 Setting Angle (°) −125 LS10-B 284444 Pulse Value (pulse) −284444 LS-B series Rev.5... - Page 133 If the arm is hitting the mechanical stops or if an error occurs after the arm hits the mechanical stops, either reset the pulse range to a narrower setting or extend the positions of the mechanical stops within the limit. LS-B series Rev.5...
-
Page 134: Setting The Mechanical Stop Of Joint #3
Use calipers to measure the distance when adjusting the mechanical stop. Measure this distance (6) Firmly tighten the lower limit mechanical stop screw (set screws: 2-M5×6). Recommended tightening torque: 3.9 N·m (39.8 kgf·cm) (7) Turn ON the Controller. LS-B series Rev.5... - Page 135 Moves to the lower limit-pulse position of Joint #3. (In this example, all pulses except those for Joint #3 are “0”. Substitute these “0s” with the other pulse values specifying a position where there is no interference even when lowering Joint #3.) LS-B series Rev.5...
-
Page 136: Setting The Cartesian (Rectangular) Range In The Xy Coordinate System Of The Manipulator
The maximum physical range is based on the position of the mechanical stops. Set the XYLim setting on the [XYZ Limits] panel shown by selecting [Tools]-[Robot EPSON Manager]. (You may also execute the XYLim command from the [Command Window].) LS-B series Rev.5... -
Page 137: Standard Motion Range
(Mechanical stop area at the rear) LS10-B**2S LS10-B**3S m (Joint #3 motion range) LS10-B**2C LS10-B**3C (Distance from the base mounting LS10-B**2* face) LS10-B**3* LS10-B***S (Joint #3 mechanical stop area upper end) LS10-B***C (Joint #3 mechanical stop area lower end) LS-B series Rev.5... - Page 138 LS10-B Manipulator 5. Motion Range Standard-model LS10-B***S LS-B series Rev.5...
- Page 139 LS10-B Manipulator 5. Motion Range Cleanroom-model LS10-B***C LS-B series Rev.5...
- Page 140 LS10-B Manipulator 5. Motion Range LS-B series Rev.5...
-
Page 141: Ls20-B Manipulator
LS20-B Manipulator This volume contains information for setup and operation of the Manipulators. Please read this volume thoroughly before setting up and operating the Manipulators. -
Page 143: Safety
WARNING This symbol indicates that a danger of possible harm to people or physical damage to equipment and facilities exists if the associated instructions are not followed properly. CAUTION LS-B series Rev.5... -
Page 144: Design And Installation Safety
To ensure safety, a safeguard must be installed for the robot system. For details on the safeguard, refer to the Installation and Design Precautions in the Safety chapter of the EPSON RC+ User’s Guide. The following items are safety precautions for design personnel: ■... -
Page 145: Strength Of The Ball Screw Spline
For calculating the allowable load, see the calculation formula below. [Allowable bending moment] M=50,000 N·mm [Moment] 44,000 N ∙ = ∙ = ∙ Example: If 110 N(11.2kgf) load is applied at 400 mm from the end of the spline nut End of the spline nut LS-B series Rev.5... -
Page 146: Operation Safety
ON. Connecting or disconnecting the motor connectors with the power ON is extremely hazardous and may result in serious bodily injury as the Manipulator may move abnormally, and also may result in electric shock and/or malfunction of the robot system. LS-B series Rev.5... - Page 147 (Speed: approx. 5 to 20%) depending on combination of Arm orientation and end effector load. Vibration arises from natural vibration frequency of the Arm and can be controlled by following measures. Changing Manipulator speed Changing the teach points Changing the end effector load LS-B series Rev.5...
-
Page 148: Emergency Stop
Whether or not the reduction gear is damaged Whether or not the joints are in their proper positions If there is a position gap, perform calibration by referring to the LS-B series Maintenance Manual – LS20-B Manipulator Calibration. Before using the Emergency Stop switch, be aware of the followings: The Emergency Stop (E-STOP) switch should be used to stop the Manipulator only in case of emergencies. -
Page 149: Safeguard
Hand weight WEIGHT Setting ACCEL Setting Workpiece weight SPEED Setting Posture etc. For stopping time and stopping distance of the Manipulator, refer to “Appendix C: Stopping Time and Stopping Distance When the Safeguard is Opened”. LS-B series Rev.5... -
Page 150: Emergency Movement Without Drive Power
Joints #3 and #4 are released simultaneously. Be careful of the shaft falling and rotating while the brake release switch is pressed because the shaft may be lowered by the weight of an end effector. LS-B series Rev.5... -
Page 151: Accels Setting For Cp Motions
Z-axis height 0 (Origin position) If the Manipulator is operated in CP motion with the wrong set values, make sure to check the following. - Whether or not the ball screw spline shaft is deformed or bent LS-B series Rev.5... -
Page 152: Warning Labels
Only authorized personnel should perform sling work and operate a crane and a forklift. When these operations are performed by unauthorized personnel, it is extremely hazardous and may result in serious bodily injury and/or severe equipment damage to the robot system. LS-B series Rev.5... - Page 153 LS20-B Manipulator 1. Safety Location Signature label NOTE Indicates Product name, Model name, Manipulator’s serial No., Local codes information, Specification, Manufacturer, Importer, Date of manufacture, Country of manufacture, etc. For details, refer to the attached label. LS20-B LS-B series Rev.5...
-
Page 154: Response For Emergency Or Malfunction
− Joint #4 (Rotating) (Figure: LS20-B804S) ■ While pressing the break release switch, not only Joint #3 but also Joint #4 may move due to its own weight. Be careful of the shaft falling or rotating. CAUTION LS-B series Rev.5... -
Page 155: Specifications
For details on the specifications, refer to Appendix A: Specifications. Models Joint #3 Model Payload Arm length Environment stroke Number Standard 420 mm LS20-B804S 800 mm Cleanroom 390 mm LS20-B804C 20 kg Standard 420 mm LS20-BA04S 1000 mm Cleanroom 390 mm LS20-BA04C LS-B series Rev.5... -
Page 156: Part Names And Outer Dimensions
- While the LED lamp is on, current is being applied to the manipulator. Performing any work with the power ON is extremely hazardous and it may result in electric shock and/or improper function of the robot system. Make sure to turn OFF the controller power before the maintenance work. LS-B series Rev.5... - Page 157 LS20-B Manipulator 2. Specifications Standard-Model (LS20-B**4S) LS-B series Rev.5...
-
Page 158: Cleanroom-Model (Ls20-B**4C)
LS20-B Manipulator 2. Specifications 2.2.2 Cleanroom-Model (LS20-B**4C) The following figures show the additional parts and specifications for Cleanroom-model when compared with the Standard-model in appearance. Upper bellows Exhaust port Lower bellows LS-B series Rev.5... - Page 159 LS20-B Manipulator 2. Specifications Cleanroom-Model (LS20-B**4C) LS-B series Rev.5...
-
Page 160: Specifications
The custom specifications may require a different configuration procedure; check the custom specifications number (MT***) and contact the supplier of your region when necessary. The Manipulator model can be set from software. Refer to the chapter Robot Configuration in EPSON RC+ User’s Guide. LS-B series Rev.5... -
Page 161: Environments And Installation
In such a case, it is recommended to warm up for about 10 minutes. LS-B series Rev.5... - Page 162 Prepare the earth leakage breaker that pertains the Controller you are using. WARNING For details, refer to the Controller manual. ■ When cleaning the Manipulator, do not rub it strongly with alcohol or benzene. It may lose luster on the coated face. CAUTION LS-B series Rev.5...
-
Page 163: Base Table
For environmental conditions regarding space when placing the Controller on the base table, refer to the Controller manual. ■ To ensure safety, a safeguard must be installed for the robot system. For details on the safeguard, refer to the EPSON RC+ User’s Guide. WARNING LS-B series Rev.5... -
Page 164: Mounting Dimensions
The minimum bend radius of the power cable is 90 mm. When installing the cable, be sure to maintain sufficient distance from obstacles. In addition, leave enough space for other cables so that they are not bent forcibly. Ensure distance to the safeguard from the maximum motion range is more than 100 mm. LS-B series Rev.5... -
Page 165: Unpacking And Transportation
NOTE When transporting the Manipulator for a long distance, secure it to the delivery equipment directly so that the Manipulator never falls over. If necessary, pack the Manipulator in the same style as it was delivered. LS-B series Rev.5... - Page 166 (7) Hoist the Manipulator attaching the hands at the positions indicated by arrows so that it can keep the balance. Then, move the Manipulator to the base table. Belt Eyebolts Wire tie Arm Lock (2-M10×65) Center of gravity LS20-B804* Belt Eyebolts Wire tie Arm Lock (2-M10×65) Center of gravity LS20-BA04* LS-B series Rev.5...
-
Page 167: Installation Procedure
(1) Secure the base to the base table with four bolts. Use bolts with specifications NOTE conforming to ISO898-1 Property Class: 10.9 or 12.9. Tightening torque: 4-M12×40 73.5 N·m (750 kgf·cm) Spring Washer Plain Washer Screw Hole (Depth 20 mm or more) 18.5 mm LS-B series Rev.5... -
Page 168: Cleanroom-Model
Wipe off the dust on the Manipulator with a little alcohol or distilled water on a lint- free cloth. Transport the Manipulator to the cleanroom. Refer to the installation procedure of each Manipulator model and install the Manipulator. Connect an exhaust tube to the exhaust port. LS-B series Rev.5... -
Page 169: Connecting The Cables
For the Manipulator of Cleanroom-model, use it with an exhaust system. For details, refer to Appendix A: Specifications. Cable Connections Connect the power cable and the signal connector of the M/C cable to the Controller as shown below. Signal Connector Power Connector LS-B series Rev.5... -
Page 170: User Wires And Pneumatic Tubes
In LS20-B series, you can connect and disconnect the M/C cable to/from the Manipulator easily. For details, refer to LS-B series Maintenance Manual LS20-B Manipulator 4.3 Replacing M/C Cable. 3.7 User Wires and Pneumatic Tubes ■ Only authorized or certified personnel should be allowed to perform wiring. - Page 171 EtherNet Connector Fitting for ø6 mm Fitting for ø6 mm pneumatic Tube (No. 1) Pneumatic Tube (No. 4) Fitting for ø8 mm Fitting for ø8 mm Pneumatic Tube (No. 2) Pneumatic Tube (No. 3) Exhaust Port (Cleanroom-model Only) LS-B series Rev.5...
-
Page 172: Relocation And Storage
If necessary, pack the Manipulator in the same way as it was delivered. When the Manipulator is used for a robot system again after long-term storage, perform a test run to verify that it works properly, and then operate it thoroughly. LS-B series Rev.5... -
Page 173: Relocation
For details on strength of the ball screw spline, refer to 1.2.1 Strength of Ball Screw Spline. Example of Arm Fixed Posture Wire tie Bolt: M4 LS-B series Rev.5... - Page 174 LS20-B Manipulator 3. Environments and Installation Hold the bottom of Arm #1 by hand to unscrew the anchor bolts. Then, remove the Manipulator from the base table. LS20-B804* Center of gravity Center of gravity LS20-BA04* Center of gravity Center of gravity LS-B series Rev.5...
-
Page 175: Setting Of End Effectors
Manipulator because of the outer diameter of the end effector, the size of the work piece, or the position of the arms. When designing your system layout, pay attention to the interference area of the end effector. LS-B series Rev.5... -
Page 176: Attaching Cameras And Valves
4.2 Attaching Cameras and Valves The bottom of the Arm #2 has threaded holes as shown in the figure below. Use these holes for attaching cameras, valves, and other equipment. [Unit: mm] *: From base installation surface LS-B series Rev.5... -
Page 177: Weight And Inertia Settings
The load (weight of the end effector and work piece) on the shaft can be set by Weight parameter. Enter a value into the [Weight:] text box on the [Weight] panel ([Tools]-[Robot Manager]). EPSON (You may also execute the Weight command from the [Command Window].) LS-B series Rev.5... - Page 178 Joint #2) with a load weight of “1 kg”. =450 =550 Shaft =1×550 /450 =1.494 Weight of → 1.5 (round up) camera =1+1.5=2.5 M=1kg Joint #2 Enter “2.5” for the Weight Parameter. =450 mm W=1kg =550 mm LS-B series Rev.5...
- Page 179 Automatic acceleration/deceleration setting by Weight * The percentage in the graph is based on the acceleration/ deceleration at rated weight (10 kg) as 100%. LS20-BA04* LS20-B804* (kg) Weight setting Automatic acceleration/deceleration setting by Weight (%) End effector weight (kg) LS20-B804* LS20-BA04* LS-B series Rev.5...
-
Page 180: Inertia Setting
When the moment of inertia of the load exceeds the rating, change the setting of the moment of inertia parameter of the Inertia command. After the setting is changed, the maximum acceleration/deceleration speed of Joint #4 at PTP motion corresponding to the “moment of inertia” value is set automatically. LS-B series Rev.5... - Page 181 28.6 0.10 0.20 0.30 0.40 0.50 0.60 0.70 0.80 0.90 1.00 (kg·m Moment of inertia setting Moment of inertia Automatic acceleration/deceleration setting of setting (kg·m Joint #4 by Inertia (moment of inertia) 0.01 0.05 0.15 28.6 1.00 LS-B series Rev.5...
- Page 182 The eccentric quantity of load (weight of the end effector and work piece) on the shaft can be set by “eccentric quantity” parameter of Inertia command. Enter a value into the [Eccentricity:] text box on the [Inertia] panel ([Tools]-[Robot EPSON Manager]). (You may also execute the Inertia command from the [Command Window].) LS-B series Rev.5...
- Page 183 Joint #3 shaft End effector (a) Work piece (c) Work piece (b) Whole moment Moment of inertia Moment of inertia Moment of inertia of inertia of end effector (a) of work piece (b) of work piece (c) LS-B series Rev.5...
- Page 184 + m × L (b) Moment of inertia of a cylinder Cylinder’s center of gravity Rotation center + m × L (c) Moment of inertia of a sphere Sphere’s center of gravity Rotation center + m × L LS-B series Rev.5...
-
Page 185: Precautions For Auto Acceleration/Deceleration Of Joint #3
− 400 (mm) Shaft height NOTE When moving the Manipulator horizontally while the shaft is being lowered, it may cause over-shoot at the time of final positioning. Acceleration/Deceleration Shaft height (mm) LS20-B804* LS20-BA04* −150 −400 −420 LS-B series Rev.5... -
Page 186: Motion Range
Manipulator does not move. The pulse range can be set on the [Range] panel shown by selecting [Tools]-[Robot EPSON Manager]. (You may also execute the Range command from the [Command Window].) LS-B series Rev.5... -
Page 187: Max. Pulse Range Of Joint #1
With the 0 pulse as a starting point, the counterclockwise pulse value is defined as the positive (+) and the clockwise pulse value is defined as the negative (-). 0 pulse − A − B A: Max. Motion Range B: Max. Pulse Range ± 345885 pulse ± 152° LS-B series Rev.5... -
Page 188: Max. Pulse Range Of Joint #3
Arm #2. With the 0 pulse as a starting point, the counterclockwise pulse value is defined as the positive (+) and the clockwise pulse value is defined as the negative (-). Counterclockwise (+value) : +X 0 ± 344064 pulse Clockwise (-value) LS-B series Rev.5... -
Page 189: Motion Range Setting By Mechanical Stops
Mechanical stop of Joint #3 (Lower limit mechanical stop) Mechanical stop of Joint #2 (Adjustable) (Mechanical stop of Joint #1) (Do not move the position of upper limit mechanical stop.) Mechanical stop of Joint #1 (Adjustable) (Mechanical stop of Joint #2) LS-B series Rev.5... -
Page 190: Setting The Mechanical Stops Of Joints #1 And #2
Joint #1 Mechanical Stops Views from the bottom of Arm #1 Setting Angle (°) −122 Pulse Value (pulse) 771868 −116508 Joint #2 Mechanical Stops Views from the top of Arm #1 Setting Angle (°) −135 Pulse Value (pulse) 307200 −307200 LS-B series Rev.5... - Page 191 If the arm is hitting the mechanical stops or if an error occurs after the arm hits the mechanical stops, either reset the pulse range to a narrower setting or extend the positions of the mechanical stops within the limit. LS-B series Rev.5...
-
Page 192: Setting The Mechanical Stop Of Joint #3
Do not remove the upper limit mechanical stop on the bottom because the calibration point of Joint #3 is specified using the stop. LS-B series Rev.5... - Page 193 ** For the Joint #3 resolution, refer to the section Appendix A: Specifications. Execute the following command from the [Command Window]. Enter the calculated EPSON value in X. >JRANGE 3,X,0 ' Sets the pulse range of Joint #3 LS-B series Rev.5...
-
Page 194: Setting The Cartesian (Rectangular) Range In The Xy Coordinate System Of The Manipulator (For Joints #1 And #2)
The maximum physical range is based on the position of the mechanical stops. Set the XYLim setting on the [XYZ Limits] panel shown by selecting [Tools]-[Robot EPSON Manager]. (You may also execute the XYLim command from the [Command Window].) LS-B series Rev.5... -
Page 195: Standard Motion Range
693.1 832.1 LS20-B***S m (Joint #3 motion range) LS20-B***C LS20-B***S 26.5 (Distance from the base mounting face) LS20-B***C 33.7 LS20-B***S (Joint #3 mechanical stop area upper end) LS20-B***C LS20-B***S (Joint #3 mechanical stop area lower end) LS20-B***C LS-B series Rev.5... - Page 196 LS20-B Manipulator 5. Motion Range Standard-model Cleanroom-model LS-B series Rev.5...
-
Page 197: Regular Inspection
Regular Inspection Performing inspection properly is essential to prevent trouble and ensure safety. This volume describes the inspection schedule and contents. Inspect according to the schedule. -
Page 199: Regular Inspection For Ls3-B Ls6-B Manipulator
8 months (2000 h) √ 9 months (2250 h) √ √ 10 months (2500 h) √ 11 months (2750 h) √ 12 months (3000 h) √ √ √ √ 13 months (3250 h) √ √ 20000 h h = hour LS-B series Rev.5... -
Page 200: Inspection Point
Also, if the break is not released even operated release the break, contact the supplier. Check whether unusual sound or Check that there is no unusual sound or vibration when operating. vibration occurs. If there is something wrong, contact the supplier. LS-B series Rev.5... -
Page 201: Overhaul (Parts Replacement)
Perform greasing at 50 km of operation for the first time of greasing. NOTE For EPSON RC+ 7.0 Ver. 7.2.x or later (firmware Ver.7.2.x.x or later), the recommended replacement time for the grease on the ball screw spline unit can be checked in the [Maintenance] dialog box of EPSON RC+ 7.0. - Page 202 - Move the shaft to its lower limit manually while pressing the brake release switch. - Move the shaft to its lower limit from EPSON RC+ 7.0 [Tools]-[Robot Manager]- [Jog & Teach]. Joint #3. Joint #4 NOTE Be sure to keep enough space and prevent the ...
- Page 203 Run for about 5 minutes to spread the grease over the shaft. Turn OFF the controller. (10) Wipe off excess grease on the end of the spline nut and mechanical stop. End of the spline nut Figure: LS6-B LS-B series Rev.5...
-
Page 204: Tightening Hexagon Socket Head Bolts
Bolt hole fasten the bolts securely with a hexagonal wrench. Then, use a torque wrench to fasten the bolts with tightening torques shown in the table above. LS-B series Rev.5... -
Page 205: Regular Inspection For Ls10-B Manipulator
8 months (2000 h) √ 9 months (2250 h) √ √ 10 months (2500 h) √ 11 months (2750 h) √ 12 months (3000 h) √ √ √ √ 13 months (3250 h) √ √ 20000 h LS-B series Rev.5... -
Page 206: Inspection Point
Also, if the break is not released even operated release the break, contact the supplier. Check whether unusual sound or Check that there is no unusual sound or vibration when operating. vibration occurs. If there is something wrong, contact the supplier. LS-B series Rev.5... -
Page 207: Overhaul (Parts Replacement)
Normal grease Discolored grease Perform greasing at 50 km of operation for the first time of greasing. For EPSON RC+ 7.0 Ver. 7.2.x or later (firmware Ver.7.2.x.x or later), the recommended NOTE replacement time for the grease on the ball screw spline unit can be checked in the [Maintenance] dialog box of EPSON RC+ 7.0. - Page 208 - Move the shaft to its lower limit manually while pressing the brake release switch. Joint #3. Joint #4 - Move the shaft to its lower limit from Break release switch EPSON RC+ 7.0 [Tools]-[Robot Manager]-[Jog & Teach]. NOTE Be sure to keep enough space and prevent ...
- Page 209 Run for about 5 minutes to spread the grease over the shaft. Turn OFF the controller. (10) Wipe off excess grease on the end of the spline nut and mechanical stop. End of the spline nut LS-B series Rev.5...
-
Page 210: Tightening Hexagon Socket Head Bolts
Bolt hole fasten the bolts securely with a hexagonal wrench. Then, use a torque wrench to fasten the bolts with tightening torques shown in the table above. LS-B series Rev.5... -
Page 211: Regular Inspection For Ls20-B Manipulator
8 months (2000 h) √ 9 months (2250 h) √ √ 10 months (2500 h) √ 11 months (2750 h) √ 12 months (3000 h) √ √ √ √ 13 months (3250 h) √ √ 20000 h LS-B series Rev.5... -
Page 212: Inspection Point
Also, if the break is not released even operated release the break, contact the supplier. Check whether unusual sound or Check that there is no unusual sound or vibration when operating. vibration occurs. If there is something wrong, contact the supplier. LS-B series Rev.5... -
Page 213: Overhaul (Parts Replacement)
Normal grease Discolored grease Perform greasing at 50 km of operation for the first time of greasing. For EPSON RC+ 7.0 Ver. 7.2.x or later (firmware Ver.7.2.x.x or later), the recommended NOTE replacement time for the grease on the ball screw spline unit can be checked in the [Maintenance] dialog box of EPSON RC+ 7.0. - Page 214 - Move the shaft to its lower limit manually while pressing the brake release switch. Joint #3. Joint #4 Break release switch - Move the shaft to its lower limit from EPSON RC+ 7.0 [Tools]-[Robot Manager]-[Jog & Teach]. NOTE Be sure to keep enough space and prevent ...
- Page 215 Run for about 5 minutes to spread the grease over the shaft. Turn OFF the controller. (10) Wipe off excess grease on the end of the spline nut and mechanical stop. End of the spline nut LS-B series Rev.5...
-
Page 216: Tightening Hexagon Socket Head Bolts
Bolt hole fasten the bolts securely with a hexagonal wrench. Then, use a torque wrench to fasten the bolts with tightening torques shown in the table above. LS-B series Rev.5... - Page 217 Appendix This volume describes the specifications table for each model and detailed data of stopping time and stopping distance.
-
Page 219: Appendix A: Specifications
= 70 dB (A) or under Applicable Controller RC90-B Speed 1 ~ (5) ~ 100 Accel *6 (10) SpeedS (50) 2000 Assignable Value ( ) Default values AccelS (200) 25000 Fine (1250) 65535 Weight 0,175 (1,175) 3,175 LS-B series Rev.5... - Page 220 Accel setting may shorten the product life remarkably. *7: LS3-B401S-V1 does not obtain certification of KC Marking and KCs Marking. LS-B series Rev.5...
-
Page 221: Ls6-B Specifications
1 ~ (200) ~ 25000 Fine 0 ~ (1250) ~ 65535 Weight 0,275 ~ (2,275) ~ 6,275 CE Marking EMC Directive, Machinery Directive, RoHS Directive Safety standard UKCA Marking EMC Regulations, Machinery Regulations, RoHS Regulations KC Marking, KCs Marking *7 LS-B series Rev.5... - Page 222 Accel setting may shorten the product life remarkably. *7: LS6-B602S-V1 does not obtain certification of KC Marking and KCs Marking. LS-B series Rev.5...
-
Page 223: Ls10-B Specifications
0 ~ (1250) ~ 65535 Weight 0,375 ~ (5,375) ~ 10,375 Operation mode Standard mode (default), Low-oscillation mode *7 CE Marking EMC Directive, Machinery Directive, RoHS Directive Safety standard UKCA Marking EMC Regulations, Machinery Regulations, RoHS Regulations KC Marking, KCs Marking LS-B series Rev.5... - Page 224 Although values larger than 100 can be set to Accel, it is recommended to minimize the use of large values to necessary motions since operating the manipulator continuously with the large Accel setting may shorten the product life remarkably. LS-B series Rev.5...
- Page 225 4. Consider using VRT option with following conditions - Eccentric Quantity is large and vibrates (As a guide, end effector or work piece is 100 mm or more.) - Base table vibrates - End effector or work piece vibrates LS-B series Rev.5...
-
Page 226: Ls20-B Specifications
1 ~ (200) ~ 10000 Fine 0 ~ (1250) ~ 65535 Weight 0,450 ~ (10,450) ~ 20,450 CE Marking EMC Directive, Machinery Directive, RoHS Directive Safety standard UKCA Marking EMC Regulations, Machinery Regulations, RoHS Regulations KC Marking, KCs Marking LS-B series Rev.5... - Page 227 Although values larger than 100 can be set to Accel, it is recommended to minimize the use of large values to necessary motions since operating the manipulator continuously with the large Accel setting may shorten the product life remarkably. LS-B series Rev.5...
-
Page 228: Appendix B: Stopping Time And Stopping Distance In Emergency
: Arm speed (Speed value) Vertical axis : Stopping time and stopping distance in each arm speed Time [sec] : Stopping time Distance [deg] : Stopping distance of J1 and J2 Distance [mm] : Stopping distance of J3 LS-B series Rev.5... -
Page 229: Ls3-B Stopping Time And Stopping Distance In Emergency
100% Speed[%] Speed[%] LS3-B401*: J3 1.0kg 2.0 kg 3.0 kg 1.0kg 2.0 kg 3.0 kg Weight[kg] Weight[kg] 0.50 100.0 90.0 0.40 80.0 70.0 0.30 60.0 50.0 0.20 40.0 30.0 0.10 20.0 10.0 0.00 100% 100% Speed[%] Speed[%] LS-B series Rev.5... - Page 230 0.10 10.0 0.00 100% 100% Speed[%] Speed[%] LS3-B401S-V1: J3 1.0kg 2.0 kg 3.0 kg 1.0kg 2.0 kg 3.0 kg Weight[kg] Weight[kg] 0.50 120.0 100.0 0.40 80.0 0.30 60.0 0.20 40.0 0.10 20.0 0.00 100% 100% Speed[%] Speed[%] LS-B series Rev.5...
-
Page 231: Ls6-B Stopping Time And Stopping Distance In Emergency
20.0 0.00 100% 100% Speed[%] Speed[%] LS6-B502*: J3 2.0kg 4.0 kg 6.0 kg 2.0kg 4.0 kg 6.0 kg Weight[kg] Weight[kg] 0.50 140.0 120.0 0.40 100.0 0.30 80.0 60.0 0.20 40.0 0.10 20.0 0.00 100% 100% Speed[%] Speed[%] LS-B series Rev.5... - Page 232 LS6-B602*: J3 2.0kg 4.0 kg 6.0 kg 2.0kg 4.0 kg 6.0 kg Weight[kg] Weight[kg] 1.00 160.0 0.90 140.0 0.80 120.0 0.70 100.0 0.60 0.50 80.0 0.40 60.0 0.30 40.0 0.20 20.0 0.10 0.00 100% 100% Speed[%] Speed[%] LS-B series Rev.5...
- Page 233 100% 100% Speed[%] Speed[%] LS6-B602S-V1: J3 2.0kg 4.0 kg 6.0 kg 2.0kg 4.0 kg 6.0 kg Weight[kg] Weight[kg] 0.50 180.0 160.0 0.40 140.0 120.0 0.30 100.0 80.0 0.20 60.0 40.0 0.10 20.0 0.00 100% 100% Speed[%] Speed[%] LS-B series Rev.5...
- Page 234 LS6-B702*: J3 2.0kg 4.0 kg 6.0 kg 2.0kg 4.0 kg 6.0 kg Weight[kg] Weight[kg] 1.00 180.0 0.90 160.0 0.80 140.0 0.70 120.0 0.60 100.0 0.50 80.0 0.40 60.0 0.30 40.0 0.20 20.0 0.10 0.00 100% 100% Speed[%] Speed[%] LS-B series Rev.5...
-
Page 235: Ls10-B Stopping Time And Stopping Distance In Emergency
5.0 kg Weight[kg] Weight[kg] Weight[kg] 7.0 kg 10.0 kg 7.0 kg 10.0 kg 1.00 180.0 0.90 160.0 0.80 140.0 0.70 120.0 0.60 100.0 0.50 80.0 0.40 60.0 0.30 40.0 0.20 20.0 0.10 0.00 100% 100% Speed[%] Speed[%] LS-B series Rev.5... - Page 236 5.0 kg Weight[kg] Weight[kg] 7.0 kg 10.0 kg 7.0 kg 10.0 kg 1.00 200.0 0.90 180.0 0.80 160.0 0.70 140.0 0.60 120.0 0.50 100.0 0.40 80.0 0.30 60.0 0.20 40.0 0.10 20.0 0.00 100% 100% Speed[%] Speed[%] LS-B series Rev.5...
- Page 237 3.0kg 5.0 kg Weight[kg] Weight[kg] 7.0 kg 10.0 kg 7.0 kg 10.0 kg 1.00 180.0 0.90 160.0 0.80 140.0 0.70 120.0 0.60 100.0 0.50 80.0 0.40 60.0 0.30 40.0 0.20 20.0 0.10 0.00 100% 100% Speed[%] Speed[%] LS-B series Rev.5...
-
Page 238: Ls20-B Stopping Time And Stopping Distance In Emergency
LS20-B804*: J3 7.0kg 10.0 kg 7.0kg 10.0 kg Weight[kg] Weight[kg] 13.0 kg 20.0 kg 1.00 360.0 0.90 320.0 0.80 280.0 0.70 240.0 0.60 200.0 0.50 160.0 0.40 120.0 0.30 80.0 0.20 40.0 0.10 0.00 100% 100% Speed[%] Speed[%] LS-B series Rev.5... - Page 239 10.0 kg Weight[kg] Weight[kg] 13.0 kg 20.0 kg 13.0 kg 20.0 kg 1.00 330.0 300.0 0.90 270.0 0.80 240.0 0.70 210.0 0.60 180.0 0.50 150.0 0.40 120.0 0.30 90.0 0.20 60.0 0.10 30.0 0.00 100% 100% Speed[%] Speed[%] LS-B series Rev.5...
-
Page 240: Appendix C: Stopping Time And Stopping Distance When Safeguard Is Opened
: Arm speed (Speed value) Vertical axis : Stopping time and stopping distance in each arm speed Time [sec] : Stopping time Distance [deg] : Stopping distance of J1 and J2 Distance [mm] : Stopping distance of J3 LS-B series Rev.5... -
Page 241: Ls3-B Stopping Time And Stopping Distance When Safeguard Is Opened
100% Speed[%] Speed[%] LS3-B401*: J3 1.0kg 2.0 kg 3.0 kg 1.0kg 2.0 kg 3.0 kg Weight[kg] Weight[kg] 0.50 100.0 90.0 0.40 80.0 70.0 0.30 60.0 50.0 0.20 40.0 30.0 0.10 20.0 10.0 0.00 100% 100% Speed[%] Speed[%] LS-B series Rev.5... - Page 242 0.10 10.0 0.00 100% 100% Speed[%] Speed[%] LS3-B401S-V1: J3 1.0kg 2.0 kg 3.0 kg 1.0kg 2.0 kg 3.0 kg Weight[kg] Weight[kg] 0.50 120.0 100.0 0.40 80.0 0.30 60.0 0.20 40.0 0.10 20.0 0.00 100% 100% Speed[%] Speed[%] LS-B series Rev.5...
-
Page 243: Ls6-B Stopping Time And Stopping Distance When Safeguard Is Opened
20.0 0.00 100% 100% Speed[%] Speed[%] LS6-B502*: J3 2.0kg 4.0 kg 6.0 kg 2.0kg 4.0 kg 6.0 kg Weight[kg] Weight[kg] 0.50 140.0 120.0 0.40 100.0 0.30 80.0 60.0 0.20 40.0 0.10 20.0 0.00 100% 100% Speed[%] Speed[%] LS-B series Rev.5... - Page 244 LS6-B602*: J3 2.0kg 4.0 kg 6.0 kg 2.0kg 4.0 kg 6.0 kg Weight[kg] Weight[kg] 1.00 160.0 0.90 140.0 0.80 120.0 0.70 100.0 0.60 0.50 80.0 0.40 60.0 0.30 40.0 0.20 20.0 0.10 0.00 100% 100% Speed[%] Speed[%] LS-B series Rev.5...
- Page 245 100% 100% Speed[%] Speed[%] LS6-B602S-V1: J3 2.0kg 4.0 kg 6.0 kg 2.0kg 4.0 kg 6.0 kg Weight[kg] Weight[kg] 0.50 180.0 160.0 0.40 140.0 120.0 0.30 100.0 80.0 0.20 60.0 40.0 0.10 20.0 0.00 100% 100% Speed[%] Speed[%] LS-B series Rev.5...
- Page 246 LS6-B702*: J3 2.0kg 4.0 kg 6.0 kg 2.0kg 4.0 kg 6.0 kg Weight[kg] Weight[kg] 1.00 180.0 0.90 160.0 0.80 140.0 0.70 120.0 0.60 100.0 0.50 80.0 0.40 60.0 0.30 40.0 0.20 20.0 0.10 0.00 100% 100% Speed[%] Speed[%] LS-B series Rev.5...
-
Page 247: Ls10-B Stopping Time And Stopping Distance When Safeguard Is Opened
5.0 kg Weight[kg] Weight[kg] Weight[kg] 7.0 kg 10.0 kg 7.0 kg 10.0 kg 1.00 180.0 0.90 160.0 0.80 140.0 0.70 120.0 0.60 100.0 0.50 80.0 0.40 60.0 0.30 40.0 0.20 20.0 0.10 0.00 100% 100% Speed[%] Speed[%] LS-B series Rev.5... - Page 248 5.0 kg Weight[kg] Weight[kg] 7.0 kg 10.0 kg 7.0 kg 10.0 kg 1.00 200.0 0.90 180.0 0.80 160.0 0.70 140.0 0.60 120.0 0.50 100.0 0.40 80.0 0.30 60.0 0.20 40.0 0.10 20.0 0.00 100% 100% Speed[%] Speed[%] LS-B series Rev.5...
- Page 249 3.0kg 5.0 kg Weight[kg] Weight[kg] 7.0 kg 10.0 kg 7.0 kg 10.0 kg 1.00 180.0 0.90 160.0 0.80 140.0 0.70 120.0 0.60 100.0 0.50 80.0 0.40 60.0 0.30 40.0 0.20 20.0 0.10 0.00 100% 100% Speed[%] Speed[%] LS-B series Rev.5...
-
Page 250: Ls20-B Stopping Time And Stopping Distance When Safeguard Is Opened
7.0kg 10.0 kg Weight[kg] Weight[kg] 13.0 kg 20.0 kg 13.0 kg 20.0 kg 1.00 360.0 0.90 320.0 0.80 280.0 0.70 240.0 0.60 200.0 0.50 160.0 0.40 120.0 0.30 80.0 0.20 40.0 0.10 0.00 100% 100% Speed[%] Speed[%] LS-B series Rev.5... - Page 251 10.0 kg Weight[kg] Weight[kg] 13.0 kg 20.0 kg 13.0 kg 20.0 kg 1.00 330.0 300.0 0.90 270.0 0.80 240.0 0.70 210.0 0.60 180.0 0.50 150.0 0.40 120.0 0.30 90.0 0.20 60.0 0.10 30.0 0.00 100% 100% Speed[%] Speed[%] LS-B series Rev.5...
- Page 252 Appendix C: Stopping time and Stopping distance When Safeguard Is Opened LS-B series Rev.5...