Table of Contents
Advertisement
Quick Links
DVD-Recorder and Videorecorder
DVR-RT400-S
THIS MANUAL IS APPLICABLE TO THE FOLLOWING MODEL(S) AND TYPE(S).
Model
Type
DVR-RT400-S
NYXGB
For details, refer to "Important Check Points for good servicing" .
PIONEER CORPORATION
PIONEER ELECTRONICS (USA) INC. P.O. Box 1760, Long Beach, CA 90801-1760, U.S.A.
PIONEER EUROPE NV Haven 1087, Keetberglaan 1, 9120 Melsele, Belgium
PIONEER ELECTRONICS ASIACENTRE PTE. LTD. 253 Alexandra Road, #04-01, Singapore 159936
PIONEER CORPORATION 2004
Power Requirement
AC230V
4-1, Meguro 1-chome, Meguro-ku, Tokyo 153-8654, Japan
DVR-RT400-S
Region No.
2
T-ZZR DEC. 2004 printed in Japan
ORDER NO.
RRV3052
Remarks
Advertisement
Table of Contents

Related Manuals for Pioneer DVR-RT400-S


Summary of Contents for Pioneer DVR-RT400-S
- Page 1 PIONEER CORPORATION 4-1, Meguro 1-chome, Meguro-ku, Tokyo 153-8654, Japan PIONEER ELECTRONICS (USA) INC. P.O. Box 1760, Long Beach, CA 90801-1760, U.S.A. PIONEER EUROPE NV Haven 1087, Keetberglaan 1, 9120 Melsele, Belgium PIONEER ELECTRONICS ASIACENTRE PTE. LTD. 253 Alexandra Road, #04-01, Singapore 159936 PIONEER CORPORATION 2004 T-ZZR DEC.
-
Page 2: Safety Information
PIONEER Service Manual. A subscription to, or additional copies Also test with plug reversed of, PIONEER Ser vice Manual may be obtained at a (Using AC adapter Earth nominal charge from PIONEER. plug as required) - Page 3 IMPORTANT THIS PIONEER APPARATUS CONTAINS WARNING! LASER OF CLASS 1. DEVICE INCLUDES LASER DIODE WHICH SERVICING OPERATION OF THE APPARATUS EMITS INVISIBLE INFRARED RADIATION SHOULD BE DONE BY A SPECIALLY WHICH IS DANGEROUS TO EYES. THERE IS INSTRUCTED PERSON. A WARNING SIGN ACCORDING TO PICTURE 1 INSIDE THE DEVICE CLOSE TO THE LASER DIODE.
- Page 4 To protect products from damages or failures during transit, the shipping mode should be set or the shipping screws should be installed before shipment. Please be sure to follow this method especially if it is specified in this manual. DVR-RT400-S...
-
Page 5: Table Of Contents
7.5 TAPE REMOVAL METHOD AT NO POWER SUPPLY ................93 7.6 PARENTAL CONTROL-RATING LEVEL....................94 7.7 TRAY LOCK ..............................94 7.8 DISASSEMBLY............................95 7.9 CAUTIONS ON DIASSEMBLING AND ASSEMBLING ................103 7.10 KEY TO ABBREVIATIONS ........................105 7.11 DISC/CONTENT FORMAT ........................106 7.12 CLEANING ............................108 8. PANEL FACILITIES ............................109 DVR-RT400-S... -
Page 6: Specifications
33.4 / 32.4 / 40.9MHz FP-FS 5.5 / 6.5 / 6.5MHz Auto Tuning Method ALL Band (Not C.C.I.R. CH Plan) Auto Guide Ch Area Preset CH 80CH RF Converter Output Channel Level/Impedance Sound Selector Stereo/Dual TV Sound G.ST/NICAM DUAL Tuner Sound Muting DVR-RT400-S... - Page 7 Wow And Flutter : Less than 0.01 %Wrms Channel Separation : More than 60 dB Harmonic Distortion : Less than 0.01 Accessories 75 Ω coaxial cable Transmitter unit Dry cell battery (AAA/R03) 21 pin SCART cable (076R0JZ030) (06CDVA5002) (06CDL020004) DVR-RT400-S...
-
Page 8: Exploded Views And Parts List
For the applying amount of lubricants or glue, follow the instructions in this manual. (In the case of no amount instructions, apply as you think it appropriate.) 2.1 PACKING 8, 9, 10, 11 DVR-RT400-S... - Page 9 Guarantee Card J2E390402A Warning Sheet J2E90428A Operating Instructions J2E90521A (English, French, German) Operating Instructions J2E90531A (Dutch, Spanish, Italian) Polyethylene bag,Instruction JA4XD400 Transmitter Unit 076R0JZ030 75 ohm Coaxial Cable 06CDL02004 21 pin SCART Cable 06CDVA5002 NSP 16 Battery (AAA/R03) 1412004013 DVR-RT400-S...
-
Page 10: Exterior Section
2.2 EXTERIOR SECTION No. 5 DRIVE Assy R070R No. 26 Shield. Deck Refer to "2.3 DECK ASSY (TOP SECTION)" "2.4 DECK ASSY (BOTTOM SECTION)". 16 (1/2) 16 (2/2) DVR-RT400-S... - Page 11 752WSA0391 Shield, Jack 752WUA0008 Angle, DVD (L) 761WSA0150 Angle, DVD (R) 761WSA0151 Holder, Top 701WPA0781 Cabinet, Earth-Top 753WUA0062 Cushion (20 x 5 x T1) 800WFA0055 Cushion 65TS10-10 8965TS1017 (17.5 x 20 x 14) Holder, DVD 713WPA0337 Cushion 65TS10-5 8965TS1015 DVR-RT400-S...
-
Page 12: Deck Assy (Top Section)
2.3 DECK ASSY (TOP SECTION) CD1501 To VCR MT PCB Assy CP102 DVR-RT400-S... - Page 13 Motor, Loading (M101) 1596S98002 Micro Motor (M2003) 1589S11020 > Cylinder Unit Assy (UN4001) A5L1046500 Cord Jumper (CD102) 122F061501 • • • • • • • • • • • • • • • Screw 8107226804 Screw 8107226404 Screw 8102120604 Screw 8109126604 DVR-RT400-S...
-
Page 14: Deck Assy (Bottom Section)
2.4 DECK ASSY (BOTTOM SECTION) DVR-RT400-S... - Page 15 85OP600578 Rod, Main 85OP600579 Gear, Joint 85OP600582 Spring, Coupling 85OP800355 Spring, Ring 85OP800356 Holder, Capstan 85OP400549 Cord Jumper (CD1501) 122H071603 Cord Jumper (CD1502) 122Y021902 > Capstan DD Unit (M2001) 1510S98043 Screw 8107226804 E-Ring 83ETW30000 Screw 8109126604 Polyslider Washer 82P184505N DVR-RT400-S...
-
Page 16: Block Diagram And Schematic Diagram
3. BLOCK DIAGRAM AND SCHEMATIC DIAGRAM 3.1 BLOCK DIAGRAM 3.1.1 OVERALL BLOCK DIAGRAM DVR-RT400-S... -
Page 17: Mpeg Block Diagram
3.1.2 MPEG BLOCK DIAGRAM DVR-RT400-S... -
Page 18: Y/C Audio / Head Amp Block Diagram
3.1.3 Y/C AUDIO / HEAD AMP BLOCK DIAGRAM DVR-RT400-S... -
Page 19: System Control Block Diagram
3.1.4 SYSTEM CONTROL BLOCK DIAGRAM DVR-RT400-S... -
Page 20: Regulator Block Diagram
3.1.5 REGULATOR BLOCK DIAGRAM DVR-RT400-S... -
Page 21: Operation / Display Block Diagram
3.1.6 OPERATION / DISPLAY BLOCK DIAGRAM DVR-RT400-S... -
Page 22: Av In / Out / Tuner / Hi-Fi Block Diagram
3.1.7 AV IN / OUT / TUNER / Hi-Fi BLOCK DIAGRAM DVR-RT400-S... -
Page 23: Pin In / Out Block Diagram
3.1.8 21 PIN IN / OUT BLOCK DIAGRAM DVR-RT400-S... -
Page 24: Power Block Diagram
3.1.9 POWER BLOCK DIAGRAM D505, D506 D502, D503 DVR-RT400-S... - Page 25 DVR-RT400-S...
-
Page 26: Overall Wiring Diagram
AT+13V AT+13V AT+5.2V AT+5.2V AT+5.2V AT+5.2V UNREG+3.3V UNREG+3.3V UNREG+3.3V UNREG+3.3V M501 DRIVE ON-H DRIVE ON-H FAN MOTOR CP506 P.CON+12V MOTOR_GND P.FAIL P.FAIL CD501 TUNER+32V TUNER+32V AC230V_50Hz CP501 -22V -22V BROWN HEATER - HEATER - HEATER + HEATER + BLUE DVR-RT400-S... - Page 27 EP/LP HEAD HEAD AUDIO CONTROL ASS ’Y CD102 H5001 CP102 A.OUT AUDIO REC AUDIO REC AUDIO AUDIO PB AUDIO PB CTL+ CTL+ CONTROL DVD AUDIO OUT COAXIAL CTL- CTL- J8002 AE HEAD(+) AE HEAD(+) IF(NC) AE HEAD(-) AE HEAD(-) V.OUT DVR-RT400-S...
-
Page 28: Dvd Mpeg Pcb Assy(1/6)
MD24 C4065 53 54 55 56 C4086 MDQM 0.01 B LDQM 0.01 MDQM UDQM C4087 MCAS MCLK 0.001 B4002 MRAS C4159 HCB2012K MA12 -600T25 MBA0 MA11 MBA1 MA10 FROM/TO AV I/O C4066 CVBSIN 0.1 F +1.8V +1.8V +3.3V +3.3V DVR-RT400-S... - Page 29 57 58 59 60 61 62 63 64 65 66 67 68 69 70 71 72 73 74 75 76 77 78 79 80 81 82 83 84 85 86 87 88 89 90 91 92 93 94 95 96 97 98 99 101 102 103 104 DVR-RT400-S...
-
Page 30: Dvd Mpeg Pcb Assy(2/6)
RESET JG4065 R4129 IC4003 BD5229G SBVALID C4137 C4004 VOUT 0.01 B C4005 0.01 B C4006 B4001 6.3V FCM2012H -102T04 C4002 EXT_RESET 0.1 F I55_AMCLK R4015 AMCLK_SEL R4016 IC4010 SN74LVC1G125DCKR X4001 R4036 27MHz DSO751SV R4109 VADDIS_AMCLK AMCLK SW 11 12 DVR-RT400-S... - Page 31 JG4016 I55_RESET JG4080 I55_AODAT B4006 JG4081 I55_ABCLK JG4082 FCM2012H I55_ALRCLK JG4083 -102T04 I55_AMCLK I55_TX0 I55_RX0 JG4002 MHDO MHD1 JG4003 MHD2 JG4004 JG4005 MHD3 MHD4 JG4006 MHD5 JG4007 JG4008 MHD6 MHD7 JG4009 MHA0 JG4010 JG4011 MHA1 MHA2 JG4012 MHA3 JG4013 DVR-RT400-S...
-
Page 32: Dvd Mpeg Pcb Assy(3/6)
RAMCS RAMADD12 PCLK RAMBA0 RAMADD11 RAMCLE (BA0) RAMDQM RAMBA1 RAMADD9 (BA1) RAMWE RAMADD10 RAMADD8 RAMCAS RAMRAS RAMADD0 RAMADD7 RAMCS RAMADD1 RAMADD6 RAMBA0 RAMBA1 RAMADD2 RAMADD5 PNVMCE RAMADD3 RAMADD4 RESET C4053 0.1 F C4156 0.001 B FROM/TO AV I/O +3.3V DVR-RT400-S... - Page 33 RAMDAT4 R4053 FRAMDAT21 RAMDAT3 R4056 FRAMDAT22 DQ12 RAMADD4 R4057 FRAMDAT23 C4061 RESET 0.1 F FRAMDAT24 DQ11 FRAMDAT25 FRAMDAT26 DQ10 RAMDAT11 R4060 FRAMDAT27 R4061 RAMDAT10 FRAMDAT28 FRAMDAT9 FRAMDAT29 FRAMDAT8 FRAMDAT30 FRAMADD11 FRAMDAT31 R4062 FRAMADD9 RAMADD3 FRAMADD8 FRAMADD7 PNVMCE FRAMADD6 FRAMADD5 DVR-RT400-S...
-
Page 34: Dvd Mpeg Pcb Assy(4/6)
DVD MPEG PCB ASSY (A2E905TB10B) ATAPI BLOCK CP4001 ATAPI FFC 04_6274_040_000_800 DRVRST ATDD7 ATDD8 ATDD6 ATDD9 ATDD5 ATDD10 ATDD4 ATDD11 ATDD3 ATDD12 ATDD2 ATDD13 ATDD1 ATDD14 ATDD0 ATDD15 DRIVE ASSY ATDMARQ ATDIOW ATDIOR ATIORDY ATDMACK ATINTRQ ATDA1 ATDA0 ATDA2 ATCS0 ATCS1 DVR-RT400-S... - Page 35 ATDMARQ ATDD3 ATDD4 ATDD5 R4085 ATIOW ATDD6 ATDD7 ATDD8 R4092 ATDD9 ATIOR ATDD10 ATDD11 R4093 ATIORDY ATDD12 ATDD13 ATDD14 R4094 ATDD15 ATDMACK ATDA2 ATCS1 R4086 ATINTRQ R4087 ATDA1 R4088 ATDA0 R4089 ATDA2 R4090 ATCS0 R4091 ATCS1 FROM/TO AV I/O DVR-RT400-S...
-
Page 36: Dvd Mpeg Pcb Assy(5/6)
AIN3R C7305 MODE AIN4L FROM/TO MPEG AIN4R ADC_ADAT R7358 C7337 IC7301 AIN5L WM8776SEFT/R R7362 C7338 VADDIS_AMCLK AUDIO CODEC AIN5R ABCLKO AOUT0 ALRCLKO HPOUTL AINOPL R7312 HPGND AINVGL C7309 24 NC AGND HPVDD AINOPR R7315 HPOUTR AINVGR CAUTION: DIGITAL TRANSISTOR DVR-RT400-S... - Page 37 FROM/TO AV I/O ZERO R7318 100K C7341 AUDIO_IN_L_1 R7319 100K C7346 AUDIO_IN_R_1 R7320 100K C7347 AUDIO_IN_L_2 R7321 100K C7350 AUDIO_IN_R_2 R7322 100K C7351 TU_AUDIO_L R7323 100K C7352 TU_AUDIO_R R7326 C7353 BS_AUDIO_L R7327 C7354 BS_AUDIO_R DAC_R DAC_L B7301 FCM2012H-102T04 +3.3V DVR-RT400-S...
-
Page 38: Dvd Mpeg Pcb Assy(6/6)
L7305 C7308 12P CH L7303 FROM/TO MPEG VIDEO_IN_SEL C7307 CVBS 12P CH L7302 MUTE SPDIF EXT_RESET VSC_ON-H VSC_DATA VSC_CLK VADDIS_INT ASP1 C7319 ASP2 P-H/I-L 12P CH L7306 CVBS FPCDOUT FPCCLK FPCDIN MPEG_CS +3.3V +1.8V FROM/TO ATAPI FROM/TO MEMORY +3.3V DVR-RT400-S... - Page 39 MPEG CLK FPCDIN MPEG DATA IN FPCDOUT MPEG DATA OUT VSC_ON-H VSC ON-H VSC_DATA VSC DATA VSC_CLK VSC CLK CP7304 A2001WV2-10P B7307 +1.8V +1.8V HCB2012K-600T25 +1.8V NC(GND) NC(GND) B7305 +3.3V +3.3V HCB2012K-600T25 +3.3V CP1703 B7304 MPEG5V HCB2012K-600T25 B7306 HCB2012K-600T25 DVR-RT400-S...
-
Page 40: Vcr Mt Pcb Assy(1/7)
220P CH 5.6K 1/4W PB SW PB SW Q103 Q104 DTA124EKA R105 KTC3875S_Y_RTK R103 4.7K R101 C103 CP103 2.2K PB SW B2013H02-2P 0.0047 B R106 Q105 NORMAL AUDIO FE HEAD(GND) REC ST SW KTC3875S_Y_RTK 4.7K FE HEAD(HOT) Q101 KTC3875S_Y_RTK DVR-RT400-S... - Page 41 0 5.0 3.2 2.5 2.8 1.1 1.1 1.9 1.8 0.4 0 2.2 2.8 1.9 2.8 1.9 2.8 2.4 2.8 5.0 2.3 2.1 2.8 0 2.1 2.8 NC NC HEAD AMP IC C160 DUMMY_V.SYNC L112 0.1 B P.CON+5V 22uH 0305 Y/C_VIDEO_OUT BUFFER Q108 KTA1504S_Y_RTK DVR-RT400-S...
-
Page 42: Vcr Mt Pcb Assy(2/7)
D3009 RESET IC3099 S-24C08ADPA-01 1SS133 EEP ROM (DIP) JG301 H8 WRITE JG302 H8 WRITE MP_DATA_IN JG303 H8 WRITE MP_DATA_OUT CAUTION: DIGITAL TRANSISTOR JG304 H8 WRITE JG305 H8 WRITE RESET JG306 H8 WRITE JG307 H8 WRITE JG308 H8 WRITE MP_CLK DVR-RT400-S... - Page 43 OSD_VIDEO_OUT 12P CH R3053 BAIAS 330K D3007 BUFFER Q3003 FROM/TO 21PIN I/O 1SS133 KTC3875S_Y_RTK BLAKKING-L R3010 R3009 P_MUTE-H C3049 IIC_CLK C3035 100P CH IIC_DATA PERI_CTL_IN C3051 OSD_VIDEO_OUT OSD_VIDEO_OUT 0.0022 B CH_V_MUTE-H FRONT_V_SW-H VCR MT PCB ASSY (A2E905T010B) SYSCON/SERVO/TIMER BLOCK DVR-RT400-S...
-
Page 44: Vcr Mt Pcb Assy(3/7)
0.1 F SC1_IN_R MPEG DATA OUT 44 AVSS C802 VREFTOP VSC ON-H MPEG_RESET MONO IN VSC DATA D8314 MP_CLK VSC CLK D8307 RB721Q-40 MP_DATA_IN D8301 RB721Q-40 MP_DATA_OUT MUTE SW RB721Q-40 Q8310 DTA124EKA MUTE SW Q8312 DTA124EKA CAUTION: DIGITAL TRANSISTOR DVR-RT400-S... - Page 45 DVSS 24 NC DVSUP W810 IIC_CLK TP_CO W808 IIC_DATA IC801 MSP3417G-QG-B8 IIS_DA_IN1 AFT-S.CURVE NICAM/A2 P.CON+5V IIS_DA_OUT A.OUT 13 SDA IIS_WS C811 12 SCL 47P CH IIS_CL 31.7 +32V R801 IIC_DATA IF(NC) R802 IIC_CLK W848 W849 TU_VIDEO_OUT V.OUT X801 18.432MHz DVR-RT400-S...
-
Page 46: Vcr Mt Pcb Assy(4/7)
100uH 0305 MUTE MUTE MUTE_SW MUTE Q8004 MUTE MUTE DTC124EKA P_MUTE-H 0.2,4,6dB 0.2,4,6dB Gin CTL Gin CTL V[PR]_V_OUT Y[G]_V_OUT R8004 U[PB]_V_OUT C8002 4.7K C8007 47P CH 47P CH C8003 0.1 B C8004 C8030 C8032 6.3V D8009 D8010 MTZJ6.2B MTZJ6.2B DVR-RT400-S... - Page 47 V[PR]_V_OUT SWD_AUDIO-L SWD_AUDIO-R C8095 C8096 C8097 SPDIF 47P CH 47P CH C8078 D8008 47P CH C8077 D8007 MTZJ6.8B S803Y C8079 D8006 MTZJ6.8B FROM/TO HI-FI DEC_AUDIO-L MTZJ6.8B DEC_AUDIO-R HIFI_AUDIO_OUT-L HIFI_AUDIO_OUT-R DVD_AUDIO_L DVD_AUDIO_R SWD_AUDIO-L SWD_AUDIO-R FROM/TO REGULATOR MP_P.CON+5V AT+12V P.CON+5V AT+5.2V DVR-RT400-S...
-
Page 48: Vcr Mt Pcb Assy(5/7)
VOLTAGE CTL IC AT+12V REG. IC P.CON+12V REG. IC 13.2 12.0 13.2 13.2 12.1 23.1 CP1701 52147-1610 MOTOR+27V MOTOR+12V MOTOR GND AT+13V AT+5.2V ICP1701 AT+5.2V C1703 20N_1600FS UNREG+3.3V 1.6A_125V UNREG+3.3V 0.1 F DRIVE ON-H P.FAIL TUNER+32V -22V HEATER - HEATER + DVR-RT400-S... - Page 49 DTA124EKA MP_P.CON+5V AT+12V 12.1 8V REG. P.CON+5V Q1703 KTC3209_Y AT+5.2V R1718 FROM/TO AV I/O 2 W829 P.CON+12V W820 MP_P.CON+3.3V P.CON+8V +32V -16.0 AT+5.2V P.CON+5V -15.9 -15.3 HEATER VOLTAGE CTL Q1709 KTC3203_Y FROM/TO DISPLAY AT+5.2V P.CON+12V -22V HEATER_DC- W825 HEATER_DC+ DVR-RT400-S...
-
Page 50: Vcr Mt Pcb Assy(6/7)
FRONT_S_SW 390 1/4W R664 FRONT_C_IN OS651 ROM-N340LO Vout CP651 R602 A2001WR2-5P B651 B652 MMZ1608R102CT KEY-B KEY-B B653 MMZ1608R102CT KEY-A KEY-A B654 MMZ1608R102CT DVD_LED DVD LED B655 MMZ1608R102CT AT+5.2V AT+5.2V MMZ1608R102CT R651 R652 R653 R601 W819 2.7K 1.8K 1.5K W842 DVR-RT400-S... - Page 51 KEY MATRIX MEMORY FRONT_V_IN -22.0 -9.0 FROM/TO HI-FI SERIAL DRIVE DATA C665 FRONT_AUDIO_IN-R INTERFACE FRONT_AUDIO_IN-L 0.1 B R668 FROM/TO AV I/O 2 10K 1/4W FRONT_AUDIO_IN-R FRONT_AUDIO_IN-L FRONT_Y_IN FRONT_C_IN TP651 005P-2100 FROM/TO REGULATOR P.CON+12V AT+5.2V -22V HEATER_DC+ HEATER_DC- C685 0.1 B DVR-RT400-S...
-
Page 52: Vcr Mt Pcb Assy(7/7)
R743 R708 HIFI_AUDIO_OUT-L FROM/TO DISPLAY 0.0015 B FRONT_AUDIO_IN-L FRONT_AUDIO_IN-R R738 NORMAL_AUDIO_OUT FROM/TO REGULATOR IC702 3.9K NJM4580M NORMAL_AUDIO_IN AT+5.2V AT+9V SWD_AUDIO-L R723 P.CON+12V FRONT_AUDIO_IN-L 11.6 L701 AT+9V C747 R730 R744 22uH 0305 DVD_AUDIO_L C703 R728 C741 R735 R737 0.0015 B DVR-RT400-S... - Page 53 22uH 0305 D0 DET C740 0.1 F C706 C735 470P CH R716 2.2K REC-H PB AMP C707 HF_COM COMP C709 PB AMP REC-H MUTE HIFI_ENV.DET L-CH IN SEL C738 0.01 B C710 VREF A GND HIFI_REC_MUTE C712 R710 R711 R709 DVR-RT400-S...
-
Page 54: Power Pcb Assy
RGP15J MTZJ10B HS501_1 763WAA0136 560 1/4W R519 R513 D514 1K 1/4W 100 1/4W 1SS133 D504 C524 R508 1SS133 0.01 B 470 1/4W PRIMARY SIDE IC501 KIA431A-AT VOLTAGE CTL 10.43 2 .5 10.43 SAFTY SW R523 Q503 KTC3198 1K 1/4W DVR-RT400-S... - Page 55 1A 125V 1K 1/4W CP506 M501 1/4W 2410ML-04W-B10-C47 A2001WV2-2P R532 P.CON+12V 120 1W MOTOR_GND C527 R539 D516 1 2 W 1SS133 C531_1 CP504 A2544WV2-4P P.CON+12V M_GND C517_1 MOTOR GND D GND 6.3V P.CON+D5V SAFTY SW 2.22 Q504 KTA1271_Y 2.22 DVR-RT400-S...
-
Page 56: Opeartion Pcb Assy
3.17 OPEARTION PCB ASSY OPERATION PCB ASSY (A2E905T270B) CP681 A2001WR2-5P KEY-B R681 R682 R683 R684 R685 R686 KEY-A 13K 1/4W 6.8K 1/4W 3.9K 1/4W 2.7K 1/4W 1.8K 1/4W 1.5K 1/4W CP651 DVD LED DVD LED (ORANGE) AT+5.2V D681_1 R688 330 1/4W LTL-1CHAE-002A DVR-RT400-S... -
Page 57: Wave Forms
IC4001-pin 99 (VADDIS_AMCLK) IC4001-pin 142 (SBCLK) V: 1.0V/div. H: 100nsec/div. V: 1.0V/div. H: 20nsec/div. V: 1.0V/div. H: 20nsec/div. IC4009-pin 177 (I55_AMCLK) IC4001-pin 100 (I55_ALRCK) IC4001-pin 144 (SPDIF) V: 1.0V/div. H: 20nsec/div. V: 1.0V/div. H: 5µsec/div. V: 1.0V/div. H: 200nsec/div. DVR-RT400-S... - Page 58 IC7301-pin 26 (DAC_L) IC7302-pin 6 (TU_VIDEO) V: 1.0V/div. H: 5µsec/div. V: 1.0V/div. H: 200µsec/div. V: 200mV/div. H: 10µsec/div. IC7301-pin 10 (I55_ABCLK) CP7302-pin 9 (Y_OUT) IC7302-pin 4 (COMPOSITE_IN) V: 1.0V/div. H: 100nsec/div. V: 500mV/div. H: 10µsec/div. V: 200mV/div. H: 10µsec/div. EE DVR-RT400-S...
- Page 59 C134 –side (NORMAL_AUDIO_OUT) IC3001-pin 104 (CYL_FG/PG) V: 500mV/div. H: 10µsec/div. VCR STOP VCR PLAY V: 20mV/div. H: 500µsec/div. V: 100mV/div. H: 5msec/div. CP102-pin 6 (AUDIO REC) VCR REC IC3001-pin 8 (CTL_SMT(I)) VCR PLAY V: 1.0V/div. H: 5µsec/div. V: 50mV/div. H: 5msec/div. DVR-RT400-S...
- Page 60 IC701-pin 23 (HIFI_ENV. DET) V: 200mV/div. H: 200msec/div. VCR PLAY V: 100mV/div. H: 10msec/div. Q3001-pin 3 (REEL_S) VCR PLAY IC701-pin 40 (HIFI_H. SW) VCR PLAY V: 200mV/div. H: 200msec/div. V: 100mV/div. H: 10msec/div. IC301-pin 2 VCR STOP V: 10mV/div. H: 1µsec/div. DVR-RT400-S...
- Page 61 DVR-RT400-S...
-
Page 62: Pcb Connection Diagram
CP8302 R7306 R4028 R4024 C4006 Q7301 R4021 R4109 R4059 C4031 VMD340A R4099 C4008 C4007 X4001 C4035 REFLOW NTSC/PAL C4157 ENC. C7369 C4094 C4161 C4107 C4117 C7370 C4098 C4128 C7367 C4076 B4004 C4158 C4145 C4077 CP8303 IC4009 C4102 C4093 C4081 DVR-RT400-S... - Page 63 SIDE A R4110 R4027 R4026 R4066 R4092 R4083 R4081 R4079 SIDE B MPEG P.C.Board Chip Part R4077 Q7301 R4075 R4073 R4071 4031 C4137 R4069 C4047 R4067 IC4003 IC4003 IC4002 C4136 X4001 C4130 C4129 C4134 C4128 B4004 C4158 C4145 IC4009 DVR-RT400-S...
- Page 64 R4086 C4017 R4094 R4034 C4015 R4093 R4012 R4085 C4024 R4084 R4082 R4080 R4078 R4076 R4074 R4072 R4100 R4122 R4070 R4068 R4095 R4010 R4009 C4003 IC7302 C4119 C4122 R5719 C4075 IC4008 C4152 C4071 C4064 C4070 C4073 IC4007 C4067 C4068 C4062 DVR-RT400-S...
- Page 65 C7364 C4105 C4122 C4110 C7348 C4075 C4074 R4043 C7361 C7363 C7362 C7344 C7343 C4095 C7342 C4088 C4101 IC4008 C7330 C7374 C7345 C4152 C7376 C4071 C4064 C4065 C4066 C4070 C7375 C4072 C4073 IC4007 C4086 C4087 C4067 C4068 C4062 C4069 C4063 DVR-RT400-S...
-
Page 66: Vcr Mt Pcb Assy
SW3001 W192 W407 W218 W405 W406 TAB SW W217 W334 L803 W803 L702 W333 W213 J652 Q1703 W329 Q1708 W212 W211 W326 IC1706 W209 W320 L651 W394 W395 J653 W393 POWER Q3006 V.ENV SW652 IC301 IC301 W833 W392 X301 DVR-RT400-S... - Page 67 IC1705 W124 W048 IC1701 W123 HI-FI/ W144 HS1701 H.AMP D1709 W218 W143 W142 W803 L702 W141 D1707 W820 W213 R1729 W067 Q1708 W212 L701 R1725 Q1703 W064 W209 W837 IC1706 W062 TU301_1 W810 TUNER L801 W057 W849 W808 W134 DVR-RT400-S...
- Page 68 IC702 Q8301 Q8304 Q8305 Q8303 IC8002 IC651 IC3001 Q8005 Q8008 IC8007 Q8013 IC3003 Q8012 Q8004 IC8005 IC8004 IC8003 IC8006 Q1713 Q101 Q104 Q8011 Q105 Q1714 Q103 IC101 Q1710 Q701 Q1707 Q702 Q703 IC801 IC701 Q704 Q651 Q652 Q302 Q301 DVR-RT400-S...
- Page 69 SIDE A DVR-RT400-S...
-
Page 70: Power Pcb Assy
R525 D530 D531 D524 R524 R507 R516 C511 Q501 C503 C508_1 W805 W806 R508 R509 W010 W808 D504 Q502 Q502 R505_1 C542 BLUE CP501 D506 D505 F501 C543 FH501 FH502 D502 RISK OF FIRE - REPLACE AS MARKED . DVR-RT400-S... -
Page 71: Operation Pcb Assy
4.4 OPERATION PCB ASSY SIDE A SIDE A CP651 CP681 OPERATION PCB ASSY OPEN/CLOSE FF/CUE REC/OTR CH DOWN CH UP VECA30A D681_1 PAL/NTSC DVR-RT400-S... -
Page 72: Pcb Parts List
IC8002 MM1501XNRE I0UF015010 Q8302 TRANSISTOR,SILICON KTC3875S_Y_RTK TCAA3875SY IC8003 IC MM1506XNRE I0UF015060 Q8303 TRANSISTOR,SILICON KTC3875S_Y_RTK TCAA3875SY Q8304 TRANSISTOR,SILICON KTC3875S_Y_RTK TCAA3875SY IC8004 IC MM1506XNRE I0UF015060 Q8305 TRANSISTOR,SILICON KTC3875S_Y_RTK TCAA3875SY IC8005 IC MM1506XNRE I0UF015060 Q8306 TRANSISTOR,SILICON KTC3875S_Y_RTK TCAA3875SY IC8006 IC NJM2534V(TE2) I0QF02534V DVR-RT400-S... - Page 73 021W7A220K B7305 CORE,BEADS HCB2012K-600T25 024HC36001 L3001 COIL 27UH 021LA6270K B7306 CORE,BEADS HCB2012K-600T25 024HC36001 B7307 CORE,BEADS HCB2012K-600T25 024HC36001 L3002 COIL 22UH 021W7A220K B8001 CORE,BEADS FCM2012H-102T04 024HC31022 L3003 COIL 12UH 021LA6120J BT601 BATTERY, MANGAN R03(AB)2PXGP I 1412004013 L4601 COIL 22UH 021W7A220K DVR-RT400-S...
- Page 74 X101 CRYSTAL AT-49 100DT4R410 X301 CERAMIC OSCILLATOR CSB500E5 1002A0R503 X801 CRYSTAL HC-49/U-S 100CT01803 X3001 CRYSTAL HC-49/U-S 100CT01002 X3002 CRYSTAL DT-26 100DA32R01 X3003 CRYSTAL HC-49/U-S 100CT01701 X4001 CRYSTAL DSO751SV 100DT02712 X8301 CERAMIC OSCILLATOR CSB500E5 1002A0R503 J651 RCA JACK MSP-281V31-A 060J421039 DVR-RT400-S...
-
Page 75: Adjustment
3. In case of using a cassette tape, press the VCR EJECT button to insert or eject a cassette tape. Turn on the power and re-check the cable before checking the trouble points. When you servicing with connection of DVD, perform the operations above step 2 to step 3. DVR-RT400-S... -
Page 76: Adjustment Items And Necessary Adjustment Points
2-2 CONFIRMATION AND ADJUSTMENT OF AUDIO/CONTROL HEAD 2-3 TAPE RUNNING ADJUSTMENT (X VALUE ADJUSTMENT) 2-4 CONFIRM HI-FI AUDIO (Hi-Fi model only) [Electrical Part] 1. BASIC ADJUSTMENT 1-1 PG SHIFTER DCR SIDE EEPROM (IC3099) INITIAL SETTING REPLACING EEPROM (IC4002) IC REGION SETTING REPLACING NEW DVD LOADER DVR-RT400-S... - Page 77 Mechanical point None DECK ASSY VCR MT PCB ASSY Electrical point Replacing Mechanical point None IC3099 (DCR SIDE EEPROM) Electrical point Replacing Mechanical point None IC4002 (DVD SIDE EEPROM) Electrical point Replacing Mechanical point None DVD LOADER Electrical point DVR-RT400-S...
-
Page 78: Service Mode List
DVD mode STOP 2 sec. Region setting. (STOP) Refer to the "6.8 WHEN REPLACING NEW DVD LOADER". DVD mode STOP 2 sec. Measure ment of Error Rate. (DVD Play Refer to the "7.2 Measure ment of Error Rate". back) DVR-RT400-S... -
Page 79: Confirmation Of Hours Used
Initial setting data check sum. 0000 Romcorrection data check sum. PLAY/REC total hours. = (16 × 16 × 16 × thousands digit value) + (16 × 16 × hundreds digit value) Fig. 1 + (16 × tens digit value) + (ones digit value) DVR-RT400-S... -
Page 80: Preventive Checks And Service Intervals
Clean the full erase head in the same manner. (Refer to the figure below.) NOTE Do not exert force against the cylinder head. Do not move the chamois upward or downward on the head. Use the chamois one by one. Cylinder Head Audio Control Head DVR-RT400-S... -
Page 81: Mechanical Adjustments
2. Confirm that the right meter of the torque tape indicates 50~90gf•cm during playback in SP mode. 3. Confirm that the left meter of the torque tape indicates Height Adjustment Washer 25~40gf•cm during playback in SP mode. 2.6 × 4.7 × T0.13 2.6 × 4.7 × T0.25 Fig. 1-1-B DVR-RT400-S... - Page 82 Cassette Holder Assy Fig. 1-4-A Torque Gauge/Adapter CH-1 (GGF1508/GGF1506) Envelope (TP101) CH-1 CH-2 Torque Gauge/Adapter Track Track CH-2 (GGF1507/GGF1506) SW Pulse (TP3002) Fig. 2-1-A Entrance Exit S Reel T Reel A : B 3 : 2 Fig. 2-1-B Fig. 1-4-B DVR-RT400-S...
- Page 83 7. If the difference are more than 3 steps, set the X Value adjustment driver (GGF1510) to 4 of Fig. 2-2-B. Change the X Value and adjust it so that the value becomes within 2 steps. 0.25 ± 0.05 mm Fig. 2-2-C DVR-RT400-S...
- Page 84 1. Tension Connect 6. P4 Post 2. Tension Arm 7. T Brake Spring 3. Guide Roller 8. T Reel 4. Audio/Control Head 9. S Reel 5. X value adjustment driver hole 10. Adjusting section for the Tension Arm position DVR-RT400-S...
-
Page 85: Electrical Adjustments
2 seconds to set tracking to center. 4. Press both VCR/DVD button on the set and the REC button on the set for more than 2 seconds. CH-2 6.5 H CH-1 Fig. 1-1-A CH-2 CH-1 6.5 H Fig. 1-1-B DVR-RT400-S... - Page 86 CP501 CD502 CP1701 CP504 CD7304 FAN MOTOR CP506 CP102 CP103 CD7301 FE HEAD CD7302 AC HEAD CD7303 CP7301 CP651 CP4001 CP7304 TP102 TP103 OS651 J654 TP651 V651 OPERATION PCB ASSY CD651 CP681 DVD/HD MPEG PCB ASSY DRIVE ASSY R7R DVR-RT400-S...
-
Page 87: When Replacing New Dvd Loader
9. Press both CH DOWN button on the set and the DVD/VCR button on the set for more than 2 seconds. Information screen will be displayed on the TV Monitor. (Refer to Fig. 1) 10. If the writing Region No. is appeared, the Region setting is completed. 11. Turn off the power. RPE4A191-p OEC0152A909A 1A8D Region No. Fig. 1 DVR-RT400-S... -
Page 88: When Replacing Eeprom (Memory) Ic
Press both CH UP button on the set and the PLAY button on the set for more than 2 seconds. After the finishing of the initializing of shipping, the unit will turn off automatically. The unit will now have the correct DATA for the new MEMORY IC. DVR-RT400-S... - Page 89 12. After the finishing of the initializing of shipping, the unit will turn off automatically. The unit will now have the correct DATA for the new MEMORY IC. * : When initializing to shipping data, the VCR operating time record is cleared. DVR-RT400-S...
-
Page 90: General Information
15. Press both CH DOWN button on the set and the VCR/DVD button on the set for more than 2 seconds. Information screen will be displayed on the TV Monitor. (Refer to Fig. 1) 16. When the changed version displays, the Re-write will be completed. 17. Turn off the power Firmware version RPE4A191-P OEC0152A909A 040501BD 1A8D Fig. 1 DVR-RT400-S... -
Page 91: Measurement Of Error Rate
When clearing this display, the error rate measurement is not executed. Table 1: List of Reference Value Disc Type Recording Mode Reference Value 8.0 × 10 – 4 DVD-VIDEO 1.0 × 10 – 3 DVD-R Video mode 1.0 × 10 – 3 DVD-RW Video mode DVR-RT400-S... -
Page 92: Power On Sequence
MP_P.CON1.8V,3.3V REGULATOR UNREG+3.3V Q1701(MP POWER SW) (from U-COM) MPEG_P_ON-L DVD BLOCK MP_P.CON+1.8V DVD BLOCK MP_P.CON+3.3V Q1722(MPEG P.CON SW) BLOCK (from U-COM) MPEG5V_ON-H DVD BLOCK MP_P.CON+5V IC502(DRIVE 12V REGULATOR) (from U-COM) DRIVE_ON-H DVD UNIT,FAN MOTOR P.CON+12V (POWER SIDE) DVD UNIT P.CON+D5V DVR-RT400-S... -
Page 93: Disc Removal Method
5. Repeat the above step 3~4. Then take out the Video Cassette from the Deck Chassis. Be careful not to scratch on the tape. Loading Motor Screw Capstan DD Unit Pinch Roller Cam Main Cam Insert hole for screwdriver Clutch Assy Main Chassis (Front Side) Fig. 1 Fig. 2 DVR-RT400-S... -
Page 94: Parental Control-Rating Level
3. Simultaneously press and hold the 'STOP' key on the front panel. 4. Hold both keys for more than 2 seconds. 5. The Tray Lock has now been cleared. 6. Turn Unit OFF. NB: No indications on the screen when the Tray Lock is setting. DVR-RT400-S... -
Page 95: Disassembly
1. Open Flap to 90° and flex in direction of arrow (A), at Deck Shield Assy the same time slide in direction of arrow (B). 2. Then lift in direction of arrow (C). DVD Angle (R) DVD MPEG PCB MPEG Shield Flap Fig. 1-2 Fig. 1-3 DVR-RT400-S... - Page 96 5. Remove the 3 screws 3. 6. Disconnect the following connectors: (CP101, CP102, CP3001). 7. Remove the AC Head Cover and VCR Deck in the direction of arrow. FE Head AC Head Cover VCR Deck Top Holder Fig. 1-5 DVR-RT400-S...
- Page 97 2. Remove the Link Lever. Side L/R. 3. Remove the Flap Lever. 3. Unlock the support 2 and then remove the Locker R. Locker Spring Cassette Holder Flap Lever Locker R Link Lever Cassette Side R Cassette Side L Fig. 2-3-A Fig. 2-5 DVR-RT400-S...
- Page 98 Loading Motor Tension Band Tension Connect Fig. 2-7-C Tension Connect Cassette Opener [OK] Tension Band Tension Connect [NG] Fig. 2-6-C Tension Band Fig. 2-7-D Pink Capstan DD Unit Loading Motor Tension Connect White Main Chassis Fig. 2-6-D Fig. 2-7-E DVR-RT400-S...
- Page 99 5. When you install the reel, clean the shaft and grease it (FG-84M). (If you do not grease, noise may be heard in FF/REW mode.) 6. After installing the reel, adjust the height of the reel. (Refer to MECHANICAL ADJUSTMENT) DVR-RT400-S...
- Page 100 (2), finally tighten the screw (3). Cylinder Unit Assy AHC Assy A/C Head A/C Head Spring A/C Head Base Screw Torque: Screw Torque: 3 ± 0.5kgf•cm 5 ± 0.5kgf•cm (Screw 1) Fig. 2-11-A Fig. 2-13 DVR-RT400-S...
- Page 101 1. In case of the Pinch Roller Cam and Main Cam installation, install them as the circled section of Fig. 2-15-B so that the each markers are met. Loading Arm T Unit Loading Arm S Unit (Refer to Fig. 2-15-B) Fig. 2-16-B DVR-RT400-S...
- Page 102 [NG] 1. Remove the P4 Cap. 2. Unlock the support 1 and remove the Cassette Guide Cassette Guide Post Post. 3. Remove the Inclined Base S/T Unit. 4. Remove the screw 2. 5. Remove the LED Reflector. Fig. 2-18-C DVR-RT400-S...
-
Page 103: Cautions On Diassembling And Assembling
6. When attaching the ferrite core to the CD7304, pass the wires through it twice (one wind around it). Incorrect attachment of the ferrite core may compromise its effects of reducing spurious radiation. DVR-RT400-S... - Page 104 9. Be sure to reattach the Shield 3 Pin so that part of it protrudes from the Plate bottom. Be careful that the Shield 3 Pin is not embedded between the Plate bottom and the circuit board. Shield Compo DVR-RT400-S...
-
Page 105: Key To Abbreviations
: Inverter : Visual Search Rewind : Voltage Super Source : Killer V-SYNC : Vertical-Synchronization : Voltage Tuning : Left : Light Emitting Diode X'TAL : Crystal LIMIT AMP : Limiter Amplifier LM, LDM : Loading Motor : Luminance/Chrominance DVR-RT400-S... -
Page 106: Disc/Content Format
Discs recorded using a personal computer may not be playable in this unit due to the setting of the application software used to create the disc. In these particular instances, check with the software publisher for more detailed information. DVR-RT400-S... - Page 107 Editing (with limitation) • This unit cannot record on DVD-R and DVD-RW DVD-R Video mode Playback and recording discs that are 8 cm in diameter. Ver.2.0 Editing (with limitation) • This unit cannot record on CD-R or CD-RW. (Ver.2.0/4x/8x) DVR-RT400-S...
-
Page 108: Cleaning
Before shipping out the product, be sure to clean the following positions by using the prescribed cleaning tools: Position to be cleaned Cleaning tools Pickup lenses Cleaning liquid : GEM1004 Cleaning paper : GED-008 Position to be cleaned Cleaning tools Fans Cleaning paper : GED-008 DVR-RT400-S... -
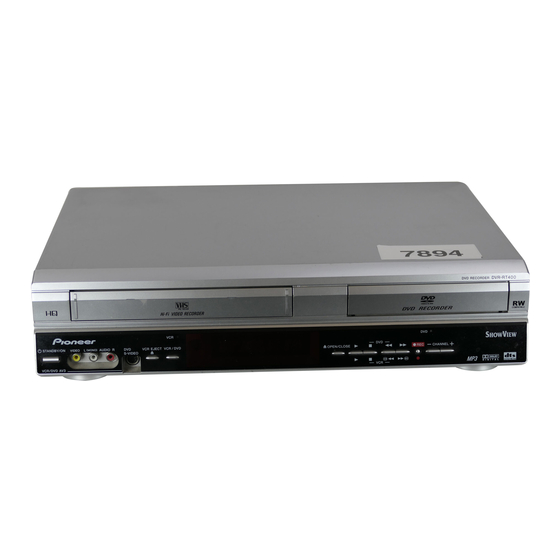
Page 109: Panel Facilities
Rear DECODER/EXTERNAL Scart socket (AV2) DVD COAXIAL DIGITAL AC power cord RF IN jack AUDIO OUT jack DVD AUDIO (L/R) OUT jacks RF OUT jack Make sure that when installed the fan is not obstructed TV Scart socket (AV1) DVR-RT400-S... - Page 110 The external input channel (AV1, AV2, or AV3) display. Lights during playback of DVD and CD. Flashes in auto resume. DVD or CD is temporarily stopped. Lights during DVD recording. NOTE: Some discs may not playback correctly, or chapter number, playback time, etc may not be displayed. DVR-RT400-S...
- Page 111 ANGLE Changes playback angle of a DVD disc. SUBTITLE Selects subtitles of the DVD disc. Digital AUTO TRACKING. PLAY MODE Displays the playback mode. REPEAT Repeats playback. CLOCK/COUNTER Changes the front panel displa y mode. TV/VCR Changes the TV/VCR. DVR-RT400-S...
- Page 112 Guide Roller Adjustment X Value Adjustment Screwdriver GGF1510 X Value Adjustment Mater Plane GGF1511 Reel Disk Height Adjustment Reel Disk Height Adjustment Jig GGF1512 Reel Disk Height Adjustment Torque Tape (VHT-063) GGV1186 Playback Torque, Back Tension Torque During Palyback DVR-RT400-S...