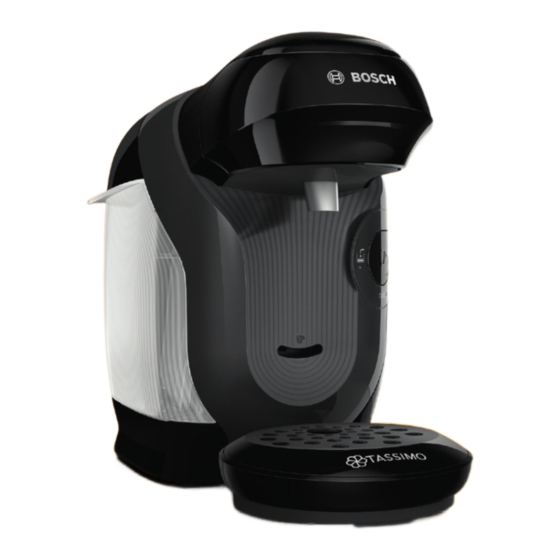
Bosch TASSIMO style TAS110 Series User Manual
Hide thumbs
Also See for TASSIMO style TAS110 Series:
- User manual (200 pages) ,
- User manual (72 pages) ,
- User manual (197 pages)

Related Manuals for Bosch TASSIMO style TAS110 Series


Summary of Contents for Bosch TASSIMO style TAS110 Series
- Page 1 TAS110x GB/CH de Gebrauchsanleitung en User manual Manuel d'utilisation Manuale utente...
- Page 2 - -- [de] Scannen Sie den QR-Code oder besuchen Sie die Webseite, um die erweiterten Hinweise zur Benutzung zu öffnen. Dort finden Sie zusätzliche Informationen zu Ihrem Gerät oder Zubehör. [en] Scan the QR code or visit the website to open the Further Notices for Use. You can find additional informa- tion about your appliance or accessory here.
- Page 4 min. 250 ml 9 fl.oz.
- Page 8 min. 250 ml 9 fl.oz.
- Page 9 min. 500 ml 17 fl.oz.
-
Page 11: Table Of Contents
Inhaltsverzeichnis 1 Sicherheit ........ 12 1.1 Allgemeine Hinweise..... 12 1.2 Bestimmungsgemäßer Ge- brauch......... 12 1.3 Einschränkung des Nutzerkrei- ses .......... 12 1.4 Sicherheitshinweise ...... 12 2 Übersicht ........ 14 2.1 Bedienelemente ...... 14 3 Erste Inbetriebnahme vorneh- men .......... -
Page 12: Sicherheit
de Sicherheit Sicherheit ¡ Lesen Sie diese Anleitung sorgfältig. ¡ Bewahren Sie die Anleitung sowie die Produktinformationen für einen späteren Gebrauch oder Nachbesitzer auf. ¡ Schließen Sie das Gerät bei einem Transportschaden nicht an. Verwenden Sie das Gerät nur: ¡ im privaten Haushalt und in geschlossenen Räumen des häusli- chen Umfelds. - Page 13 Sicherheit de ▶ Wenn das Gerät oder die Netzanschlussleitung beschädigt ist, sofort den Netzstecker der Netzanschlussleitung ziehen oder die Sicherung im Sicherungskasten ausschalten. ▶ Den Kundendienst rufen. ▶ Nur dafür geschultes Fachpersonal darf Reparaturen am Gerät durchführen. ▶ Nur Original-Ersatzteile dürfen zur Reparatur des Geräts verwen- det werden.
-
Page 14: Übersicht
de Übersicht ▶ Beim Einlegen der T DISC oder dem Reinigen auf die Finger achten. ▶ Personen mit elektronischen Implantaten müssen 10 cm Min- destabstand zum Gerät einhalten. ▶ Den Mindestabstand von 10 cm auch zum entnommenen Was- sertank einhalten. ▶ Die Reinigungshinweise zur Hygiene zum Gerät beachten. Übersicht ¡... -
Page 15: Gerät Reinigen
Gerät reinigen de ▶ Den Entkalkungsvorgang nach Anwei- reinigen Gerät Gerät reinigen sung sofort durchführen. Folgen Sie der Bildanleitung am Anfang reinigen Gerät ▶ Keine Entkalkungsmittel mit Phosphor- dieser Anleitung. säure verwenden. → Abb. - → Abb. - entkalken Gerät Gerät entkalken reinigen Teile Gerät Gerät und Teile reinigen... - Page 16 de Störungen beheben Störung Ursache und Störungsbehebung Brühvorgang startet Gerät war beim Einlegen der T DISC nicht an die Stromver- nicht. sorgung angeschlossen. Schließen Sie das Gerät an die Stromversorgung an, be- Statusanzeige leuchtet ▶ vor Sie die T DISC einlegen. rot. Brühsystem lässt sich T DISC-Stanzvorrichtung oder T DISC-Träger ist nicht richtig nicht schließen.
-
Page 17: Technische Daten
Technische Daten de Störung Ursache und Störungsbehebung leuchtet, obwohl Schwimmer im Wassertank hängt fest. sich genug Wasser im Entkalken Sie das Gerät. Wassertank befindet. → "Gerät entkalken", Seite 15 Greifen Sie in den Wassertank und bewegen Sie den Schwimmer auf und ab. leuchtet, ob- Enthärtetes Wasser enthält noch geringe Mengen an Kalk. - Page 18 de Garantiebedingungen Sie können die Garantiebedingungen jeder- ten dieses Hefts. Darüber hinaus sind die zeit über Ihren Fachhändler, bei dem Sie Garantiebedingungen auch im Internet un- das Gerät gekauft haben oder direkt bei un- ter der genannten Web-Adresse hinterlegt. serer Landesvertretung anfordern. Die Ga- Für die Inanspruchnahme von Garantieleis- rantiebedingungen für Deutschland finden tungen ist in jedem Fall die Vorlage des...
- Page 19 Garantiebedingungen de Gedruckt auf 100% Recyclingpapier...
- Page 20 Table of contents 1 Safety .......... 21 1.1 General information ...... 21 1.2 Intended use ........ 21 1.3 Restriction on user group .... 21 1.4 Safety information...... 21 2 Overall view ........ 22 2.1 Controls ........ 23 3 Performing initial start-up ....
-
Page 21: Safety
Safety en Safety ¡ Read this instruction manual carefully. ¡ Keep the instruction manual and the product information safe for future reference or for the next owner. ¡ Do not connect the appliance if it has been damaged in transit. Only use this appliance: ¡... -
Page 22: Overall View
en Overall view ▶ Repairs to the appliance should only be carried out by trained specialist staff. ▶ Only use genuine spare parts when repairing the appliance. ▶ If the power cord of this appliance is damaged, it must be re- placed by the manufacturer, the manufacturer's Customer Ser- vice or a similarly qualified person in order to prevent any risk. -
Page 23: Controls
Performing initial start-up en Note: You can prepare a wide range of hot Float beverages with the multiple hot drinks ma- Calc mark chine. When you insert a T DISC, the scan- Max mark ner reads the barcode and controls the flow of hot water automatically. - Page 24 en Troubleshooting Fault Cause and troubleshooting The appliance is not The appliance has no power supply. working. Check to see whether the appliance is connected to the ▶ mains. LEDs do not light up. Brewing process starts, Water tank was removed during brewing and inserted again drink is not dispensed.
-
Page 25: Technical Specifications
Technical specifications en Fault Cause and troubleshooting Water is dripping from Press the T DISC piercing unit into the holder until it ▶ the brewing unit. clicks audibly into place. There is water under the Condensation has formed due to technical reasons or valves cup stand. -
Page 26: Warranty Conditions
en Warranty conditions Dispose of the appliance in an environ- mentally friendly manner. Information about current disposal meth- ods are available from your specialist dealer or local authority. This appliance is labelled in accordance with European Directive 2012/19/EU con- cerning used electrical and electronic appliances (waste electrical and electronic equipment - WEEE). - Page 27 Table des matières 1 Sécurité ......... 28 1.1 Indications générales .... 28 1.2 Conformité d’utilisation.... 28 1.3 Restrictions du périmètre utilisa- teurs ........... 28 1.4 Consignes de sécurité .... 28 2 Aperçu........... 30 2.1 Éléments de commande .... 30 3 Première mise en service ....
-
Page 28: Sécurité
fr Sécurité Sécurité ¡ Lisez attentivement cette notice. ¡ Conservez la notice ainsi que les informations produit en vue d’une réutilisation ultérieure ou pour un futur nouveau proprié- taire. ¡ Ne branchez pas l’appareil si ce dernier a été endommagé du- rant le transport. - Page 29 Sécurité fr ▶ Ne jamais faire fonctionner l’appareil avec une surface fissurée ou cassée. ▶ Ne tirez jamais sur le cordon d'alimentation secteur pour débran- cher l'appareil du secteur. Débranchez toujours la fiche du cor- don d'alimentation secteur. ▶ Si l'appareil ou le cordon d'alimentation secteur est endommagé, débranchez immédiatement le cordon d'alimentation secteur ou coupez le fusible dans le boîtier à...
-
Page 30: Aperçu
fr Aperçu ▶ Laisser refroidir les pièces chaudes de l’appareil après utilisation et avant de les toucher. ▶ Si nécessaire, laisser refroidir les boissons. ▶ Éviter tout contact entre la peau et les liquides et vapeurs qui s'échappent. ▶ Pour éviter des blessures, utiliser l‘appareil uniquement confor- mément à... -
Page 31: Préparer Une Boisson
Préparer une boisson fr boisson Préparer l’appareil Détartrer Préparer une boisson Détartrer l’appareil Apprenez comment préparer la boisson de est allumé, exécutez le programme boisson Préparer l’appareil Détartrer votre choix. Suivez les instructions de la fi- de détartrage. Suivez les instructions de la gure au début de la présente notice. - Page 32 fr Dépannage Défaut Cause et dépannage La séquence de percola- Le T DISC n'est pas bien positionné. tion démarre. Assurez-vous que le T DISC est bien placé. ▶ L'affichage du statut s'al- Le code-barres du T DISC n'est pas reconnu. lume en rouge. Nettoyez la fenêtre de lecture du T DISC avec un chiffon ▶...
-
Page 33: Données Techniques
Données techniques fr Défaut Cause et dépannage Toutes les LED cli- Problèmes associés à l‘alimentation électrique. gnotent. Débrancher la fiche de la prise de courant, attendre 5 minutes, puis rebrancher la fiche dans la prise de cou- rant. Si le problème persiste, contacter la ligne d’assistance de TASSIMO. -
Page 34: Conditions De Garantie
fr Conditions de garantie Cet appareil est marqué se- lon la directive européenne 2012/19/UE relative aux ap- pareils électriques et électro- niques usagés (waste elec- trical and electronic equip- ment - WEEE). La directive définit le cadre pour une reprise et une ré- cupération des appareils usagés applicables dans les pays de la CE. - Page 35 Indice 1 Sicurezza ........ 36 1.1 Avvertenze generali ...... 36 1.2 Utilizzo conforme all'uso previ- sto .......... 36 1.3 Limitazione di utilizzo .... 36 1.4 Avvertenze di sicurezza .... 36 2 Panoramica........ 38 2.1 Elementi di comando .... 38 3 Prima messa in funzione ....
-
Page 36: Sicurezza
it Sicurezza Sicurezza ¡ Leggere attentamente le presenti istruzioni. ¡ Conservare le istruzioni e le informazioni sul prodotto per il suc- cessivo utilizzo o per il futuro proprietario. ¡ Non collegare l'apparecchio se ha subito danni durante il tra- sporto. Utilizzare l'apparecchio soltanto: ¡... - Page 37 Sicurezza it ▶ Se l'apparecchio o il cavo di alimentazione è danneggiato, stac- care subito la spina di alimentazione del cavo di alimentazione e spegnere il fusibile nella scatola dei fusibili. ▶ Rivolgersi al servizio di assistenza clienti. ▶ Solo il personale adeguatamente specializzato e formato può eseguire riparazioni sull'apparecchio.
-
Page 38: Panoramica
it Panoramica ▶ Per evitare lesioni, utilizzare l'apparecchio soltanto conforme- mente all'uso previsto. ▶ Durante l'inserimento del T DISC o durante la pulizia prestare at- tenzione alle dita. ▶ I portatori di impianti elettronici devono mantenersi a una distan- za minima di 10 cm dall'apparecchio. ▶... -
Page 39: Pulizia Dell'apparecchio
Pulizia dell’apparecchio it ¡ Per prolungare l'erogazione, tenere pre- ▶ Eseguire subito il processo di decalcifi- muto fino alla quantità desiderata. cazione seguendo le istruzioni. ▶ Non utilizzare decalcificanti contenenti dell’apparecchio Pulizia Pulizia dell’apparecchio acido fosforico. Seguire le indicazioni riportate nelle figure dell’apparecchio Pulizia → Fig. - Page 40 it Sistemazione guasti Anomalia Causa e ricerca guasti Il processo di infusione Se il problema persiste, contattare la TASSIMO Infoline. ▶ non si avvia. L'apparecchio non era collegato all'alimentazione elettrica al L'indicatore di stato è ac- momento dell'inserimento del T DISC. ceso di colore rosso. Collegare l'apparecchio all'alimentazione elettrica prima ▶...
-
Page 41: Dati Tecnici
Dati tecnici it Anomalia Causa e ricerca guasti Il LED è acceso anche Il galleggiante nel serbatoio dell'acqua è bloccato. se è presente acqua nel Decalcificare l'apparecchio. serbatoio dell'acqua. → "Decalcificazione dell’apparecchio", Pagina 39 Inserire la mano nel serbatoio dell'acqua e muovere il galleggiante verso l'alto e verso il basso. -
Page 42: Condizioni Di Garanzia
it Condizioni di garanzia garanzia Condizioni Condizioni di garanzia L'apparecchio è coperto da garanzia alle garanzia Condizioni condizioni seguenti. Per questo apparecchio sono valide le con- dizioni di garanzia pubblicate dal nostro rappresentante nel paese di vendita. Il ri- venditore, presso il quale è stato acquistato l’apparecchio, è... - Page 43 Service AprèsVente agréés Reparaturservice, Ersatzteile & Zubehör, IE Republic of Ireland Bosch les plus proches de chez vous en Produktinformationen Tel.: 0810 550 BSH Home Appliances Ltd. contactant TASSIMO : 511* M50 Business Park, Ballymount Road Up- N°...
- Page 44 HELLO! Looking for help? You´II find it here. Expert advice for your Bosch home appliances, help with problems or a repair from Bosch experts. Find out everything about the many ways Bosch can support you: www.bosch-home.com/service Contact data of all countries are listed in the attached service directory.