
Related Manuals for LG MC8289UR


Summary of Contents for LG MC8289UR
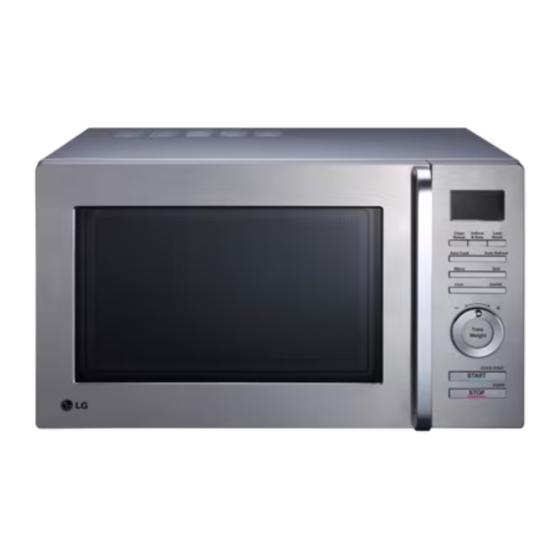
- Page 1 OWNER’S MANUAL MICROWAVE/GRILL/ CONVECTION OVEN PLEASE READ THIS OWNER’S MANUAL THOROUGHLY BEFORE OPERATING. MC8289UR www.lg.com MFL55318549...
-
Page 3: Precautions
Precautions Precautions to avoid possible exposure to excessive microwave energy. When heating liquids, e.g. soups, sauces and beverages in your microwave You cannot operate your oven with the door open due to the safety interlocks built into the door mechanism. These safety interlocks automatically switch off oven, delayed eruptive boiling can occur without evidence of bubbling. -
Page 4: Table Of Contents
Precautions Contents Unpacking & Installing Setting the Clock Child Lock Micro Power Cooking Micro Power Level Two Stage Cooking Quick Start Grill Cooking Convection Cook 14~15 Combination Cooking 16~17 Auto Cook 18~19 Auto Defrost 20~21 Crispy Reheat 22~23 Defrost & Bake 24~25 Lean Roast 26~27... -
Page 5: Unpacking & Installing 5~6
Unpacking & By following the basic steps on these two pages you will be able to quickly check that your oven is operating correctly. Please pay particular attention to the guidance on where to install your oven. When unpacking your oven make sure you remove all accessories and packing. - Page 6 Plug your oven into a standard household socket. Make Press the STOP/CLEAR button, and press sure your oven is the only appliance connected to the the START button one time to set 30 socket. If your oven does not operate properly, unplug it seconds of cooking time.
-
Page 7: Setting The Clock
You can set either 12 hour clock or 24 hour clock. Setting the In the following example I will show you how to set the time for 14:35 when using the 24 clock. Clock Make sure that you have removed all packaging from your oven. Make sure that you have correctly installed your oven as described earlier in this book. -
Page 8: Child Lock
Child Lock Press STOP/CLEAR. Your oven has a safety feature that Press and hold STOP/CLEAR until “L” appears on the display and prevents accidental running of the oven. BEEP sounds. The CHILD LOCK is now set. Once the child lock is set, you will be unable to use any functions and no cooking can take place. -
Page 9: Micro Power Cooking
Micro Power In the following example I will show you how to cook some food on 80% power for 5 minutes and 30 seconds. Cooking Make sure that you have correctly installed your oven as described earlier in this book. Press STOP/CLEAR. -
Page 10: Micro Power Level
Micro Power Your microwave oven is equipped with 5 power levels to give you maximum flexibility and control over cooking. The table below shows the examples of food and their recommended cooking power levels for use Level with this microwave oven. POWER LEVEL POWER OUTPUT POWER LEVEL... -
Page 11: Two Stage Cooking
Two stage In the following example I will show you how to cook some food in two stages. The first stages will cook your Cooking food for 11 minutes on HIGH; the second will cook for 35 minutes on 360W. Press STOP/CLEAR. -
Page 12: Quick Start
Quick Start In the following example I will show you how to set 2 minutes of cooking on high power. Press STOP/CLEAR . The QUICK START feature allows you to Press START four times to select 2 minutes on HIGH power. set 30 seconds intervals of HIGH power Your oven will start before you have finished the fourth press. -
Page 13: Grill Cooking
Grill Az automatikus felolvasztási fokozatok részletezése In the following example I will show you how to use the grill to cook some food for 12 minutes and 30 seconds. Cooking Fokozat Étel Min./Max. mennyiség Darálthús, csontozott comb, pörkölthöz feldarabolt hús, hátszín, fartŒ, hamburger Marhahús 0,1/4,0 kg Hússzeletek (2,5 cm vastag), göngyölt hús... -
Page 14: Convection Cook Ing 14~15
Convection Cooking In the following example I will show you how to preheat the oven at a temperature of 230°C. 1. To preheat. Press STOP/CLEAR. mode. Press CONVECTION The convection oven has a temperature range of 40°C and 100°C~ 230°C (180°C is automatically available when convection mode is selected). - Page 15 Convection In the following example I will show you how to cook some food at a temperature of 230°C for 50 minutes. Cooking 2. To cook. Press STOP/CLEAR. mode. Press CONVECTION If you do not set a temperature your oven will automatically select 180°C. The cooking temperature can be changed by turn the DIAL.
-
Page 16: Combination Cooking 16~17
Combination In the following example I will show you how to programme your oven with micro power Cooking 40% and grill for a cooking time of 25 minutes. 1. GRILL COMBINATION. 1. GRILL COMBINATION. Press STOP/CLEAR. Press STOP/CLEAR. once to select Grill Combi. Press COMBI Your oven has a combination cooking feature which allows you to cook food... - Page 17 Combination In the following example I will show you how to programme your oven with micro power power and at a convection temperature 200°C for a cooking time of 25 minutes. Cooking 2. CONVECTION COMBINATION. 1. GRILL COMBINATION. Press STOP/CLEAR. Press STOP/CLEAR.
-
Page 18: Auto Cook 18~19
Auto Cook In the following example I will show you how to cook 0.6kg of jacket potato . Press STOP/CLEAR. AUTO COOK allows you to cook most of Press AUTO COOK key of the required food type your favorite food easily by selecting the in this example press AUTO COOK once. - Page 19 Function Category Weight Limit Utensil Food Temp. Instructions Auto Cook Jacket Potato ~ 1.0kg Metal tray Room Choose medium sized potatoes 200 -220g. Wash and dry potatoes. Pierce the potatoes several times with fork. Place the potatoes on the metal tray. Adjust weight and press start. After cooking, remove the potatoes from the oven.
-
Page 20: Auto Defrost 20~21
The temperature and density of food varies, I would recommend that the food is checked before cooking Auto The temperature and density of food varies, I would recommend that the food is checked before cooking commences. Pay particular attention to large joints of meat and chicken, some foods should not be commences. - Page 21 AUTO WEIGHT DEFROST GUIDE The temperature and density of food varies, I would recommend that the food is checked before cooking commences. Pay particular attention to large joints of meat and chicken, some foods should not be * Food to be defrosted should be in a suitable microwave proof container and place uncovered on the glass turntable. completely thawed before cooking.
-
Page 22: Crispy Reheat 22~23
Crispy Reheat In the following example I will show you how to cook 0.3kg of "Roasted Meat ". Press STOP/CLEAR. Press Crispy Reheat once. Crispy reheat allows you to cook your favorite food easily by selecting the food type and entering the weight of food by turn the wheel dial. - Page 23 FOOD Category Quantity Utensil Instructions TEMP. Slice each of roasted meat under 2.5cm Roasted Meat 0.2-0.6kg Refrigerated thickness. Place food on the low rack. Low Rack After cooking, remove from the oven and stand. (Cr-1) Place leftover lasagna on the low rack. Lasagna 0.2-0.8kg Refrigerated...
-
Page 24: Defrost & Bake 24~25
Defrost & Bake In the following example I will show you how to cook 0.6 kg of "Quiche". Press STOP/CLEAR. Press Defrost & Bake once. Defrost & Bake allows you to cook most of your favorite food easily by selecting the food type and entering the weight of food by turn the dial. - Page 25 FOOD Category Quantity Utensil Instructions TEMP. Quiche High Rack 0.3~0.6kg Frozen (db-1) 1.Remove the cover and place on the low rack. Lasagna 0.3~0.6kg Low Rack Frozen 2.After cooking, stand for 2 minutes. (db-2) 1.Remove "Tart" from package and place on the low rack. Tart 0.1~0.6kg 2.After cooking, stand for 2 minute.
-
Page 26: Lean Roast 26~27
Lean Roast In the following example I will show you how to cook 0.6kg of "Beef ". Press STOP/CLEAR. Press Lean Roast once. Lean Roast allows you to cook your favorite food easily by selecting the food type and entering the weight of food by turn the dial. - Page 27 FOOD Instructions Category Quantity Utensil TEMP. 1.Brush beef with melted butter or oil and season as desired. 2.Place beef with fat side up on the low rack with a dripping dish below. ~1.5kg Low Rack Refrigerated Beef 3.Choose the menu and adjust weight, and press start. (Lr-1) 4.After cooking, stand covered with foil for 10 minutes.
-
Page 28: Important Safety Instructions
WARNING Important safety instructions Please ensure cooking times are correctly set as over cooking may result in FIRE and Read carefully and keep for future reference subsequent DAMAGE to the OVEN. 1 Do not attempt to tamper with, or make any adjustments or repairs to the 12 Before cooking, pierce the skin of potatoes, apples or any such fruit or door, control panel, safety interlock switches or any other part of the oven. - Page 29 Important safety instructions Read carefully and keep for future reference 24 Only use utensils that are suitable for use in microwave ovens. 37 This connection may be achieved by having the plug accessible or by incorporation a switch in the fixed wiring in accordance with the wiring 25 When heating food in plastic or paper containers, keep an eye on the rules.
-
Page 30: Microwave-Safe Utensils
Microwave-safe Utensils Never use metal or metal trimmed utensils in your Paper microwave oven Paper plates and containers are convenient and safe to use in your microwave oven, Microwaves cannot penetrate metal. They will bounce off any metal object in the provided that the cooking time is short and foods to be cooked are low in fat and oven and cause arcing, an alarming phenomenon that resembles lightning. -
Page 31: Food Characteristics & Microwave Cooking 31~32
Food characteristics & Microwave cooking Moisture content of food Keeping an eye on things Since the heat generated from microwaves tends to evaporate moisture, relatively dry food The recipes in the book have been formulated with great care, but your success in such as roasts and some vegetables should either be sprinkled with water prior to cooking preparing them depends on how much attention you pay to the food as it cooks. - Page 32 Food characteristics & Microwave cooking Stirring To Clean Your Oven Stirring is one of the most important of all microwaving techniques. In conventional cooking, food is stirred for the purpose of blending. Microwaved food, however, is stirred in order to 1 Keep the inside of the oven clean spread and redistribute heat.
-
Page 33: Questions & Answers
Questions & Answers Q What’s wrong when the oven light will not glow? Q Is it possible to pop corn in a microwave oven? A There may be several reasons why the oven light will not glow. A Yes, if using one of the two methods described below Light bulb has blown 1. -
Page 34: Plug Wiring Information/Technical Specifications
Plug wiring information/ Technical Specifications WARNING Technical Specification This appliance must be earthed MC8289UR The wires in this mains lead are colored in accordance with the following codes Power Input 230 V AC / 50Hz BLUE ~ Neutral Output 900 W (IEC60705 rating standard) - Page 35 MC8289UR P/No. : MFL55318549...
- Page 36 ﻳﺔ ﻮﻗﺎﻳﺔ ا ا ﻟ ﻟﻮﻗﺎ .اﻟﻮﻗﺎﻳﺔ ﻟﺘﺠﻨﺐ اﻟﺘﻌﺮﻳﺾ اﳌﻤﻜﻦ ﻟﻄﺎﻗﺔ اﳌﺎﻳﻜﺮووﻳﻒ اﳌﻔﺮط ﻻ ﳝﻜﻨﻚ ﺗﺸﻐﻴﻞ اﻟﻔﺮن واﻟﺒﺎب ﻣﻔﺘﻮﺣﺎ ﺑﺴﺒﺐ وﺟﻮد ﻗﻔﻞ أﻣﻦ ﻋﻨﺪ ﺗﺴﺨﲔ اﻟﺴﻮاﺋﻞ ﻛﺎﳊﺴﺎء واﻟﺸﻮرﺑﺔ واﳌﺸﺮوﺑﺎت ﻓﻲ ﻓﺮن ﺗﺸﺎﺑﻜﻲ ﻓﻲ ﻧﻈﺎم اﻟﺒﺎب. ﻗﻔﻞ اﻷﻣﻦ اﻟﺘﺸﺎﺑﻜﻲ ﻳﻮﻗﻒ ﻋﻤﻞ اﻟﻔﺮن اﳌﺎﻳﻜﺮووﻳﻒ...
- Page 37 اﶈﺘﻮﻳﺎت اﶈﺘﻮﻳﺎت ﻛﻴﻒ ﻳﻌﻤﻞ ﻓﺮن اﳌﺎﻳﻜﺮووﻳﻒ اﳌﺎﻳﻜﺮووﻳﻒ ﻧﻮع ﻣﻦ أﻧﻮاع اﻟﻄﺎﻗﺔ ﻣﺜﻞ ﻣﻮﺟﺎت اﻟﺮادﻳﻮ واﻟﺘﻠﻔﺰﻳﻮن وأﺷﻌﺔ اﻹﺿﺎءة ﻓﻲ اﻟﻨﻬﺎر. ﺗﻨﺘﺸﺮ ﻣﻮﺟﺎت اﳌﺎﻳﻜﺮو ﻋﺎدة ﻓﻲ اﻻﲡﺎه اﳋﺎرﺟﻲ وﺗﻨﺘﺸﺮ ﻓﻲ اﳉﻮ دون أن ﺗﺘﺮك أﺛﺮا. ﻏﻴﺮ أن أﻓﺮان اﳌﺎﻳﻜﺮووﻳﻒ ﻓﻴﻬﺎ ﻣﺎﺟﻨﻴﺘﺮون ﻣﺼﻤﻢ ﻻﺳﺘﻐﻼل ﻫﺬه اﻟﻄﻠﻘﺔ ﻓﻲ أﻓﺮان...
- Page 38 إﺧﺮاج اﻟﻔﺮن ﻣﻦ اﻟﻜﺮﺗﻮن ﻋﻨﺪ اﺗﺒﺎع اﳋﻄﻮات اﻷﺳﺎﺳﻴﺔ اﻟﺘﺎﻟﻴﺔ ﺳﺘﺘﻤﻜﻦ ﻣﻦ اﺧﺘﺒﺎر ﺗﺸﻐﻴﻞ اﻟﻔﺮن ﺑﺎﻟﺸﻜﻞ اﻟﺼﺤﻴﺢ. اﻟﺮﺟﺎء اﻷﻫﺘﻤﺎم ﺟﻴﺪا ﺑﺘﻌﻠﻴﻤﺎت ﻣﻜﺎن ﺗﺮﻛﻴﺐ اﻟﻔﺮن. ﻋﻨﺪ وﺗﺮﻛﻴﺐ اﻟﻔﺮن ﻓﺘﺢ ﺻﻨﺪوق اﻟﻜﺮﺗﻮن ﺗﺄﻛﺪ ﻣﻦ رﻓﻊ ﻛﺎﻓﺔ اﻟﻘﻄﻊ اﳌﻠﺤﻘﺔ ﺑﺎﻟﻔﺮن وﻏﻴﺮﻫﺎ. ﺗﺄﻛﺪ أن اﻟﻔﺮن ﻏﻴﺮ ﻣﻜﺴﻮر أو ﻣﻀﺮور أﺛﻨﺎء ﻧﻘﻞ اﳉﻪ ٢...
- Page 39 ٦ ٣ ﺻﻞ ﻗﺎﺑﺲ اﻟﻔﺮن اﻟﻰ ﻣﻘﺒﺲ ﳕﻮذﺟﻲ ﻓﻲ اﳌﻨﺰل . وﺗﺄﻛ ّ ﺪ اﺿﻐﻂ ﻋﻠﻰ زر اﻹﻳﻘﺎف/اﳌﺴﺢ ، واﺿﻐﻂ ﻋﻠﻰ زر اﻟﺘﺸﻐﻴﻞ ﻣﺮة ﻟﻀﺒﻂ ٠٣ ﺛﺎﻧﻴﺔ ﻣﻦ ﻣﻦ أن ﻓﺮﻧﻚ ﻣﻮﺻﻮل ﻓﻘﻂ اﻟﻰ اﳌﻘﺒﺲ. إذا ﻟﻢ ﻳﻌﻤﻞ ﻓﺮﻧﻚ .وﻗﺖ اﻟﻄﺒﺦ .ﻛﻤﺎ...
- Page 40 ﺪم اﳌﺴﺘﺨﺪم ﺿﺒ ﻂ ﻂ اﳌﺴﺘﺨ ﺿﺒ .ﳝﻜﻨﻚ ﺿﺒﻂ ﻧﻈﺎم ٢١ ﺳﺎﻋﺔ أو ٤٢ ﺳﺎﻋﺔ .ﻋﻠﻰ ﺳﺒﻴﻞ اﳌﺜﺎل اﻟﺘﺎﻟﻲ، ﺗﻌﺮف ﻛﻴﻔﻴﺔ ﺿﺒﻂ اﻟﻮﻗﺖ ﻟـ ٥٣: ٤١ ﻋﻨﺪ اﺳﺘﺨﺪام ﻧﻈﺎم ٤٢ ﺳﺎﻋﺔ ﺿﺒﻂ اﻟﺴﺎﻋﺔ ّ .ﺗﺄﻛﺪ ﻣﻦ أﻧﻚ ﺗﺰﻳﻞ ﺟﻤﻴﻊ ﻣﺎدة اﻟﺘﻐﻠﻴﻒ ﻣﻦ اﻟﻔﺮن ﺗﺄﻛﺪ...
- Page 41 ” “ ” L L “ ” “...
- Page 42 ” “ ” “ D D I I A A L L ٩٠٠ ٧٢٠ ٥٤٠ ٣٦٠ ١٨٠...
- Page 43 ٩٠٠ ٧٢٠ ٥٤٠ ٣٦٠ ١٨٠...
- Page 44 ” “ D D I I A A L L ” “ D D I I A A L L...
- Page 46 ” “ D D I I A A L L...
- Page 47 “ ° 0 “ A A I I ˚ وﻳﺴﺘﻐﺮقﭨاﻟﻮﻗﺖﭨﺑﻌﺾﭨدﻗﺎﺋﻖﭨﻟﻠﻮﺻﻮلﭨ .اﻟﻰﭨدرﺟﺔﭨاﳊﺮارةﭨاﳌﺨﺘﺎرة ,ﻋﻨﺪﭨاﻟﻮﺻﻮلﭨاﻟﻰﭨدرﺟﺔﭨاﳊﺮارةﭨاﳌﻄﻠﻮﺑﺔ ﺗﻨﻄﻠﻖﭨﺻﻔﺎرةﭨﻣﻦﭨاﻟﻔﺮنﭨﻟﻜﻲﭨﺗﻌﺮفﭨأنﭨ .اﻟﻔﺮنﭨوﺻﻞﭨاﻟﺮىﭨدرﺟﺔﭨاﳊﺮارةﭨاﳌﻄﻠﻮﺑﺔ وﻋﻨﺪﻫﺎﭨﺿﻊﭨاﻟﻄﻌﺎمﭨﻓﻲﭨاﻟﻔﺮن;ﭨوﻋﻨﺪﻫﺎﭨ .اﻋﻤﻞﭨاﻟﻔﺮنﭨﻟﻠﺒﺪءﭨﺑﺎﻟﻄﺒﺦ...
- Page 48 D D I I A A L L . “230°C” اﳊﻠﻘ ﺔ ﺔ ﺣﺘﻰ ﻳﻌﺮض دور اﳊﻠﻘ ” “ D D I I A A L L...
- Page 49 C C O O M M B B I I M M I I C C R R O O ” “ D D I I A A L L...
- Page 50 C C O O M M B B I I “ ° 0 “ D D I I A A L L C C I I “ “ A A I I...
- Page 51 Æ…dÄ —“ vKŽ jG{« wzUIK²Ã« a³Dë ® « ∞ ´ K π Ø ¢ ∑ • U Õ H ∑ « ∞ Í ¥ d √ œ “ “ D I A L "...
- Page 52 Ac 2) (Ac 3) (Ac 4)
- Page 53 ”dEF2” "...
- Page 54 (dEF1) (dEF2) (dEF3) . . . (dEF4) 0 0 2 2...
- Page 55 ” “ “ “ A A I I " 1 1 2 2...
- Page 56 (Cr-1) (Cr-2) (Cr-3) (Cr-4) 2 2 2 2...
- Page 57 ” “ “ “ A A I I " D D . A A I I 3 3 2 2...
- Page 58 (db-1) (db-2) (db-3) (db-4) 4 4 2 2...
- Page 59 ” . “ “ “ A A I I D D . A A I I...
- Page 60 (Lr-1) (Lr-2) (Lr-3)
- Page 61 ﺗﻨﺒﻴﻪ ﲢﺬﻳﺮات ﻣﻦ أﺟﻞ اﻟﺴﻼﻣﺔ ﺗﺄﻛﺪ ﻣﻦ اﻻوﻗﺎت اﳌﺨﺼﺼﺔ ﻟﻠﻄﺒﺦ ﺟﻴﺪا ﻻن زﻳﺎدة اﻟﻄﺒﺦ ﻋﻦ اﻟﻮﻗﺖ اﶈﺪد ﺗﺆذي اﻟﻰ إﺣﺪاث اﳊﺮاﺋﻖ اﻗﺮأﻫﺎ ﺑﻌﻨﺎﻳﺔ واﺣﺘﻔﻆ ﺑﻬﺎ ﻟﻠﻤﺮاﺟﻌﺔ ﻓﻲ اﳌﺴﺘﻘﺒﻞ .وإﺗﻼف اﻟﻔﺮن...
- Page 62 ﲢﺬﻳﺮات ﻣﻦ أﺟﻞ اﻟﺴﻼﻣﺔ ﲢﺬﻳﺮات ﻣﻦ أﺟﻞ اﻟﺴﻼﻣﺔ اﻗﺮأﻫﺎ ﺑﻌﻨﺎﻳﺔ واﺣﺘﻔﻆ ﺑﻬﺎ ﻟﻠﻤﺮاﺟﻌﺔ ﻓﻲ اﳌﺴﺘﻘﺒﻞ ﲢﺬﻳﺮ : إذا ﺣﺪث اﻟﻀﺮر ﻓﻲ اﻟﺒﺎب أو أﺧﺘﺎم اﻟﺒﺎب ، ﻻ ﺑﺪ ﻣﻦ .ﻋﺪم ﺗﺸﻐﻴﻞ اﻟﻔﺮن ﺣﺘﻰ ﻳﺘﻢ إﺻﻼﺣﻪ ﻣﻦ ﻗﺒﻞ ﻓﻨﻲ ﻣﺆﻫﻞ ﲢﺬﻳﺮ : ﻣﻦ اﳋﻄﺮ اﻟﻘﻴﺎم ﺑﺄي ﻋﻤﻠﻴﺔ ﺻﻴﺎﻧﺔ أو ﻋﻤﻠﻴﺔ إﺻﻼح ﻣﺜﻞ...
- Page 63 أواﻧﻲ اﻟﻄﺒﺦ اﻷﻣﺎﻧﻴﺔ أواﻧﻲ اﻟﻄﺒﺦ اﻷﻣﺎﻧﻴﺔ ﺑﻔﺮن اﳌﺎﻳﻜﺮووﻳﻒ ﻻ ﺗﺴﺘﺨﺪم أﺑﺪ ا ً أواﻧﻲ ﻣﻌﺪﻧﻴﺔ أو ﻳﺪﺧﻞ ﻓﻲ ﺗﺮﻛﻴﺒﻬﺎ ﻣﻌﺎدن ﻓﻲ ﻓﺮن ﻻ ﺗﺴﺘﺨﺪم أﺑﺪ ا ً أواﻧﻲ ﻣﻌﺪﻧﻴﺔ أو ﻳﺪﺧﻞ ﻓﻲ ﺗﺮﻛﻴﺒﻬﺎ ﻣﻌﺎدن ﻓﻲ ﻓﺮن اﻟﻮرق اﻟﻮرق .اﳌﺎﻳﻜﺮووﻳﻒ .اﳌﺎﻳﻜﺮووﻳﻒ اﳊﺎوﻳﺎت...
- Page 65 ﺧﺼﺎﺋﺺ اﳌﻮاد اﻟﻐﺬاﺋﻴﺔ ﺧﺼﺎﺋﺺ اﳌﻮاد اﻟﻐﺬاﺋﻴﺔ واﻟﻄﺒﺦ ﺑﻔﺮن اﳌﺎﻳﻜﺮووﻳﻒ اﻟﺘﺤﺮﻳﻚ اﻟﺘﺤﺮﻳﻚ :ﺗﻨﻈﻴﻒ اﻟﻔﺮن :ﺗﻨﻈﻴﻒ اﻟﻔﺮن اﻟﺘﺤﺮﻳﻚ ﻣﻦ أﻫﻢ أﺳﺎﻟﻴﺐ ﻃﺒﺦ اﳌﺎﻳﻜﺮووﻳﻒ. ﻓﻲ اﻟﻄﺒﺦ اﻟﻌﺎدي ﻳﺠﺮي ﲢﺮﻳﻚ اﳌﻮاد اﻟﻐﺬاﺋﻴﺔ ﻣﻦ أﺟﻞ ﻣﺰﺟﻬﺎ ﻣﻊ ﺑﻌﻀﻬﺎ ﺟﻴﺪا. وﻟﻜﻦ ﻓﻲ ﻓﺮن اﳌﺎﻳﻜﺮووﻳﻒ ﻳﺠﺮي ﲢﺮﻳﻜﻬﺎ ﻣﻦ .١.
- Page 66 أﺳﺌﻠﺔ ﻠﺔ أﺳﺌ وأﺟﻮﺑﺔ س. ﻣﺎ ﻫﻮ اﻟﺴﺒﺐ ﻓﻲ ﻋﺪم ﺗﻮﻫﺞ ﺿﻮء اﻟﻔﺮن ؟ س. ﻣﺎ ﻫﻮ اﻟﺴﺒﺐ ﻓﻲ ﻋﺪم ﺗﻮﻫﺞ ﺿﻮء اﻟﻔﺮن ؟ س. ﻫﻞ ﳝﻜﻦ ﻋﻤﻞ اﻟﻔﺸﺎر ﻓﻲ ﻓﺮن اﳌﺎﻳﻜﺮووﻳﻒ ؟ س. ﻫﻞ ﳝﻜﻦ ﻋﻤﻞ اﻟﻔﺸﺎر ﻓﻲ ﻓﺮن اﳌﺎﻳﻜﺮووﻳﻒ ؟ .ج.
- Page 67 ﻠﻴﻤﺎت ﺗ ﺗﻮﺻﻴ ﺗﻌ ﺗﻌﻠﻴﻤﺎت اﳌﻮاﺻﻔﺎت اﻟﻔﻨﻴﺔ اﻟﺘﻨﺒﻴﻬﺎت اﳌﻮاﺻﻔﺎت اﻟﻔﻨﻴﺔ ﻻ ﺑﺪ ﻣﻦ ﺗﺄرﻳﺾ اﳉﻬﺎز MC8289UR ٠٣٢ ﻓﻮﻟﺖ ﺗﻴﺎر ﻣﺘﺮدد٠٥ ﻫﺮﺗﺰ ﻣﺼﺪر اﻟﻄﺎﻗﺔ اﻻﺳﻼك ﻓﻲ ﻫﺬا اﳉﻬﺎز ﻣﻠﻮﻧﺔ ﺗﺒﻌﺎ ﻟﻠﺮﻣﻮز اﻟﺘﺎﻟﻴﺔ (٦٠٧٠٥ ٠٠٩ واط )ﺗﻘﺪﻳﺮ ﻣﻌﺎﻳﻴﺮ وﻣﻘﺎﻳﻴﺲ اﻳﻪ ﺋﻲ ﺳﻲ اﻟﻔﻮﻟﺘﻴﺔ...