Miele HS19 Operating Instructions Manual
Cordless vacuum cleaner
Hide thumbs
Also See for HS19:
- Operating instructions manual (276 pages) ,
- Operating instructions manual (48 pages) ,
- Operating instructions manual (248 pages)
Table of Contents
Advertisement
Quick Links
Advertisement
Table of Contents

Related Manuals for Miele HS19


Summary of Contents for Miele HS19
- Page 1 Operating instructions Cordless vacuum cleaner AU, NZ HS19 M.-Nr. 11 843 110...
-
Page 2: Table Of Contents
Contents Warning and Safety instructions ..............Safety instructions and warnings for AP01 battery, LG01/LG02 charger and LS03 battery charger cradle (optional accessory, see “Optional accessories”) . Guide to the appliance ..................14 Caring for the environment ................16 Installation and connection ................18 Assembling the vacuum cleaner ................. - Page 3 Contents Service........................ 39 Contact in case of malfunction ................39 Warranty ......................39 Cleaning and care ..................... 40 Optional accessories ..................41 Purchasing accessories ..................41 Electrical connection ..................43...
-
Page 4: Warning And Safety Instructions
Warning and Safety instructions It is essential to read these instructions. WARNING AU/NZ! Keep batteries out of reach of children. Coin or button batteries containing lithium can cause severe or fatal injuries within 2 hours of being swallowed or placed inside any part of the body. - Page 5 “Installation and connection” section as well as the safety instruc- tions and warnings. Miele cannot be held liable for injury or damage caused by non- compliance with these instructions. Keep these operating instructions in a safe place and pass them on to any future owner/operator.
- Page 6 Warning and Safety instructions The vacuum cleaner must only be used to vacuum dry floor sur- faces. Do not vacuum people or animals. Any other types of use, modifications or alterations are not permitted. The vacuum cleaner can only be used by people (including chil- dren) with reduced physical, sensory, or mental capabilities, or lack of experience or knowledge, if they are supervised whilst using it or have been shown how to use it in a safe way and understand and re-...
- Page 7 Electro Compact hand- held brush (optional accessory). Store the vacuum cleaner and all accessories at an ambient tem- perature between 0 °C and 45 °C. Repairs should only be undertaken by a Miele authorised service technician. Otherwise the warranty will be invalidated.
- Page 8 Warning and Safety instructions Repairs and other work by unqualified persons can cause consid- erable danger to users. If the vacuum cleaner is to be stored unused for a long period, the battery should be removed. The supply terminals must not be short-circuited. Correct use ...
-
Page 9: Safety Instructions And Warnings For Ap01 Battery, Lg01/Lg02 Charger And Ls03 Battery Charger Cradle (Optional Accessory, See "Optional Accessories")
Technical safety The AP01 battery, the LG01/LG02 charger and the LS03 charger cradle are designed for use with the Miele HS19 vacuum cleaner. For safety reasons, the vacuum cleaner must not be used with a battery, charger or charger cradle produced by another manufacturer. - Page 10 The protective measures provided in the domestic installation and in this Miele product must also be assured in their function and opera- tion in isolated operation or in non-mains synchronous operation, or replaced with equivalent measures in the installation.
- Page 11 To deal with leaking batteries, refer to the Safety Data Sheet (con- tact Miele to request a copy). The AP01 lithium-ion battery is subject to the dangerous goods le- gislation. The user is permitted to transport the AP01 battery by road, but may be subject to further requirements.
- Page 12 The manufacturer cannot otherwise guarantee the safety of the product. Miele can only guarantee the safety of the appliance when genu- ine Miele replacement parts are used. Faulty components must only be replaced with genuine Miele replacement parts.
- Page 13 Warning and Safety instructions Transport The packaging material protects the vacuum cleaner from trans- port damage. We recommend you keep the packaging for transport purposes.
-
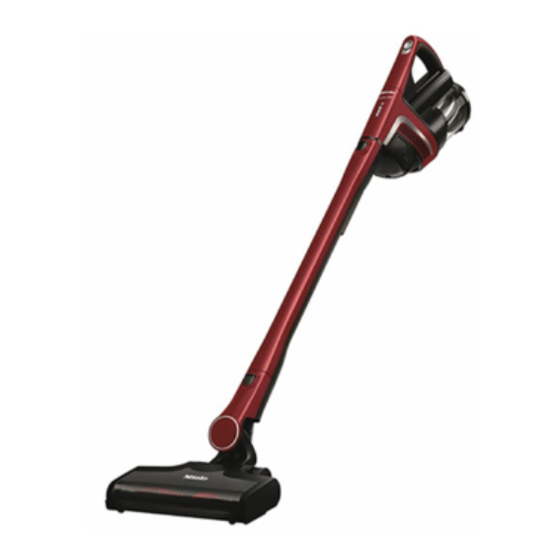
Page 14: Guide To The Appliance
Guide to the appliance... - Page 15 Guide to the appliance a Fine dust filter (HX FSF-2) b Pre-filter c Dust container d Dust container flap e PowerUnit with a connection at the bottom for the battery, a connector at the bottom for the suction tube and Electrobrush, and a connector at the top for the suction tube and Comfort handle f Release catches for battery (on both sides of the battery) g Charging socket (at the bottom of the battery)
-
Page 16: Caring For The Environment
Miele, free of charge. By law, you are solely responsible for deleting any personal data from the old appliance prior to disposal. You are legally obliged... - Page 17 Caring for the environment Disposing of old batteries In many cases, electrical and electronic appliances contain batteries which must not be disposed of with house- hold waste after use. You are legally ob- liged to remove any old batteries which are not securely enclosed by the appli- ance and take them to a suitable collec- tion point (e.g.
-
Page 18: Installation And Connection
Installation and connection (see “Use – Self-standing function for Assembling the vacuum short pauses in vacuuming”) cleaner - Ergonomic (reduced strain on the You can assemble the vacuum cleaner wrist) in 2 different ways. - Convenient cleaning of large surfaces The advantages of placing the PowerUnit at the top of the vacuum cleaner are as follows: –... -
Page 19: Connecting The Comfort Handle
Installation and connection Connecting the Comfort handle Depending on how you decide to con- figure your vacuum cleaner, you can connect the Comfort handle to either the suction tube or the PowerUnit. Press the release catch and remove the Comfort handle by pulling it up- wards. -
Page 20: Inserting The Battery
Installation and connection Push the PowerUnit connector into the suction tube from above until it audibly clicks into place (right image detail). If you want to separate the sections again, press both release catches at the side of the battery to remove the battery. -
Page 21: General Battery Information
Installation and connection However, if you use the PowerUnit solo and select the minimum power level, you can vacuum for up to 60 minutes at a time. WARNING! Keep batteries out of reach of children. Coin or button batteries containing lithium can cause severe or fatal in- juries within 2 hours of being swal- lowed or placed inside any part of... -
Page 22: Charging The Battery (Without Wall Mounting)
Installation and connection Charging the battery (without Charging the battery (with wall wall mounting) mounting) You can store the vacuum cleaner up- There are 2 ways to store and charge right and charge the battery directly. the vacuum cleaner in the supplied wall bracket. -
Page 23: Wall Mounting
Installation and connection Wall mounting Attaching the mounting plate The supplied wall bracket has a mount- 2 plugs and 2 T20 TORX screws are ing plate with a bag of screws attached supplied for attaching the mounting to the back. plate to the wall. Attach the mounting plate to the point You will also need a battery-operated on the wall where you want the wall... - Page 24 Installation and connection Attach the mounting plate to the wall. Plug the supplied charging cable into the opening from above. Attaching the charging cable Lay the charging cable in its guide. to the wall bracket A cable compartment is located on the underside of the wall bracket.
- Page 25 Installation and connection Connecting the accessories Connecting the wall bracket holder (if required) An accessories holder is supplied for storing the 3-piece accessory set on the wall bracket (see “Using the ac- cessories supplied”). Slide the wall bracket down into the mounting plate from above until it audibly clicks into place.
-
Page 26: Battery Charging State Indicator (While Charging)
Installation and connection Battery charging state indic- If the battery has not been used for a ator (while charging) long time and has run down, it will go into safe mode. As a result, the battery The battery charging state is displayed charging state indicator will only re- on the PowerUnit. -
Page 27: Using The Supplied Accessories
Using the supplied accessories Multi Floor XXL Electrobrush Miele offers a range of suitable ac- cessories for many special applica- Follow the flooring manufacturer’s tions (see “Optional accessories”). cleaning and care instructions. Damage caused by trapped ma- terial. Risk of the flooring getting scratched. -
Page 28: Use
Switching on and off Min. Lowest power level for light soiling If you have charged the battery in the wall bracket, take the vacuum cleaner Medium power level for nor- out of the wall bracket. mal soiling If you have charged the battery dir- Max. -
Page 29: Maintenance
Risk of injury caused by rotating roller brush. Original Miele accessories are available You can injure yourself on the rotat- from the Miele webshop, the Miele Cus- ing roller brush. tomer Service Department and from your Miele dealer. Switch the vacuum cleaner off before doing any maintenance work. -
Page 30: Filter System
Maintenance Filter system Activating the ComfortClean function Always run the interim cleaning function for the fine dust filter before emptying the dust container. You should also run it whenever the suction power begins to drop. This enables the vacuum cleaner to achieve the very best cleaning perform- ance again straight away. -
Page 31: Emptying The Dust Container
Maintenance Emptying the dust container Provided that no prohibited sub- stances are present, the contents of Empty the dust container at the latest the dust container can be disposed of when the dust has reached the MAX with normal household waste. marking on the dust container. -
Page 32: Cleaning The Pre-Filter And Fine Dust Filter
Maintenance If chunks of dust, hair or coarse debris do not fall out, remove the pre-filter by pulling it upwards (see “Cleaning the pre-filter and fine dust filter” below). Turn the lid of the dust container back to its original position. ... - Page 33 Maintenance Risk of damage caused by incor- rect cleaning. The pre-filter can become damaged and be less effective as a result. Do not clean the pre-filter with water. Do not use pointed or sharp-edged objects to clean the filter. ...
-
Page 34: Cleaning The Dust Container
Maintenance Cleaning the Electrobrush To do this, line up the guides (arrows) and turn the pre-filter back to its ori- Disconnect the Electrobrush from the ginal position. vacuum cleaner. Close the dust container flap, making Place the Electrobrush upside down sure it clicks into place. -
Page 35: Replacing The Rechargeable Battery
If the small running wheels are very battery heavily soiled or blocked, you can re- move them for easier cleaning. To re- An original Miele AP01 lithium-ion re- move them, use a flat-head screw- chargeable battery (HX LA) is required. driver. Follow the instructions regarding the... -
Page 36: Error Messages
Bottom and middle in- “Battery overheating” or “Battery not recognised” er- dicators are flashing quickly Wait for approximately 30 minutes before switch- ing the vacuum cleaner back on again. Insert an original Miele AP01 lithium-ion re- chargeable battery (HX LA). -
Page 37: Problem Solving Guide
With the help of the following guide, minor faults in the performance of the appli- ance, some of which may result from incorrect operation, can be remedied without contacting Miele. This will save you time and money because you won't need a service call. - Page 38 Problem solving guide Problem Cause and remedy The operating noise is The Electrobrush power consumption is automatic- changing during vacu- ally set to the optimum level based on the type of uming. flooring. The noise is not unusual – the vacuum cleaner is functioning normally.
-
Page 39: Service
Contact in case of malfunction In the event of any faults which you cannot remedy yourself, please contact Miele. Contact information for Miele can be found at the end of this document. Please note that telephone calls may be monitored and recorded for training... -
Page 40: Cleaning And Care
Cleaning and care Risk of injury caused by rotating roller brush. You can injure yourself on the rotat- ing roller brush. Always switch the vacuum cleaner off before cleaning it. Use the On/Off switch on the Comfort handle to do this. -
Page 41: Optional Accessories
For intensive cleaning of car seats and carpeted stairs. Purchasing accessories Hardfloor Care soft roller Original Miele accessories are available from the Miele webshop, the Miele Cus- (HX HC) tomer Service Department and from For cleaning delicate hard floors. your Miele dealer. Insert the Hardfloor Care soft roller into... - Page 42 Optional accessories new one after approx. 3 years (see Crevice nozzle, 300 mm “Maintenance – Cleaning the pre-filter (SFD 10) and fine dust filter”). Extra long crevice nozzle for cleaning in folds, crevices and corners. Crevice nozzle, 560 mm (SFD 20) Flexible crevice nozzle for vacuuming hard to reach places.
-
Page 43: Electrical Connection
Electrical connection All work should be carried out by a suit- ably qualified and competent person in strict accordance with national and local safety regulations. The voltage and rated load are given on the data plate located underneath the vacuum cleaner. - Page 44 183 Featherston Street Miele Experience Centre South Melbourne: Wellington 6011 206-210 Coventry Street South Melbourne, VIC 3205 0800 464 353 (0800 4 MIELE) Miele Experience Centre and Office Sydney: www.miele.co.nz 3 Skyline Place Frenchs Forest, NSW 2086 Miele Experience Centre and Office Brisbane:...