Table of Contents
Advertisement
Quick Links
Refrigerant; R600a
Refer to "REFRIGERATING-CYCLE REPAIR MANUAL" for handling this refrigerant.
[1]INSTALATION .......................................... 2
[2] SPECIFICATIONS .................................... 3
[3] FICHE ................................................... 5
4] DESIGNATION OF VARIOUS PARTS ......... 6
1. EXTERNAL DESCRIPTION .................. 6
2. CONSTRUCTIONS .............................. 7
2. INNER DIMENSIONS ........................... 8
[6] LIST OF ELECTRICAL PARTS .................. 9
1. WIRING DIAGRAM .............................. 10
1. OUTLINE OF CONTROL ........................ 13
SERVICE MANUAL
Refrigerator-freezer
MODEL
SJ-FS810V-WH
CONTENTS
[9] CIRCUIT DIAGRAM OF MAIN PWB ............ 17
[10] SELF-DIAGNOSIS MODE ........................ 19
[11] MODE FOR DISPLAY .............................. 26
1. REFRIGERATOR COMPARTMENT ...... 27
2. FREEZER COMPARTMENT .................. 35
ARE NOT ON THE SAME LEVEL .................. 46
[13] COOLING UNIT .................................... 47
1. COOLING UNIT .................................... 47
2. LOCATION .......................................... 48
Parts Guide
No.SX528SJ79AHTJT
DESTINATION
This document has been published to be used for
after sales service only.
The contents are subject to change without notice.
J
Advertisement
Table of Contents

Related Manuals for Sharp SJ-FS810V-WH


Summary of Contents for Sharp SJ-FS810V-WH
-
Page 1: Table Of Contents
SERVICE MANUAL No.SX528SJ79AHTJT Refrigerator-freezer MODEL SJ-FS810V-WH DESTINATION Refrigerant; R600a Refer to "REFRIGERATING-CYCLE REPAIR MANUAL" for handling this refrigerant. CONTENTS DEFINITION OF SERIAL NUMBER FOR VESTEL 2. WHEN THE DEFROSTING FAILURE IS DOUBTFUL 13 3. RE-SETTING OF MICROCOMPUTER AT POWER FAILURE 14 [1]INSTALATION ……………………………………... -
Page 2: Definition Of Serial Number For Vestel
SJFS810VWH ・ DEFINITION of serial number for VESTEL Initial letter of serial number : J The serial number on the “Name label” and “Feature label” 2. Feature label 1. Name label SJ-FS810V-WH SJ-FJ810V-BK SJ-FJ810V-BK WIRING DIAGRAM MODEL : SJ-FS810V-SL 1 6 0 1 0 0 0 0 1 SERIAL NO. -
Page 3: Specifications
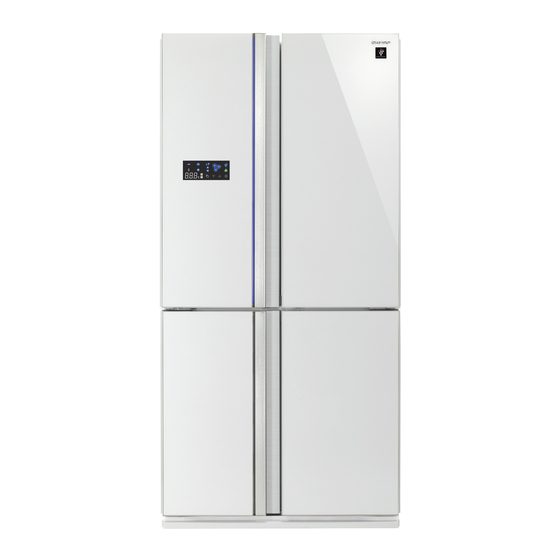
SJFS810VWH [2] SPECIFICATIONS Items SJ-FS810V Type 4 Door Outer dimensions Height 1830 mm ( 72.0 ") Width 892 mm ( 35.1 ") Depth 766 mm ( 30.2 ") Rated storage volume Total 600liter (21.2 cu.ft) Freezer 207liter (7.3 cu.ft) Refrigerator 393liter(13.9 cu.ft) Rated gross volume Total... - Page 4 SJFS810VWH PLUG TYPE Receptacle Plug cord 2pin+Earth Plug type Destination mark COLOR Items Outside color White Inside color White AUTOMATIC ICE MAKER • Water supply system …… Water is sent from the water tank to the ice tray. • Water tank capacity …… Approx. 1.8L • Ice-making capability Ice size Normal...
-
Page 5: Fiche
SJFS810VWH [3] FICHE ANNEX Ⅲ (EU) Regulation No.1060/2010 A Trade mark Model name SJ-FS810V C Category D Energy class E EU Ecolabel award — F Annual energy consumption *1 [KWh/ year] Storage volume of all compartments that do not merit a star rating [ L ] H Storage volume of all frozen-foodstorage compartments that merit a star rating... -
Page 6: Designation Of Various Parts
SJFS810VWH [4] DESIGNATION OF VARIOUS PARTS 1. EXTERNAL DESCRIPTION The names in parenthesis “[ ]” are the denominations used in the PARTS GUIDE. Shovel [Ice scoop] 1. Door pockets [Door pocket ass’y] 2. Refrigerator shelves [R-shelf ass’y] 3. Shelf [V-shelf ass’y] Noise-prevention sheet 4. -
Page 7: Constructions
SJFS810VWH 2. CONSTRUCTIONS Top led PWB ass'y Multicolor PWB ass'y Cold air flow PWB-s ass'y R-thermistor Lr led PWB ass'y Lr led PWB ass'y Ionizer-K OP PWB ass'y Handle PWB upper ass'y Handle PWB lower ass'y R fan motor Gear pump Tank heater Damper ass'y Door sw PWB... -
Page 8: Dimensions
SJFS810VWH [5] DIMENSIONS 1. OUTER DIMENSIONS AND CLEARANCE more than more than with badge thickness more than 60 more than 1334 Refrigerator 1500 Freezer 2. INNER DIMENSIONS The dimensions between shelves can be changed by setting the shelves on the other rails. 357.6... -
Page 9: List Of Electrical Parts
SJFS810VWH [6] LIST OF ELECTRICAL PARTS ITEMS PARTS CODE TYPE NAME RATING SPECIFICATIONS R thermistor RH-HXA158CBZZ DC5V R0 = 6.4 kΩ, B(0) = 3811 F /DEF thermistor RH-HXA108CBZZ DC5V (F) R0 = 6.4 kΩ, B(0) = 3811 (DEF) R0 =15 kΩ, B(0) = 3811 Damper ass'y DTHM-A031CBKZ DC12V R fan motor RMOTRA095CBZZ D08A-12PM05(K) DC12V F fan motor RMOTRA096CBZZ FBA12J15VXD DC15V Fuse ass'y FFS-TA087CBKZ... -
Page 10: Wiring Diagram
SJFS810VWH [7] WIRING DIAGRAM 1. WIRING DIAGRAM Be sure to replace the electrical parts with specified ones for maintaining the safety and performance of the set. BK : BLACK BR : BROWN : RED : ORANGE : YELLOW GR : GREEN BL : BLUE : VIOLET GY : GRAY W : WHITE : PINK SB : SKY-BLUE G/Y : GREEN/YELLOW STRIPE... -
Page 11: Electric Accessories Layout
SJFS810VWH 2. ELECTRIC ACCESSORIES LAYOUT... -
Page 12: Precautions For Using Lead-Free Solder
SJFS810VWH 3. PRECAUTIONS FOR USING LEAD-FREE SOLDER 1) Employing lead-free solder The PWB of this model employs lead-free solder. This is indicated by the "LF" symbol printed on the PWB and in the service manual. The suffix letter indicates the alloy type of the solder. Example: Indicates lead-free solder of tin, silver and copper 2) Using lead-free wire solder When repairing a PWB with the "LF"... -
Page 13: Failure Diagnosis
SJFS810VWH [8] FAILURE DIAGNOSIS 1. OUTLINE OF CONTROL 1) ON/OFF Control of Compressor • ON/OFF of the compressor will be controlled depend on the temperature detected by the R-thermistor and F-thermistor. (Normal cooling control) • In case the surrounding temperature is high at the power supply input, the compressor will be ON at once and the normal cooling control will start after several hours. -
Page 14: Re-Setting Of Microcomputer At Power Failure
SJFS810VWH 3. RE-SETTING OF MICROCOMPUTER AT POWER FAILURE • At the power failure for over about 1 second, the control of the microcomputer will be reset. • Microcomputer might continue to operate for approximately 10 seconds maximum at power failure depending on the load at the operation. -
Page 15: Conversion Table Between Temperature And ......... Resistance Value
SJFS810VWH Varistor Normal (over approx.1.5MΩ) Damage Flow of excessive current is considerable for There is a possibility of excessive voltage applied from outside some reasons. with the factor such as thunder etc. Melting Check for any portion to cause short circuits When repeated with a factor other than thunder, there might be especially on the primary circuit. - Page 16 SJFS810VWH 2) Def-thermistor Temperature Resistance Value Temperature Resistance Value Temperature Resistance Value (°C) (KΩ) (°C) (KΩ) (°C) (KΩ) 61.2 24.1 10.6 57.5 22.9 10.1 54.1 21.7 50.9 20.5 47.9 19.5 45.2 18.5 42.6 17.5 40.1 16.6 37.9 15.8 35.7 33.7 14.3 31.9 13.6...
-
Page 17: Circuit Diagram Of Main Pwb
SJFS810VWH [9] CIRCUIT DIAGRAM OF MAIN PWB... - Page 18 SJFS810VWH...
-
Page 19: Self-Diagnosis Mode
SJFS810VWH [10] SELF-DIAGNOSIS MODE 1. Entering method of the mode 1) Press the [Select] key on the control panel over 5 seconds at the opening condition of the refrigerating room doors and the freezing room doors. 2) With a beep sound of buzzer, the self-diagnosis mode is entered. When the self-diagnosis mode is not entered by the above operation, defect of Door SW system can be considered. - Page 20 SJFS810VWH 4. Defect display Correspondance Status Buzzer Content Display method No defects None None -- -- None -- -- - F-thermistor system defect E.01 Defect of each thermistor, short circuit/wire breakage of → [1] thermistor wiring and defect of main PWB R-thermistor system defect E.02 →...
- Page 21 SJFS810VWH 5. Correspondence method [ 2 ] [ 1 ] (R-thermistor system diagnosis) (F-thermistor system diagnosis) Power OFF Power OFF ⑱ ⑯ Remove 4P connector from E.V. Remove 4P connector from R-cbox cover Assy and measure the Assy and measure the thermistor thermistor resistance between resistance between ③...
- Page 22 SJFS810VWH [ 3 ] [ 5 ] (DEF-thermistor system diagnosis) (ICE-thermistor system diagnosis) Power OFF Power OFF ⑦ ⑧ ③ ④ Remove 6P connector from Auto Ice maker and measure the Remove 4P connector from E.V. thermistor resistance between cover Assy and measure the ⑥...
- Page 23 SJFS810VWH [ 7 ] [ 6 ] (Cooling Fan motor system diagnosis) (Defrosting diagnosis) Turn power OFF. After approx. 30 sec., open the refrigerating room door and Under compressor operating, re-energize. (Buzzer beeps continuously) close the door switch Forced defrosting (Measurement is impossible when DEF-thermistor is set at 10°C or higher because defrosting ends immediately) Cooling Fan motor...
- Page 24 SJFS810VWH [10] [ 8 ] (Operation PWB communication diagnosis) (R room Fan motor system diagnosis) Under damper opening, close the door switch CN6 on the main PWB is positively engaged? R Room Fan motor rotates? FS810V: 2P and 3P, FS810V/760V : 3P connector to the Operation PWB is positively engaged? Check cause of defrosting...
- Page 25 SJFS810VWH [ 12 ] [ 13 ] (ICE storage box is full) (Auto ICE Maker system defect) Select ice tray cleanig “ON” Check ICE box on the operation panel (Releasing the ice started) ICE storage box full? Measure the voltage between ③and④...
-
Page 26: Mode For Display
SJFS810VWH [11] MODE FOR DISPLAY (Enter) key 1) Entering method of the mode Within 2 minutes after main power input, press the [ ] button over 5 seconds at the opening condition of the refrigerating room door. 2) Release of the mode Press the [ ] button over 5 seconds at the opening condition of the refrigerating room door. -
Page 27: Disassembling/Assembling Procedures
SJFS810VWH [12] DISASSEMBLING/ASSEMBLING PROCEDURES CAUTION: DISCONNECT THE UNIT FROM THE POWER SUPPLY BEFORE ANY REPAIRING. 1. REFRIGERATOR COMPARTMENT Presents parts name Included electrical parts Plasmacluster unit, Lr led pwb ass'y, Top led pwb ass'y, Pci pwb ass'y,Lr led harness, R-louver ass'y Pci indicator harness, R-thermistor R control box ass'y Damper ass'y, Lead r-c box, R fan motor... - Page 28 SJFS810VWH 7) Remove joint pipe from pipe cover ass'y. 10) Remove the r control box ass'y. Screw Pump unit ass'y Latch Latch Joint pipe Pipe cover ass'y R contorol box ass'y 8) Remove the c partion r cover ass'y. Screw C partion r cover ass'y 9) Remove the pipe cover ass'y.
- Page 29 SJFS810VWH 1-2. Assembling procedures of R CONTROL BOX ASS’Y. A-sealer ag4 A-sealer rc-c Deodorizer R air guider a A-sealer rc-i A-sealer rc-a R fan motor R-C box cover A-sealer rc-f R air guider b Lead r-c box A-sealer rc-h Damper ass'y A-sealer rc-d 1) Insert Lead r-c box to Damper ass’y.
- Page 30 SJFS810VWH 6) Stick A-sealer rc-f to R air guider b. 7) Stick A-sealer rc-g to R air guider a. A-sealer rc-f >PS< A230 R air guider b R air guider a 8) Assemble R air guider b to R air guider a. Wire harness are fixed with kraft tape.
- Page 31 SJFS810VWH 1-3. Assembling procedures of R-louver ass’y. R-louver insu A- sealer r-lv a Plasmacluster unit A-sealer r-lv b Led holder l Lr led harness Top led pwb ass’y A-sealer r-lv b Multicolor PWB ass’y Lr led pwb ass’y Led holder R-tp harness Top led harness R lamp cover t...
- Page 32 SJFS810VWH 1) Fix Al panel to r-louver. 2) Fix R-louver cover l and R-louver cover r to R-louver. 3) Connect Top led harness ass'y to multicolor pwb ass'y. 4) Fix 3) ass'y to r-louver. 5) Fix Lr led pwb ass'y to led holder l & r. 6) Fix 5) ass'y to r-louver.
- Page 33 SJFS810VWH 9) Connect r-tp harness ass'y to plasmacluster unit. 10) Insert plasmacluster unit into r-louver insu. 11) Fix plusmacluster unit and r-tp harness ass'y by paper tape to r-rouver insu. 12) Stick A-sealer r-louver a & b to r-rouver insu. PAPER TAPE...
- Page 34 SJFS810VWH 1-4. Assembling procedures of Pump unit ass'y 1) Insert joint packing and joint pipe to gear pump. 3) Fix packing holder by tapping screw.(2 places) *Insert it enough Tapping screw Joint pipe is vertically. Packing holder Joint packing Joint pipe Joint packing Joint pipe Gear pump...
-
Page 35: Freezer Compartment
SJFS810VWH 2. FREEZER COMPARTMENT Parents parts name Included electrical parts Ev cover ass'y F/def-thermistor, F fan motor Evaporator ass'y Fuse ass'y Def-heater ass'y Defrost heater Ice maker t-s-ass'y Thermistor, Ice cube heater , Ice maker ass'y 2-1. Disassembling procedures 5) Remove the connect cover, and disconnect the connector. - Page 36 SJFS810VWH 2-2. Assembling procedures of C PARTITION FFB ASS’Y. V-partition lfb Sealer d V-p sealer a V-partition rfb Sealer c V-p sealer a Sealer e 1) Stick Sealer c to V-Partition lfb. V-p sealer a V-PARTITION LFB SEALER C 2) Fix V-partition lfb and V-Partition rfb with the tapping screw. V-PARTITION LFB V-p sealer a V-PARTITION RFB...
- Page 37 SJFS810VWH 3) Stick Sealer d to the back side. Stick Sealer e to the bottom side. V-p sealer a SEALER D SEALER E 2-3. Assembling procedures of E.V. COVER ASS’Y. Sealer fm EV-cover insu E.V. PE-AL sheet EV-c sealer l EV-cover sealer EV cover EV-cov.
- Page 38 SJFS810VWH 1) Assembly F fan motor • Sticking of sealer to F fan motor. • Insert F fan motor to E.V cover .Then fix with tapping screw. Tappig screw 2) Sticking of sealers and Al tapes to E.V cover. 3) Insert F/df-thermistor ( wire color : Blue) to E.V cover. 4) Insert E.V cover insulation to E.V cover.
- Page 39 SJFS810VWH 2-4. Banding the connectors It is necessary to bind the connector joint of the Defrost heater and fuse ass’y in the band. Only the lower side Attach to each inside face. (reverce of lock) lock lock 2P-connector 3P-connector (Fuse ass'y) (Defrost heater)
- Page 40 SJFS810VWH 2-5. DEFROST HEATER ASSEMBLY 2-5-2. Replacement of Def. heater 2-5-1. Taking-out Evaporator 1) Remove the center screw of Heater support to take it off from the food liner. 1) Take-out C Partition ffb ass’y. 2) Take-out Fan louver. 3) Take-out E.V cover ass’y. Heater support Evaporator Food liner convex part...
- Page 41 SJFS810VWH 4) Replace Def. heater with new one. 2-5-3. Installing of Evaporator 1. Install Evaporator as shown in 3) in the reverse order of 4). 2. Correct the deformed fin. NOTE: 1.When installing Evaporator, take care not to deform significantlyand break the pipes. 2.Take care not to damage the lead wires and hurt yourself by the fin of Evaporator.
- Page 42 SJFS810VWH 2-6. Ice maker T-S ass'y Nylon band I-grill Ice cube maker Ice cube tray at Harness cover Ice maker ass’y Thermistor Thermistor cover Sealer Ice cube heater Ice senser Ice heater cover t L-band c 1) Put Thermistor on back side of Ice cube tray at . Put Selar on Thermistor , cover them with Thermistor cover and fix by 4 claws and square holes.
- Page 43 SJFS810VWH 3) Cover Ice cube tray at with Ice heater cover t , and fix 2 point by tapping screw. *Set Ice heater cover t so as to " " marking side is on axis of Ice cube tray at. *Tightening toruque is 0.5N m. marking “ ” Ice heater cover t Screw axis Ice cube tray at 4) Put rib of Ice senser in groove of ice maker ass'y.
- Page 44 SJFS810VWH 6) Put harness of Ice maker T-T ass'y through hole A and hole B (in front and back side of I-grill). *hole A(front side) : for harness of Ice maker ass'y hole B(back side) : for harness of Thermistor ahd heater *protect tube edge (Ice cube tray at side) is always coverd with Ice heater cover t.
- Page 45 SJFS810VWH 9) Bundle harness by insulating (vinyl) tape, L-band c and fix at I-grill. *Fix L-band c same as below picture but don't roll. *Don't pull harness of Ice cube heater by more than 2 kgf. (1)Bundle protect tube covering Thermistor and Ice cube heater by fix at I-grill. *Cover edge of protect tube (Ice cube tray at side) with Ice heater cover t. (Don't pull harness strongly) *Line edge surfaces of protect tubes and bind at left side of marking of Ice cube heater as below picture.
-
Page 46: When Left And Right Doors Are Not On The Same Level
SJFS810VWH 3. WHEN LEFT AND RIGHT DOORS ARE NOT ON THE SAME LEVEL 3-1. Cause The floor is not flat and refrigerator is slanting. 3-2. Adjustment 1. Unscrew 4 screws on the bottom of the cabinet,and remove the foot cover. Screw Foot cover 2. Adjust the adjustable feet as follows: [When left door is raised] 1) Raise and then lower the both feet until they touch the floor. -
Page 47: Cooling Unit
SJFS810VWH [13] COOLING UNIT 1. COOLING UNIT Mark:Refrigerant flow Hot pipe Hot pipe (Side condenser) (Side condenser) Evaporator Hot pipe (DP-condenser) Suction pipe DCP ass’y F DP Condenser Compressor Drain pan Capillary tube Dryer... -
Page 48: Location
SJFS810VWH 2. LOCATION 1) LOCATION 1 Capillary tube Dryer F DP Condenser Charge pipe Charge pipe Compressor DCP Assy Suction pipe S-P Connector Drain pan Mark shows pinch points Mark shows welding points 2) LOCATION 2 FromHot pipe FromDischarge pipe ass’y FromCharge pype to F DP Condenser to Hot pipe...