
Related Manuals for LG WDP3 Series


Summary of Contents for LG WDP3 Series
- Page 1 SERVICE MANUAL PEDESTAL For washer, dryer, and combo LG 27" CAUTION : READ THIS MANUAL CAREFULLY TO DIAGNOSE CORRECTLY BEFORE SERVICING THE UNIT. MODEL : WDP3*...
-
Page 2: Pedestal Kit
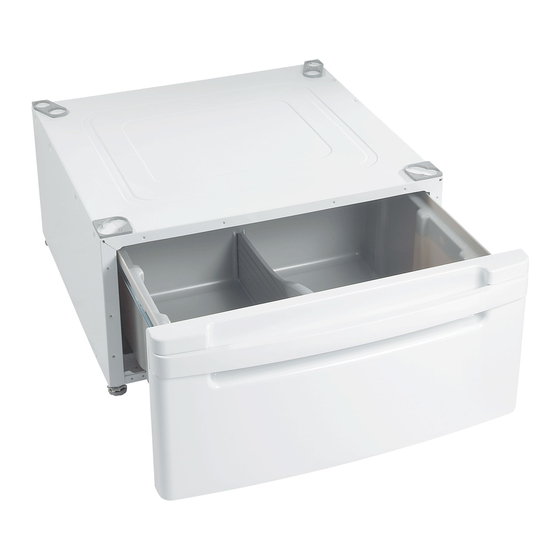
PEDESTAL KIT INTRODUCTION The pedestal accessory includes: Tools Needed for Installation: • Drawer divider (1) • Wrench • Phillips-head screwdriver • Screws (18) † • Retainers (4)†† • Wrench (supplied) • Floor Pads (4) † Dryer installation only uses 8 screws ††... - Page 3 PEDESTAL KIT PEDESTAL INSTALLATION – WASHER For dryer Tighten all 4 For washer/combo locknuts securely Make sure the leveling feet of the appliance Position the appliance on top of the pedestal. are fully retracted. The washer feet will fi t into the outermost Once the leveling feet of the washer are fully corner positions and the dryer feet will fi t into retracted, tighten all locknuts securely.
- Page 4 PEDESTAL KIT PEDESTAL INSTALLATION – DRYER T- clip Retract fully Then loosen 1-1/2 turns Retainer To set the dryer to the same height as the Insert the T-clip of the 4 retainers into the washer, fully retract the leveling feet of the dryer base as shown.
- Page 5 PEDESTAL KIT PEDESTAL INSTALLATION – FINAL INSTALLATION Raise Locknut Lower Loosen the locknuts on all 4 leveling feet of Securely tighten all locknuts by hand. the pedestal until you can turn them with the wrench. Turn clockwise to raise or NOTE: Noise and vibration may result if counterclockwise to lower until the pedestal is locknuts are not tightened.
- Page 6 PEDESTAL KIT DISASSEMBLY INSTRUCTIONS Protect the floor with a large piece of Open the drawer, and then remove the four (4) cardboard. screws (two on each side) on both side of Lay the appliance on the cardboard. drawer. Be sure the cardboard is under the entire lower back of the appliance.
- Page 7 PEDESTAL KIT DISASSEMBLY INSTRUCTIONS Loosen the leg using the wrench.(supplied) Remove twelve (12) screws on the bottom of the pedestal. Remove four (4) screws (two on each side) on both side of slide.
-
Page 8: Exploded View
PEDESTAL KIT EXPLODED VIEW A140 A150 A160 A102 A100 A103 A101 A120 A110 A130... - Page 9 APR. 2003 PRINTED IN KOREA P/NO:3828ER3018F...