Table of Contents
Advertisement
Quick Links
Advertisement
Table of Contents
Troubleshooting

Related Manuals for Panasonic CQ-DX200W5


Summary of Contents for Panasonic CQ-DX200W5
- Page 1 DVD Player/receiver DVD-ÔÎÂÂ/ÂÒË‚Â DVD 플레이어/리시버 CQ-DX200W Model: TEXT...
-
Page 2: Safety Information
They contain instructions about how to use the sys- from improper connections and operations. The meanings of tem in a safe and effective manner. Panasonic assumes no the pictographs are explained below. It is important that you responsibility for any problems resulting from failure to fully understand the meanings of the pictographs in order to observe the instructions given in this manual. - Page 3 In case of battery leakage For maximum safety, have it installed by your dealer. ● Thoroughly wipe the battery liquid off the battery case and Panasonic is not liable for any problems resulting from your insert new battery. own installation of the unit. ●...
- Page 4 Safety Information (continued) Warning For your safety, this system is designed not to see the moving pic- Warning ture while you are driving. When connecting this unit to the front monitor (on-dash/in-dash): ¡ Park your car in a safe place and activate the parking brake before seeing the moving picture.
-
Page 5: Before Reading These Instructions
Differences between 2 Models ¡ This operating instruction manual is for 2 models CQ-DX200W3 and CQ-DX200W5. The following table describes the dif- ferences between 2 models. Models... - Page 6 Before Reading These Instructions (continued) XXXXXXXXXXXXXXX XXXXXXXXXXXXXXXXX XXXXXXXXXXXXXXX XXXXXXXXXXXXXXXXX XXXXXXXXXXXXXX XXXXXXXXXXXXXXX XXXXXXXXXXXXXXXX XXXXXXXXXXXXXXXXX XXXXXXXXXXXXXX XXXXXXXXXXXXXX XXXXXXXXXXXXXXXX OO-OOOOO XXXXXXXXXXXXXXXX XXXXXXXXXXXXXXXXX OO-OOOOO XXXXXXXXXXXXXXXXX XXXXXXX XXXXXXX XXXXXXX XXXXXXX XXXXXXX XXXXXXX XXXXXXX XXXXXXX XXXXXXX XXXXXXX XXXXXXX XXXXXXX XXXXXXX XXXXXXX XXXXXXX XXXXXXX XXXXXXX XXXXXXX XXXXXXX XXXXXXX XXXXXXX XXXXXXX...
-
Page 7: Features
¡ DVD Changer The optional adapter (Conversion Cable for DVD/CD Changer: CA-CC30N) allows users to connect the optional Panasonic DVD changer unit (CX-DH801W). ¡ CD Changer The optional adapter (Conversion Cable for DVD/CD Changer: CA-CC30N) allows users to connect the optional Panasonic CD changer unit (CX-DP880). -
Page 8: Discs That Can Be Played Back
The Region number for this product is “3” (for CQ- Discs not supported DX200W3), “5” (for CQ-DX200W5) or “ALL”. The following discs are not played back on this product. Example: ¡DVD-Audio... -
Page 9: Table Of Contents
Contents English ê ê Û Û Ò Ò Ò Ò Í Í Ë Ë È È Safety Information ¡ Before Reading These Instructions ¡ Features ¡ Discs that can be Played Back ¡ Controls Layout ¡ Preparation ¡ General ¡ Radio ¡... -
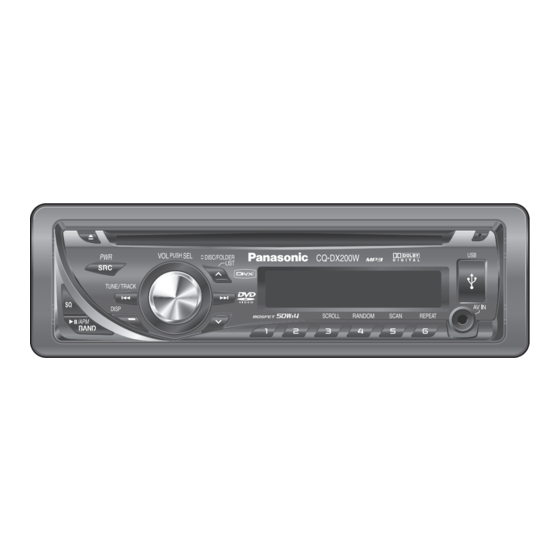
Page 10: Controls Layout
Controls Layout Note: These operating instructions manual explains operations for use with the buttons on the main unit. (Different operations excluded) TUNE page 18) TRACK (FILE) USB Connector page 20, 22, 26, 32) page 32) SRC Source DISC page 50, 52) PWR Power page 22) FOLDER... - Page 11 General [MUTE] [SRC] ¡Mutes the sound temporarily. ¡Toggles power on/off. ¡Selects a source. [VOL] ¡Adjusts the sound volume. [}] [{] ¡Selects (vertically) or adjusts an [MENU] operation or item. ¡Shows the menu screen. []] [[] ¡Selects (horizontally) or adjusts an operation or item.
-
Page 12: Preparation
Stick your thumbnail into the groove, and push the Note: Battery Information: holder in the direction of Battery Type: Panasonic lithium battery (CR2025) the arrow. (Included in the remote control) w Pull it out in the direction Battery Life: Approximately 6 months under normal use... - Page 13 You can select a TV standard format (NTSC/PAL). Refer to “TV Type” Page 37). Press [SRC] (PWR) to turn on the Adjust the minute. power. [ d ] :Sets ahead. [ s ] :Sets back. Hold down [DISP] for 2 sec. or more. Press [DISP].
-
Page 14: General
General This chapter explains how to turn on or off the power, how to adjust the volume, etc. Power on Press [SRC] (PWR: POWER). Power off Hold down [SRC] (PWR: POWER). You can remove the face plate to prevent it from being stolen. - Page 15 Volume off (down) (only by remote control unit) Press [MUTE]. Cancel Press [MUTE] again. Note: The volume-down range can be specified. page 35) When the power of the unit is set to OFF, press [DISP] (ACC ON). (Clock time) (Default) (Display off) When the power is set to ON, refer to the description for each source mode.
- Page 16 General (continued) The source changes as follows every time [SRC] is pressed. Radio Bluetooth FM1, FM2, FM3, AM page 18) Devices connected via Bluetooth Player CD, MP3/DivX, DVD/VCD page 20, 22, 26) System-up Connector Device connected to the System-up Connector of this unit When optional devices are connected: Device connected to the USB terminal...
- Page 17 The equalizer curve is selectable from among preset 6 types (FLAT, ROCK, POP, VOCAL, JAZZ, and CLUB) depending on your listening category. SQ changeover The SQ category is changed every time [SQ] (SOUND QUALITY) is pressed. Note: Setting of SQ, bass/treble and volume are influenced one another.
-
Page 18: Radio
Radio This chapter explains how to listen to the radio. Press [SRC] to select the radio mode. Press [BAND] to select a band. Select a station. Frequency adjustment [ s ] (TUNE): Lower [ d ] (TUNE): Higher Note: Hold down the button for 0.5 sec. or more and release it for station search. - Page 19 Up to 6 stations can be preset in AM (LW/MW), FM1, Manual station preset FM2, and FM3 respectively. Tune in to a station. Auto Preset Memory (APM) Hold down one of the preset buttons Stations with good receiving conditions are automatically preset.
-
Page 20: Cd Player
CD Player Cautions ¡ Do not insert a disc when ¡ This unit does not support a MIX mode CD (a CD containing indicator lights both CD-DA and compressed audio data). In case of using because a disc is already loaded. ¡... - Page 21 Random Play All the available tracks are played in a random sequence. Press [4] (RANDOM). lights. Press [4] (RANDOM) again to cancel. Scan Play The first 10 seconds of each track is played in sequence. Press [5] (SCAN). Press [5] (SCAN) again to cancel. Repeat Play The current track is repeated.
-
Page 22: Mp3/Divx Player
MP3/DivX Player The optional monitor (CY-VM7203W) is necessary to be connected to see images of DivX files. When a disc is already loaded, press [SRC] to select the compressed audio mode. Load a disc with the printed side facing Printed side File selection [7] (TRACK): Next file [6] (TRACK): Preceding file (press twice) - Page 23 Notes: ¡ Refer to “Notes on MP3/DivX”. Page 24) ¡ This unit does not support a MIX mode CD (a CD containing both CD-DA and compressed audio files). In case of using such a CD, problems such as anacoustic playback may occur. Random Play Repeat Play All the available files are played in a random sequence.
-
Page 24: Notes On Mp3/Divx
Notes on MP3/DivX What is MP3/DivX? MP3: DivX: MP3 (MPEG Audio Layer-3) is the compression The video compression format developed by DivX, format of digital audio. It is developed by MPEG (Motion Inc. compresses video files without any considerable loss Picture Experts Group). - Page 25 Compressed audio file writing Folder selection order/file playback order ¡ Do not save an audio file (CD-DA file) and a com- Maximum number of files/folders pressed audio file on the same disc. Failure to ¡ Maximum number of files: CD-media: 1200 observe this may result in difficulty in playing.
-
Page 26: Dvd/Vcd Player
DVD/VCD Player You can enjoy watching DVDs and VCDs if the optional monitor (CY-VM7203W) is connected. When a disc is already loaded, press [SRC] to select the DVD/VCD mode. Load a disc with the printed side facing Printed side Fast Forward/Fast Reverse Hold down for 0.5 sec. - Page 27 Disc Menu Title Menu DVD VCD DVD VCD Playback of the disc can be temporarily stopped and the Playback of the disc can be temporarily stopped and the on-disc menu screen can be called up. on-disc title menu screen can be called up. Press [MENU] on the remote control Hold down [MENU] (TITLE) on the during playback.
-
Page 28: Advanced Operation For Video Discs (Dvd/Vcd/Divx)
Advanced Operation for Video Discs (DVD/VCD/DivX) DivX Video-on-Demand (VOD) content is encrypted for copyright protection. In order to play DivX VOD content on this unit, you first need to register the unit. Follow the on-line instructions for purchasing DivX VOD content to enter the unit’s registration code and register the unit. - Page 29 D.Range Compression Subtitle DVD VCD DVD VCD DVD VCD CD MP3 DivX DivX DivX A range of dynamic range compression can be selected. A subtitle language can be selected if the loaded disc has multi-language subtitles. This function is effective for playback of Dolby Digital/Dolby Surround DVD video.
-
Page 30: Osd (On-Screen Display)
OSD (On-Screen Display) You can see OSDs (On-Screen Display) if the optional monitor (CY-VM7203W) is connected. (Only for remote control unit) The optional monitor can be set up to display or hide the following information: title/artist name for CDs, album/title/artist name for MP3, playtime for VCDs/DivX and title/chapter/playtime for DVDs. Each time [OSD] is pressed, the display changes according to the disc type. - Page 31 DVD (DVD Video) VCD (Video CD) Text off Text off Chapter play time Play time Play Title:02/03 Chapter:025/050 Time: 00:05:59 Total play time Play Title:02/03 Chapter:025/050 Time: 02:35:40 [OSD] CQ-DX200W...
-
Page 32: Usb (Mp3/Wma)
USB (MP3/WMA) Notes: Cautions This unit plays back MP3/WMA files stored on a USB ¡ memory. ¡ Do not connect a USB device directly to this unit. If a USB ¡ Connection of an iPod to the USB connector of this unit is device is connected directly to this unit and an accident not supported. - Page 33 Lights when a USB device is loaded Display Change Press [DISP]. Folder/File Clock time Play time Title/Artist name Folder File Folder name Album name File name Notes: ¡ “NO TEXT” is displayed when there is no information on the disc. To have another circle scroll while a title is displayed, ¡...
-
Page 34: Audio Setting
Audio Setting Adjustment to each speaker and an optional subwoofer BALANCE Press [PUSH SEL: SELECT] to display Balance adjustment (Setting range: L (left) 15 to R (right) 15 and Centre, the AUDIO menu Default: Centre) display. q : Right enhanced For using the remote w : Left enhanced control, use [SEL]. -
Page 35: Function Setting
Function Setting Adjustment to display on the FUNCTION menu COLOR Hold down [VOL- UME] (PUSH SEL: Color change of the light (Setting range: OCEAN, SKY, FOREST, ORANGE, FIRE, select) for 2 sec.or PINK, ROSE, STORM (7 colors available) Default: more. STORM) For using the remote control, hold down [SEL] for 2 MUTE KEY... -
Page 36: User Settings
User Settings The following information explains the settings only about the disc player and displayed contents on the screen. (Only for remote control unit) 1. Menu Language Press [MENU] to display “Setup Menu”. Disc menu language selection (Default: English) <Setup Menu> 1. - Page 37 TV standard format (PAL/NTSC) setting This is to select On-screen Display messages which will be displayed when On-screen Display is turned off by (Default: NTSC (CQ-DX200W3)/PAL (CQ-DX200W5)) pressing [OSD]. Page 30) Note: Setting should be made to match the format of the (Default: ON) connected monitor.
-
Page 38: Language Code List
Language Code List (Only for remote control unit) In “Other” cases (Menu Language, Subtitle Language, Audio Language) Page 36) Press numeric buttons from Press [ENTER] to finalize [0] to [9] to enter a 4-digit the selection. language code. (See below.) [ENTER] Setting is finished and the display [RETURN]... -
Page 39: Troubleshooting
If the described suggestions do not solve the problem, it is example, without sound, or with smoke or a foul recommended to take the unit to your nearest authorized Panasonic smell, which can cause ignition or electric shock. Service Center. The product should be serviced only by qualified Immediately stop using the unit and consult your personnel. - Page 40 The power fails The safety device works. unintentionally. Consult your dealer, or your nearest Panasonic Service Center. Antenna installation or wiring of antenna cable is faulty. Check whether the antenna mounting position and its wiring are correct. In addition, check to see whether the antenna ground is securely connected to Poor reception or the chassis.
- Page 41 Problem Possible cause Possible solution The number of auto The number of receivable stations is less than 6. preset stations is Move to an area where receivable stations number is maximum, and try pre- setting. less than 6. The contact of the battery lead is poor, or the battery lead is not always powered. Preset stations Make sure that the battery lead is connected securely, and preset stations cannot be stored.
- Page 42 Troubleshooting (continued) Problem Possible cause Possible solution No playback or The disc has unplayable formatted data. disc ejected Check the file format. The CD-R/RWs that The playability of some CD-Rs/RWs/DVD-Rs/RWs may depend on the combination are playable on of media, recording software and recorder to be used even if these CD- other devices are Rs/RWs/DVD-Rs/RWs are playable on other devices such as a PC.
- Page 43 Problem Possible cause Possible solution The USB device and USB extension cable are not connected correctly. Connect the USB device and USB extension cable correctly. There is no music stored in a format that is supported on this unit. Music is not played Check if there is any music data that can be played stored on the USB device.
- Page 44 Troubleshooting (continued) Problem Possible cause Possible solution Video CD menu Video CD menu playback works only when playing a video CD that has the playback does not playback control feature. work. The picture becomes distorted while fast A certain amount of distortion is normal. forwarding or reversing.
-
Page 45: Error Display Messages
Error Display Messages Display Possible cause Possible solution The disc is dirty, or is upside down. Check the disc. The disc has scratches. Check the disc. No operation by some cause. Unplug the power cord and plug it again. In case the unit is still out of order, consult your dealer. -
Page 46: Maintenance/Fuse
Your product is designed and manufactured to ensure the minimum of maintenance. Use a soft cloth for routine exterior cleaning. Never use benzine, thinner, or other solvents. If the fuse blows out, consult your dealer, or your nearest authorized Panasonic Service Center. Warning ¡... -
Page 47: Notes On Discs
Notes on Discs If commercial CDs are used, they must have either of these labels shown at right. Some copy-protected music CDs are not TEXT playable. How to hold the disc Printed side ¡ Do not touch the underside of the disc. ¡... -
Page 48: System Upgrade Sample
System Upgrade Sample Monitor: CY-VM7203W (Option) Head Unit: CQ-DX200W iPod Page 54) Hands Free Kit with Audio CD Changer Streaming featuring Bluetooth ® CX-DP880 technology: CY-BT200N Page 50) (Option) (Option) Page 56) Expansion Module (hub unit): Page 49) CY-EM100N (Option) Head Unit CQ-DX200W CD Changer... -
Page 49: General
Changer: CA-CC30N ) allows users to connect the unit) (CY-EM100N). Connection of the Expansion Module optional Panasonic DVD changer unit (CX-DH801W). For allows you to simultaneously connect optional devices details, refer to the operating instructions for the DVD mentioned before as well as other AV devices. For changer unit. -
Page 50: Disc Changer
Disc Changer (When CDs or MP3 discs are loaded) Connected an optional CD changer or an optional DVD changer can be controlled by this unit. Load a magazine (discs). When a magazine is already loaded, press [SRC] to select the CD changer mode. The unit recognizes the magazine and starts playing automatically. - Page 51 Notes: When CX-DP880 or CX-DH801W is connected, a CD-RW This unit does not support the following through the CD ¡ ¡ disc is playable. changer. ¡ Trouble may occur while playing CD-Rs. Refer to the section ¡MP3 playback. on “Notes on CD/CD Media (CD-ROM, CD-R, CD-RW)”. Page 47) RANDOM DISC REPEAT (Only for CD-DA disc)
- Page 52 Disc Changer (when DVDs or VCDs are loaded) Connected an optional DVD changer (CX-DH801W) can be controlled by this unit. Load a magazine (discs). When a magazine is already loaded, press [SRC] to select the DVD changer mode. The unit recognizes the magazine and starts playing automatically.
- Page 53 ¡ ¡ For a DVD insertion For a VCD insertion CHAPTER REPEAT REPEAT The current chapter is repeated. The current track is repeated. Press [6] (REPEAT). Press [6] (REPEAT). lights. lights. Press [6] (REPEAT) again to cancel. Press [6] (REPEAT) again to cancel. TITLE REPEAT DISC REPEAT The current disc is repeated.
-
Page 54: Ipod Control
iPod Control Connection of the optional iPod adapter (Direct cable for iPod) (CA-DC300N) allows users to operate the iPod including file selection and file sequence change with the buttons on this unit. Connect the iPod. Press [SRC] to select the iPod mode. Playback starts. - Page 55 Notes: ¡ The shuffle function of iPod corresponds to the RANDOM The iPod equipped with a dock connector is exclusively con- function of this unit. nectable. Further information about the controllable iPod is ¡ Please make sure to detach the iPod after turning off the car described below.
-
Page 56: Bluetooth
Bluetooth Please read the operating instructions for the related devices as well before use. Establish pairing. next page) Please read the instructions for the devices to be connected as well. Press [SRC] to select the Bluetooth mode. Select the BT HF mode/BT AUDIO Display Change mode. - Page 57 Notes: This unit is not operable when receiving a call at power-off We do not guarantee all the operations of connectable ¡ ¡ setting. devices. Switch unit Pick up the phone. Status indicator (Blue LED) Pressing [Hang-on] allows users to pick up the phone lights: Call waiting/Talking during a call incoming.
- Page 58 Bluetooth (continued) Notes: ✽✽✽✽/CONNECT ¡ This setting is feasible only in the Bluetooth mode. ¡ Each item can be set in the BT HF mode and BT Establishment of pairing with the devices last time AUDIO mode independently. connected Hold down [VOL- Notes: UME] (PUSH SEL: ¡...
-
Page 59: Troubleshooting
If the described suggestions do not solve the problem, it is example, without sound, or with smoke or a foul recommended to take the unit to your nearest authorized Panasonic smell, which can cause ignition or electric shock. Service Centre. The product should be serviced only by qualified Immediately stop using the unit and consult your personnel. - Page 60 Troubleshooting (continued) Display Possible cause Possible solution The iPod cable was disconnected in the iPod mode. Reconnect the iPod cable. Your iPod has no playable music. Download playable music to your iPod. No device to be connected detected. Check whether the power of the device to be connected is turned on. Two (2) minutes elapse before pairing establishment.
-
Page 61: Definition Of Terms
Definition of Terms Interactive DVD DivX An interactive DVD is DVD software which includes multiple DivX is a popular media technology created by DivX, Inc. DivX angles, multiple plot endings, etc. media files contain highly compressed video with high visual quality that maintains a relatively small file size. -
Page 62: Specifications
Specifications Notes: ¡ Specifications and design are subject to modification without notice due to improvements. ¡ Some figures and illustrations in these instructions may be different from your product. Power supply 12 V DC (11 V – 16 V), test voltage 14.4 V, negative ground Tone controls (Bass/Treble) Bass;... - Page 63 Memorandom CQ-DX200W...
- Page 64 CQ-C3303W CQ-DX200W Matsushita Electric Industrial Co., Ltd. Web Site : http://panasonic.net YFM264C048CA NY1107-1127 Printed in China...