LG LRE30955ST Owner's Manual & Cooking Manual
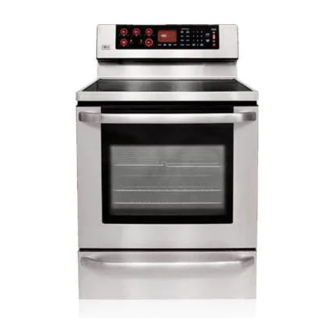
Freestanding electric range with dual convection system (stainless steel)
Hide thumbs
Also See for LRE30955ST:
- Owner's manual & cooking manual (88 pages) ,
- User's manual and cooking manual (44 pages) ,
- Specifications (2 pages)

Related Manuals for LG LRE30955ST


Summary of Contents for LG LRE30955ST
- Page 1 Website: http://us.lge.com ELECTRIC RANGE OWNER'S MANUAL & COOKING GUIDE LRE30955ST PLEASE READ THIS OWNER'S MANUAL THOROUGHLY BEFORE OPERATING. Printed in Korea P/NO.:MFL37118202...
-
Page 2: Table Of Contents
Please record the model number and serial number of this unit for future reference. We also suggest that you record the details of any contact with LG (LG Electronics USA, Inc.) concerning this unit. Staple your receipt here to verify your retail purchase. -
Page 3: Safety
Read and follow all instructions before using your oven to prevent the risk of fire, electric shock, personal injury, or damage when using the range. This guide do not cover all possible conditions that may occur. Always contact your service agent or manufacturer about problems that you do not understand. - Page 4 O V E N • DO NOT TOUCH HEATING ELEMENTS OR INTERIOR SURFACES OF OVEN. Heating elements may be hot even though they are dark in color. Interior surfaces of an oven become hot enough to cause burns. During and after use, do not touch or let clothing or other flammable materials contact heating elements or interior surfaces of oven until they have had sufficient time to cool.
- Page 5 - The range could be tipped and injury might result from spilled hot liquid, food, or the range itself. - If the range is pulled away from the wall for cleaning, service, or any other reason, ensure that the Anti-Tip Device is properly reengaged when the range is pushed back against the wall.
- Page 6 • Storage in or on appliance. - Flammable materials should not be stored in an oven or near surface elements. • Be certain all packing materials are removed from the appliance before operating. - Keep plastics, clothes, and paper away from parts of the appliance that may become hot. •...
-
Page 7: Safety
• DO NOT leave small children unattended near the appliance. - During the Self-cleaning cycle, the outside of the range can become very hot to touch. • DO NOT line the oven walls, racks, bottom or any other part of the range with aluminum foil or any other material. -
Page 8: Surface Controls Cooking
SURFACE CONTROLS COOKING (Power Failure) MESSAGE The PF message will appear whenever there has been a power interruption to the appliance. To clear the PF message touch ON/OFF control pad to reset and be sure to reset the clock with the correct time of day (see page 17). ( Hot Surface) MESSAGE: •... -
Page 9: Setting Surface Controls
SURFACE CONTROLS COOKING SETTING SURFACE CONTROLS When changing from a high heat setting to a lower heat setting, the surface unit may stop glowing. This is normal. To turn on a single surface unit (Right Rear, Left Rear, Left front) 1. -
Page 10: Recommended Surface Cooking Settings
SURFACE CONTROLS COOKING To turn on a bridge surface element (Left Front-Bridge-Left Rear) 1. Touch the Left Front element ON/OFF. The display will flash (The display will disappear if not used after 10 seconds). 2. Touch SELECT to choose the BRIDGE elements. -
Page 11: Operating The Warming Zone
SURFACE CONTROLS COOKING OPERATING THE WARMING ZONE To set the warming zone control (Center Rear) 1. Touch ON/OFF at the warming zone control position. The warming zone indicator light will flash. (The display will disappear if not used after 10 seconds.) 2. -
Page 12: About Glass Cooktop Surface
This is normal and will disappear when the surface cools. COOKING AREAS The cooking areas on your range are identified by permanent circles on the glass cooktop surface. For the most efficient cooking, fit the pan size to the element size. -
Page 13: About Cookware
SURFACE CONTROLS COOKING USING THE PROPER COOKWARE Using the right cookware can prevent many problems, such as food taking longer to cook or achieving inconsistent results. Proper pans will reduce cooking times and cook food more evenly. Stainless steel is recommended. Check pans for flat bottoms by using a straight edge or ruler 1. -
Page 14: Setting Warming Drawer Controls
SETTING WARMING DRAWER CONTROLS ARRANGING WARMING DRAWER RACK POSITIONS The rack can be used in 2 ways: • In the upright position to allow low profile food items to be placed both under and on top of the rack (for example, rolls or biscuits on top of the rack and a casserole dish underneath). -
Page 15: Information
PARTS AND FEATURES Oven vent Bridge element Ceramic glass Broiler pan & Grid Anti-tip bracket Model and serial number plate Dual Purpose Roast rack Grid Broiler pan INFORMATION Split rack Template Heavy duty racks (2 ea) Cleaner Warming drawer rack - 15 - Warming zone element Single element... -
Page 16: Control Panel Features
CONTROL PANEL FEATURES READ THE INSTRUCTIONS CAREFULLY BEFORE USING THE OVEN. For satisfactory use of your oven, become familiar with the various features and functions of the oven as described below. Detailed instructions for each feature and function follow later in this Owner’s manual. . -
Page 17: Operation
The CLOCK pad is used to set the clock. The clock has been preset at the factory for 12 hours operation. When the range is first plugged in, or when the power supply to the range has been interrupted, the timer in the display will show with power failure PF. -
Page 18: Setting The Timer
SETTING THE TIMER The TIMER serves as an extra timer in the kitchen that will beep when the set time has run out. It does not start or stop cooking. The TIMER feature can be used during any of the other oven control functions. -
Page 19: Setting
SETTING CONVECTION AUTO CONVERSION FEATURE When using convection bake, the Convection Auto Conversion feature will automatically convert entered regular baking temperatures to convection baking temperatures. This feature is activated so that the display will show the actual converted (reduced) temperature. For example, if you enter a regular recipe temperature of 350°F and touch the START pad, the display will show the converted... -
Page 20: Setting Language Selection (English Or Spanish)
SETTING LANGUAGE SELECTION (English or Spanish) The scroll display can be shown either ENGLISH or SPANISH. To set language option 1. Touch the SETTING 3 times. 2. Touch 1 for ENGLISH or 2 for SPANISH. 3. Touch START to accept the change. -
Page 21: Setting Bake
SETTING BAKE The BAKE pad controls normal baking. The oven can be programmed to bake at any temperature from 170°F to 550°F. Default temperature is 350°F (175°C). To set the Bake Temperature to 375°F: 1. Touch BAKE. 350°F will appear in the display. 2. -
Page 22: Before Using Oven Racks
BEFORE USING OVEN RACKS The oven has three racks, two heavy duty racks and one split rack. The racks have a up-turned back edge to prevent the rack from coming out completely when sliding them to check on contents. OPERATION SPLIT RACK The right side of the split rack can be removed to accommodate a large roaster on the lower rack. -
Page 23: Setting Timed Bake
SETTING TIMED BAKE The oven will turn on immediately and cook for a selected length of time. At the end of the cooking time, the oven will turn off automatically. To program the oven to begin baking immediately and to shut off automatically: (example below to bake at 300°F for 30 minutes): 1. -
Page 24: Setting Delayed Timed Bake
SETTING DELAYED TIMED B A K E The BAKE , COOK TIME and START TIME pads control the Delayed Timed Bake feature. The automatic timer of the Delayed Timed Bake will turn the oven ON and OFF at the time you select in advance. To program the oven for a Delay Start and to shut off automatically (example for baking at 300°F for 30 minutes and starting at 4:30):... -
Page 25: Recommended Broiling Guide
RECOMMENDED BROILING GUIDE The size, weight, thickness, starting temperature, and your preference of doneness will affect broiling times. This guide is based on meats at refrigerator temperature. For best results when broiling, use a pan designed for broiling (refer to the Fig. 1) Quantity and/ or Food Thickness... -
Page 26: Setting Dual Convection Bake
The convection fan can stop during a convection bake Note: cycle to allow for more even heating. This is not a failure of the range and should be considered normal operation. To set the oven for Convection Bake and temperature to 375°F: Touch CLEAR/OFF to cancel Convection Bake at any time. -
Page 27: Setting Convection Roast 2
SETTING CONVECTION ROAST The CONV. ROAST pad is designed to give optimum cooking performance for this feature. The Convection Roast pad combines a cook cycle with the convection fan and element to roast meats and poultry. Preheating is not necessary for meats and poultry. Heated air circulates around the food from all sides, sealing in juices and flavors. -
Page 28: Setting Timed Convection Bake (Or Roast) 2
SETTING TIMED CONVECTION BAKE (OR ROAST) The CONV BAKE and COOK TIME pads control the Timed CONV BAKE feature. The Timed CONV feature will automatically turn off the oven, as soon as the bake time has elapsed. To set the Timed Convection Bake or Roast feature (example for baking to cook at 300°F for 30 minutes): 1. -
Page 29: Setting Delayed Timed Convection Bake(Or Roast)
SETTING DELAYED TIMED CONVECTION BAKE(OR ROAST) The CONV BAKE, COOK TIME and START TIME pads control the Delayed Timed Conv. Bake feature. The automatic timer of the Delayed Timed Conv. Bake will turn the oven ON and OFF at the time you select in advance. To set the Delayed Timed Convection Bake or Convection Roast feature(example for baking to cook at 300°F for 30 minutes and starting at 4:30):... -
Page 30: Using The Favorite Feature
USING THE FAVORITE FEATURE The FAVORITE pad is used to record and recall your favorite recipe settings. This feature may store and recall up to 3 different settings. The Favorite Setting feature may be used with COOK TIME feature. This feature will not work with any other function including START TIME feature. -
Page 31: Setting Oven Lockout Feature
SETTING OVEN LOCKOUT FEATURE The START pad controls the Oven Lockout feature. The Oven Lockout feature automatically locks the oven door, prevents the Warming Drawer and most oven controls from being turned ON. It does not disable the clock, timer, or the interior oven light. -
Page 32: Self-Clean
• Soil on the front frame of the range and outside the gasket on the door will need to be cleaned by hand. Clean these areas with hot water, soap-filled steel-wool pads, or cleansers such as Soft Scrub. -
Page 33: Self-Clean
The SELF-CLEAN pad is used to start a Self-Clean cycle. When used with START TIME pad, a delayed Self-Clean cycle may also be programmed. The Self-Clean function has cycle times of 2, 3, or 4 hours. To start an immediate Self-Clean cycle and shut off automatically 1. -
Page 34: Maintenance
3. Align the glide on each side of the drawer with the glide slots on the range. 4. Push the drawer into the range until levers click (approximately 2 inches). Pull the drawer open again to seat bearing glides into position. If you do not hear the levers click or the bearing glides do not feel seated, remove the drawer and repeat steps 2-4. -
Page 35: Care & Cleaning
- The range could be tipped and injury might result from spilled hot liquid, food, or the range itself. - If the range is pulled away from the wall for cleaning, service, or any other reason, ensure that the Anti-Tip Device is properly reengaged when the range is pushed back against the wall. -
Page 36: Oven Racks
CLEANING THE GLASS COOKTOP Normal Daily Use Cleaning Use ONLY the Ceramic Cooktop Cleaner or cooktop cleaner included with your range, on the glass cooktop. Other creams may not be as effective or they might damage the surface with scratches or permanent staining. -
Page 37: Cooktop Surface
Burned-On Residue To clean the glass-ceramic Step. 1 First remove any burnt-on deposits or spilled food from your glass- ceramic cooking surface with a suitable metal razor scraper (similar to scraping paint off of your windowpanes in your home - it will not damage the decorated cooking surface). -
Page 38: Removing & Replacing The Lift-Off Oven Door
REMOVING & REPLACING THE LIFT-OFF OVEN DOOR CAUTION • Be careful when removing and lifting the door. • DO NOT lift the door by the handle. - The door is very heavy. To remove the door: Step. 1 Open the door fully. Slot Step. -
Page 39: Troubleshooting
Adjust leveling legs at base of range until the oven rack is level. • Be sure floor is level and is strong and stable enough to adequately support range. • If floor is sagging or sloping, contact a carpenter to correct the situation. - Page 40 Problem Oven will not work • Plug on range is not completely inserted in the electrical outlet. - Make sure electrical plug is plugged into a live, properly grounded outlet. • A fuse in your home may be blown or the circuit breaker tripped.
- Page 41 The Glass Cooktop in the MAINTENANCE section, page 36~37. The Glass Cooktop in the MAINTENANCE section, page 36~37. cream. Use cookware with clean, dry bottoms. - Allow the range to cool and reset the controls. - See the using the self-cleaning oven section. remains ON.
- Page 42 - Apply a small amount of vegetable oil to a paper towel and wipe the edges of the oven racks with the paper towel. - This is normal and is done to allow for more even heating during the cycle. This is not a failure of the range and should be considered normal operation. - 42 -...
-
Page 43: Warranty
LG ELECTRIC OVEN LIMITED WARRANTY – USA LG Electronics Inc. will repair or replace your product, at LG’s option, if it proves to be defective in material or workmanship under normal use, during the warranty period set forth below, effective from the date of original consumer purchase of the product. - Page 44 MEMO - 44 -...