
Related Manuals for Dell OptiPlex 7040 - Mini Tower


Summary of Contents for Dell OptiPlex 7040 - Mini Tower
- Page 1 OptiPlex 7040 - Mini Tower Owner's Manual Regulatory Model: D18M Regulatory Type: D18M001...
- Page 2 WARNING: A WARNING indicates a potential for property damage, personal injury, or death. Copyright © 2015 Dell Inc. All rights reserved. This product is protected by U.S. and international copyright and intellectual property laws. Dell and the Dell logo are trademarks of Dell Inc.
-
Page 3: Table Of Contents
Contents 1 Working on your computer.................5 ....................5 Before working inside your computer ........................6 Turning off your computer .....................6 After working inside your computer 2 Removing and installing components.............. 8 ..........................8 Recommended tools ..........................8 Removing the cover ..........................8 Installing the cover .......................... - Page 4 Accessing System Setup ..........................46 Updating the BIOS ....................... 46 System and setup password ..............47 Assigning a system password and setup password ..........47 Deleting or changing an existing system and/or setup password 5 Specifications...................... 48 6 Contacting Dell....................53...
-
Page 5: Working On Your Computer
Damage due to servicing that is not authorized by Dell is not covered by your warranty. Read and follow the safety instructions that came with the product. -
Page 6: Turning Off Your Computer
Disconnect all network cables from the computer. Disconnect your computer and all attached devices from their electrical outlets. Press and hold the power button while the computer is unplugged to ground the system board. Remove the cover. CAUTION: Before touching anything inside your computer, ground yourself by touching an unpainted metal surface, such as the metal at the back of the computer. - Page 7 Connect any telephone or network cables to your computer. Connect your computer and all attached devices to their electrical outlets. Turn on your computer. If required, verify that the computer works correctly by running Dell Diagnostics.
-
Page 8: Removing And Installing Components
Removing and installing components This section provides detailed information on how to remove or install the components from your computer. Recommended tools The procedures in this document require the following tools: • Small flat blade screwdriver • Phillips screwdriver • Small plastic scribe Removing the cover Follow the procedure in... -
Page 9: Removing The Bezel
Removing the bezel Follow the procedure in Before Working Inside Your Computer. Remove the cover. To remove the front bezel: a. Lift the tabs to release the front bezel from the computer. b. Remove the front bezel from the computer. Installing the bezel Insert the tabs on the bezel into the slots on the computer. -
Page 10: Removing The Hard Drive Assembly
CAUTION: The front bezel door opens only to a limited extent. See the printed label for the maximum permissible level. Removing the hard drive assembly Follow the procedure in Before Working Inside Your Computer. Remove the: • cover • bezel Open the front bezel door. -
Page 11: Removing The Hard Drive From The Hard Drive Bracket
Removing the hard drive from the hard drive bracket Follow the procedure in Before Working Inside Your Computer. Remove the: cover bezel hard drive assembly To remove the hard drive bracket: a. Pull one side of the hard drive bracket to disengage the pins on the bracket from the slots on the hard drive [1]. -
Page 12: Removing The Optical Drive
Install the: • bezel • cover Follow the procedure in After Working Inside Your Computer. Removing the optical drive Follow the procedure in Before Working Inside Your Computer. Remove the: • cover • bezel To remove the optical drive: a. Open the front bezel door. -
Page 13: Removing The Optical Drive (3.5-Inch)
Removing the optical drive (3.5-inch) Follow the procedure in Before Working Inside Your Computer. Remove the: • cover • bezel To remove the optical drive: a. Disconnect the data cable and power cable from the connectors on the optical drive [1, 2]. b. - Page 14 Place the rubber on the system board [1] and peel the adhesive tape (pink) from the rubber [2]. To install the SSD card: a. Connect the SSD card to the connector on the system board [1]. b. Tighten the screw to secure the SSD card to the system board [2].
-
Page 15: Removing The Optional Ssd Card
Close the front bezel door. Install the: bezel cover Follow the procedure in After Working Inside Your Computer. Removing the optional SSD card Follow the procedure in Before Working Inside Your Computer. Remove the: • cover • bezel Open the front bezel door. -
Page 16: Installing The Sd Card Reader
Installing the SD card reader Insert the SD card reader into the slot on the system board. Tighten the screw to secure the SD card reader to the system board Connect the SD card reader cable to the connector on the system board. Close the front bezel door. -
Page 17: Removing The Pcie Expansion Card
Removing the PCIe expansion card Follow the procedure in Before Working Inside Your Computer. Remove the: • cover • bezel Open the front bezel door. To remove the PCIe expansion card: a. Pull the release latch to unlock the PCIe expansion card [1]. b. -
Page 18: Installing The Optional Ethernet Port Card
b. Hold the Ethernet port card and pull it to disengage it from the slot on the system board. c. Lift the Ethernet port card from the computer [2]. Installing the optional Ethernet port card Pull the release latch to open it. Align the Ethernet port card with the slot on the back on the computer and the card connector with the connector on the system board. -
Page 19: Installing The Power Supply Unit (Psu)
Installing the power supply unit (PSU) Insert the PSU into the PSU slot and slide it toward the back of the computer until it clicks into place. Tighten the screws to secure the PSU to the computer. Route the PSU cables through the retention clips. Connect the PSU cables to the connectors on the system board. -
Page 20: Installing The Vga Card
Installing the VGA card Align the VGA card with the screw holder on the system board. Tighten the screw to secure the VGA card to the system board. Insert the VGA connector into the slot at the back of the computer. Tighten the screws to secure the VGA connector to the computer. -
Page 21: Installing The Intrusion Switch
Installing the intrusion switch Insert the intrusion switch into the slot on the computer. Route the intrusion switch cable through the fan grommet. Connect the intrusion switch cable to the connector on the system board. Install the: • bezel • cover Follow the procedure in After Working Inside Your... -
Page 22: Installing The Power Switch
Installing the power switch Insert the power switch into the slot and press it until it clicks into place. Route the power switch cable through the cable retention clip. Connect the power switch cable to the connector on the system board. Close the front bezel door. -
Page 23: Installing The Speaker
Installing the speaker Insert the speaker into the slot and press it until it clicks into place. Open the front bezel door. Connect the speaker cable to the connector on the system board. Close the front bezel door. Install the: bezel cover Follow the procedure in... -
Page 24: Installing The Coin Cell Battery
Installing the coin cell battery Hold the coin cell battery with the "+" sign facing up and slide it under the securing tabs at the positive side of the connector. Press the battery into the connector until it locks into place. Close the front bezel door. -
Page 25: Removing The Processor
• bezel • cover Follow the procedure in After Working Inside Your Computer. Removing the processor Follow the procedure in Before Working Inside Your Computer. Remove the: • cover • bezel Open the front bezel door. Remove the heat sink assembly. -
Page 26: Removing The System Fan
Removing the system fan Follow the procedure in Before Working Inside Your Computer. Remove the: • cover • bezel Open the front bezel door. To remove the system fan: a. Disconnect the system fan cable from the connector on the system board [1]. b. -
Page 27: Removing The System Board
Removing the system board Follow the procedure in Before Working Inside Your Computer. Remove the: • cover • bezel Open the front bezel door. Remove the: • heat sink assembly • processor • PCIe expansion card • optional Ethernet port card •... -
Page 28: System Board Layout
• optional SSD card • optional Ethernet port card • PCIe expansion card • processor • heat sink assembly Close the front bezel door. Install the: • bezel • cover Follow the procedure in After Working Inside Your Computer. System board layout PCIe x16 connector PCI connector PCIe x16 connector... - Page 29 Internal speaker connector ATX power connector HDD and ODD power cable connector SATA2 connector SATA0 connector Internal USB connector RTCRST/Password clear/MFG Jumper Coin cell battery...
-
Page 30: Troubleshooting Your Computer
Troubleshooting your computer You can troubleshoot your computer using indicators like diagnostic lights, beep codes, and error messages during the operation of the computer. Diagnostic power LED codes Table 1. Diagnostic power LED codes Power LED light status Possible cause Troubleshooting steps •... -
Page 31: Diagnostic Error Messages
The hard drive failed initialization. Run the hard DISK C: FAILED INITIALIZATION drive tests in Dell Diagnostics. The operation requires a hard drive in the bay DRIVE NOT READY before it can continue. Install a hard drive in the hard drive bay. - Page 32 Then, shut down the computer, reinstall the hard drive, and restart the computer. If the problem persists, try another drive. Run the Hard Disk Drive tests in Dell Diagnostics. The hard drive does not respond to commands HARD-DISK DRIVE FAILURE from the computer.
- Page 33 KEYBOARD STUCK KEY FAILURE connection. Restart the computer, and avoid touching the keyboard or keys during the boot routine. Run the Stuck Key test in Dell Diagnostics. Dell MediaDirect cannot verify the Digital Rights LICENSED CONTENT IS NOT ACCESSIBLE IN...
- Page 34 Error messages Description A chip on the system board may be NO TIMER TICK INTERRUPT malfunctioning. Run the System Set tests in Dell Diagnostics. You have too many programs open. Close all NOT ENOUGH MEMORY OR RESOURCES. EXIT windows and open the program that you want to SOME PROGRAMS AND TRY AGAIN use.
-
Page 35: System Error Messages
NOTICE - Hard Drive SELF MONITORING SYSTEM has reported that a parameter has exceeded its normal operating range. Dell recommends that you back up your data regularly. A parameter out of range may or may not indicate a potential hard drive problem... -
Page 36: System Setup
Boot Sequence allows you to bypass the System Setup‐defined boot device order and boot directly to a specific device (for example: optical drive or hard drive). During the Power-on Self Test (POST), when the Dell logo appears, you can: •... -
Page 37: System Setup Options
Table 4. Navigation keys Keys Navigation Up arrow Moves to the previous field. Down arrow Moves to the next field. Enter Allows you to select a value in the selected field (if applicable) or follow the link in the field. Spacebar Expands or collapses a drop‐down list, if applicable. - Page 38 Allows you to connect to display through WiFi. WIDI requires Intel WiFi card, Intel graphics, and WIDI receiver in display (or WIDI compliant display). To install the WIDI application, see the dell.com/support site to download the WIDI application. NOTE: When installing the WIDI application, connect the display to Intel on-board graphic output.
- Page 39 Option Description Back USB Configuration Allows you to enable or disable the back USB ports. All the ports are enabled by default. USB PowerShare This option allows you to charge the external devices, such as mobile phones, music player. This option is disabled by default. Audio Allows you to enable or disable the integrated audio controller.
- Page 40 Option Description NOTE: The system will always prompt for the system and internal HDD passwords when powered on from the off state (a cold boot). Also, the system will always prompt for passwords on any module bay HDDs that may be present. Password Change This option lets you determine whether changes to the System and Hard Disk passwords are permitted when an administrator password is set.
- Page 41 Option Description HDD Protection Support Allows you to enable or disable the HDD Protection feature. This option is an advanced feature, which is intended to keep the HDD data secure and unchangeable. By default, this option is disabled. Table 9. Secure Boot Option Description Secure Boot Enable...
- Page 42 Table 11. Performance Option Description Multi Core Support This field specifies whether the process will have one or all cores enabled. This option is enabled by default. Intel SpeedStep Allows you to enable or disable the Intel SpeedStep mode of the processor. This option is disabled by default.
- Page 43 Option Description • LAN or WLAN - Allows the system to be powered on by special LAN or wireless LAN signals. • LAN Only - Allows the system to be powered on by special LAN signals. • LAN with PXE Boot - A wakeup packet sent to the system in either the S4 or S5 state, that will cause the system to wake-up and immediately boot to PXE.
- Page 44 Controls the SERR message mechanism. This option is not set by default. Some graphics cards require that the SERR message mechanism be disabled. Dell Development Allows you to turn on/off certain features to control the BIOS. This option is Configuration disabled by default.
-
Page 45: System Setup Overview
Accessing System Setup Turn on (or restart) your computer. After the white Dell logo appears, press F2 or F12 immediately. The System Setup page is displayed. NOTE: If you wait too long and the operating system logo appears, wait until you see the... -
Page 46: Updating The Bios
For laptops, ensure that your computer battery is fully charged and connected to a power outlet Restart the computer. Go to Dell.com/support. Enter the Service Tag or Express Service Code and click Submit. NOTE: To locate the Service Tag, click Where is my Service Tag? NOTE: If you cannot find your Service Tag, click Detect My Product. -
Page 47: Assigning A System Password And Setup Password
Assigning a system password and setup password You can assign a new System Password and/or Setup Password or change an existing System Password and/or Setup Password only when Password Status is Unlocked. If the Password Status is Locked, you cannot change the System Password. NOTE: If the password jumper is disabled, the existing System Password and Setup Password are deleted and you need not provide the system password to log on to the computer. -
Page 48: Specifications
Specifications NOTE: Offerings may vary by region. For more information regarding the configuration of your computer in: • Windows 10, click or tap Start → Settings → System → About. • Windows 8.1 and Windows 8, click or tap Start →... - Page 49 Table 22. Audio Feature Specification Integrated Two channel High Definition Audio Table 23. Network Feature Specification Integrated Intel I219-LM Ethernet capable of 10/100/1000 Mb/s communication Table 24. System information Feature Specification System chipset Intel 100 series, Q170 DMA channels Two 8237 DMA controllers with seven independently programmable channels Interrupt levels Integrated I/O APIC capability with 24 interrupts...
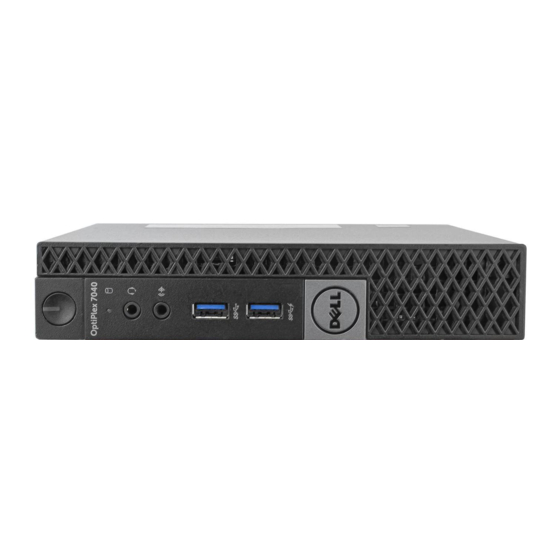
- Page 50 Table 28. External connectors Feature Specification Audio: Front panel Universal Audio Jack Back panel Line out connector Network adapter RJ45 connector Serial 9-pin connector; 16550 C compatible Parallel 25-pin connector (optional) • Front panel: two USB 2.0 • Back panel: two •...
- Page 51 Feature Specification Processor 1151-pin connector Processor fan 4-pin connector Service mode jumper 2-pin connector Password clear jumper 2-pin connector RTC reset jumper 2-pin connector Internal speaker 4-pin connector Intruder connector 3-pin connector One 8-pin for PSU, one 4-pin for CPU, one 8-pin for Power connector SATA power Table 30.
- Page 52 Table 31. Power NOTE: Heat dissipation is calculated by using the power supply wattage rating. Power Wattage Maximum Heat Voltage Dissipation 240 W 819.00 BTU/hr 100 VAC to 240 VAC, 50 Hz to 60 Hz, 4A/2A Coin cell battery 3 V CR2032 lithium coin cell Table 32.
-
Page 53: Contacting Dell
Dell product catalog. Dell provides several online and telephone-based support and service options. Availability varies by country and product, and some services may not be available in your area. To contact Dell for sales, technical support, or customer service issues: Go to Dell.com/support.