Miele DA 3466 Operating And Installation Instructions
Hide thumbs
Also See for DA 3466:
- Operating and installation instructions (52 pages) ,
- Operating and installation instructions (48 pages) ,
- Operating and installation instructions (48 pages)
Table of Contents

Related Manuals for Miele DA 3466


Summary of Contents for Miele DA 3466
- Page 1 Operating and installation instructions Rangehood To prevent the risk of accidents or damage to the appliance, it is essential to read these instructions before it is installed and used for the first time. en-AU,NZ M.-Nr. 10 646 580...
-
Page 2: Table Of Contents
Contents Warning and Safety instructions..............Caring for the environment ................13 Guide to the appliance ..................14 Description of the functions ................16 Operation......................17 Switching the fan on.................... 17 Selecting a power level ..................17 Run-on time......................17 Switching the fan off ................... 17 Switching the cooktop lighting on/off .............. - Page 3 Contents After sales service and warranty ..............44 Position of the data plate ..................44 Warranty ......................44 Technical data....................45...
-
Page 4: Warning And Safety Instructions
It must only be used to extract vapours and remove odours from cooking. Any other usage is at the owner's risk. Miele cannot be held liable for damage resulting from incorrect or improper use or operation. The rangehood cannot be used to ventilate the room in which it is installed in recirculation mode above a gas cooktop. - Page 5 Warning and Safety instructions This appliance is not intended for use by persons (including children) with reduced physical, sensory or mental capabilities, or lack of experience and knowledge, unless they have been given supervision or instruction concerning its use by a person responsible for their safety, and are able to recognise the dangers of misuse.
- Page 6 EXT/EXTA model rangehoods are connected to their external motor using a special connection cable and plug connectors. These appliances may only be combined with a Miele external motor.
- Page 7 The manufacturer's warranty will be invalidated if the appliance is not repaired by a Miele authorised service technician. Faulty components must only be replaced by genuine Miele spare parts. The manufacturer can only guarantee the safety of the appliance when Miele replacement parts are used.
- Page 8 Warning and Safety instructions Using at the same time as other heating appliances that depend on the air from the room Danger of toxic fumes! Great care should be taken when using the rangehood in the same room or the same area of the house as another heating appliance that depends on the air from the room.
- Page 9 Warning and Safety instructions In order to ensure safe operation and to prevent gases given off by a heating appliance from being drawn back into the room, when the rangehood and the heater are both operated simultaneously, an underpressure in the room of 0.04 mbar (4 Pa) is the maximum permissible.
- Page 10 Warning and Safety instructions Correct use Open flames are a fire hazard! Never use an open flame under the rangehood. To avoid the danger of fire, do not flambé or grill over an open flame. When switched on, the rangehood could draw flames into the filter. Kitchen grease deposits could ignite.
- Page 11 Warning and Safety instructions Do not use the rangehood without the filters in place. This way you will avoid the risk of grease and dirt getting into the appliance and hindering its smooth operation. The rangehood can get very hot during cooking due to heat rising from the cooktop.
- Page 12 The steam could reach electrical components and cause a short circuit. Accessories Use only genuine original Miele spare parts. If spare parts or accessories from other manufacturers are used, the warranty will be invalidated, and Miele cannot accept liability.
-
Page 13: Caring For The Environment
Caring for the environment Disposal of the packing Disposing of your old material appliance The transport and protective packaging Electrical and electronic appliances has been selected from materials which often contain valuable materials. They are environmentally friendly for also contain specific materials, disposal, and can normally be recycled. -
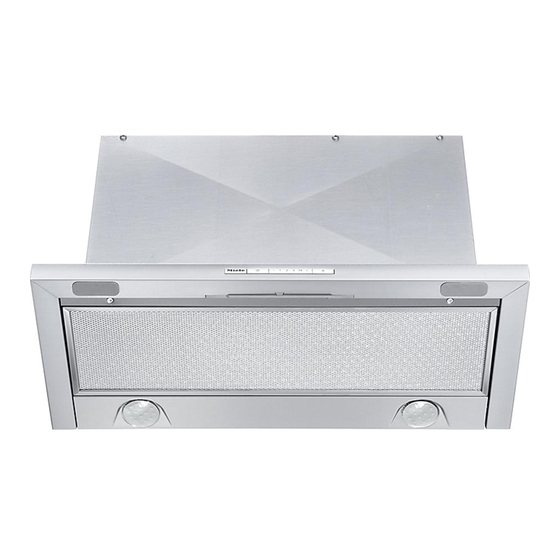
Page 14: Guide To The Appliance
Guide to the appliance... - Page 15 Guide to the appliance a Exhaust connection for air extraction/recirculation b Touch controls c Grease filter d Pull-out deflector plate e Cooktop lighting f NoSmell active charcoal filter (special accessory for recirculation mode) g On/Off touch control for the fan h Touch controls to select the fan power setting i On/Off touch control for the cooktop lighting j Drop-down front panel...
-
Page 16: Description Of The Functions
It must be to a Miele external motor located in a fitted in the exhaust socket on the suitable position outside the room in motor unit. -
Page 17: Operation
Operation Switching the fan on Switching the fan off Pull out the deflector plate. For Turn off the fan by pushing the optimum extraction with minimum deflector plate back in. The next time noise levels, always pull the deflector the deflector plate is pulled out, the plate out to its full extent. -
Page 18: Power Management
Operation If Power management is switched on, Power management the 1 and B indicators light up The rangehood is fitted with a Power constantly. management system. The Power When it is switched off, the 1 and B management system is designed to indicators flash. -
Page 19: Energy Saving Tips
Energy saving tips This rangehood operates very efficiently and economically. The following will help you to save even more energy when using it: - Ensure that there is sufficient ventilation in the kitchen when cooking. In extraction mode, if there is insufficient air flow the rangehood cannot operate efficiently and this causes increased operating noise... -
Page 20: Cleaning And Care
Unsuitable cleaning agents can becoming dirty again, we recommend damage the surfaces and control treating them with a stainless steel care elements. product (available from Miele). Do not use any cleaning agents containing soda, acid, chloride, or Important information for the control solvent. -
Page 21: Grease Filter
Cleaning and care Grease filter Fire hazard! An oversaturated grease filter is a fire hazard. Clean the grease filter at regular intervals. The re-usable metal grease filter in the When removing the grease filter do appliance removes solid particles from not tilt it downwards at an angle. - Page 22 Cleaning and care Unsuitable cleaning agents When removing the filter for cleaning, also clean off any residues of oil or fat Unsuitable cleaning agents can cause from the now accessible casing to damage to the surface of the filters if prevent the risk of these catching fire.
-
Page 23: Nosmell Active Charcoal Filter
Disposing of charcoal filters Charcoal filters are available to order via Used charcoal filters can be disposed the Miele Webshop (see end of this of with the normal household waste. booklet for contact details) or directly from Miele. -
Page 24: Changing A Lamp
Manufacturer ....... EGLO Lamp type ........GU10 Specification........ 12981 Wattage ........... 3 W These lamps are available from Miele or from specialist retailers. Pull out the deflector plate, and remove the grease filter as described earlier. Switch off the fan and the lighting. -
Page 25: Installation
*INSTALLATION* Installation Before installation Before installation, it is important to read the information given on the following pages as well as the “Warning and Safety instructions” at the beginning of this booklet. -
Page 26: Assembly Parts
*INSTALLATION* Installation Assembly parts... - Page 27 *INSTALLATION* Installation a 1 exhaust connection for exhaust ducting 150 mm. b 1 non-return flap 8 screws 4 x 15 mm for securing the rangehood in the wall for fitting into the exhaust unit. connection on the motor unit (not needed for recirculation mode). c 2 brackets for securing the rangehood in the 8 screws M4 x 12 mm...
-
Page 28: Appliance Dimensions
*INSTALLATION* Installation Appliance dimensions a Extraction mode: the height of the wall unit and cut-out dimensions must allow for any accessories fitted (e.g. silencer, DSM module). b Recirculation mode with conversion kit DUU 151. c DSM 400 accessory. d When installing the rangehood with a DAR 3000 drop-down frame, make sure that you note the different wall unit height (please refer to the dimensions given in the DAR 3000 building-in diagram). -
Page 29: Safety Distance (S)
*INSTALLATION* Installation Safety distance (S) The minimum distances between the cooking surface of a cooktop (pan support(s) for gas models) and the bottom of the rangehood are as follows, unless a greater distance is specified by the manufacturer of your cooking appliance. -
Page 30: Installation Recommendations
*INSTALLATION* Installation Installation recommendations - To achieve optimum vapour extraction, the rangehood must be positioned centrally over the cooktop, not to the side. - The cooktop should be no wider than the rangehood and, if possible, it should be narrower, especially for safety distances greater than 750 mm. - Page 31 *INSTALLATION* Installation a Example: Installation without a front panel fitted and with the front edge of the deflector plate flush with the front edge of the furniture housing unit. b Example: Installation with a front panel to match the kitchen furniture. This installation requires dimension b for the front panel plus 5 mm for the DML 400 fixing bracket to be...
- Page 32 *INSTALLATION* Installation Secure the spacer strip underneath the housing unit sides, flush with the rear wall. The brackets are designed for 16 and 19 mm thick unit sides. Orientate the bracket so that the vertical depth matches the thickness of the unit side.
- Page 33 *INSTALLATION* Installation To avoid scratching the deflector plate, do not remove the protective film between the deflector plate and the casing until the rangehood has been placed in the housing unit. Installation of the rangehood is carried out without the grease filter placed in position.
- Page 34 *INSTALLATION* Installation Secure the rangehood to the brackets from below using two screws on each Secure the retaining brackets to the side. rear wall using the screws supplied. The housing must be secured firmly to the rear wall of the furniture unit. If this is not ensured, the housing may lean forwards and the canopy could be damaged when it is pulled...
-
Page 35: Attaching The Front Panel
*INSTALLATION* Installation Attaching the front panel The front of the deflector plate can be fitted with a front panel to match existing kitchen furniture units. The weight of the front panel must not exceed 1300 g. This applies to front panels with a depth of up to 30 mm. For larger and heavier front panels, the weight must be reduced, e.g. -
Page 36: Aligning The Deflector Plate
*INSTALLATION* Installation Aligning the deflector plate Fitting the grease filter The position of the deflector plate can be brought forward by up to 35 mm using the adjusting screws on either side of the deflector plate. This allows the deflector plate to be aligned to the front of the kitchen furniture units on either side. -
Page 37: Set Up For Extraction Mode
*INSTALLATION* Installation Set up for extraction mode Place the exhaust ducting on the exhaust connection for the If required, install the non-return flap. rangehood. Check that the flap opens easily and See “Connection for air extraction” closes by itself. Depending on the for further instructions on fitting the model of rangehood, the non-return ducting. -
Page 38: Set Up For Recirculation Mode
The DUU 151 conversion kit, available from Miele, is required for operating the rangehood in recirculation mode. You will also need a charcoal filter (see “Technical data”). -
Page 39: Mains Connection
*INSTALLATION* Installation Mains connection Refer to the notes in “Electrical connection” and “Warning and Safety instructions” before connecting to the electricity supply. For appliances connected to an external motor (EXT models): Connect the rangehood and the external motor using the connection cable and the six-pole plug connector. -
Page 40: Electrical Connection
*INSTALLATION* Electrical connection The rangehood must only be connected to a properly installed AC 230 V ~ 50 Hz earthed socket. The electrical installation must be in compliance with current local and national safety regulations. For extra safety, it is advisable to protect the appliance with a suitable residual current device (RCD) with a trip current of 30 mA. -
Page 41: Connection For Air Extraction
Connection for air extraction - Only use wide radius bends. Before installation, it is important to read the information given on the - The exhaust ducting must not be following pages as well as the kinked or compressed. “Appliance dimensions” and the - Ensure that all connections are “Warning and Safety instructions”... -
Page 42: Condensate Trap
The problem of condensation Silencer will need to be addressed. The exhaust ducting will need to be suitably insulated. Miele will not accept warranty claims for any functional defects or damage caused by inadequate ducting. Condensate trap To achieve even further reductions in... - Page 43 Connection for air extraction Recirculation mode The silencer needs to be positioned between the exhaust connection and the exhaust grille . Ensure there is adequate space for fitting it. Air extraction with external motor To minimise noise from the motor in the kitchen, the silencer should be positioned in front of the external motor ...
- Page 44 After sales service and warranty In the event of a fault which you cannot remedy yourself, please contact Miele. The contact details for Miele are given at the back of these instructions. When contacting Miele, please quote the model and serial number of your appliance.
- Page 45 1.5 m Weight DA 3466 12 kg DA 3496 14 kg DA 3466 EXT 10 kg DA 3496 EXT 11.5 kg * For EXT models, the rated load will depend on the type of external motor fitted. Length of connection cable to external motor: 1.9 m Special accessories for recirculation mode: Conversion kit DUU 151 and charcoal filter DKF 13-1.
- Page 47 43rd Floor Unit 4301-4303 Singapore 138565 689 Sukhumvit Road Tel.: +65-67351191 North Klongton Sub-District Fax: +65-67351161 Vadhana District E-mail: info@miele.com.sg Bangkok 10110, Thailand Internet: www.miele.sg Miele Global Headquarters Germany Miele & Cie. KG Carl-Miele-Straße 29, 33332 Gütersloh, Federal Republic of Germany...
- Page 48 DA 3466 DA 3496 DA 3466 EXT DA 3496 EXT en-AU,NZ M.-Nr. 10 646 580 / 04...