Table of Contents
Advertisement
Quick Links
Advertisement
Table of Contents

Related Manuals for Dell D2720DS


Summary of Contents for Dell D2720DS
- Page 1 Dell Monitor D2720DS User’s Guide Model: D2720DS Regulatory model: D2720DSt...
- Page 2 WARNING: A WARNING indicates a potential for property damage, personal injury, or death. Copyright © 2019 Dell Inc. or its subsidiaries. All rights reserved. Dell, EMC, and other trademarks are trademarks of Dell Inc. or its subsidiaries. Other trademarks may be trademarks of their respective owners.
-
Page 3: Table Of Contents
Contents About Your Monitor . . . . . . . . . . . . . . . . . . . . . . . . . . . . . . . . . . . . . 5 Package Contents . - Page 4 Contacting Dell . . . . . . . . . . . . . . . . . . .
-
Page 5: About Your Monitor
Package Contents Your monitor ships with the components shown below. Make sure that you have received all the components and contact Dell if something is missing. NOTE: Some items may be optional and may not ship with your monitor. Some features may not be available in certain countries. -
Page 6: Product Features
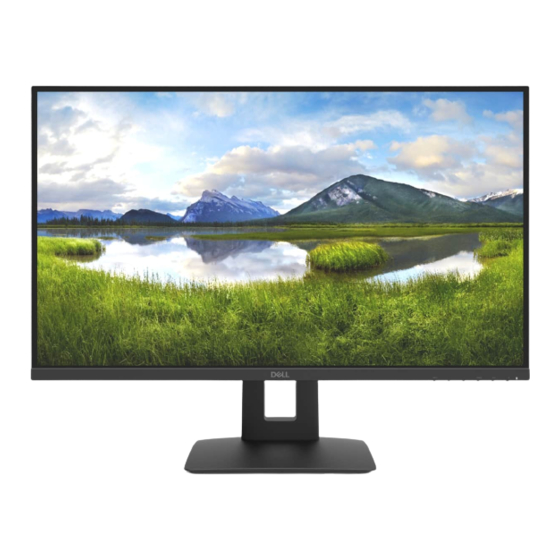
• Safety,Environmental,and Regulatory Information Product Features The Dell D2720DS monitor has an active matrix, thinfilm transistor (TFT), liquid crystal display (LCD), and LED backlight. The monitor features include: • 68.467 cm (27.0-inch) viewable area display (measured diagonally). 2560 x 1440 resolution with full-screen support for lower resolutions. -
Page 7: Identifying Parts And Controls
Identifying Parts and Controls Front view Label Description Function buttons (For more information, see Operating the Monitor) Power on/off button (with LED indicator) About Your Monitor... - Page 8 VESA Cover) Security lock slot Secures monitor with security lock (sold separately). Barcode, serial number, Refer to this label if you need to contact Dell for and Service Tag label technical support. Cable-management slot Use to organize cables by inserting them through the slot.
-
Page 9: Monitor Specifications
Monitor Specifications Screen type Active matrix - TFT LCD Panel Type In-Plane Switching Technology Aspect ratio 16:9 Viewable image dimensions Diagonal 684.67 mm (27 inches) Active Area Horizontal 596.74 mm (23.5 inches) Vertical 335.66 mm (13.2 inches) Area 200301.7 mm² (310.20 inches²) Pixel pitch 0.233 mm x 0.233 mm Pixel per inch (PPI) - Page 10 Video input capabilities 480i, 480p, 576i, 576p, 720p, 1080i, 1080p,2160p (HDMI playback) Preset Display Modes Display Mode Horizontal Vertical Pixel Clock Sync Polarity Frequency Frequency (MHz) (Horizontal/ (kHz) (Hz) Vertical) 720 x 400 31.5 70.0 28.3 VESA, 640 x 480 31.5 60.0 25.2...
- Page 11 Physical Characteristics Signal cable type • Digital: DisplayPort, 20 pins • Digital: HDMI, 19 pins Dimensions (with stand) Height (extended) 523.5 mm (20.61 inches) Height (compressed) 423.5 mm (16.67 inches) Width 612.6 mm (24.12 inches) Depth 218.0mm (8.58 inches) Dimensions (without stand) Height 362.1 mm (14.26 inches) Width...
- Page 12 Altitude Operating 5,000 m (16,404 ft) (maximum) Non-operating 12,192 m (40,000 ft) (maximum) Thermal dissipation • 148.5 BTU/hour (maximum) • 114.0 BTU/hour (typical) Compliant standards RoHS Compliant BFR/PVC free Monitor (excluding external cables) Power Management Modes If you have VESA’s DPM-compliant video card or software installed in your PC, the monitor can automatically reduce its power consumption when not in use.
- Page 13 Pin Assignments HDMI connector Pin number 19-pin side of the connected signal cable TMDS DATA 2+ TMDS DATA 2 SHIELD TMDS DATA 2- TMDS DATA 1+ TMDS DATA 1 SHIELD TMDS DATA 1- TMDS DATA 0+ TMDS DATA 0 SHIELD TMDS DATA 0- TMDS CLOCK+ TMDS CLOCK SHIELD TMDS CLOCK-...
- Page 14 DP connector Pin number 20-pin side of the connected signal cable ML3 (n) ML3 (p) ML2 (n) ML2 (p) ML1 (n) ML1 (p) ML0 (n) ML0 (p) CONFIG1 CONFIG2 AUX (p) AUX (n) Hot Plug Detect Return DP_PWR About Your Monitor...
-
Page 15: Plug-And-Play
During the LCD monitor manufacturing process, it is not uncommon for one or more pixels to become fixed in an unchanging state which are hard to see and do not affect the display quality or usability. For more information on LCD Monitor Pixel Policy, see Dell support site at: http://www.dell.com/support/monitors. -
Page 16: Setting Up The Monitor
Setting Up the Monitor Attaching the stand NOTE: The stand is not installed at the factory when shipped. NOTE: The following instructions are applicable only for attaching the stand that was shipped with your monitor. If you are attaching a stand that you purchased from any other source, follow the set up instructions that were included with the stand. -
Page 17: Using The Tilt And Vertical Extension
4 Lift the screw handle and turn the screw clockwise. 5 After fully tightening the screw, fold the screw handle flat within the recess. NOTE: Lift the monitor carefully to prevent it from slipping or falling. Using the Tilt and Vertical Extension NOTE: This is applicable for a monitor with a stand. -
Page 18: Connecting Your Monitor
Vertical Extension NOTE: The stand extends vertically up to 100 mm. The figure below illustrates how to extend the stand vertically. 100 mm Rotating the Monitor Before you rotate the monitor, your monitor should be fully vertically extended and fully tilted up to avoid hitting the bottom edge of the monitor. -
Page 19: Organizing Your Cables
Connecting the HDMI cable HDMI Connecting the DP cable (optional) Organizing Your Cables After attaching all necessary cables to your monitor and computer, (see Connecting Your Monitor for cable attachment) organize all cables as shown above. Setting Up the Monitor... -
Page 20: Removing The Monitor Stand
Removing the Monitor Stand CAUTION: To prevent scratches on the LCD screen while removing the stand, make sure that the monitor is placed on a soft, clean surface. NOTE: The procedure below is applicable for the default stand. If you purchased any other stand, see the documentation shipped with the stand to set it up. -
Page 21: Wall Mounting (Optional)
Wall Mounting (Optional) NOTE: Use M4 x 10 mm screws to connect the monitor to the wall-mounting kit. Refer to the instructions that come with the VESA-compatible wall mounting kit. 1 Place the monitor on a soft cloth or cushion on a stable, flat table. 2 Remove the stand. -
Page 22: Operating The Monitor
Operating the Monitor Turning on the Monitor Press the button to turn on the monitor. Using the Front Panel Controls Use the control buttons on the front of the monitor to adjust the characteristics of the image being displayed. As you use these buttons to adjust the controls, an OSD shows the numeric values of the characteristics as they change. - Page 23 The following table describes the front panel buttons: Front-Panel Button Description Use this button to choose Input Source from a list of INPUT Auto, DisplayPort, HDMI. Shortcut key: Input Use this button to select the next item down the list or decrease the setting value.
-
Page 24: Using The On-Screen Display (Osd) Menu
Using the On-Screen Display (OSD) Menu Accessing the Menu System NOTE: Any changes you make using the OSD menu are automatically saved if you move to another OSD menu, exit the OSD menu, or wait for the OSD menu to disappear. MENU Press the button to launch the OSD menu and display the main menu. - Page 25 Icon Menu and Description Submenus Color Temp. Allows users to select the Color Temp: 6500K, User, 9300K, 7500K. H. Position to adjust the H. Position from 0 to 100. V. Position to adjust the V. Position from 0 to 100. OSD Timeout Use the buttons to adjust the slider in 5-second increments, from 5 to 30 seconds.
- Page 26 Icon Menu and Description Submenus Display Use the Display menu to adjust image. Display Mode Adjust the image ratio to Full or Aspect. Opticolor When you select Opticolor, you can choose Standard, Scenery, Game, Cinema or Text from the list. • Standard: Default color settings.
- Page 27 Icon Menu and Description Submenus Miscellaneous Select this option to adjust the settings of the OSD. Language Set the OSD display to languages of English, Simplified Chinese. Input Select Use the Input Select menu to select between different video inputs that are be connected to your monitor. DDC/CI DDC/CI (Display Data Channel/Command Interface) allows you to adjust the monitor settings using software on your computer.
- Page 28 Icon Menu and Description Submenus Information Displays the monitor’s current settings. NOTE: This monitor has a built-in feature to automatically calibrate the brightness to compensate for LED aging. Operating the Monitor...
- Page 29 OSD Warning Messages Activate the computer and wake up the monitor to gain access to the OSD. If you press any button other than the power button, the following messages will appear depending on the selected input: No Signal If either HDMI or DP is selected and the corresponding cable is not connected, a floating dialog box as shown below appears.
-
Page 30: Troubleshooting
Troubleshooting WARNING: Before you begin any of the procedures in this section, follow the Safety Instructions. Self-Test Your monitor provides a self-test feature that allows you to check whether your monitor is functioning properly. If your monitor and computer are properly connected but the monitor screen remains dark, run the monitor self-test by performing the following steps: 1 Turn off both your computer and the monitor. -
Page 31: Common Problems
Missing Pixels LCD screen has • Cycle power on-off. spots • Pixel that is permanently off is a natural defect that can occur in LCD technology. • For more information on Dell Monitor Quality and Pixel Policy, see Dell Support site at: http://www.dell.com/support/monitors. Stuck-on Pixels LCD screen has • Cycle power On-Off. bright spots • Pixel that is permanently off is a natural defect that can occur in LCD technology. - Page 32 Common What You Possible Solutions Symptoms Experience Missing Color Picture missing • Perform monitor self-test. color • Ensure that the video cable connecting the monitor to the computer is connected properly and is secure. • Check for bent or broken pins in the video cable connector.
-
Page 33: Product Specific Problems
Product Specific Problems Specific What You Possible Solutions Symptoms Experience Screen image is Image is • Check the Aspect setting in the Display menu too small centered on OSD. screen, but does • Reset the monitor to factory settings. not fill entire viewing area Cannot adjust OSD does not... -
Page 34: Appendix
Contacting Dell NOTE: If you do not have an active Internet connection, you can find contact information on your purchase invoice, packing slip, bill, or Dell product catalog. Dell provides several online and telephone-based support and service options. Availability varies by country and product, and some services may not be available in your area. -
Page 35: Setting Up Your Monitor
2 After installing the drivers for your graphics adapter, attempt to set the resolution to 2560 x 1440 again. NOTE: If you are unable to set the resolution to 2560 x 1440, please contact Dell to inquire about a graphics adapter that supports these resolutions. - Page 36 Non-Dell computer In Windows Vista, Windows 7, Windows 8 or Windows 8.1: 1 For Windows 8 or Windows 8.1 only, select the Desktop tile to switch to classic desktop. 2 Right-click on the desktop and click Personalization. 3 Click Change Display Settings.
-
Page 37: Maintenance Guidelines
Maintenance Guidelines Cleaning Your Monitor WARNING: Before cleaning the monitor, unplug the monitor power cable from the electrical outlet. CAUTION: Read and follow the Safety Instructions before cleaning the monitor. For best practices, follow these instructions in the list below while unpacking, cleaning, or handling your monitor: • To clean your anti-static screen, lightly dampen a soft, clean cloth with water.