Table of Contents
Advertisement
Quick Links
Advertisement
Chapters
Table of Contents

Related Manuals for Epson ELPBU01


Summary of Contents for Epson ELPBU01
- Page 1 User's Guide...
-
Page 2: Table Of Contents
Contents Notations Used in This Guide Precautions on Installation ....................23 Installing the Base Unit on a Wall ................... 23 Connecting Base Unit to an External Display Equipment.... 25 Using the Manual to Search for Information ........6 External Display Equipment Preparation ................25 Searching by Keyword ........................ - Page 3 Contents Sharing Computer Screen or Mobile Device Screen Using Importing a Web Server Certificate Using the Menus............. 68 Application (Wireless Network Projection) ........44 Supported Web Server Certificates................... 68 Connection Methods for Wireless Network Projection ..........44 Selecting Wireless Network Settings Manually..............45 Monitoring and Controlling the Base Unit Selecting Wireless Network Settings in Windows............
- Page 4 Contents Transferring Settings From a Computer................93 Solutions When the Image Contains Static During Network Projection....108 Batch Setup Error Notification.................... 94 Solutions When You Cannot Connect Using Screen Mirroring......... 109 Solutions When You Cannot Use Two Screen Mirroring Sources ......109 Solutions When the Image or Sound Contains Static During Screen Mirroring Maintaining the Base Unit Connection ............................
-
Page 5: Notations Used In This Guide
Notations Used in This Guide Safety Symbols The product and its manuals use graphical symbols and labels to indicate content that tells you how to use the product safely. Read and carefully follow the instructions that are marked with these symbols and labels to avoid injury to persons or damage to property. This symbol indicates information that, if ignored, could possibly result in personal injury or even death. -
Page 6: Using The Manual To Search For Information
Using the Manual to Search for Information The PDF manual allows you to search for information you are looking for by • Mac OS: Hold down the command key, and then press ←. keyword, or jump directly to specific sections using the bookmarks. You can also print only the pages you need. -
Page 7: Getting The Latest Version Of The Documents
Getting the Latest Version of the Documents You can get the latest version of the manuals and specifications on the Epson Web site. Visit epson.sn, and enter your model name. -
Page 8: Introduction To The Product
Introduction to The Product Refer to these sections to learn more about your product's features and part names. g g Related Links • "Safety Instructions" • "Product Features" p.12 • "Product Parts and Functions" p.15... -
Page 9: Safety Instructions
Safety Instructions All safety and operating instructions should be read before using the product. Warning Warning • Do not touch the plug during an electrical storm. Otherwise, you may receive an electric shock. • Never open any covers on the base unit. Never attempt to disassemble or modify •... - Page 10 Safety Instructions Warning Caution • Do not use the power cord that is damaged. Fire or electric shock may result. • Do not install the base unit in a location that exceeds the operating temperature. Heat may build up inside and cause a fire. The internal temperature could rise Take the following precautions when handling.
-
Page 11: Notes On Handling And Storage
Safety Instructions Notes on Handling and Storage Caution • Use a dry cloth (or, for stubborn dirt or stains, a moist cloth that has been wrung • Do not use or store the projector in places where it might be subjected to dry) for cleaning. -
Page 12: Product Features
This product comes with these special features. Refer to these sections for Using the wireless transmitter (ELPWT01) and the receiver (base unit more details. (ELPBU01)), you can share the image and audio from the computer with an external display equipment. g g Related Links •... -
Page 13: Various Input Source For Base Unit
• Screen Mirroring to connect your base unit and mobile device wirelessly (ELPWP10) as a receiver as well. using Miracast technology. • Epson iProjection to operate multiple screens of the devices connected to the base unit, such as computers, smartphones and tablets. Example: Connecting the receiver and input sources directly g g Related Links •... - Page 14 • "Connecting Video Sources to the Base Unit" p.26 • When using Epson projector and projecting images using a wireless LAN, you may need to install the Epson 802.11b/g/n wireless LAN module, and then set up your projector and computer for wireless projection.
-
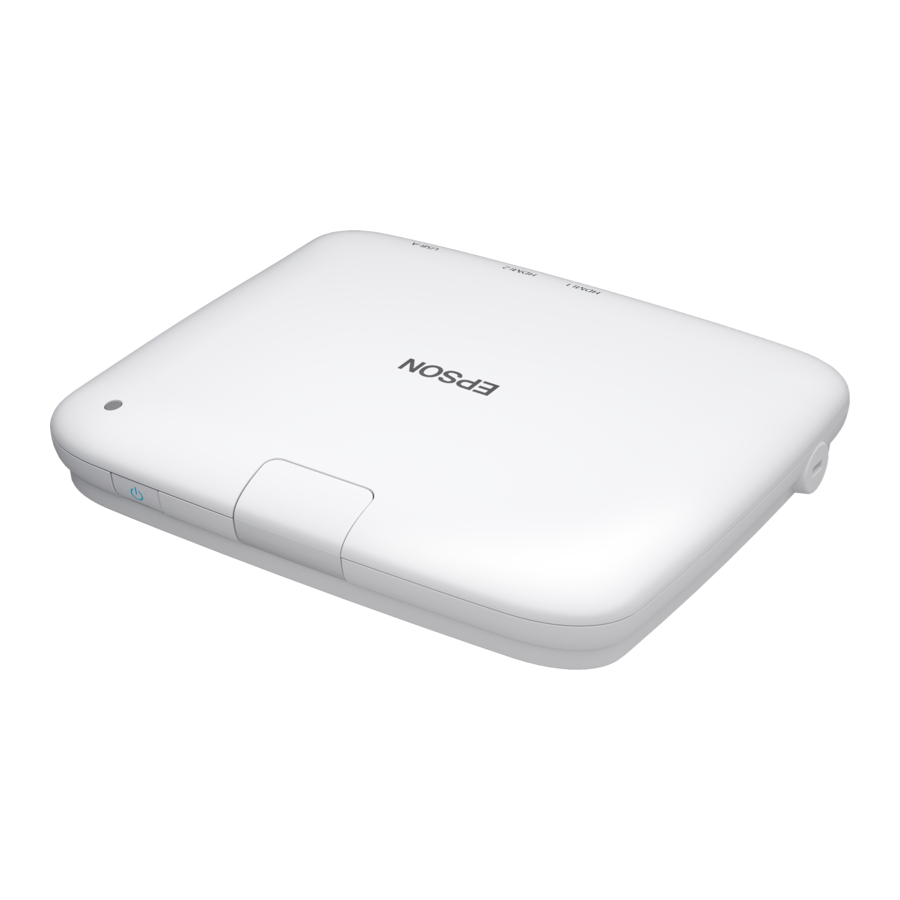
Page 15: Product Parts And Functions
Product Parts and Functions The following sections explain the product parts and their functions. g g Related Links • "Cleaning the Base Unit Case" p.96 The base unit is included only with the Wireless Presentation System • "Base Unit Indicator Status" p.102 (ELPWP20). -
Page 16: Base Unit Parts - Rear
Product Parts and Functions g g Related Links Base Unit Parts - Interface Ports • "Installing the Base Unit on a Wall" p.23 Base Unit Parts - Rear Name Function LAN port Connects a LAN cable to connect to a network. HDMI Out port Connects an external display equipment such as a projector or large display to output video signals. -
Page 17: Base Unit Parts - Remote Control
Product Parts and Functions • "Copying Menu Settings Between Base Units (Batch Setup)" p.92 Name Function • "Updating the Firmware" p.97 [Screen Mirroring] Switches the image source between the Screen button Mirroring 1 and Screen Mirroring 2. [Home] button Displays and closes the Home screen. Base Unit Parts - Remote Control Arrow buttons Selects menu items while displaying the base unit's... -
Page 18: Wireless Transmitter Parts
Product Parts and Functions Wireless Transmitter Parts Name Function USB terminal Connects to a computer's USB port. You can use this terminal with a USB conversion adapter as USB-C, or without a USB conversion adapter as USB-A. When pairing with the receiver (supported projector or base unit), connect to the USB-A port. -
Page 19: Setting Up The Product
Setting Up the Product Follow the instructions in these sections to set up your product. g g Related Links • "Pairing the Wireless Transmitter" p.20 • "Base Unit Placement" p.22 • "Connecting Base Unit to an External Display Equipment" p.25 •... -
Page 20: Pairing The Wireless Transmitter
You need to pair the wireless transmitter in the one of the following conditions: • The first time you start using Epson Wireless Presentation System (ELPWP10) (You are using supported projector as a receiver) • The first time you start using optional wireless transmitter (ELPWT01) -
Page 21: Pairing On A Computer
You can pair the wireless transmitter with the receiver (base unit or supported projector) on a computer using the Epson Wireless Transmitter Settings software. You can download and install Epson Wireless Transmitter Settings from the following Web site. epson.sn See the Epson Wireless Transmitter Settings Operation Guide for instructions. -
Page 22: Base Unit Placement
Base Unit Placement When you are using the base unit as a receiver for the wireless transmitter, Caution you need to set up the base unit. You can install the base unit on a wall or ceiling, or place it on a table to •... -
Page 23: Precautions On Installation
Base Unit Placement Attention Caution • Do not install the base unit on the top (back side) of the projector installed on the ceiling. Mount the AC adapter cover on the wall to prevent the AC adapter from falling. • Do not install the base unit on the back side of a large display. •... - Page 24 Base Unit Placement Hook the base unit on the convex parts of the mount. Secure the AC adapter holder to the wall using commercially available M4 screws (x4). Tighten the screws at the bottom of the mount to fix the base unit to the mount.
-
Page 25: Connecting Base Unit To An External Display Equipment
Connecting Base Unit to an External Display Equipment Follow the instructions in these sections to connect an external display Connect the other end to the base unit's HDMI Out port. equipment to the base unit. g g Related Links • "External Display Equipment Preparation" p.25 •... -
Page 26: Connecting Video Sources To The Base Unit
Connecting Video Sources to the Base Unit See these sections to connect the base unit to a variety of input sources. Connect the other end to the base unit's HDMI1 or HDMI2 port. Attention Check the shape and orientation of the connectors on any cable you plan to connect. -
Page 27: Connecting To A Wired Network
You can connect a document camera to your base unit's USB-A port to project images viewed by the camera. The connection method varies depending on your Epson document camera model. See the document camera manual for details. Connecting to External Speakers You can connect the base unit to external self-powered speakers. - Page 28 Connecting Video Sources to the Base Unit Connect the stereo mini-jack end of the cable to your base unit's Audio Out port.
-
Page 29: Installing Batteries In The Remote Control
Installing Batteries in the Remote Control The remote control uses the two AA batteries that came with the base unit. Insert the batteries with the + and – ends facing as shown. Attention Make sure you read the Safety Instructions before handling the batteries. Replace the batteries as soon as they run out. -
Page 30: Remote Control Operation
Installing Batteries in the Remote Control g g Related Links • "Remote Control Operation" p.30 • "Safety Instructions" Remote Control Operation The remote control lets you control the base unit from almost anywhere in the room. Make sure that you aim the remote control at the base unit's receivers within the distance and angles listed here. -
Page 31: Using Basic Features
Using Basic Features Follow the instructions in these sections to use the product's basic features. g g Related Links • "Turning On the Base Unit" p.32 • "Turning Off the Base Unit" p.34 • "Setting the Date and Time" p.35 •... -
Page 32: Turning On The Base Unit
If there is no input signal when the base unit is turned on, the on the base unit. connection guide screen for Epson Wireless Presentation is displayed. Connect the AC adapter to the base unit's DC 12V port. Connect the power cord to the AC adapter. -
Page 33: Home Screen
Turning On the Base Unit Home Screen The Home screen disappears after 10 minutes of inactivity. The Home screen feature allows you to easily select an image source and access useful functions. You can display the Home screen by pressing the g g Related Links [Home] button on the remote control. -
Page 34: Turning Off The Base Unit
Turning Off the Base Unit Turn off the base unit after use. Press the power button on the base unit or remote control. The status indicator turns off. To transport or store the base unit, make sure the status indicator is off, then unplug the power cord. -
Page 35: Setting The Date And Time
Setting the Date and Time You can set the date and time for the base unit. You see this screen: Turn on the base unit. Press the [Menu] button on the remote control. Select the Management setting and press Enter button. Select Date, press Enter button, and use the displayed keyboard to enter today's date. - Page 36 Setting the Date and Time To activate daylight saving time, select the Daylight Saving Time To update the time automatically through an Internet time server, setting and set it to On. Then select settings. select the Internet Time setting and set it to On. Then select settings. When you are finished, select Set and press Enter button.
-
Page 37: Selecting The Language For The Menus
Selecting the Language for the Menus If you want to view the base unit's menus and messages in another language, you can change the Language setting. Turn on the base unit. Press the [Menu] button on the remote control. Select the Management setting and press Enter button. Select the Language setting and press Enter button. -
Page 38: Sharing Computer Screen Using Wireless Transmitter
Start Epson Wireless Presentation from the drive. • "Starting Computer Screen Sharing" p.38 • "Switching Between Maximize Screen and Split Screen" p.39 • Epson Wireless Presentation starts automatically if Epson • "Ending Computer Screen Sharing" p.40 iProjection (Ver.3.0 or later) has been installed on your computer. -
Page 39: Switching Between Maximize Screen And Split Screen
Start sharing the computer screen to the external display equipment. The Epson Wireless Presentation icon is displayed on the Windows taskbar (Windows) or Dock (Mac). Click the Epson Wireless Presentation icon to display the popup, and • When using the Epson iProjection moderator function, only one switch screens. -
Page 40: Ending Computer Screen Sharing
• Windows: Disconnect the wireless transmitter from the computer. There is no need to use Safely Remove Hardware. • Mac: Select Disconnect from the Epson Wireless Presentation icon menu on the menu bar or Dock, and then disconnect the wireless transmitter. -
Page 41: Sharing Computer Screen Using Application (Wired Network Projection)
Epson iProjection (Windows/Mac) from the following Web site. epson.sn Epson iProjection software sets up your computer for network projection. It also allows you to hold interactive meetings by projecting user's computer screens over a network. See the Epson iProjection Operation Guide (Windows/Mac) for instructions. - Page 42 Select the Network Projection menu and press Enter button. • Moderator Password lets you enter a four-digit number password for accessing the base unit as a moderator using Epson iProjection. (No password is set by default.) • Keyword Interrupt Display lets you select whether to display a base unit keyword on the projected image when accessing the base unit using Epson iProjection.
- Page 43 Sharing Computer Screen Using Application (Wired Network Projection) The wired network settings complete when you see the correct IP address on the network information screen. g g Related Links • "Using the Displayed Keyboard" p.80...
-
Page 44: Sharing Computer Screen Or Mobile Device Screen Using Application (Wireless Network Projection)
• Epson iProjection (iOS/Android) app allows you to project from iOS or Android devices. You can download Epson iProjection for free from the App Store or Google Play. Any fees incurred when communicating with the App Store or Google Play are the responsibility of the customer. -
Page 45: Selecting Wireless Network Settings Manually
Sharing Computer Screen or Mobile Device Screen Using Application (Wireless Network Projection) Press the [Menu] button, select the Management menu, and press the base unit using Advanced Connection Mode of the Epson iProjection Enter button. software. When monitoring or controlling the base unit using wireless LAN in standby mode, connect your computer and base unit with infrastructure mode. - Page 46 Sharing Computer Screen or Mobile Device Screen Using Application (Wireless Network Projection) Select the Network menu and press Enter button. • For infrastructure mode, set the Simple AP setting to Off and go to next step. Select the Wireless LAN menu and press Enter button. Select Network Settings and press Enter button.
- Page 47 Home screen. • Moderator Password lets you enter a four-digit number password for accessing the base unit as a moderator using Epson iProjection. (No password is set by default.) • Keyword Interrupt Display lets you select whether to display a base unit keyword on the projected image when accessing the base unit using Epson iProjection.
-
Page 48: Selecting Wireless Network Settings In Windows
Sharing Computer Screen or Mobile Device Screen Using Application (Wireless Network Projection) The wireless network settings are complete when you see the correct IP When connecting to devices over a wireless network access point, make address on the network information screen. sure Wi-Fi is turned on and select the network name (SSID) of the network the base unit is connecting to. -
Page 49: Setting Up Wireless Network Security For Infrastructure Mode
Sharing Computer Screen or Mobile Device Screen Using Application (Wireless Network Projection) Select Passphrase, press Enter button, and enter a passphrase from 8 to If you want to set up WPA3-EAP or WPA2/WPA3-EAP security, make 63 characters long. sure your digital certificate file is compatible with base unit registration type and placed directly on a USB storage device. -
Page 50: Supported Client And Ca Certificates
Sharing Computer Screen or Mobile Device Screen Using Application (Wireless Network Projection) Do one of the following according to the security you selected. Select the certificate to import using the displayed list. • WPA3-PSK or WPA2/WPA3-PSK: Select Passphrase, press Enter A message is displayed prompting you to enter the password for the button, and enter a passphrase from 8 to 63 characters long. -
Page 51: Using A Qr Code To Connect A Mobile Device
• Make sure you have installed the latest version of Epson iProjection on your device. • You can download Epson iProjection for free from the App Store or Google Play. Any fees incurred when communicating with the App Store or Google Play are the responsibility of the customer. -
Page 52: Sharing Mobile Device Screen Using Screen Mirroring
Sharing Mobile Device Screen Using Screen Mirroring You can send image to your receiver (base unit or supported projector) from Mobile devices with Android installed or Windows 8.1 or later installed mobile devices such as laptops, smartphones, and tablets using Miracast mainly support Miracast. - Page 53 Sharing Mobile Device Screen Using Screen Mirroring Press the [Menu] button, select the Management menu, and press Select the Network menu and press Enter button. Enter button. Select Network Settings and press Enter button. Set the Wireless LAN Power setting to On. Select Priority Control Interface and press Enter button.
-
Page 54: Connecting Using Screen Mirroring With The Miracast Function
Sharing Mobile Device Screen Using Screen Mirroring Set the Simple AP setting to On. Connecting Using Screen Mirroring with the Miracast Function If your mobile device such as a smartphone supports Miracast, you can connect it to the base unit wirelessly and project images. You can play audio through the external speaker system connected to the base unit by connecting using Screen Mirroring. -
Page 55: Connecting Using Screen Mirroring In Windows 10
Sharing Mobile Device Screen Using Screen Mirroring Connecting Using Screen Mirroring in Windows 10 It may take some time until the connection is established. While connecting, do not disconnect the base unit's AC adapter. Doing so may cause your device to freeze or malfunction. You can set up your computer for wireless projection and play audio through the external speaker system connected to the base unit by connecting using Screen Mirroring. - Page 56 Sharing Mobile Device Screen Using Screen Mirroring Select Add a wireless display. The external display equipment connected to the base unit displays the image from your computer. It may take some time until the connection is established. While connecting, do not disconnect the base unit's AC adapter. Doing so may cause your device to freeze or malfunction.
-
Page 57: Selecting An Image Source
Selecting an Image Source When multiple image sources are connected to the base unit, such as a • Press the [Home] button on the remote control. computer and DVD player, you can switch from one image source to the other. Make sure the connected image source you want to use is turned on. - Page 58 Selecting an Image Source • The display order of the input sources changes when the base unit detects an input signal. (The detected input source appears in the upper left position.) • You can fix the display order of the input sources using the Sort Source Thumbnails setting in the base unit's Display menu.
-
Page 59: Adjusting Base Unit Features
Adjusting Base Unit Features Follow the instructions in these sections to use your base unit's adjustment features. g g Related Links • "Projecting Multiple Images Simultaneously" p.60 • "Base Unit Identification System for Multiple Device Control" p.63 • "Base Unit Security Features" p.65 •... -
Page 60: Projecting Multiple Images Simultaneously
Projecting Multiple Images Simultaneously You can use the split screen feature of the base unit to simultaneously project Select 2 Screens or 4 Screens. two or four images from different image sources. When splitting screen into halves, the currently selected input source moves to the left of the screen. -
Page 61: Unsupported Input Source Combinations For Split Screen Projection
Projecting Multiple Images Simultaneously g g Related Links Select the input source. • "Unsupported Input Source Combinations for Split Screen Projection" p.61 • "Split Screen Projection Restrictions" p.61 You can only select input sources that can be combined. Select the screen from which you want to hear audio. Unsupported Input Source Combinations for Split Screen Projection Select the screen size. - Page 62 Projecting Multiple Images Simultaneously Restrictions when the Input Source is LAN If you use the [Split] button to split the screen and select LAN as the input source when you are splitting screen on the LAN screen, the LAN screen will be projected keeping split screen.
-
Page 63: Base Unit Identification System For Multiple Device Control
Base Unit Identification System for Multiple Device Control When lining up multiple external display equipments to project images, you Select Base Unit ID and press Enter button. can select split screen type or input source of each base unit. Use the arrow buttons to select the identification number you want to You can set a unique base unit ID for each base unit to operate them use for the base unit. - Page 64 Base Unit Identification System for Multiple Device Control Aim the remote control at the target base unit and press the [ID] The base unit you want to operate is selected. button. • When you select [0/All] on the remote control, you can operate all base unit regardless the Base Unit ID setting.
-
Page 65: Base Unit Security Features
Base Unit Security Features You can secure your base unit to deter theft or prevent unintended use by The default password is set to "0000". Change this to your own setting up the following security features: password. • Password security to prevent people who do not know the password from using the base unit, and prevent changes to the settings. -
Page 66: Selecting Password Security Types
Base Unit Security Features • To prevent changes to the base unit's settings, select the Menu Protection If you select No, the Password Protection setting menu is setting, press Enter button, and select the options as necessary. displayed again. • To prevent changes to the base unit's schedule settings, set the Schedule setting to On. -
Page 67: Installing A Security Cable
• If you have forgotten the password, make a note of the "Request Code: xxxxx" number that appears on the screen and contact Epson for help. • If you continue to repeat the above operation and input the wrong password 30 times in succession, the message "The base unit's operation... -
Page 68: Secure Http
Secure HTTP You can use the HTTPS protocol to increase security between the base unit Select the Base Unit Control menu and press Enter button. and a Web browser communicating with it. To do this, you create a server certificate, install it on the base unit, and turn on the Secure HTTP setting in the base unit menus to verify the reliability of the Web browser. - Page 69 Secure HTTP Web Server Certificate (Secure HTTP) Specification Description Format PKCS#12 Extension PFX, P12 Encryption Hashes MD5/SHA-1/SHA-256/SHA-384/SHA-512 Key length 512/1024/2048/4096 bit Common name Network host name Organization Optional Password Up to 64 alphanumeric characters; required...
-
Page 70: Monitoring And Controlling The Base Unit
Monitoring and Controlling the Base Unit Follow the instructions in these sections to monitor and control the base unit over a network. g g Related Links • "Controlling a Networked Base Unit Using a Web Browser" p.71 • "Registering Digital Certificates from a Web Browser" p.75 •... -
Page 71: Controlling A Networked Base Unit Using A Web Browser
Start your Web browser on the computer or device. Select the option corresponding to the base unit function you want to Go to the Epson Web Control screen by entering the base unit's IP control. address into the browser's address box. When entering an IPv6 address,... -
Page 72: Web Control Options
• You may need to log in to access some of the options on the • If you see a log in window, enter your user name and password. (The Epson Web Control screen. If you see a log in window, enter user name is EPSONREMOTE and the default password is guest.) your user name and password. - Page 73 Options on the OSD Control Pad screen allow you to display the base unit's setting menus and select them moving your finger or mouse on the pad. Returns to the Epson Web Control screen. Displays a list of monitored settings.
- Page 74 • Start Pairing • Reset Network Settings • Firmware Update You can select the following settings only with Epson Web Control. • Monitor Password (up to 16 alphanumeric characters) • Display Logs • HTTP port (port number used for Web Control except for 80...
-
Page 75: Registering Digital Certificates From A Web Browser
Start your Web browser on a computer or device connected to the network. Go to the Epson Web Control screen by entering the base unit's IP address into the browser's address box. You see the Epson Web Control screen. -
Page 76: Setting Event Schedules
Setting Event Schedules You can schedule up to 30 events to occur automatically on your base unit, Select the event details you want to perform. such as turning the base unit on or off or switching the input source. The base unit performs the selected events on the specified date and time in the schedule you set up. - Page 77 Setting Event Schedules The scheduled events are displayed on the screen with icons indicating Select an option from the menu displayed. the event status. • On or Off lets you enable or disable the selected event. • Edit lets you change the event details or date and time. •...
-
Page 78: Adjusting The Menu Settings
Adjusting the Menu Settings Follow the instructions in these sections to access the base unit menu system and change base unit settings. g g Related Links • "Using the Base Unit's Menus" p.79 • "Using the Displayed Keyboard" p.80 • "Input Signal Settings - Signal I/O Menu" p.81 •... -
Page 79: Using The Base Unit's Menus
Using the Base Unit's Menus You can use the base unit's menus to adjust the settings that control how your base unit works. The external display equipment connected to the base unit arrow indicates that the menu contains sub items. When you turn on a menu setting or select a specific value for it, the menu system displays the menus on the screen. -
Page 80: Using The Displayed Keyboard
Using the Displayed Keyboard You can use the displayed keyboard to enter numbers and characters. Available Text Using the Displayed Keyboard Use the arrow buttons on the remote control to highlight the number You can enter the following text when using the displayed keyboard. or character you want to enter and press the Enter button. -
Page 81: Input Signal Settings - Signal I/O Menu
Input Signal Settings - Signal I/O Menu Normally the projector automatically detects and optimizes the input signal Setting Options Description settings. If you need to customize the settings, you can use the Signal I/O HDMI Link Set to On to enable the HDMI Link menu. -
Page 82: Base Unit Installation Settings - Installation Menu
Base Unit Installation Settings - Installation Menu Settings on the Installation menu help you set up your base unit in your installation environment. Setting Options Description Remote Receiver Front/Upper Limits reception of remote control signals by the selected receiver; Off turns Front off all receivers. -
Page 83: Base Unit Display Settings - Display Menu
Base Unit Display Settings - Display Menu Settings on the Display menu let you customize various base unit display features. Setting Options Description Sort Source Set to On to display the detected input Thumbnails source in the upper left position of the Home screen. -
Page 84: Base Unit Feature Settings - Operation Menu
Base Unit Feature Settings - Operation Menu Settings on the Operation menu let you customize various base unit features. Setting Options Description HDMI Auto Power Set to On to automatically start projection in standby mode when the base unit detects HDMI input signal. Sleep Mode Set to On to automatically turns off the base unit after an interval of inactivity. -
Page 85: Base Unit Administration Settings - Management Menu
Base Unit Administration Settings - Management Menu Settings on the Management menu let you customize various base unit Setting Options Description administrative features. Log Save Internal Memory Sets the location in which to save error Destination and operation log files. USB and Internal Memory Batch Setup Range... -
Page 86: Base Unit Network Settings - Network Menu
Transmitter Start Pairing Updates the network information from Settings your computer using the Epson Wireless Transmitter Settings software. See the Epson Wireless Transmitter Settings Operation Guide for details. Auto Power On Set to On to turn on the base unit automatically when you connect a computer using the wireless transmitter. -
Page 87: Network Menu - Wireless Lan Menu
Make sure you are also doing the following: • Using Quick Connection Mode of Network Menu - Wireless LAN Menu Epson iProjection Settings on the Wireless LAN menu let you select the wireless LAN settings. • Using Screen Mirroring connection SSID... - Page 88 Base Unit Network Settings - Network Menu WPA is an encryption standard that improves the security for wireless Setting Options Description networks. The base unit supports AES encryption methods. Passphrase Various Enter the pre-shared passphrase used on passphrases from 8 the network.
-
Page 89: Network Menu - Wired Lan Menu
Base Unit Network Settings - Network Menu Setting Options Description Setting Options Description Client Certificate — Imports the client certificate. IP Settings DHCP Set DHCP to On if your network assigns addresses automatically; set to Off to Setting is only displayed when EAP Type IP Address manually enter the network's IP is set to PEAP-TLS or EAP-TLS. - Page 90 Epson iProjection to access the base unit and share the current screen. Epson iProjection Set to On to use Epson iProjection. SSID Display Set to On to display the SSID on the network information screen and Home screen.
-
Page 91: Base Unit Initial Settings And Reset Options - Initial/All Settings Menu
Base Unit Initial Settings and Reset Options - Initial/All Settings Menu Settings on the Initial/All Settings menu let you reset certain base unit Reset All options settings to their default values and place the base unit in firmware update When you select Reset All, you see the following screen. mode so you can update the firmware. -
Page 92: Copying Menu Settings Between Base Units (Batch Setup)
Caution Remove the USB flash drive. Epson takes no responsibility for batch setup failures and associated repair costs due to power outages, communication errors, or other problems that may cause The file name for the batch setup file is PJCONFDATA.bin. If such failures. -
Page 93: Transferring Settings From A Computer
Copying Menu Settings Between Base Units (Batch Setup) The file name for the batch setup file is PJCONFDATA.bin. If Caution you need to change the file name, add text after PJCONFDATA using only alphanumeric characters. If you change the Do not disconnect the AC adapter or the USB flash drive from the base unit PJCONFDATA section of the file name, the base unit may not be while the file is being written. -
Page 94: Batch Setup Error Notification
USB cable may not be connected correctly. Disconnect the USB flash drive or the USB cable, unplug and then plug in the base unit's power cord, and then try again. If the problem persists, unplug the base unit and contact Epson for help. -
Page 95: Maintaining The Base Unit
Maintaining the Base Unit Follow the instructions in these sections to maintain your base unit. g g Related Links • "Cleaning the Base Unit Case" p.96 • "Updating the Firmware" p.97... -
Page 96: Cleaning The Base Unit Case
Cleaning the Base Unit Case To clean the base unit case, do the following: • To remove dust or dirt, use a soft, dry, lint-free cloth. • To remove stubborn dirt, use a soft cloth moistened with water and mild soap. -
Page 97: Updating The Firmware
Download the base unit firmware file from the Epson Web site. Copy the downloaded firmware file to the root folder (highest folder in the hierarchy) of the USB storage device. -
Page 98: Updating Firmware Using A Computer And Usb Cable
• macOS 10.15.x (64-bit) Select Yes to start the firmware update. Download the base unit firmware file from the Epson Web site. Do not disconnect the AC adapter from the base unit while the firmware is updating. If the AC adapter is disconnected, the base •... - Page 99 If the indicators continue to flash even after reconnecting the AC adapter, remove the power plug from the electrical outlet and contact Epson. • If no operations are performed for 20 minutes in update mode, the base unit turns off automatically.
-
Page 100: Solving Problems
Solving Problems Check the solutions in these sections if you have any problems using the product. g g Related Links • "Projection Problems" p.101 • "Base Unit Indicator Status" p.102 • "Wireless Transmitter Indicator Status" p.103 • "Solving Image or Sound Problems" p.104 •... -
Page 101: Projection Problems
• The solutions in this manual can help you solve many problems. If none of these solutions help, contact Epson for technical support. If you are using Wireless Presentation System (ELPWP10) with the supported projector, see your projector User's Guide for the projector. -
Page 102: Base Unit Indicator Status
Flashing orange Internal base unit error. refer to this table for a solution. Turn the base unit off, unplug it, and contact Epson for help. If the indicator displays a pattern not listed in the table below, turn the base unit off, unplug it, and contact Epson for help. -
Page 103: Wireless Transmitter Indicator Status
The transmitter is not connected to the computer, or is performing paring. Flashing blue (quickly) The transmitter is connected to the computer and is waiting for the Epson Wireless Presentation software to launch. Flashing blue (slowly) The input source from the computer is being projected. -
Page 104: Solving Image Or Sound Problems
Solving Image or Sound Problems Check the solutions in these sections if you have any problems with projected • If you are projecting from an HDMI source, replace the HDMI cable with images or sound from the base unit. the shorter one. •... -
Page 105: Solutions When Only A Partial Image Appears
• Not connected to an extension cable noise may be mixed. Turn up the computer's volume and turn down the external display equipment's volume. (When you use Epson iProjection • If you connected an extension power cable, try projecting without it to see if (Windows/Mac).) -
Page 106: Solving Base Unit Or Remote Control Operation Problems
ID settings. Operation menu. • If you lose the remote control, you can order another one from Epson. • If the base unit turns off and the status indicator is lit orange, the base unit has overheated. -
Page 107: Solutions To Password Problems
Provide the request code and proof of ownership for assistance in unlocking the base unit. • If you set an Epson Web Control password and forgot the user ID or password, try entering the following: • User ID: EPSONWEB •... -
Page 108: Solving Network Problems
• "Solutions When You Cannot Access the Base Unit Through the Web" • If your Web browser is set up to connect via a proxy server, the Epson Web p.108 Control screen cannot be displayed. Make settings for a connection without •... -
Page 109: Solutions When You Cannot Connect Using Screen Mirroring
Solving Network Problems Network > Network Settings > Network Projection > Screen Mirroring Solutions When You Cannot Connect Using Screen Mirroring g g Related Links • "Network Menu - Network Projection Settings" p.89 If you are unable to connect to the base unit using Screen Mirroring, try the following solutions: •... -
Page 110: Solving Wireless Transmitter Pairing Problems
Solving Wireless Transmitter Pairing Problems Check the solutions in these sections if you have problems pairing the wireless • If you are using the supported projector as a receiver, make sure Simple AP transmitter. is set to On in the Network Settings menu. Network >... -
Page 111: Solutions When Hdmi Link Does Not Function
Solutions When HDMI Link does not Function If you cannot operate the connected devices using the HDMI Link features, try the following solutions: • Make sure the cable meets the HDMI CEC standard. • Make sure the connected device meets the HDMI CEC standard. See the documentation supplied with the device for more information. -
Page 112: Appendix
Appendix Check these sections for the technical specifications and important notices about your product. g g Related Links • "Optional Accessories and Replacement Parts" p.113 • "Supported Monitor Display Resolutions" p.114 • "Product Specifications" p.117 • "External Dimensions" p.118 • "List of Safety Symbols and Instructions" p.119 •... -
Page 113: Optional Accessories And Replacement Parts
Optional Accessories and Replacement Parts The following optional accessories and replacement parts are available. Please purchase these products as and when needed. The following list of optional accessories and replacement parts is current as of: March 2021. Details of accessories are subject to change without notice and availability may vary depending on the country of purchase. -
Page 114: Supported Monitor Display Resolutions
Supported Monitor Display Resolutions The table here lists the compatible refresh rate and resolution for each HDMI compatible video display format. Resolution Refresh Mode YCbCr(8bit) Rate (Hz) (dot) (8bit) 4:2:0 4:2:2 4:4:4 Compatible Mode SXGA1_70 1152 SXGA1_75 1152 HDMI SXGA1_85 1152 Resolution Refresh... - Page 115 Supported Monitor Display Resolutions HDMI HDMI Resolution Resolution Refresh Refresh Mode YCbCr(8bit) Mode YCbCr(8bit) Rate (Hz) Rate (Hz) (dot) (dot) (8bit) (8bit) 4:2:0 4:2:2 4:4:4 4:2:0 4:2:2 4:4:4 SDTV (480i) 59.94 ✓ ✓ ✓ ✓ HDTV 1920 1080 29.97 ✓ ✓...
-
Page 116: Supported Monitor Display Resolutions
Supported Monitor Display Resolutions HDMI Resolution Refresh Mode YCbCr(8bit) Rate (Hz) (dot) (8bit) 4:2:0 4:2:2 4:4:4 3840 2160 ✓ (3840×2160) 3840 2160 59.94 ✓ (3840×2160) 3840 2160 ✓ (3840×2160) (4096×2160) 4096 2160 23.98 ✓ ✓ ✓ (SMPTE) (4096×2160) 4096 2160 ✓... -
Page 117: Product Specifications
Product Specifications Base Unit Dimensions Maximum dimension: 63.5 (W) × 11 (H) × 63.5 (D) mm (not including USB cable) Product name ELPBU10 USB cable length (including main body): 175 mm USB cable length (including main body and USB-C Dimensions 230 (W) ×... -
Page 118: External Dimensions
External Dimensions Without the Mount Including the Mount The unit in these illustrations is mm. The unit in these illustrations is mm. -
Page 119: List Of Safety Symbols And Instructions
List of Safety Symbols and Instructions The following table lists the meaning of the safety symbols labeled on the No. Symbol mark Approved Description equipment. standards — The same as No. 8. No. Symbol mark Approved Description standards IEC60417 Battery, general IEC60417 "ON"... - Page 120 List of Safety Symbols and Instructions No. Symbol mark Approved Description No. Symbol mark Approved Description standards standards IEC60417 Class II equipment IEC60417 Caution (Sharp Corners) No. 5172 To identify equipment meeting the No. 6043 To indicate sharp corners that should safety requirements specified for Class not be touched.
-
Page 121: Notices
CPU Boards and Power Supplies used with Class B Personal Computers user is encouraged to try to correct the interference by one or more of the following measures. We: Epson America, Inc. • Reorient or relocate the receiving antenna. Located at: 3131 Katella Avenue, Los Alamitos, CA •... -
Page 122: Indication Of The Manufacturer And The Importer In Accordance With Requirements Of Eu Directive
Trademarks Restriction of Use EPSON is a registered trademark, EXCEED YOUR VISION and its logos are registered trademarks or trademarks of Seiko Epson Corporation. When this product is used for applications requiring high reliability/safety such as transportation devices related to aviation, rail, marine, automotive Mac, OS X, and macOS are trademarks of Apple Inc. -
Page 123: Copyright Notice
Notices Other product names used herein are also for identification purposes only and may be trademarks of their respective owners. Epson disclaims any and all rights in those marks. Copyright Notice All rights reserved. No part of this publication may be reproduced, stored in a...