
Related Manuals for Toro 07068


Summary of Contents for Toro 07068
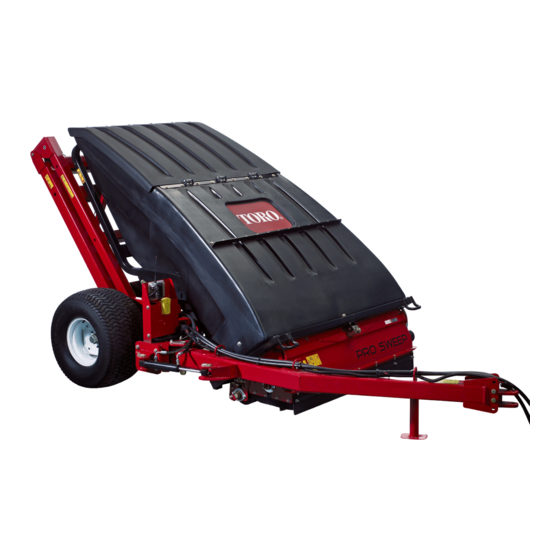
- Page 1 Form No. 3395-469 Rev A Pro Sweep Turf Sweeper Model No. 07068—Serial No. 315000001 and Up *3395-469* A Register at www.Toro.com. Original Instructions (EN)
- Page 2 This product complies with all relevant European directives. You may contact Toro directly at www.Toro.com for product For details please see the separate product specific Declaration and accessory information, help finding a dealer, or to register of Conformity (DOC) sheet.
-
Page 3: Table Of Contents
Become familiar with all controls and know how to Adjusting the Roller Scraper........21 stop quickly. A free replacement manual is available by Adjusting the Front Flap Height ......22 contacting Toro directly at www.Toro.com. Checking the Tire Pressure ........22 • Never allow children to operate the machine. Never allow Checking the Wheel Lug Nut Torque......22... - Page 4 Drive this manual. If major repairs are ever needed or assistance carefully. To prevent tipping or loss of control: desired, contact an Authorized Toro Distributor. – Operate only in daylight or when there is good •...
-
Page 5: Safety And Instructional Decals
• To be sure of optimum performance and safety, always or death. Such use could void product warranty of The purchase genuine Toro replacement parts and accessories. Toro Company. Safety and Instructional Decals Safety decals and instructions are easily visible to the operator and are located near any area of potential danger. - Page 6 93-9852 1. Warning—read the Operator’s Manual. 2. Crushing hazard—install the cylinder lock. 108–0862 1. Warning—read the Operator's Manual, do not operate this machine unless you are trained; keep bystanders a safe distance from the machine. 2. Entanglement hazard, belts—stay away from moving parts, keep all guards and shields in place; do not operate with covers removed.
- Page 7 108–0863 1. Crushing hazard, falling object hazard—keep bystanders and vehicles a safe distance from the machine when the sweeper is raised. 110-7999 1. Warning 3. The machine must be parked with the attachment in the tow position before raising the sweeper to dump.
-
Page 8: Setup
Setup Loose Parts Use the chart below to verify that all parts have been shipped. Procedure Description Qty. – No parts required Requirements before using the vehicle. Remove the tongue and hydraulic – No parts required cylinder from the shipping position. Hitch tongue Hitch pin Bolt (3/8 x 1-1/4 inch) -
Page 9: Requirements Before Using The Vehicle
No Parts Required No Parts Required Procedure • The Toro Pro Sweep can be towed by most utility tractors Procedure equipped with hydraulics producing 7 to 8 GPM @ 2000 Note: Have 2 people remove the hitch assembly. p.s.i. and flotation tires for operation over golf greens. - Page 10 1. Insert the rear end of the hitch tongue between the mounting plates on the sweeper while aligning the mounting holes (Figure Note: The hose guides are to be positioned on top Installing the Hitch Tongue of hitch tongue. 2. Insert the hitch pin through the mounting plates and the hitch tongue (Figure Parts needed for this procedure:...
-
Page 11: Installing The Hydraulic Cylinder
5. Loosen the jam nuts securing the proximity switch to the frame and lower the switch until it is 2.6 to 4.0 mm (0.10 to 0.16 inch) from the sensing plate on the hitch tongue (Figure 4). Tighten the jam nuts to secure the adjustment. -
Page 12: Installing The Power Wiring Harness
Note: If the Workman vehicle does not have an open the spring pin (Figure fuse slot, obtain and install a Toro accessory fuse block, Part no. 92–2641. 4. Route the wiring harness alongside the main vehicle wiring harness to the rear of the vehicle... -
Page 13: Routing And Securing The Hydraulic Hoses And Wiring Harness
Figure 10 1. Hydraulic hoses and wiring 2. Hose guide harness 2. Secure the hydraulic hoses and wiring harness as shown Figure 9 Figure 11 Figure 1. Hitch pin 3. Hairpin cotter 2. Clevis • Raise or lower the hitch clevis to the position approximately level with the tow vehicle hitch. -
Page 14: Connecting The Harness
Connecting the Hydraulic Connecting the Harness Hoses No Parts Required No Parts Required Procedure Connect the harness from the sweeper to the power harness Procedure on the tow vehicle (Figure 13). Note: Ensure the harness cannot get pinched in the hitch Connect the hydraulic hoses from the sweeper to the quick couplers on the tow vehicle (Figure... - Page 15 Note: When the windrow is not required, unhook the 4. Secure the other end of the chain to the slot in the frame with the snap link (Figure 15). chain from the snap link, pivot the windrow assembly upward, and hook the chain at the raised level. Note: There should be some slack in the chain when connected.
-
Page 16: Assembling The Handheld Remote
Assembling the Handheld Remote Parts needed for this procedure: Handheld remote Battery (AAA) Screws, small Procedure 1. Remove the rubber bands securing the remote halves together, and remove the back cover. 2. Plug each battery into a terminal cradle observing proper polarity (Figure 16). -
Page 17: Product Overview
Product Overview • Transport height (home position) is 13–1/4 to 15–1/4 inches. • Turn around height (off-set position) is 8–1/2 to 10–1/2 Controls inches. Hopper Dump Button Sweeper Up Button—Optional Mode To dump the hopper, press the hopper dump button 2 times This mode allows the operator to adjust the sweeper to any (Figure 17). -
Page 18: Specifications
A selection of Toro approved attachments and accessories is available for use with the machine to enhance and expand its capabilities. Contact your Authorized Service Dealer or Distributor or go to www.Toro.com for a list of all approved attachments and accessories. -
Page 19: Operation
Operation Note: Determine the left and right sides of the machine from the normal operating position. Operating the Sweeper The primary function of the machine is to sweep up debris from large turf areas. The sweeper is operated by using the remote control. Refer to Controls (page 17) for the proper use of the control buttons. -
Page 20: Adjusting The Brush Height
Adjusting the Brush Height Adjust the sweeper so the brush tips slightly touch the surface but do not penetrate the turf. If the brush tips do penetrate the turf, improper debris pickup could result. Refer to the charts below for the recommended sweeper settings. Condition Roller/Brush Adjustment Front Flap Adjustment... -
Page 21: Adjusting The Roller Scraper
Figure 19 1. “A” 4. 6 to 13 mm (1/4 to 1/2 inch) 2. “B” 5. Brush direction 3. “C” 1. Position the sweeper on a level surface. 2. Raise the hopper and install the hopper safety support. Refer to Using the Hopper Safety Support (page 23). -
Page 22: Adjusting The Front Flap Height
Adjusting the Front Flap Checking the Wheel Lug Nut Height Torque For best debris pickup results, adjust the front flap (Figure WARNING 21) with a 6 mm to 13 mm (1/4 inch to 1/2 inch) clearance between the bottom of the flap and surface. Failure to maintain proper torque could result in failure or loss of wheel and could result in personal Note: Raising the front flap all the way or removing the... -
Page 23: Using The Controller Time Out
Using the Controller Time Out The sweeper is equipped with a time-out feature for the control module. The time-out feature is activated after 2-1/2 hours of continuous remote transmitter inactivity. • When in the time-out mode the remote transmitter will not control any function. -
Page 24: Dumping The Hopper
Note: To maintain a straight line when sweeping, sight 1. Place the machine on a level surface and make sure that an object in the foreground. it is in the transport position before dumping. • Always try to make a long, continuous run with a slight 2. -
Page 25: Inspecting And Cleaning The Machine
Inspecting and Cleaning the Switching the Sweeper-Up Machine Mode When sweeping has been completed, thoroughly clean and The sweeper-up button has 2 possible modes; standard and wash the machine. Air dry the hopper. After cleaning, inspect optional. the machine for possible damage to mechanical components. The standard mode allows the operator to raise the sweeper Performing these procedures ensures that the machine will to the pre-defined heights with a single button push. -
Page 26: Maintenance
Maintenance Recommended Maintenance Schedule(s) Maintenance Service Maintenance Procedure Interval • Torque the wheel lug nuts After the first 10 hours • Clean the reel drive area. Every 25 hours • Grease the sweeper. Every 50 hours • Inspect the condition of the tires. Every 100 hours •... -
Page 27: Daily Maintenance Checklist
Daily Maintenance Checklist Duplicate this page for routine use. For the week of: Maintenance Check Item Mon. Tues. Wed. Thurs. Fri. Sat. Sun. Check the safety interlock operation. Check for unusual operating noises. Check the tire pressure Check hydraulic hoses for damage Check for fluid leaks Check control operation. -
Page 28: Lubrication
Lubrication Service Interval: Every 50 hours The sweeper has 11 grease fittings that require lubrication with No. 2 lithium grease. If the machine is operated under normal conditions, lubricate all bearings and bushings immediately after every washing. Lubricate the bearings and bushings daily when operating conditions are extremely dusty and dirty. -
Page 29: Associate The Remote Control And The Base Unit
Figure 37 Figure 38 Associate the Remote Control 1. LED light 5. Stop and the Base Unit 2. Off-set left 6. Sweeper up 3. Sweeper down 7. Off-set right Important: Make sure to read the entire procedure 4. Hopper dump before attempting the association process. -
Page 30: Storage
Storage 3. Plug each fresh battery into a terminal cradle observing proper polarity. 1. Thoroughly clean the sweeper so it is free of dirt, leaves Note: If the batteries are improperly installed, the unit and debris. will not be damaged, but it will fail to operate. 2. -
Page 31: Troubleshooting
Troubleshooting Condition Possible Causes Corrective Action The sweeper is not The brush is damaged. Replace brush. picking up debris. The brush height is too high. Adjust brush height. See Brush Height Adjustment. The Front flap height is too low or too high. Adjust front flap height. -
Page 32: Entering Diagnostic Mode And Checking The Codes
Something wrong in the wiring; contact your Toro Distributor. BASE is bad; contact your Toro Distributor. Blink once, pause, blink twice, Version incompatibility of the Wrong software (install long pause, then repeat... -
Page 33: Resetting The Fault Codes
Resetting the Fault Codes After solving the problem, disconnect and reconnect the diagnostic connectors. The diagnostic light will flash continuously once per second. Exiting Diagnostic Mode 1. Turn the key to the position. 2. Disconnect the power by separating the vehicle harness from the sweeper harness. 3. - Page 34 Notes:...
- Page 35 The Way Toro Uses Information Toro may use your personal information to process warranty claims, to contact you in the event of a product recall and for any other purpose which we tell you about. Toro may share your information with Toro's affiliates, dealers or other business partners in connection with any of these activities. We will not sell your personal information to any other company.
- Page 36 Countries Other than the United States or Canada Customers who have purchased Toro products exported from the United States or Canada should contact their Toro Distributor (Dealer) to obtain guarantee policies for your country, province, or state. If for any reason you are dissatisfied with your Distributor's service or have difficulty obtaining guarantee information, contact the Toro importer.