
Related Manuals for Dell OptiPlex 5080 Micro


Summary of Contents for Dell OptiPlex 5080 Micro
- Page 1 OptiPlex 5080 Micro Setup and specifications guide Regulatory Model: D14U Regulatory Type: D14U001 May 2020 Rev. A00...
- Page 2 A WARNING indicates a potential for property damage, personal injury, or death. © 2020 Dell Inc. or its subsidiaries. All rights reserved. Dell, EMC, and other trademarks are trademarks of Dell Inc. or its subsidiaries. Other trademarks may be trademarks of their respective owners.
-
Page 3: Table Of Contents
Contents 1 Set up your computer........................5 2 Chassis overview........................10 Front view..................................... 10 Back view....................................11 System board Layout................................12 3 Technical specifications......................13 Dimensions and weight................................13 Chipset....................................13 Processors.....................................14 Operating system................................. 15 Memory....................................15 Intel Optane memory (optional)............................16 Ports and connectors................................16 Communications................................... - Page 4 Updating BIOS on systems with BitLocker enabled....................33 Updating your system BIOS using a USB flash drive....................33 System and setup password.............................. 34 Assigning a system setup password..........................34 Deleting or changing an existing system setup password..................35 6 Getting help..........................36 Contacting Dell..................................36 Contents...
-
Page 5: Set Up Your Computer
Set up your computer Steps 1. Connect the keyboard and mouse. 2. Connect to your network using a cable, or connect to a wireless network. Set up your computer... - Page 6 3. Connect the display. 4. Connect the power cable. Set up your computer...
- Page 7 5. Press the power button. Set up your computer...
- Page 8 6. Finish Windows system setup. Follow the on-screen instructions to complete the setup. When setting up, Dell recommends that you: • Connect to a network for Windows updates. NOTE: If connecting to a secured wireless network, enter the password for the wireless network access when prompted.
- Page 9 Table 1. Locate Dell apps(continued) Dell apps Details NOTE: Renew or upgrade your warranty by clicking the warranty expiry date in SupportAssist. Dell Update Updates your computer with critical fixes and important device drivers as they become available. Dell Digital Delivery Download software applications including software that is purchased but not preinstalled on your computer.
-
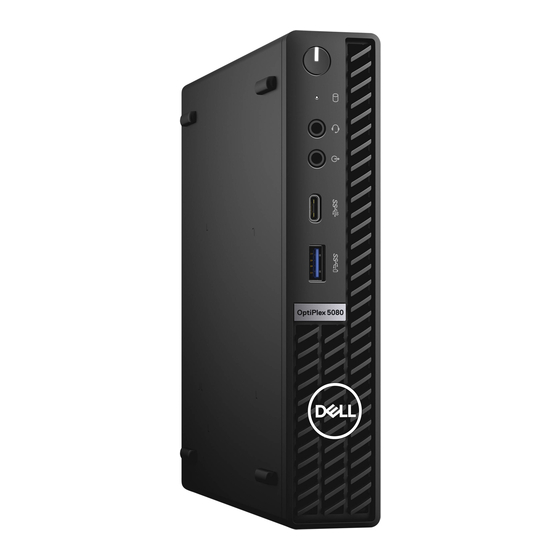
Page 10: Chassis Overview
Chassis overview Topics: • Front view • Back view • System board Layout Front view 1. Power button with diagnostic LED 2. Hard-disk drive activity light 3. Universal audio jack port 4. Line-out port (retaskable Line-in) 5. USB 3.2 Gen 2 Type-C port 6. -
Page 11: Back View
Back view 1. External antenna connectors 2. Serial/Video Port (Serial/PS2/DP 1.4/HDMI 2.0/VGA/USB 3.2 Gen 2 Type-C with DP Alt Mode) (optional) 3. USB 3.2 Gen 1 Type-A port with Smart Power on 4. USB 3.2 Gen 1 Type-A ports (2) 5. -
Page 12: System Board Layout
System board Layout 1. M.2 WLAN connector 2. HDD connector 3. M.2 SSD PCIe connector 4. Coin-cell battery 5. Optional video connector (VGA Port/DisplayPort 1.4 Port/HDMI 2.0b Port/USB 3.2Gen 2 Type-C Port with Alt-mode) 6. Optional connector (USB 3.2Gen 2 Type-C Port) 7. -
Page 13: Technical Specifications
Technical specifications Dimensions and weight Table 2. Dimensions and weight Description Values Height: Front 182.00 mm (7.16 in.) Rear 182.00 mm (7.16 in.) Width 36.00 mm (1.40 in.) Depth 178.56 mm (7.03 in.) Weight (maximum) 1.38 kg (3.04 lb) NOTE: The weight of your computer depends on the configuration ordered and the manufacturing variability. -
Page 14: Processors
Processors NOTE: Global Standard Products (GSP) are a subset of Dell’s relationship products that are managed for availability and synchronized transitions on a worldwide basis. They ensure the same platform is available for purchase globally. This allows customers to reduce the number of configurations managed on a worldwide basis, thereby reducing their costs. -
Page 15: Operating System
RTS with Windows 10 version v19H2 at the time of launch, and this version will determine the N-2 versions that are initially qualified for this platform. For future versions of Windows 10, Dell continues to test the commercial platform with coming Windows 10 releases during device production and for five years post-production, including both fall and spring releases from Microsoft. -
Page 16: Intel Optane Memory (Optional)
Table 5. Memory specifications(continued) Description Values • 16 GB DDR4 at 2666 MHz for Intel Core Pentium i3/i5 processors, 2933 MHz for Intel Core i7 processor (2 x 8 GB) • 16 GB DDR4 at 2666 MHz for Intel Core Pentium i3/i5 processors, 2933 MHz for Intel Core i7 processor (1 x 16 GB) •... -
Page 17: Communications
Table 7. Ports and connectors(continued) Description Values Video • Two DisplayPort 1.4 port (rear) • One VGA Port/DisplayPort 1.4 Port/HDMI 2.0b Port/ USB 3.2 Gen 2 Type-C Port with Alt-mode (optional) • One Serial RS232 (optional) • One Serial + PS2 port (optional) Memory card reader Not supported Power port... -
Page 18: Graphics And Video Controller
Table 9. Wireless module specifications(continued) Description Values Bluetooth Graphics and Video controller Table 10. Integrated graphics specifications Integrated graphics Controller External display support Memory size Processor Intel UHD Graphics 610 Two DisplayPort 1.4 HBR2 Shared system memory Intel Pentium Gold Intel UHD Graphics 630 Two DisplayPort 1.4 HBR2 Shared system memory... -
Page 19: Power Adapter
• with a M.2 solid-state drive, the M.2 solid-state drive is the primary drive • without a M.2 drive, the 2.5-inch hard-disk drive is the primary drive Table 12. Storage specifications Storage type Interface type Capacity 2.5-inch, 5400 RPM, hard-disk drive SATA 3.0 Up to 2 TB 2.5-inch, 7200 RPM, hard-disk drive... -
Page 20: Environmental
Incident Management Retainer Supported Emergency Incident Response Supported SafeData Supported Environmental Table 15. Environmental specifications Feature OptiPlex 5080 Micro Recyclable packaging BFR/PVC—free chassis MultiPack packaging Yes (US only) (optional) Energy-Efficient Power Supply Standard ENV0424 compliant NOTE: Wood‐based fiber packaging contains a minimum of 35% recycled content by total weight of wood‐based fiber. -
Page 21: Service And Support
* Measured using a random vibration spectrum that simulates user environment. † Measured using a 2 ms half-sine pulse when the hard drive is in use. Service and support NOTE: For more details on Dell Service Plans, see https://www.dell.com/learn/us/en/19/services/warranty-support- services. Table 18. Warranty... -
Page 22: Software
Downloading Windows drivers Steps 1. Turn on the . 2. Go to Dell.com/support. 3. Click Product Support, enter the Service Tag of your , and then click Submit. NOTE: If you do not have the Service Tag, use the auto detect feature or manually browse for your model. -
Page 23: System Setup
Boot menu Press <F12> when the Dell logo appears to initiate a one-time boot menu with a list of the valid boot devices for the system. Diagnostics and BIOS Setup options are also included in this menu. The devices listed on the boot menu depend on the bootable devices in the system. -
Page 24: Boot Sequence
Boot Sequence Boot sequence enables you to bypass the System Setup–defined boot device order and boot directly to a specific device (for example: optical drive or hard drive). During the Power-on Self-Test (POST), when the Dell logo appears, you can: •... -
Page 25: System Information
System information Table 21. System Configuration Option Description Integrated NIC Allows you to control the onboard LAN controller. The option ‘Enable UEFI Network Stack’ is not selected by default. The options are: • Disabled • Enabled • Enabled w/PXE (default) NOTE: Depending on the computer and its installed devices, the items that are listed in this section may or may not appear. -
Page 26: Video Screen Options
Video screen options Table 22. Video Option Description Primary Display Allows you to select the primary display when multiple controllers are available in the system. • Auto (default) • Intel HD Graphics NOTE: If you do not select Auto, the on-board graphics device will be present and enabled. -
Page 27: Secure Boot Options
Table 23. Security(continued) Option Description Absolute This field lets you Enable, Disable or permanently Disable the BIOS module interface of the optional Absolute Persistence Module service from Absolute Software. • Enabled - This option is selected by default. • Disable •... -
Page 28: Intel Software Guard Extensions Options
Table 24. Secure Boot(continued) Option Description • Replace from File- Replaces the current key with a key from a user-selected file • Append from File- Adds a key to the current database from a user-selected file • Delete- Deletes the selected key •... -
Page 29: Power Management
Table 26. Performance(continued) Option Description This option is set by default. Intel TurboBoost Allows you to enable or disable the Intel TurboBoost mode of the processor. • Enable Intel TurboBoost This option is set by default. Hyper-Thread Control Allows you to enable or disable the HyperThreading in the processor. -
Page 30: Post Behavior
Table 27. Power Management (continued) Option Description Block Sleep Allows you to block entering to sleep (S3 state) in OS environment. This option is disabled by default. Post behavior Table 28. POST Behavior Option Description Adapter Warnings This option lets you choose whether the system displays warning messages when you use certain power adapters. -
Page 31: Virtualization Support
Virtualization support Table 29. Virtualization Support Option Description Virtualization This option specifies whether a Virtual Machine Monitor (VMM) can utilize the additional hardware capabilities provided by the Intel Virtualization technology. • Enable Intel Virtualization Technology This option is set by default. VT for Direct I/O Enables or disables the Virtual Machine Monitor (VMM) from utilizing the additional hardware capabilities provided by the Intel Virtualization technology for direct I/O. -
Page 32: System Logs
It is recommended to update your BIOS (System Setup) when you replace the system board or if an update is available. About this task NOTE: If BitLocker is enabled, it must be suspended prior to updating the system BIOS, and then re enabled after the BIOS update is completed. Steps 1. Restart the computer. 2. Go to Dell.com/support. System setup... -
Page 33: Updating Bios On Systems With Bitlocker Enabled
3. Insert the USB Flash drive into the system that requires the BIOS update. 4. Restart the system and press F12 when the Dell Splash logo appears to display the One Time Boot Menu. 5. Using arrow keys, select USB Storage Device and click Return. -
Page 34: System And Setup Password
Figure 1. DOS BIOS Update Screen System and setup password Table 34. System and setup password Password type Description System password Password that you must enter to log on to your system. Setup password Password that you must enter to access and make changes to the BIOS settings of your computer. -
Page 35: Deleting Or Changing An Existing System Setup Password
• The password can contain the numbers 0 through 9. • Only lower case letters are valid, upper case letters are not allowed. • Only the following special characters are allowed: space, (”), (+), (,), (-), (.), (/), (;), ([), (\), (]), (`). 3. -
Page 36: Getting Help
About this task Dell provides several online and telephone-based support and service options. Availability varies by country and product, and some services may not be available in your area. To contact Dell for sales, technical support, or customer service issues: Steps 1.