
Related Manuals for Philips FW-C85/37


Summary of Contents for Philips FW-C85/37
- Page 1 Toll Free Help Line Ligne d'assistance en service libre Linea de ayuda telefónica sin cargo 800-531-0039 Mini Hi-Fi System with 3 CD changer 3139 116 19591 (ENG) pg 01-28/C85/37-Eng 2/16/00, 9:02 AM...
-
Page 2: President Message
’re e n t i t l e d t o. • Once your Philips purchase is registered, you’re eligible to receive all the privileges of owning a Philips product. - Page 3 As a member of the Philips “family,” you’re entitled to protection by one of the most comprehensive warranties and outstanding service networks in the industry.
-
Page 4: Important Safety Instructions
IMPORTANT SAFETY INSTRUCTIONS – This product was designed and manufactured to meet strict quality and safety standards. There are, however, some installation and operation precautions which you should be particularly aware of. Read these instructions – All the safety and operating instructions should be read before the appliance is operated. -
Page 5: Limited Warranty
(although there may be a delay if the appropriate including any implied warranties of merchantability or spare parts and technical manual(s) are not readily fitness for a particular purpose. Philips is not liable under available). any circumstances for any direct, indirect, special, incidental or consequential damages, howsoever incurred, even if MAKE SURE YOU KEEP... -
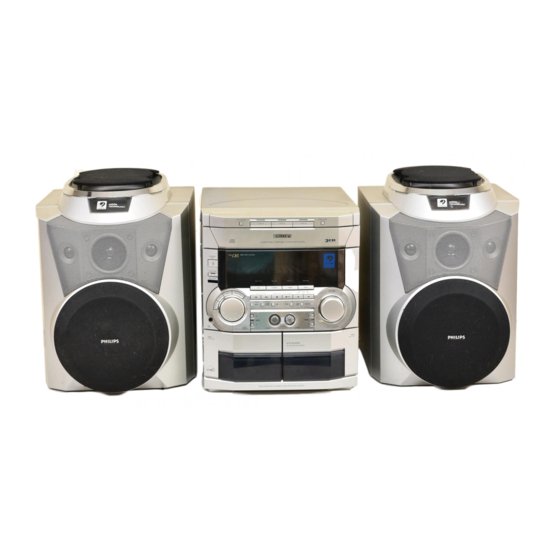
Page 6: Model Illustration
3139 116 19591 (ENG) pg 01-28/C85/37-Eng 2/16/00, 9:02 AM... -
Page 7: General Information
• When the system is switched on, do not move it around. • Place the system on a solid base (e.g. a cabinet). Partner; Philips • Place the system in a location with guidelines for adequate ventilation to prevent internal heat build-up in your system. -
Page 8: Preparation
Rear Connections STANDBY ON CUT OFF FREQUENCY HIGH POWER SUBWOOFER 60Hz 150Hz DIGITAL MAINS pg 01-28/C85/37-Eng PREPARATION AUDIO OUT AUDIO IN SUB- WOOFER AUX/CDR IN LINE OUT FM ANTENNA 300 AM ANTENNA FRONT – – – + 2/16/00, 9:02 AM A AM Loop Antenna Connection Connect the supplied loop antenna to... -
Page 9: Subwoofer Out
radio frequency. Connect the wireless radio frequency transmitter to the LINE 12 mm OUT terminals. Place the active speakers at your preferred location. Be sure to follow the instructions supplied unlock lock with the active speakers. Note: CAUTION: – Availability of wireless transmitter and –... -
Page 10: Controls
DISC CHANGE DISC 1 MINI HIFI SYSTEM STANDBY POWER SAVE IR SENSOR CD 1•2•3 C1 • 2 • 3 SEARCH•TUNING PROG BASS ≤ pg 01-28/C85/37-Eng CONTROLS OPEN•CLOSE DISC 2 DISC 3 C H A N G E R FM•AM TAPE 1•2 CDR/DVD BAND TUNER... - Page 11 DIGITAL SOUND CONTROL Controls on the system – to select the desired Digital Sound and remote control Control effect : OPTIMAL, CLASSIC, TECHNO, VOCAL, 1 STANDBY ON ROCK or JAZZ. – to switch the system on or to standby mode. –...
- Page 12 ( DUB (HSD) (HIGH SPEED ª SHUFFLE DUBBING) – to play all the available discs and – to dub a tape in normal or fast their tracks in random order. º REPEAT speed. ) BASS/TREBLE CONTROL – – to repeat a CD track, a disc, or all to adjust BASS/TREBLE level : available discs.
-
Page 13: Operating The System
MINI HIFI SYSTEM STANDBY POWER SAVE IR SENSOR CD 1•2•3 FM•AM TAPE 1•2 CDR/DVD C 1 • 2 • 3 BAND TUNER TAPE PRESET SIDE SEARCH•TUNING STOP•CLEAR PLAY PAUSE PREV CLOCK/ PROG A. REV TIMER (HSD) BASS wOOx PLUS TECHNOLOGY LEVEL To stop the demonstration mode Important:... -
Page 14: Selecting The Source
DIM 1 - normal brightness with Selecting the Source Spectrum Analyzer Off • Press the respective source selection button: CD, TUNER, TAPE or AUX. ™ The display indicates the selected source. Note: DIM 2 - half brightness with – For an external source, make sure you Spectrum Analyzer On have connected the audio left and right OUT terminals of the external... - Page 15 • Repeat step 3 - 4 to select the DIGITAL SOUND CONTROL desired mid and high frequencies (DSC) Spectrum Analyzer band levels. The DSC feature enables you to adjust 5 You can choose to edit the name for the system to suit your type of music. the personal setting.
-
Page 16: Loading The Cd Changer
DISC CHANGE DISC 1 DISC 2 DISC 3 MINI HIFI SYSTEM STANDBY POWER SAVE IR SENSOR CD 1•2•3 FM•AM TAPE 1•2 CDR/DVD C 1 • 2 • 3 BAND TUNER TAPE PRESET SEARCH•TUNING STOP•CLEAR PLAY PAUSE PREV SIDE CLOCK/ PROG A. -
Page 17: Disc Change
Selecting a desired track during Disc Change playback You can change the outer two discs • Press í or ë (or Digit 0-9 on the while the third inner disc is stopped or remote control) until the desired track is playing. appears on the display. - Page 18 Notes: Shuffle – If you press any of the CD DIRECT In shuffle mode, the system plays all the PLAY buttons, the system will play the available discs and their tracks in selected disc or track and the stored random order. Shuffle may be used also program will be ignored temporarily.
-
Page 19: Tuner
MINI HIFI SYSTEM STANDBY POWER SAVE IR SENSOR CD 1•2•3 FM•AM TAPE 1•2 CDR/DVD C 1 • 2 • 3 BAND TUNER TAPE PRESET SEARCH•TUNING STOP•CLEAR PLAY PAUSE PREV SIDE CLOCK/ PROG A. REV TIMER (HSD) BASS wOOx PLUS TECHNOLOGY LEVEL Note: •... -
Page 20: Tape
MINI HIFI SYSTEM STANDBY POWER SAVE IR SENSOR CD 1•2•3 FM•AM TAPE 1•2 CDR/DVD C1 • 2 • 3 BAND TUNER TAPE PRESET SIDE SEARCH•TUNING STOP•CLEAR PLAY PAUSE PREV CLOCK/ PROG A. REV TIMER (HSD) BASS wOOx PLUS TECHNOLOGY LEVEL pg 01-28/C85/37-Eng TAPE Loading a tape... -
Page 21: Aux/Cdr
TAPE During playback • If tape 2 is selected for playback; • Press and hold à or á until the ™ "T2 " with "! or @" scrolling left or right will be displayed depending desired passage is located. ™ "T1 or T2" with "! ! or @ @" on the tape side selected. -
Page 22: Recording
MINI HIFI SYSTEM STANDBY POWER SAVE IR SENSOR CD 1•2•3 FM•AM TAPE 1•2 CDR/DVD C1 • 2 • 3 BAND TUNER TAPE PRESET SEARCH•TUNING STOP•CLEAR PLAY PAUSE PREV SIDE CLOCK/ PROG A. REV TIMER (HSD) BASS wOOx PLUS LEVEL TECHNOLOGY pg 01-28/C85/37-Eng RECORDING Notes:... -
Page 23: Clock
RECORDING 4 Press DUB (HSD) once for CD Synchro Start normal speed dubbing or twice Recording (within 2 seconds) for high speed 1 Load a blank tape into tape deck 2 dubbing. and a disc into a disc tray. ™ "NORMAL" (normal speed) or 2 Press CD to select CD mode. -
Page 24: Timer
5 Press CLOCK/TIMER again to 1 Press and hold CLOCK/TIMER for store the setting. more than two seconds to select ™ The clock starts. timer mode. ™ "AM 12:00" or "00:00" or the • To exit without storing the setting, press Ç... -
Page 25: Specifications
Specifications AMPLIFIER Output power 2 x 100 W FTC Signal-to-noise ratio ... 75 dBA (IEC) Frequency response ... 40 – 20000 Hz, ± 3 dB Input sensitivity AUX In / CDR/DVD In ... 500 mV / 1V Output Speakers ... 6 Headphones ... -
Page 26: Maintenance
Cleaning the CD lens • After prolonged use, dirt or dust may accumulate at the CD lens. To ensure good playback quality, clean the CD lens with Philips CD Lens Cleaner or any commercially available cleaner. Follow the instructions supplied with cleaner. - Page 27 No or poor sound. Tape Deck Operation • Volume is not turned up. Recording or playback cannot be ™ Adjust VOLUME. made or there is a decrease in • The headphones are connected. audio level. ™ Disconnect the headphones. • Dirty tape heads, capstans or •...
-
Page 28: Table Of Contents
TABLE OF CONTENTS President Message ... 2 - 3 Important Safety Instructions ...4 Limited Warranty ...5 Model Illustration ...6 General Information...7 Safety Information ...7 Preparation ... 8 - 9 Controls ... 10 - 12 Operating The System ... 13 - 15 CD... - Page 29 10 11 12 13 14 15 16 17 pg 01-28/C85/37-Eng PAGE GUIDE 18 19 20 21 22 23 24 25 26 BLANK PAGE 2/16/00, 9:03 AM FRONT PAGE TABLE CONTENTS PAGE GUIDE BLANK BACK PAGE PAGE 3139 116 19591 (ENG)
- Page 30 FW 890P FW-C85 Philips Consumer Electronics Company A Division of Philips Electronics North America Corporation, Knoxville, Tennessee 37914-1810, USA 3139 116 19591 (ENG) IB8171T001 Printed In China JP-0005/37-3 3139 116 19591 (ENG) pg 01-28/C85/37-Eng 2/16/00, 9:03 AM...