Makita DMR115 Instruction Manual
Job site radio
Hide thumbs
Also See for DMR115:
- Instruction manual (136 pages) ,
- Instruction manual (99 pages) ,
- Instruction manual (16 pages)
Advertisement
Advertisement
Table of Contents

Related Manuals for Makita DMR115


Summary of Contents for Makita DMR115
- Page 1 Job Site Radio DMR115 INSTRUCTION MANUAL IMPORTANT: Read Before Using.
- Page 2 7 8 9 10...
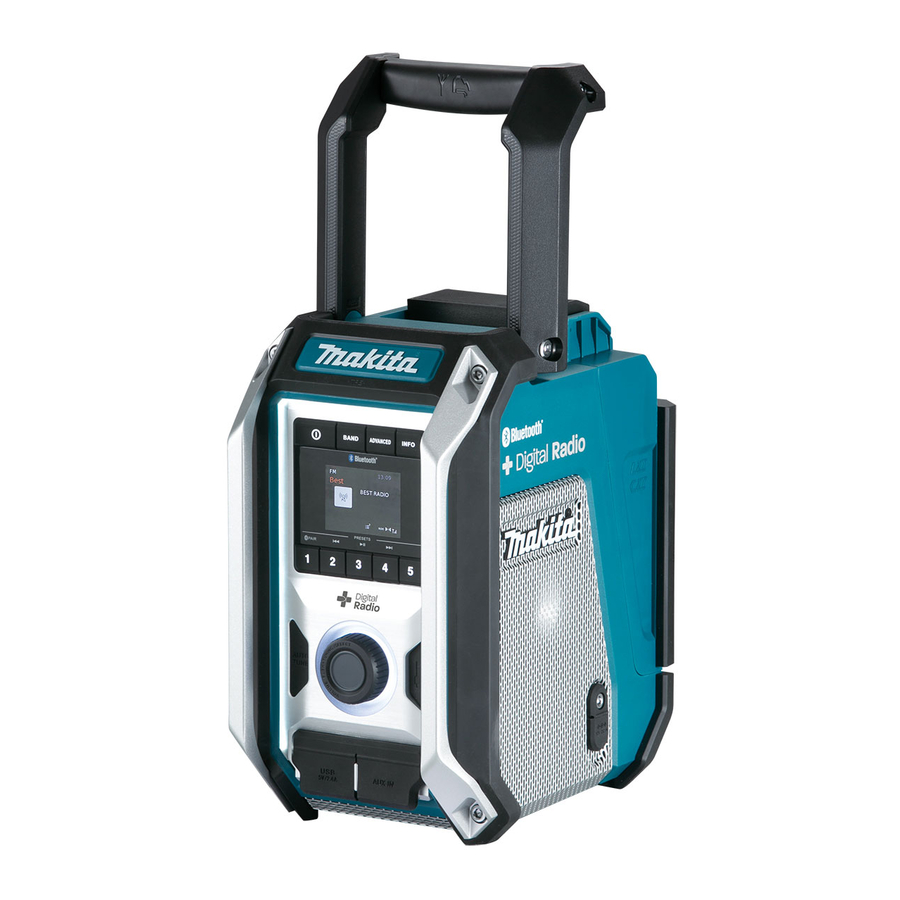
- Page 3 ENGLISH (Original instructions) EXPLANATION OF GENERAL VIEW (Fig. 1) 1. Handle/Built-in antenna(DAB/FM) 13. Preset 5 button 2. Battery compartment locker 14. Preset 4/Next track/Fast-forward button 3. Battery compartment cover (covering battery 15. Volume/Tuning control/Select knob cartridge) 16. EQ control button 4.
-
Page 4: Important Safety Instructions
9. Avoid body contact with grounded surfaces such SYMBOLS as pipes, radiators, ranges and refrigerators. There The following show the symbols used for the equipment. is an increased risk of electric shock if your body is Be sure that you understand their meaning before use. grounded. -
Page 5: Specific Safety Rules
● Replace only with the same or equivalent type. 1. Before using battery cartridge, read all instructions ● Only use genuine Makita batteries. Use of non- and cautionary markings on (1) battery charger, (2) battery, and (3) product using battery. -
Page 6: Operating Time
OPERATING TIME The suitable battery packs for this radio listed as the following table. The following table indicates the operating time on a single charge. AT SPEAKERS OUTPUT = 100mW Battery cartridge voltage Unit: Hour (Approximately) Battery capacity In Bluetooth + USB 10.8V –12Vmax 14.4V In Radio or AUX... - Page 7 INSTALLATION AND POWER SUPPLY (FIG.2) CAUTION: ● Be careful not to pinch your fingers when opening and closing the battery cover. ● Return the battery compartment locker to the original position, after installing or removing battery cartridge. If not, battery cartridge may accidentally fall out of the radio, causing injury to you or someone around you.
-
Page 8: Listening To The Radio
● Use the AC power adaptor supplied with the product or Note: specified by Makita only. The DAB antenna is built into the handle. When operating ● Do not hold the power supply cable and plug by your the radio, please straighten the handle properly above the radio to get better reception. - Page 9 d. Frequency and Displays the frequency and channel Maximum compression applied. channel number for the currently tuned DAB Medium compression applied. station. No compression applied. e. Signal error/ Displays the signal error and strength 1. When in DAB mode, press the Advanced setting button strength for the station being listened to.
-
Page 10: Miscellaneous Settings
possible hearing damage, do not listen at high volume remains in force until changed or until a system reset. levels for long periods. Stereo/Mono setting – FM 8. To switch off your radio press the Power button. If the FM radio station being listened to has a weak signal, Manual tuning –... - Page 11 4. Rotate the Tuning control knob to select “DD-MM- Makita website. YYYY” or “MM-DD-YYYY” date format. Press the 1. Using the micro USB cable (not supplied) to connect Tuning control knob to confirm the setting.
-
Page 12: Listening To Music Via Bluetooth Streaming
Press the Tuning control knob to device again to the radio. confirm the setting. ● If “DMR115” shows in your Bluetooth device list but 5. Rotate the Tuning control knob to select “Bass” setting. your device cannot connect with it, please delete the Press the Tuning control knob to enter the setting. -
Page 13: Auxiliary Input Socket
● Physical obstacles, other wireless devices or AUXILIARY INPUT SOCKET electromagnetic devices may affect the connection A 3.5mm Auxiliary input socket is provided at the front quality. ● Bluetooth connectivity performance may vary of your radio to permit an audio signal to be fed into the unit from an external audio device such as a MP3 or CD depending on the connected Bluetooth devices. -
Page 14: Specifications
SPECIFICATIONS Power requirements DC 12V 2.5A, center pin AC power adaptor positive Battery Slide battery: 10.8V-18V FM87.50-108MHz (0.05MHz/step) Frequency coverage DAB/DAB+ 174.928-239.200 MHz DAB/DAB+ Channel block DAB (Band III) 5A-13F Compatible standard DAB/DAB+ ® Bluetooth ® (The Bluetooth word mark and logos are registered trademarks owned by Bluetooth SIG, Inc.) 5.0 Certified Bluetooth version... - Page 15 Jan-Baptist Vinkstraat 2, Makita Europe N.V. 3070 Kortenberg, Belgium 3-11-8, Sumiyoshi-cho, Makita Corporation Anjo, Aichi 446-8502 Japan DMR115-ENEU-1906 www.makita.com 3A81d75Z20000...