Table of Contents
Advertisement
Advertisement
Table of Contents

Related Manuals for Miele DG 408 Series


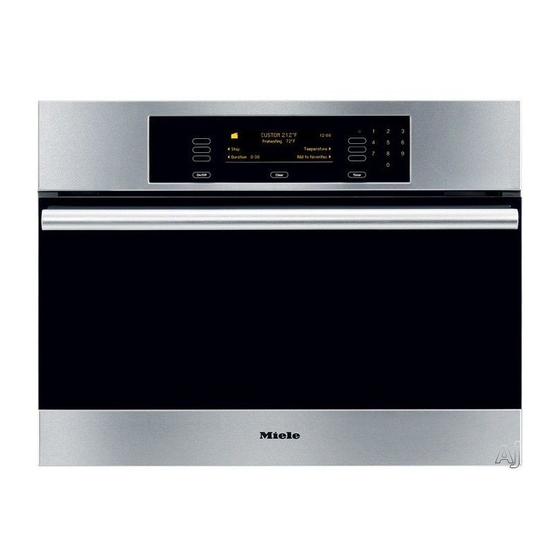
Summary of Contents for Miele DG 408 Series
- Page 1 TECHNICAL INFORMATION DG 408x Steam Ovens 2012 Miele USA ©...
-
Page 2: Table Of Contents
DG 408x Steam Ovens Technical Information Table of Contents A Warning and Safety Instructions ................5 B Modification History ....................5 C Technical Data ......................5 D Component Layouts ....................7 1 Appliance Overviews .................... - Page 3 DG 408x Steam Ovens Technical Information Appliance Generates Strong Steam at First Use, or After a Power Outage/Reset 32 Appliance Appears to be Incorrectly Installed ............32 Steam Generator is Discolored ................32 4 Service ........................
- Page 4 DG 408x Steam Ovens Technical Information Figure 010-1: Ducting ......................12 Figure 010-2: Screws on the Bottom of the Appliance (DG 4080) ........15 Figure 010-3: Appliance Retaining Screws ................15 Figure 010-4: Side Panel Screws (DG 4082 Shown) ............16 Figure 010-5: Rear Panel Screws ..................
-
Page 5: Warning And Safety Instructions
DG 408x Steam Ovens Technical Information Warning and Safety Instructions Service may only be carried out by qualified electricians and in keeping with the appropriate safety regulations. All applicable guidelines, accident prevention rules and laws must be observed. Before service or repair work can be started, all cables carrying power must be safely disconnected. -
Page 6: Table C-1: Us Data Sheet
DG 408x Steam Ovens Technical Information Model DG 4080 DG 4082 Design Steam oven Steam oven Construction Built-in Built-in Door stop Bottom Bottom Dimensions Appliance dimensions H x W x D 18.0” x 23.4” x 18.2” 17.9” x 23.6” x 16.7” Depth with door open 30.8“... -
Page 7: D Component Layouts
DG 408x Steam Ovens Technical Information Component Layouts Appliance Overviews Figure D-1: Overview of DG 4080 (Front View) 1 Door release 2 Control panel 3 Air vent 4 Door seal 5 Steam channel 6 Steam generator (with insert) 7 Steam generator compartment 8 Steam generator electrical connection 9 Runners (4) 10 Steam port... -
Page 8: Figure D-2: Overview Of Dg 4082 (Front View)
DG 408x Steam Ovens Technical Information Figure D-2: Overview of DG 4082 (Front View) 1 Control panel 2 Door release 3 Air vent 4 Door seal 5 Steam channel 6 Steam generator compartment 7 Steam generator (with insert) 8 Steam generator electrical connection 9 Runners 10 Steam port 11 Drip channel... -
Page 9: Electrical Components
DG 408x Steam Ovens Technical Information Electrical Components Figure D-3: DG 4080 Electrical Components (2F1, 2F8) Floor heater temperature regulator (239°F) and temperature limiter (402°F) (S4) Door contact switch (R28) Floor heater (1N1) Selection electronic EW (2N1) Control electronic EPX (3N1) Power electronic EPL –... -
Page 10: Figure D-4: Dg 4082 Electrical Components
DG 408x Steam Ovens Technical Information Figure D-4: DG 4082 Electrical Components (2F1, 2F8) Floor heater temperature regulator (239°F) and temperature limiter (402°F) (R28) Floor heater (S4) Door contact switch (2N1) Control/selection electronic EW (R30/10) PT1000 temperature sensor (1N1) Power electronic (X2) Power socket (Z2) -
Page 11: 010 Casing
DG 408x Steam Ovens Technical Information Casing DG 4080 DG 4082... -
Page 12: Technical Data
DG 408x Steam Ovens Technical Information Technical Data Cooling fan M2 (DG 4080) or M2/1 (DG 4082) Voltage 240VAC, 60Hz Output Table 010-1: Cooling Fan Data Function Air and Vapor Ducting Figure 010-1: Ducting Steam inlet Oven vent hose Cool air/vapor outlet Cool air inlet Release element for steam reduction (door opener) Steam vent hose... -
Page 13: Fan Coastdown
DG 408x Steam Ovens Technical Information to the air duct (Figure 010-1, Item 2). The fan draws in cool air through the air vents in the housing, and the cool air mixes with the vapors in the air duct (Figure 010-1, Item 4). The cool air/vapor mix is expelled through the gap between the fascia and the oven cavity (Figure 010-1, Item 3). -
Page 14: Fault Repair
When combining the appliance with the built-in EGW 4000 warming drawer, the clearance on top to the cabinetry is too small. This becomes particularly obvious if other Miele machines are built in next to it. Cause: Two screw heads at the bottom of the appliance meet exactly with rivets at the top of the EGW 4000 warming drawer. -
Page 15: Service
DG 408x Steam Ovens Technical Information Figure 010-2: Screws on the Bottom of the Appliance (DG 4080) Service Removing the Appliance from its Niche 1. Open the door. 2. Take the steam generator and equipment out of the oven cavity. 3. -
Page 16: Rear Panel Removal
DG 408x Steam Ovens Technical Information Figure 010-4: Side Panel Screws (DG 4082 Shown) Rear Panel Removal 1. Uninstall the appliance. See Section 010-4.1. 2. Remove the T20 screws securing the rear panel (Figure 010-5, Item 1). 3. Remove the rear panel. Figure 010-5: Rear Panel Screws... -
Page 17: Fan (M2/1) Removal
DG 408x Steam Ovens Technical Information Fan (M2/1) Removal 1. Uninstall the appliance. See Section 010-4.1. 2. Remove the right side panel. See Section 010-4.2. 3. Remove the screws securing the fan (Figure 010-6, Item 1). 4. Remove the C-clip securing the blower wheel (Figure 010-6, Item 2). 5. -
Page 18: Removing The Door Contact Switch (S24)
DG 408x Steam Ovens Technical Information Removing the Door Contact Switch (S24) 1. Uninstall the appliance. See Section 010-4.1. 2. Remove the left side panel. See Section 010-4.2. 3. Unhook the door spring (Figure 010-8, Item 1). 4. Remove the two Phillips screws (Figure 010-8, Item 2). 5. -
Page 19: Figure 010-9 Fascia Fastening Screws
DG 408x Steam Ovens Technical Information Figure 010-9 Fascia Fastening Screws 6. Remove the fascia/support panel assembly. 7. Disconnect plug ST3 from the electronic, and remove wiring from the top of the ducting. 8. Remove 17 screws (Figure 010-10, Item 1). 9. -
Page 20: Fan Wheel Removal
DG 408x Steam Ovens Technical Information Figure 010-11: Silicone Seal 11. Slide the upper duct assembly back to release the front lugs from the frame (Figure 010-12). Lift the assembly upward to remove. Figure 010-12: Front Lugs Warning! When re-installing the upper air duct, the silicone has to be replaced to seal the air duct. -
Page 21: 020 Door
DG 408x Steam Ovens Technical Information Door DG 4080 DG 4082... -
Page 22: Fault Repair
DG 408x Steam Ovens Technical Information Fault Repair Whistling Sound When Closing the Door Symptom: When the oven is in a heated state and the oven door is opened and then closed again, there is a whistling sound. Cause: When opening the door, cool air gets into the oven cavity. The cool air expands in the hot oven cavity and slightly increases the pressure when the door is closed. -
Page 23: Installing The Door
DG 408x Steam Ovens Technical Information Installing the Door 1. Place the door on the hinges and slide it down. 2. Open the door fully. 3. Push the clamps back down. 4. Close the door. Door Disassembly 1. Door removal 2. -
Page 24: 030 Oven Cavity
DG 408x Steam Ovens Technical Information Oven Cavity DG 4080 DG 4082... -
Page 25: Technical Data
DG 408x Steam Ovens Technical Information Technical Data Floor heater (R28) Output power 300W (DG 4080); 350W (DG 4082) Table 030-1: Floor Heater Data PT 1000 Temperature Sensor (R30 or R30/10) Temperature (°C) Temperature (°F) Resistance (Ω) 1000 1078 1097 1117 1194 1385... -
Page 26: Removing The Floor Heater Element (R28)
DG 408x Steam Ovens Technical Information Remove the temperature sensor from its seal. Figure 030-1: Temperature Sensor R30 Removal (DG 4080) 7. DG 4082: Disconnect the ground wire from the temperature sensor, and the temperature sensor wiring harness from the power electronic. See Figure 030-2, Item 1. -
Page 27: Figure 030-3: Floor Heater Cover
DG 408x Steam Ovens Technical Information 3. Tip the appliance onto its back. 4. Use a pair of diagonal cutters to snip the lugs securing the cover to the base (Figure 030-3). Remove the cover. Figure 030-3: Floor Heater Cover 5. -
Page 28: Floor Heater Temperature Regulator (2F1) And Temperature Limiter (2F8) Removal
DG 408x Steam Ovens Technical Information Figure 030-5: Floor Heater Removal (DG 4082) Note: Make sure that the seal is installed properly when installing the heater element. When re-installing the cover, rotate it slightly (one-quarter turn) and screw into place. To prevent adverse operation make note of (or mark) all electrical connections during disassembly, so they can be connected correctly during reassembly. -
Page 29: 040 Water Tank
DG 408x Steam Ovens Technical Information Water Tank... -
Page 30: Technical Data
DG 408x Steam Ovens Technical Information Technical Data Steam Generator Heater (1R25, 2R25) Output 2 x 1.1kW Temperature Regulator (1F1) 410°F (DG 4080); 410°F or 482°F (DG Threshold Temperature 4082) Temperature Limiter (1F8) 568°F (DG 4080); 568°F or 604°F (DG Threshold Temperature 4082) Table 040-1: Steam Generator Data... -
Page 31: Fault Repair
DG 408x Steam Ovens Technical Information elements (1R25, 2R25), (Figure 040-1, Item 6), to heat the water in the inner chamber. As water evaporates from the inner chamber, it is automatically replenished with water from the outer chamber. 2.1.2 Water Level The electronic continuously displays the water level, which is automatically calculated by the electronic using a float (with magnet) within the steam generator (Figure 040-1, Items 3 and 3a) and the water level float switch... -
Page 32: Appliance Generates Strong Steam At First Use, Or After A Power Outage/Reset
DG 408x Steam Ovens Technical Information Appliance Generates Strong Steam at First Use, or After a Power Outage/Reset Cause: Automatic altitude adjustment. After the first cooking process at 212°F and as part of the descaling process, the boiling temperature is automatically adjusted to the altitude of the location. -
Page 33: Service
DG 408x Steam Ovens Technical Information Service Checking the Resistance of the Steam Generator Heater (1R25, 2R25) Note: The steam generator heater consists of two heaters (240V/1100W), which are switched in parallel. 1. Heater element 1R25: Using an ohmmeter, measure the resistance between contact points 2 and 3 (Figure 040-3). -
Page 34: Removing The Steam Generator Heater (1R25, 2R25)
DG 408x Steam Ovens Technical Information Removing the Steam Generator Heater (1R25, 2R25) Note: The heater is integrated into the steam generator housing. Should a heater element require replacement, the steam generator must be replaced as an assembly. The heater elements are not replaced separately. 1. -
Page 35: Removing The Steam Duct And Seal
DG 408x Steam Ovens Technical Information Figure 040-5: Steam Generator Temperature Regulator and Temperature Limiter Removing the Steam Duct and Seal 1. Open the door. 2. Remove the steam generator. 3. Remove the insert from the steam generator housing. 4. Remove the bottom cover from the housing by gently pulling the cover from the assembly while using a screwdriver to release the locking tabs, as shown in Figure 040-4. -
Page 36: Accessing The Tank Float/Float Switch Actuating Magnet (Dg 4080 Only)
DG 408x Steam Ovens Technical Information Accessing the Tank Float/Float Switch Actuating Magnet (DG 4080 Only) 1. Open the door. 2. Remove steam generator. 3. Remove the insert from steam generator housing. 4. Remove the top cover retaining screw (Figure 040-7, Item 1). 5. -
Page 37: Removing The Steam Generator Present Switch (S84)
DG 408x Steam Ovens Technical Information Figure 040-8: Reed Contact Float Removing the Steam Generator Present Switch (S84) 1. Take the steam generator and equipment out of the oven cavity. 2. Uninstall the appliance. See Section 010-4.1. 3. Remove the right side panel. See Section 010-4.2. 4. -
Page 38: 060 Fascia, Electronics
DG 408x Steam Ovens Technical Information Fascia, Electronics DG 4080 DG 4082... -
Page 39: Function
Technical Information Function Optical Interface The appliance has an optical interface to support diagnosis. See Figure 060- 1, Item 1. The interface can be located with the “Find Optical Interface” function of the Miele diagnostic support (MDU). Figure 060-1 Optical Interface... -
Page 40: Electronics Overview
DG 408x Steam Ovens Technical Information Electronics Overview 2.2.1 Main Electronic Figure 060-2: EPL700 Electronic – Overview (DG 4080 Shown) -
Page 41: Warming Function
DG 408x Steam Ovens Technical Information 2.2.2 AC Power Electrical Circuit Figure 060-3: AC Power Electrical Circuit (DG 4080) Warming Function If the appliance is not switched off after a cooking process, foods can be kept warm at 158°F for a maximum of 15 minutes. In this case the display shows “Warming”. -
Page 42: Fault Repair
DG 408x Steam Ovens Technical Information 11-minute descaling phase: The un-calibrated appliance is heated to 194°F (90°C); the calibrated appliance, 203°F (95°C). Rinse and refill with fresh water. 10-minute calibration phase: The boiling temperature is adjusted for the altitude of the location. See the operating manual for the descale procedure. - Page 43 DG 408x Steam Ovens Technical Information Cause: Steam generator not seated correctly or seal not sufficiently lubricated. Remedy: Lubricate the seal with silicone grease (part no. 05132001). Slide the steam generator in properly, over the guides in the floor of the housing.
-
Page 44: F44 - Control Electronic/Power Electronic Interface Is Faulty
DG 408x Steam Ovens Technical Information F44 - Control Electronic/Power Electronic Interface is Faulty Symptom: Faulty communication between control electronic and power electronic. Cause: Defective connectors or plugs between the electronics. Remedy: Check connectors and plugs. Replace as necessary. Cause: Defective control electronic. -
Page 45: Cooking Program Does Not Start
DG 408x Steam Ovens Technical Information 3.10 Cooking Program Does Not Start Cause: Start is set to “manual”. Start can be set as manual or automatic. If start was set to “manual”, then the start of a cooking cycle has to be confirmed manually. Remedy: Set start to “automatic”;... -
Page 46: When Touching A Keypad, Tone Is Too Loud Or Too Soft
DG 408x Steam Ovens Technical Information 3.16 When Touching a Keypad, Tone is Too Loud or Too Soft Cause: Keypad volume can be programmed. The keypad tone can also be turned on or off. Remedy: See Section 060-4.1. 3.17 System Lock Is Possible/Not Possible Symptom: The lock icon is not present in the display. - Page 47 DG 408x Steam Ovens Technical Information Option Available Settings Factory Setting deutsch If the language setting is english LANGUAGE english incorrect, follow the espanol icon to locate the francais language menu. italiano polski português CLOCK The time of day can be entered using the numeric keypad.
- Page 48 DG 408x Steam Ovens Technical Information Option Available Settings Factory Setting WARMING If the appliance is not Off for DG 4080; on FUNCTION shut off after a cooking for DG 4082 process, foods can be kept warm at 158°F for a maximum of 15 minutes.
-
Page 49: Service Mode
DG 408x Steam Ovens Technical Information Option Available Settings Factory Setting RESTART or NEW A restart is like a power disconnection. All START settings made by the customer, as well as favorites and the fault memory, remain. RESET The descaling lock is cleared. Warning! After DESCALING or service is completed, the appliance has to DESCALE -... -
Page 50: Table 060-3: Service Mode
DG 408x Steam Ovens Technical Information Option Setting/Activation Description INDEX CONTROL e.g., EPX 702 The ID number of the control ELECTRONIC ID33795 V.2 electronic (2N1) is indicated. POWER e.g., EPL 700 The ID number of the power ELECTRONIC ID00796 electronic (3N1) is indicated. FAULT INDEX “No Faults”... -
Page 51: Removing The Fascia Panel Assembly
DG 408x Steam Ovens Technical Information Back: Touch the Timer (Clear) pad. Save: Touch the Off pad. Removing the Fascia Panel Assembly 4.3.1 DG 4080 1. Take the steam generator and equipment out of the oven cavity. 2. Uninstall the appliance. See Section 010-4.1. 3. -
Page 52: Figure 060-5: Control Electronic Screws (Dg 4080)
DG 408x Steam Ovens Technical Information Figure 060-5: Control Electronic Screws (DG 4080) Note: The fascia panel is firmly attached to the display electronic and can only be replaced together as an assembly. 4.3.2 DG 4082 1. Take the steam generator and equipment out of the oven cavity. 2. -
Page 53: Removing The Control Electronic (Dg 4082)
DG 408x Steam Ovens Technical Information 6. Disconnect the ribbon cable connecting the selection electronic to the control electronic. 7. Take off the fascia panel. Note: The fascia panel is firmly attached to the selection electronic and can only be replaced as a complete assembly. Removing the Control Electronic (DG 4082) 1. -
Page 54: Technical Service Bulletins
DG 408x Steam Ovens Technical Information Technical Service Bulletins DG 4080 Steam Oven Displays F20 in a New Installation When a DG 4080 displays F20 (heating fault), there are several possible causes outlined in the service documentation. If you should encounter a new steam oven with persistent F20 problems, please ascertain that the unit is properly connected to 240 volts. - Page 55 DG 408x Steam Ovens Technical Information Position Setting / Activation Description / Result TEST The buzzer goes silent. FUNCTION The display alternately lights up and DISPLAY TEST goes dark. The steam generator is inserted. The STEAM Closed steam generator switch (S84) is SENSOR GENERATOR switched on.