Table of Contents
Advertisement
Advertisement
Table of Contents

Related Manuals for Dell SC4020


Summary of Contents for Dell SC4020
- Page 1 Dell Storage Center SC4020 Storage System Deployment Guide...
- Page 2 © 2016 Dell Inc. All rights reserved. This product is protected by U.S. and international copyright and intellectual property laws. Dell and the Dell logo are trademarks of Dell Inc. in the United States and/or other jurisdictions. All other marks and names mentioned herein may be trademarks of their respective companies.
-
Page 3: Table Of Contents
........... 16 SC4020 Storage System Front-Panel Features and Indicators ............ 17 SC4020 Storage System Back-Panel Features and Indicators ........19 SC4020 Storage System Storage Controller Features and Indicators ....................24 SC4020 Storage System Drives .................. 24 SC4020 Storage System Drive Numbering ..................25... - Page 4 ...................... 37 Installation Safety Precautions ......................38 Electrical Safety Precautions .....................38 Electrostatic Discharge Precautions ......................38 General Safety Precautions ....................39 Install the Storage System in a Rack ..................42 Installing Hard Drives in a Storage System ............. 42 Installing Hard Drives in an SC200/SC220 Expansion Enclosure ............
- Page 5 Back-End SAS Redundancy ......................89 Back-End SAS Port Types ....90 Back-End Connections for an SC4020 Storage System Without Expansion Enclosures ..... 90 Back-End Connections for an SC4020 Storage System With Expansion Enclosures ........91 SC4020 Storage System and One SC200/SC220 Expansion Enclosure ....
- Page 6 Add the SC280 Expansion Enclosure to the A-Side of the Chain ..........154 Add the SC280 Expansion Enclosure to the B-Side of the Chain Adding an SC280 Expansion Enclosure to an SC4020 Deployed with One SC280 Expansion ............................156 Enclosure ..........156 Check the Disk Count before Adding an Expansion Enclosure ........
- Page 7 ........................171 Dell 12Gb SAS Cards ......................171 Cisco Fibre Channel Cards ........................171 Emulex HBA Cards ........................172 QLogic HBA Cards ....................173 Settings by Server Operating System ..........................173 Citrix XenServer ........................173 Versions 5.x to 6.2 ........................... 173 Version 6.5 ............................174...
-
Page 8: About This Guide
August 2016 Added information about 12 Gb front-end SAS connectivity Audience The information provided in this Deployment Guide is intended for use by Dell installers and Dell business partners. Contacting Dell Dell provides several online and telephone-based support and service options. Availability varies by country and product, and some services might not be available in your area. - Page 9 • Dell Storage Center SC4020 Storage System Service Manual Provides information about an SC4020 storage system, such as hardware features, replacing field replaceable components, and technical specifications. • Dell Storage Center SC4000 Series Virtual Media Update Instructions Describes how to update Storage Center software on an SC4000 series storage system using virtual media.
-
Page 10: About The Sc4020 Storage System
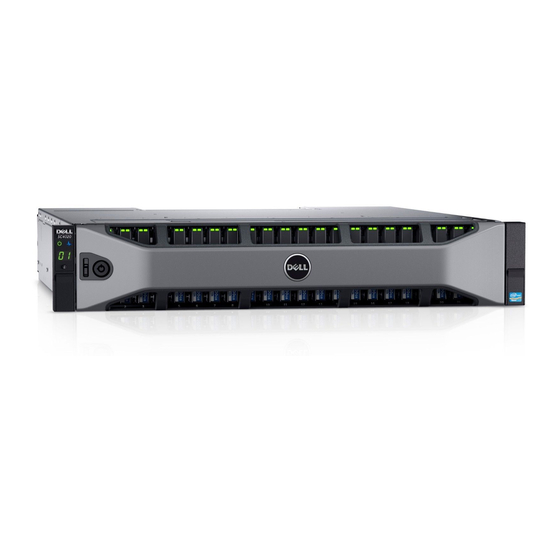
SC4020 Storage System The SC4020 is a 2U storage system that supports a minimum of 7 and a maximum of 24 internal 2.5-inch hot-swappable SAS hard drives installed horizontally side-by-side. The SC4020 storage system contains two redundant power supply/cooling fan modules and two storage controllers with multiple I/O ports that provide communication with servers and expansion enclosures. -
Page 11: Storage Center Architecture Options
NOTE: An SC4020 storage system cannot be connected to both SC200/SC220 expansion enclosures and SC280 expansion enclosures at the same time. The SC4020 supports only a single chain of SC200/SC220 expansion enclosures or a single chain of SC280 expansion enclosures. -
Page 12: Storage Center Communication
Fibre Channel ports through one or more Fibre Channel switches. Connecting host servers directly to the storage system, without using Fibre Channel switches, is not supported. When replication is licensed, the SC4020 can use the front-end Fibre Channel ports to replicate data to another Storage Center. •... - Page 13 When replication is licensed, the SC4020 can use the front-end iSCSI ports to replicate data to another Storage Center. • SAS: Hosts or servers access storage by connecting directly to the storage system SAS ports. NOTE: When replication is licensed on an SC4020 the SC4020 can use the embedded MGMT and REPL ports to perform iSCSI replication to another Storage Center.
- Page 14 (Service and installation only) SC4020 Storage System with iSCSI Front-End Connectivity An SC4020 storage system with iSCSI front-end connectivity may communicate with the following components of a Storage Center system. Figure 5. Storage System with iSCSI Front-End Connectivity Item Description...
-
Page 15: Back-End Connectivity
SC4020 Storage System with Front-End SAS Connectivity An SC4020 storage system with front-end SAS connectivity may communicate with the following components of a Storage Center system. Figure 6. Storage System with Front-End SAS Connectivity Item Description Speed Communication Type Server with SAS host bus adapters (HBAs) -
Page 16: System Administration
Serial port: Used for initial configuration of the storage controllers. In addition, it is used to perform support only functions when instructed by Dell Technical Support. NOTE: Do not throw away the serial cables that come with the SC4020. Keep the serial cables with the SC4020 for troubleshooting purposes. -
Page 17: Sc4020 Storage System Back-Panel Features And Indicators
— Can have up to 24 2.5-inch SAS hard drives. SC4020 Storage System Back-Panel Features and Indicators The back panel of the SC4020 contains the storage controller indicators and power supply indicators. Figure 8. SC4020 Storage System Back-Panel View Item... - Page 18 PSU • Blinking amber: PSU is in programming mode Power socket (2) — Accepts a standard computer power cord. Power switch (2) — Controls power for the storage system. Each PSU has one switch. About the SC4020 Storage System...
-
Page 19: Sc4020 Storage System Storage Controller Features And Indicators
The following figures show the features and indicators on a storage controller with Fibre Channel front- end ports. Figure 9. SC4020 Storage System Storage Controller with Four 8 Gb Fibre Channel Front-End Ports Figure 10. SC4020 Storage System Storage Controller with Two 16 Gb Fibre Channel Front-End Ports... - Page 20 LEDs for the two 16 Gb Fibre Channel ports: • All off: No power • All on: Booting up • Blinking amber: 4 Gbps activity • Blinking green: 8 Gbps activity • Blinking yellow: 16 Gbps activity About the SC4020 Storage System...
- Page 21 SC4020 Storage System Storage Controller with iSCSI Front-End Ports The following figure shows the features and indicators on a storage controller with iSCSI front-end ports. Figure 11. SC4020 Storage System Storage Controller with Two 10 GbE iSCSI Front-End Ports Item Control/Feature...
- Page 22 SC4020 Storage System Storage Controller with Front-End SAS Ports The following figure shows the features and indicators on a storage controller with front-end SAS ports. Figure 12. SC4020 Storage System Storage Controller with Four 12 Gb Front-End SAS Ports About the SC4020 Storage System...
- Page 23 One USB 3.0 connector Diagnostic LEDs (8) — • Green LEDs 0–3: Low byte hex POST code • Green LEDs 4–7: High byte hex POST code Serial port (3.5 mm mini Not for customer use jack) About the SC4020 Storage System...
-
Page 24: Sc4020 Storage System Drives
The Storage Center identifies drives as XX-YY, where XX is the unit ID of the storage system, and YY is the drive position inside the storage system. The SC4020 holds up to 24 drives, which are numbered from left to right starting from 0. Figure 14. SC4020 Storage Systems Drive Numbering... -
Page 25: Sc200/Sc220 Expansion Enclosure Overview
Off: Both power supplies are off • On steady green: At least one power supply is providing power to the expansion enclosure Hard drives — Dell Enterprise Plus Drives • SC200: Up to 12 3.5-inch hard drives About the SC4020 Storage System... -
Page 26: Sc200/Sc220 Expansion Enclosure Back-Panel Features And Indicators
— Contains a 700 W power supply and fans that provide module (2) cooling for the expansion enclosure. Enclosure management — EMMs provide the data path and management module (2) functions for the expansion enclosure. About the SC4020 Storage System... -
Page 27: Sc200/Sc220 Expansion Enclosure Emm Features And Indicators
Blinking amber (two times per sequence): Expansion enclosure is unable to communicate with other expansion enclosures • Blinking amber (four times per sequence): Firmware update failed • Blinking amber (five times per sequence): Firmware versions are different between the two EMMs About the SC4020 Storage System... -
Page 28: Sc200/Sc220 Expansion Enclosure Drives
SC200/SC220 Expansion Enclosure Drives Dell Enterprise Plus hard disk drives (HDDs) and Dell Enterprise Plus solid-state drives (SSDs) are the only drives that can be installed in SC200/SC220 expansion enclosures. If a non-Dell Enterprise Plus drive is installed, the Storage Center prevents the drive from being managed. -
Page 29: Sc280 Expansion Enclosure Overview
LEDs) • Drawer Fault – Amber — Sideplane card fault or drive failure causing loss of availability or redundancy • Logical Fault – Amber (steady) — Host indicated drive fault About the SC4020 Storage System... - Page 30 LED) • Drawer 1 Fault – Amber — Drive, cable, or sideplane fault has occurred in drawer 1 • Drawer 2 Fault – Amber — Drive, cable, or sideplane fault has occurred in drawer 2 About the SC4020 Storage System...
-
Page 31: Sc280 Expansion Enclosure Back-Panel Features And Indicators
2.8 kW power supply that provides power for the expansion enclosure. Optional cable — Locations for optional cable retention brackets. retention positions Power switch (2) — Controls power for the expansion enclosure. There is one switch for each power supply. About the SC4020 Storage System... - Page 32 There are four SAS PHYs per SAS port. indicators • Off: SAS PHY is not connected • Steady green: SAS PHY is connected, but no activity • Blinking green: SAS PHY is not connected plus activity About the SC4020 Storage System...
- Page 33 Figure 26. SC280 Expansion Enclosure PSU Features and Indicators Item Control/Feature Icon Description Release latch — Press the release latch to remove the PSU. PSU fault • Amber (steady) — PSU fault, PSU not supplying power About the SC4020 Storage System...
-
Page 34: Sc280 Expansion Enclosure Drives
Dell Enterprise Plus hard disk drives (HDDs) and Dell Enterprise solid-state drives (eSSDs) are the only drives that can be installed in SC280 expansion enclosures. If a non-Dell Enterprise Plus drive is installed, the Storage Center prevents the drive from being managed. -
Page 35: Sc280 Expansion Enclosure Drive Numbering
Center identifies drives as XX-YY, where XX is the unit ID of the expansion enclosure, and YY is the drive position inside the expansion enclosure. Figure 28. Hard Drive Drawers and Numbering Bottom drawer Top drawer About the SC4020 Storage System... -
Page 36: Install The Storage Center Hardware
This section describes how to unpack the Storage Center equipment, prepare for the installation, mount the equipment in a rack, and install the drives. Unpack and Inventory the Storage Center Equipment Unpack the storage system and identify the items in your shipment. Figure 29. SC4020 Storage System Components Documentation Storage system Rack rails... -
Page 37: Gather Required Materials
Always follow these safety precautions to avoid injury and damage to Storage Center equipment. If equipment described in this section is used in a manner not specified by Dell, the protection provided by the equipment could be impaired. For your safety and protection, observe the rules described in the following sections. -
Page 38: Electrical Safety Precautions
The resulting electrical discharge can damage electronic components and printed circuit boards. Follow these guidelines to protect your equipment from ESD: • Dell recommends that you always use a static mat and static strap while working on components in the interior of the storage system chassis. •... -
Page 39: Install The Storage System In A Rack
Position a rail at the marked location at the front of the rack and insert the two rail pins into the pin holes. NOTE: Dell recommends using two people to install the rail, one at the front of the rack and one at the back. - Page 40 Insert a screw into the rack mounting screw hole at the front of the rack and tighten the screw to secure the rail to the rack. Figure 31. Insert the Screw into the Rack Mounting Screw Hole Extend the rail to fit the rack and insert the two rail pins into the pin holes at the marked location at the back of the rack.
- Page 41 Figure 33. Mount the SC4020 Storage System Chassis Secure the storage system chassis to the rack using the mounting screws within each chassis ear. a. Lift the latch on each chassis ear to access the screws. b. Tighten the screws to secure the chassis to the rack.
-
Page 42: Installing Hard Drives In A Storage System
Installing Hard Drives in a Storage System The SC4020 storage system is shipped with the drives installed. Empty drive blanks are inserted in any unused slots. Prerequisites Use these instructions if you have purchased new hard drives for your SC4020 storage system. - Page 43 Start on the left side of the expansion enclosure with slot 0 and install drives from left to right. Slide the drive into the slot until the hard drive carrier contacts the backplane. Figure 36. Installing Dell Enterprise Plus Hard Drives in an SC4020 Figure 37. Installing Dell Enterprise Plus Hard Drives in an SC4020 Close the hard drive carrier handle to lock the hard drive in place.
-
Page 44: Installing The Hard Drives In An Sc280 Expansion Enclosure
Insert drive blanks into any open slots in the expansion enclosure. All the drive slots in the expansion enclosure must be filled with a drive or drive blank. Installing the Hard Drives in an SC280 Expansion Enclosure Hard drives are connected to the backplane of the drawers using Disk Drive in Carrier (DDIC) hard drive carriers. - Page 45 CAUTION: To maintain proper airflow, the drawers must be populated with drives in whole rows (each drawer has three rows of 14 drives). The number of populated rows between drawers must not differ by more than one. Populate the rows from the front to the rear of the drawer.
- Page 46 If the yellow line is visible, remove the drive and re-install it. CAUTION: If the DDIC fails to latch, do not use it and request a replacement from Dell Technical Support. If a faulty DDIC unlatches within a closed drawer, you may not be able to open the drawer.
- Page 47 Figure 41. Closing the Drawer WARNING: Keep fingers clear of the chassis as the drawer is closed. Repeat the previous steps for the top drawer. Install the Storage Center Hardware...
-
Page 48: Connect The Front-End Cabling
Front-end cabling refers to the connections between the storage system and external devices such as host servers or another Storage Center. Front‐end connections can be made using Fibre Channel, iSCSI, or SAS interfaces. Dell recommends connecting the storage system to host servers using the most redundant option available. - Page 49 A fault domain must contain a single type of transport media (FC or iSCSI, but not both). • Dell recommends configuring at least two connections from each storage controller to each Fibre Channel fabric (fault domain) or Ethernet network (fault domain).
-
Page 50: Legacy Mode
Example Virtual Port Mode Configuration The following figure shows a Storage Center in virtual port mode that is connected to switches and servers. Figure 42. Virtual Port Mode Cabling Example Server 1 Server 2 FC switch 1 FC switch 2 Storage system Storage controller 1 Storage controller 2... - Page 51 The following requirements must be met to configure a storage system in legacy mode. Table 3. Legacy Mode Requirements Requirement Description On an SC4020 with FC front-end ports, each storage controller must have Storage controller front- two FC front-end ports to connect two paths to each Fibre Channel fabric. end ports On an SC4020 with iSCSI front-end ports, each storage controller must have two iSCSI front-end ports to connect two paths to each Ethernet network.
-
Page 52: Types Of Redundancy For Front-End Connections
Figure 43. Legacy Mode Cabling Example Server 1 Server 2 Switch 1 Switch 2 Storage system Storage controller 1 Storage controller 2 NOTE: To use multiple paths simultaneously, the server must be configured to use MPIO. Types of Redundancy for Front-End Connections Front-end redundancy is achieved by eliminating single points of failure that could cause a server to lose connectivity to the Storage Center. -
Page 53: Failover Behavior
To use MPIO, configure MPIO on the server prior to connecting the server to the Storage Center. To configure MPIO on a host server, see the Dell Storage Center Best Practices document on the Dell TechCenter site (http://en.community.dell.com/techcenter/storage/) that corresponds to the server operating system. -
Page 54: Fibre Channel Zoning
Use the zoning concepts discussed in this section to plan the front-end connectivity before starting to cable the storage system. Dell recommends creating zones using a single initiator host port and multiple Storage Center ports. WWN Zoning Guidelines When WWN zoning is configured, a device may reside on any port, or change physical ports and still be visible, because the switch is seeking a WWN. -
Page 55: Cabling San-Attached Host Servers
NOTE: Some ports may not be used or dedicated for replication, however ports that are used must be in these zones. Cabling SAN-Attached Host Servers An SC4020 storage system with Fibre Channel or iSCSI front-end ports connects to host servers through Fibre Channel or Ethernet switches. •... - Page 56 Next steps Install or enable MPIO on the host servers. NOTE: For the latest best practices, see the Dell Storage Center Best Practices document on the Dell TechCenter site (http://en.community.dell.com/techcenter/storage/). Virtual Port Mode — Two Fibre Channel Fabrics with Dual 8 Gb 4-Port Storage Controllers...
- Page 57 Storage controller 1 Storage controller 2 Next steps Install or enable MPIO on the host servers. NOTE: For the latest best practices, see the Dell Storage Center Best Practices document on the Dell TechCenter site (http://en.community.dell.com/techcenter/storage/). Connect the Front-End Cabling...
- Page 58 Virtual Port Mode — One Fibre Channel Fabric with Dual 16 Gb 2-Port Storage Controllers Use one Fibre Channel (FC) fabric with virtual port mode to prevent an unavailable port or storage controller from causing a loss of connectivity between the host servers and a storage system with dual 16 Gb 2-port storage controllers.
- Page 59 NOTE: For the latest best practices, see the Dell Storage Center Best Practices document on the Dell TechCenter site (http://en.community.dell.com/techcenter/storage/). Virtual Port Mode — One Fibre Channel Fabric with Dual 8 Gb 4-Port Storage Controllers Use one Fibre Channel (FC) fabric with virtual port mode to prevent an unavailable port or storage controller from causing a loss of connectivity between the host servers and a storage system with dual 8 Gb 4-port storage controllers.
- Page 60 Next steps Install or enable MPIO on the host servers. NOTE: For the latest best practices, see the Dell Storage Center Best Practices document on the Dell TechCenter site (http://en.community.dell.com/techcenter/storage/). Legacy Mode — Two Fibre Channel Fabrics with Dual 16 Gb 2-Port Storage Controllers...
- Page 61 Next steps Install or enable MPIO on the host servers. NOTE: For the latest best practices, see the Dell Storage Center Best Practices document located on the Dell TechCenter (http://en.community.dell.com/techcenter/storage/). Legacy Mode — Two Fibre Channel Fabrics with Dual 8 Gb 4-Port Storage Controllers...
- Page 62 Storage controller 1 Storage controller 2 Next steps Install or enable MPIO on the host servers. NOTE: For the latest best practices, see the Dell Storage Center Best Practices document located on the Dell TechCenter (http://en.community.dell.com/techcenter/storage/). Connect the Front-End Cabling...
- Page 63 Legacy Mode — One Fibre Channel Fabric with Dual 16 Gb 2–Port Storage Controllers Use one Fibre Channel (FC) fabric with legacy mode to prevent an unavailable storage controller from causing a loss of connectivity between host servers and a storage system with dual 16 Gb 2-port storage controllers.
- Page 64 Next steps Install or enable MPIO on the host servers. NOTE: For the latest best practices, see the Dell Storage Center Best Practices document located on the Dell TechCenter (http://en.community.dell.com/techcenter/storage/). Legacy Mode — One Fibre Channel Fabric with Dual 8 Gb 4–Port Storage Controllers...
- Page 65 Storage controller 2 Next steps Install or enable MPIO on the host servers. NOTE: For the latest best practices, see the Dell Storage Center Best Practices document located on the Dell TechCenter (http://en.community.dell.com/techcenter/storage/). Labeling the Front-End Cables Label the front-end cables to indicate the storage controller and port to which they are connected.
-
Page 66: Connecting To Iscsi Host Servers
Install the iSCSI host bus adapters (HBAs) or iSCSI network adapters, install the drivers, and make sure that the latest supported firmware is installed. • Contact your solution provider for a list of supported iSCSI HBAs. • Refer to the Dell Storage Compatibility Matrix for a list of supported HBAs. Connect the Front-End Cabling... - Page 67 • If the host server is a Windows or Linux host: a. Install the iSCSI HBAs or network adapters dedicated for iSCSI traffic in the host servers. NOTE: Do not install iSCSI HBAs or network adapters from different vendors in the same server.
- Page 68 Next steps Install or enable MPIO on the host servers. NOTE: For the latest best practices, see the Dell Storage Center Best Practices document on the Dell TechCenter site (http://en.community.dell.com/techcenter/storage/). Virtual Port Mode — One iSCSI Network with Dual 10 GbE 2-Port Storage Controllers...
- Page 69 Storage controller 1 Storage controller 2 Next steps Install or enable MPIO on the host servers. NOTE: For the latest best practices, see the Dell Storage Center Best Practices document on the Dell TechCenter site (http://en.community.dell.com/techcenter/storage/). Connect the Front-End Cabling...
- Page 70 Ethernet switches. Guidelines for Using SFP+ Transceiver Modules The SC4020 storage system supports the use of SFP+ transceiver modules for 10 GbE iSCSI connectivity. Before installing SFP+ transceiver modules and fiber-optic cables, read the following guidelines. CAUTION: When handling static-sensitive devices, take precautions to avoid damaging the product from static electricity.
- Page 71 Keep the protective cover in the transceiver module until you are ready to connect it to a fiber optic cable. Cleaning Fiber-Optic Cable Connectors Dell recommends using a can of compressed air, methanol or isopropyl alcohol, and a lens tissue to clean fiber-optic cable connectors. Prerequisites •...
- Page 72 If streaks or contaminants still exist, repeat the cleaning process using a fresh lens tissue. Immediately install the protective dust cover over the end of the cable to avoid recontamination. Keep the protective cover on the end of the cable until you are ready to connect it. Install an SFP+ Transceiver Module Complete the following steps to install an SFP+ transceiver module in a 10 GbE iSCSI storage controller.
- Page 73 Insert the fiber-optic cable into the transceiver module until the latching mechanism clicks. Insert the other end of the fiber-optic cable into the SFP+ transceiver module of an Ethernet switch. Remove an SFP+ Transceiver Module Complete the following steps to remove an SFP+ transceiver module from a 10 GbE iSCSI storage controller.
- Page 74 Figure 58. Remove the SFP+ Transceiver Module SFP+ transceiver module Fiber-optic cable connector Labeling the Front-End Cables Label the front-end cables to indicate the storage controller and port to which they are connected. Prerequisites Locate the pre-made front-end cable labels that shipped with the storage system. About this task Apply cable labels to both ends of each cable that connects a storage controller to a front-end fabric or network, or directly to host servers.
-
Page 75: Cabling Direct-Attached Host Servers
Apply a matching label to the other end of the cable. Cabling Direct-Attached Host Servers An SC4020 storage system with front-end SAS ports connects directly to host servers. Each host bus adapter (HBA) can attach to one SAS fault domain. -
Page 76: Four Servers Connected To Dual 12 Gb 4-Port Sas Storage Controllers
If a storage controller becomes unavailable, the volume becomes active on the other storage controller. The state of the paths on the available storage controller are set to Active/Optimized and the state of the paths on the other storage controller are set to Standby. When the storage controller becomes available again and the ports are rebalanced, the volume moves back to its preferred storage controller and the ALUA states are updated. -
Page 77: Four Servers (Two Hbas Per Server) Connected To Dual 12 Gb 4-Port Sas Storage Controllers
Next steps Install or enable MPIO on the host servers. NOTE: For the latest best practices, see the Dell Storage Center Best Practices document on the Dell TechCenter site (http://en.community.dell.com/techcenter/storage/). Four Servers (Two HBAs Per Server) Connected to Dual 12 Gb 4-Port SAS... - Page 78 Steps Connect fault domain 1 (shown in orange) to host server 1. a. Connect a SAS cable from storage controller 1: port 1 to the first SAS HBA on host server 1. b. Connect a SAS cable from storage controller 2: port 1 to the second SAS HBA host server 1. Connect fault domain 2 (shown in blue) to host server 2.
-
Page 79: Two Servers Connected To Dual 12 Gb 4-Port Sas Storage Controllers
NOTE: For the latest best practices, see the Dell Storage Center Best Practices document on the Dell TechCenter site (http://en.community.dell.com/techcenter/storage/). Two Servers Connected to Dual 12 Gb 4-Port SAS Storage Controllers A storage system with four 12 Gb front-end SAS ports on each storage controller can connect up to two host servers, if each host server has two SAS HBAs with dual SAS ports. -
Page 80: Labeling The Front-End Cables
Storage controller 2 Next steps Install or enable MPIO on the host servers. NOTE: For the latest best practices, see the Dell Storage Center Best Practices document on the Dell TechCenter site (http://en.community.dell.com/techcenter/storage/). Labeling the Front-End Cables Label the front-end cables to indicate the storage controller and port to which they are connected. -
Page 81: Cabling The Ethernet Management Port
Figure 64. Attach Label to Cable Wrap the label around the cable until it fully encircles the cable. The bottom of each label is clear so that it does not obscure the text. Figure 65. Wrap Label Around Cable Apply a matching label to the other end of the cable. Cabling the Ethernet Management Port To manage Storage Center, the Ethernet management (MGMT) port of each storage controller must be connected to an Ethernet switch that is part of the management network. -
Page 82: Labeling The Ethernet Management Cables
Label the Ethernet management cables that connect each storage controller to an Ethernet switch. Prerequisites Locate the Ethernet management cable labels that shipped with the SC4020 storage system. About this task Apply cable labels to both ends of each Ethernet management cable. -
Page 83: Cabling The Embedded Ports For Iscsi Replication
Figure 68. Wrap Label Around Cable Apply a matching label to the other end of the cable. Cabling the Embedded Ports for iSCSI Replication If the Storage Center is licensed for replication, the management port and replication port can be connected to an Ethernet switch and used for iSCSI replication. -
Page 84: Cabling The Management Port And Replication Port For Iscsi Replication
Storage controller 1 Storage controller 2 To configure the fault domains and ports using, see the Dell Storage Client Administrator’s Guide. To configure replication, refer to the Dell Enterprise Manager Administrator’s Guide. Cabling the Management Port and Replication Port for iSCSI Replication If replication is licensed, the management (MGMT) port and replication (REPL) port can be used to replicate data to another Storage Center. -
Page 85: Cabling The Embedded Ports For Iscsi Host Connectivity
A storage system that is configured for virtual port mode can use the management port and replication port for front-end iSCSI host connectivity. Dell recommends using two switches dedicated for iSCSI traffic. Refer to the iSCSI Settings appendix for a list of recommend and required settings. - Page 86 To configure the fault domains and ports using, see the Dell Storage Client Administrator’s Guide. Next steps Install or enable MPIO on the host servers. NOTE: For the latest best practices, see the Dell Storage Center Best Practices document on the Dell TechCenter site (http://en.community.dell.com/techcenter/storage/). Connect the Front-End Cabling...
-
Page 87: Two Iscsi Networks Using The Embedded Ethernet Ports On A Storage System With Iscsi Storage Controllers
Two iSCSI Networks Using the Embedded Ethernet Ports on a Storage System with iSCSI Storage Controllers Use two iSCSI networks to prevent an unavailable port, switch or storage controller from causing a loss of connectivity between the host servers and a storage system with dual iSCSI storage controllers. About this task This configuration includes two fault domains, two iSCSI networks, and two Ethernet switches. - Page 88 To configure the fault domains and ports, see the Dell Storage Client Administrator’s Guide. Next steps Install or enable MPIO on the host servers. NOTE: For the latest best practices, see the Dell Storage Center Best Practices document on the Dell TechCenter site (http://en.community.dell.com/techcenter/storage/). Connect the Front-End Cabling...
-
Page 89: Connect The Back-End Cabling
You can connect multiple SC200/SC220 expansion enclosures to an SC4020 by cabling the expansion enclosures in series. You can also connect up to two SC280 expansion enclosures to an SC4020 by cabling the expansion enclosures in series. However, the SC4020 does not support SC200/SC220 expansion enclosures and SC280 expansion enclosures on the same SAS chain. -
Page 90: Back-End Connections For An Sc4020 Storage System Without Expansion Enclosures
Back-End Connections for an SC4020 Storage System Without Expansion Enclosures When you deploy an SC4020 storage system without expansion enclosures, you must interconnect the storage controllers using SAS cables. In a single-controller system, do not connect SAS back-end ports to each other. -
Page 91: Sc4020 Storage System And One Sc200/Sc220 Expansion Enclosure
Storage system Storage controller 1 Storage controller 2 Expansion enclosure The following table describes the back-end SAS connections from an SC4020 storage system to one SC200/SC220 expansion enclosure. Table 8. SC4020 Storage System Connected to One SC200/SC220 Expansion Enclosure Path... -
Page 92: Sc4020 Storage System And Two Or More Sc200/Sc220 Expansion Enclosures
Storage controller 1 Storage controller 2 Expansion enclosure 1 Expansion enclosure 2 The following table describes the back-end SAS connections from an SC4020 storage system to two SC200/SC220 expansion enclosures. Table 10. SC4020 Storage System Connected to Two SC200/SC220 Expansion Enclosures Path... -
Page 93: Back-End Connections For An Sc4020 With Sc280 Expansion Enclosures
Figure 77. SC4020 and One SC280 Expansion Enclosure Storage system Storage controller 1 Storage controller 2 Expansion enclosure The following table describes the back-end SAS connections from an SC4020 to one SC280 expansion enclosure. Table 11. SC4020 Connected to One SC280 Expansion Enclosure Path Connections Chain 1: A Side (Orange) Storage controller 1: port A to the expansion enclosure: left EMM, port C. -
Page 94: Sc4020 And Two Sc280 Expansion Enclosures
Storage system Storage controller 1 Storage controller 2 Expansion enclosure 1 Expansion enclosure 2 The following table describes the back-end SAS connections from an SC4020 to two SC280 expansion enclosures. Table 12. SC4020 Connected to Two SC280 Expansion Enclosures Path Connections Chain 1: A Side (Orange) 1. -
Page 95: Label The Back-End Cables
Path Connections Expansion enclosure 1: right EMM, port A to expansion enclosure 2: right EMM, port B. Expansion enclosure 2: right EMM, port C to storage controller 1: port B. Label the Back-End Cables Label the back-end cables that interconnect the storage controllers or label the back-end cables that connect the storage system to the expansion enclosures. - Page 96 Figure 80. Wrap Label Around Cable Apply a matching label to the other end of the cable. Connect the Back-End Cabling...
-
Page 97: Set Up Storage Center Software
Set up Storage Center Software Perform the following tasks to set up the Storage Center software. Connect the storage controllers to the Ethernet management network. Connect to the serial port on the top storage controller. Connect power cables and turn on the storage system. Configure the top storage controller with prejoin information. -
Page 98: Required Documents
If the storage system is installed with expansion enclosures, connect power cables to the expansion enclosure chassis and turn on the expansion enclosures as described in the Dell Storage Center SC4020 Storage System Getting Started Guide. After the expansion enclosures are powered on, connect power to the storage system chassis and turn on the storage system. - Page 99 Figure 82. Turn On the Storage System When the SC4020 storage system is powered on, a delay occurs while the storage system prepares to start up. During the first minute, the only indication that the storage system is powered on are the LEDs on the storage controllers.
-
Page 100: Establish A Serial Connection To The Top Storage Controller
Figure 83. Storage Controller Diagnostic LEDs Establish a Serial Connection to the Top Storage Controller Create a serial connection from a computer to the top storage controller. Use the supplied RS232 serial cable (DB9 female to 3.5 mm male adapter) to connect a computer to the 3.5 mm serial port on the top storage controller. -
Page 101: Configure The Top Storage Controller
Configure the Top Storage Controller Configure the top storage controller (storage controller 1) with the information provided in the pre- installation documents. Prerequisites Create a serial connection from a computer to the storage controller, as described in Establish a Serial Connection to the Top Storage Controller. - Page 102 DNS Server 1 0.0.0.0 **************************************************************** HSN not configured. eth0 IPv4 address not configured. When all issues identified above are corrected, type: '-sm -go' to continue normal processing. *************************************************************** Configure storage controller 1 with the information required to prejoin the storage controller. a.
-
Page 103: Establish A Serial Connection To The Bottom Storage Controller
b. Run the following commands to set the BMC IP address, netmask, and gateway. platform bmc set ip <IP address> platform bmc set netmask <netmask> platform bmc set gateway <gateway address> Example: platform bmc set ip 169.254.0.1 platform bmc set netmask 255.255.255.0 platform bmc set gateway 0.0.0.0 Run the following command to verify that the prejoin configuration information is correct. -
Page 104: Configure The Bottom Storage Controller
Table 16. Serial Connection Settings Setting Value Emulation VT220 Column Mode Line Wrapping Connection Serial Port Connection Type Direct Baud Rate 115200 Parity None Data Bits Stop Bits Flow Control XON/XOFF Related links Troubleshooting the Serial Connection to a Storage Controller Module Configure the Bottom Storage Controller Configure the bottom storage controller (storage controller 2) with the information provided in the pre- installation documents. - Page 105 Steps In the terminal emulator, press Enter several times to initiate the connection. The terminal displays the prompt <SafeMode> sn0> to indicate that the storage controller is in Safe Mode. Run the following command to enter the shellacess developer mode. shellaccess developer Run the following command to display the prejoin configuration information that must be specified.
-
Page 106: Start The Storage Center Startup Wizard
255.255.255.0 platform bmc set gateway 0.0.0.0 NOTE: Dell recommends setting the BMC IP addresses of the storage controllers in sequential order. Using the BMC IP address of the top storage controller, set the BMC IP address of the bottom storage controller to the next IP address in sequence. - Page 107 About this task NOTE: The front-end SAS ports of an SC4020 storage system cannot be configured using the Storage Center Startup Wizard. To configure the front-end SAS ports of an SC4020 storage system, see the Dell SC4020 Storage System Front-End SAS Configuration Tech Note.
- Page 108 Figure 87. Storage Center Login Page Enter the default user name and password: • User: Admin • Password: mmm NOTE: The user name and password are case-sensitive. Click Login. The password expired page opens. Figure 88. Change Admin Password Enter a new password for the Admin user. a.
-
Page 109: Completing The Storage Center Startup Wizard
Configure the Storage Center using the startup wizard. License Agreement Page Use the License Agreement page to read and accept the Dell End User License Agreement (EULA). Enter a customer name and title of the person that is approving the license in the Approving Customer Name and Approving Customer Title fields. -
Page 110: Create Disk Folder Page
Figure 89. Load License Page Select the license file, then click Load License. The Startup Wizard displays a message when the license is successfully loaded. • If the license loads successfully, the message The license submission has completed successfully is displayed. •... - Page 111 • To select all disks, click Select All. NOTE: Dell recommends selecting all available disks to maximize the benefits of Data Progression. c. Click Continue. The Startup Wizard displays a page that allows you to select the disks to designate as hot spares.
- Page 112 (Optional) Click Advanced to configure advanced disk folder options. The wizard displays options for redundancy and datapage size. NOTE: The default managed disk folder settings are appropriate for most sites. If you are considering changing the default settings, contact Dell Technical Support for advice. Set up Storage Center Software...
- Page 113 For Dell Enterprise Plus solid-state drives (SSDs), if a tier contains at least six managed disks of which one is 1.6 TB, then that tier and all tiers below it are set to dual redundant storage by default.
-
Page 114: Add Controller Page
(such as video streaming). CAUTION: When considering using either the 512 KB or 4 MB datapage settings, contact Dell Technical Support for advice on balancing resources and to understand the impact on performance. d. To configure the disk folder to use RAID 0, select the Prepare Disk Folder for non-redundant storage checkbox. - Page 115 Figure 96. Rebalancing Local Ports on Both Storage Controllers When the join process completes, the Time Settings page opens. If the join process fails to complete, a prejoin error page opens. Figure 97. Joining Process Failed To manually add the bottom storage controller, click Manually Add Controller. Related links Joining Storage Controller Modules Manually Joining Storage Controllers Manually...
- Page 116 Figure 98. Top Storage Controller IPv6 Address Values If the management network uses IPv6, configure the following IPv6 addresses: a. Enter the IPv6 IP address in the IPv6 Address field. b. Enter the IPv6 prefix length in IPv6 Prefix Length field. c.
- Page 117 The Storage Center Setup Wizard uses a predefined IP address and subnet mask for the Ether 1 (IPC) Interface. The IP address values of the Ether 1 (IPC) Interface cannot be changed. NOTE: In the SC4020 storage system, the IPC connection between the storage controllers is internal. The IPC connection does not require external cabling.
-
Page 118: Time Settings Page
Figure 100. Add Storage Controller Confirmation Click Join Now. Wait for the process to complete and for the storage controller to reboot. The storage controller takes several minutes to reboot. When complete, the Time Settings page opens. Time Settings Page Use the Time Settings page to set the system time for the Storage Center. -
Page 119: System Setup Page
To configure time using a Network Time Protocol (NTP) server, select Use NTP Time Server, then enter the fully qualified domain name (FQDN) or IP address of an NTP server. NOTE: Accurate time synchronization is critical for replications. Dell recommends using NTP to set the system time. For more information, see: http://support.ntp.org/bin/view/... - Page 120 Figure 102. System Setup Page Enter the Storage Center management IPv4 address in the Management IP Address (IPv4) field. If the management network uses IPv6, enter the Storage Center management IPv6 address in the Management IP Address (IPv6) field. Click Continue. The wizard prompts you to enable or disable the read and write cache. Figure 103.
-
Page 121: Configure Smtp Page
If the system has SEDs, the Key Management Server configuration page opens. Configure SMTP Page Use the Configure SMTP page to configure the SMTP mail server and the sender email address. About this task The SMTP server enables alert message emails to be sent to Storage Center users. Steps In the SMTP Mail Server field, enter the IP address or fully qualified domain name of the SMTP email server. -
Page 122: Update Setup Page
Figure 105. Advanced SMTP Settings a. Verify that the Enable SMTP E-mail checkbox is selected. b. In the SMTP Mail Server field, verify the IP address or fully qualified domain name of the SMTP mail server. Modify this field if necessary. c. -
Page 123: User Setup Page
Figure 106. Update Setup Page The Storage Center update options are: • Do not automatically check for software updates: Select this option to disable automatic checking for updates. When this option is selected, manually check for updates by selecting Storage Management → System → Update → Check for Update. For more information, see the Storage Center System Manager Administrator’s Guide. -
Page 124: Configure Io Cards Page
Figure 107. User Setup Page Click Continue. The Configure IO Cards page opens. Configure IO Cards Page Use the Configure IO Cards page to configure network settings for iSCSI ports. Enter the IP address for each iSCSI port in the IP Address field. Figure 108. -
Page 125: Configure Ports Page
Use the Configure Ports page to configure the local ports for the Storage Center. Select the connectivity modes and configure the front-end and back-end ports. NOTE: To configure the front-end SAS ports of an SC4020 storage system, see the Dell SC4020 Storage System Front-End SAS Configuration Tech Note. - Page 126 Figure 110. Configure Ports Page Click Continue to configure the selected operational mode. Figure 111. Selected Operational Modes Configured Click Continue to begin port initialization. The Startup Wizard verifies the configuration and displays a confirmation page when the port configuration is generated. Set up Storage Center Software...
- Page 127 Figure 112. Port Configuration Generated Click Continue. The page that is displayed depends on whether there are any iSCSI transports in virtual port mode. If there are iSCSI transports in virtual port mode, a page is displayed asking for IP address attributes for the control port of the new iSCSI fault domain.
- Page 128 Related links Configure Local Ports Configure Local Ports Configure the front-end ports and back-end ports on an SC4020. The following table shows the port purposes for transport types in Virtual Port Mode. Table 17. Port Purposes in Virtual Port Mode...
- Page 129 Use the FC tab to create fault domains and configure the Fibre Channel ports. About this task The Startup Wizard displays FC, iSCSI, and SAS tabs for an SC4020 with Fibre Channel front-end ports. NOTE: The embedded iSCSI ports can be used for replication to another Storage Center or used for front‐end connectivity to host servers.
- Page 130 Configure FC Ports in Legacy Mode Use the FC tab to create fault domains and configure the Fibre Channel ports. About this task The Startup Wizard displays the FC, iSCSI, and SAS tabs for an SC4020 with front-end Fibre Channel ports. Steps Click the FC tab.
- Page 131 Use the iSCSI tab on the Configure Ports page to create fault domains and configure the iSCSI ports. About this task The Startup Wizard displays the FC, iSCSI, and SAS tabs for an SC4020 with Fibre Channel front-end ports. NOTE: The embedded iSCSI ports can be used for replication to another Storage Center or used for front‐end connectivity to host servers.
- Page 132 f. Click Continue. The dialog box displays a summary. g. Click Create Now. h. Repeat the previous steps to create additional fault domains as needed. When you are finished creating fault domains, click Return. The iSCSI tab opens. To use the embedded iSCSI port for iSCSI replication, configure the port numbered Slot 3/Port 2 on each storage controller.
- Page 133 Use the iSCSI tab on the Configure Ports page to create fault domains and configure the iSCSI ports. About this task The Startup Wizard displays the iSCSI and SAS tabs for an SC4020 with iSCSI front-end ports. NOTE: The embedded iSCSI ports can be used for replication to another Storage Center or used for front‐end connectivity to host servers.
- Page 134 Figure 120. iSCSI Ports Tab in Virtual Ports Mode Create a fault domain for each pair of redundant iSCSI ports. a. Click Edit Fault Domains. The wizard displays a list of the currently defined fault domains. b. Click Create Fault Domain. A dialog box opens. c.
- Page 135 Figure 121. Configure iSCSI Front-End Ports To use the embedded REPL port for iSCSI replication, configure the port numbered Slot 3/Port 2 on each storage controller. a. Set the Purpose field to Front End. b. Set the Fault Domain field to the appropriate fault domain. c.
- Page 136 The front-end SAS ports of an SC4020 storage system cannot be configured using the Storage Center Startup Wizard. To configure the front-end SAS ports of an SC4020 storage system, see the Dell SC4020 Storage System Front-End SAS Configuration Tech Note.
-
Page 137: Generate Ssl Cert Page
Figure 124. SAS Ports Tab Set the Purpose field of the SAS ports to Back End. (Optional) Type a descriptive name in the User Alias field. Generate SSL Cert Page Use the Generate SSL Cert page to generate a new Secure Socket Layer (SSL) certificate or import an existing certificate for the Storage Center. - Page 138 Figure 125. Generate SSL Cert Page Import a Certificate If an SSL certificate has already been generated, import the certificate. Prerequisites The public key file must be in x.509 format. Steps Click Import. An file window opens. Figure 126. Import Certificate Browse to the location of the public key (*.pem) file and select it.
- Page 139 Browse to the location of the private key file (*.pem). Click Next. A Summary page is displayed that identifies the key files selected. Click Save to import the certificates. Generate a New Certificate Create a new certificate if you do not have a certificate that contains the Storage Center host name or IP address.
-
Page 140: Perform Post-Setup Tasks
Dell Storage Manager Client 2016 is required to perform the tasks described in the following sections. Install Dell Storage Manager Client 2016 on a computer with network access to the storage system. For more information, see the Dell Storage Manager 2016 Installation Guide. -
Page 141: Verify Connectivity And Failover
Configure a localhost to access the Storage Center using the Set up localhost on Storage Center wizard. Use the Dell Storage Manager Client to connect to the Storage Center. Create a 25 GB test volume named TestVol1. a. Click the Storage tab. -
Page 142: Test Storage Controller Failover
CAUTION: When testing storage controller failover, do not restart a storage controller by pulling it out and reseating it. Instead, restart the storage controller using Dell Storage Manager Client. NOTE: Before restarting a storage controller in this task, put the storage controller into maintenance mode. -
Page 143: Clean Up Test Volumes
Storage Center. About this task To facilitate easy identification in the rack, use the Dell Storage Manager Client to match each expansion enclosure ID to a Service Tag. Locate the Service Tag on the back of each expansion enclosure and then label it with the correct expansion enclosure ID. -
Page 144: Next Steps
Next Steps After installation is complete, perform some basic tasks to configure Storage Center for your environment. These tasks are configuration-dependent, so some might not apply to your site. • Manage unmanaged disks • Add Storage Center users; including configuring Lightweight Directory Access Protocol (LDAP) •... -
Page 145: A Adding Or Removing An Expansion Enclosure
Steps Cable the expansion enclosures together to form a chain. Use the Dell Storage Manager Client to connect to the Storage Center. Check the disk count of the Storage Center system before adding the expansion enclosures. Turn on the expansion enclosures. When the drives spin up, make sure that the front panel and power status LEDs show normal operation. -
Page 146: Cable The Expansion Enclosures Together
Repeat the previous steps to connect additional expansion enclosures to the chain. Check the Disk Count before Adding an Expansion Enclosure Use the Dell Storage Manager Client to determine the number of drives that are currently accessible to the Storage Center. -
Page 147: Add The Sc200/Sc220 Expansion Enclosures To The B-Side Of The Chain
Figure 129. Remove the A-Side Cable from the Storage Controllers Storage system Storage controller 1 Storage controller 2 Cable the expansion enclosures to the A-side of the chain. a. Connect a SAS cable from storage controller 1: port A to the first expansion enclosure in the chain, top EMM, port A. - Page 148 Figure 131. Remove the B-Side Cable from the Storage Controllers Storage system Storage controller 1 Storage controller 2 Expansion enclosure 1 Expansion enclosure 2 Cable the expansion enclosures to the B-side of the chain. a. Connect a SAS cable from storage controller 1: port B to expansion enclosure 2: bottom EMM, port B.
-
Page 149: Adding An Sc200/Sc220 Expansion Enclosure To An Sc4020 Deployed With Expansion Enclosures
SAS chain. Steps Use the Dell Storage Manager Client to connect to the Storage Center. Check the disk count of the Storage Center system before adding the expansion enclosure. -
Page 150: Check The Disk Count Before Adding An Expansion Enclosure
Label the new back-end cables. Check the Disk Count before Adding an Expansion Enclosure Use the Dell Storage Manager Client to determine the number of drives that are currently accessible to the Storage Center. Connect to the Storage Center using the Dell Storage Manager Client. -
Page 151: Add An Sc200/Sc220 Expansion Enclosure To The B-Side Of The Chain
Connect the A-side cable that was disconnected in step 2 to the new expansion enclosure (2): top EMM, port B. Figure 134. Connect A-Side Cables to the New Expansion Enclosure Storage system Storage controller 1 Storage controller 2 Expansion enclosure 1 New expansion enclosure (2) Add an SC200/SC220 Expansion Enclosure to the B-Side of the Chain Connect the expansion enclosure to one side of the chain at a time to maintain drive availability. - Page 152 Figure 135. Disconnect B-Side Cable from the Existing Expansion Enclosure Storage system Storage controller 1 Storage controller 2 Expansion enclosure 1 New expansion enclosure (2) Use a new SAS cable to connect expansion enclosure 1: bottom EMM, port B to the new expansion enclosure (2): bottom EMM, port A.
-
Page 153: Adding An Sc280 Expansion Enclosure To An Sc4020 Deployed Without Expansion Enclosures
Label the new back-end cables. Check the Disk Count before Adding an Expansion Enclosure Use the Dell Storage Manager Client to determine the number of drives that are currently accessible to the Storage Center. Connect to the Storage Center using the Dell Storage Manager Client. -
Page 154: Add The Sc280 Expansion Enclosure To The A-Side Of The Chain
Add the SC280 Expansion Enclosure to the A-Side of the Chain Connect the expansion enclosure to one side of the chain at a time to maintain drive availability. Remove the A-side cable (shown in orange) that connects storage controller 1: port A to storage controller 2: port B. - Page 155 Figure 139. Remove the B-Side Cable from the Storage Controllers Cable the expansion enclosure to the B-side of the chain. a. Connect a SAS cable from storage controller 1: port B to the expansion enclosure: right EMM, port B. b. Connect a SAS cable from storage controller 2: port A to the expansion enclosure: right EMM, port C.
-
Page 156: Adding An Sc280 Expansion Enclosure To An Sc4020 Deployed With One Sc280 Expansion Enclosure
Label the new back-end cables. Check the Disk Count before Adding an Expansion Enclosure Use the Dell Storage Manager Client to determine the number of drives that are currently accessible to the Storage Center. Connect to the Storage Center using the Dell Storage Manager Client. -
Page 157: Add A Second Sc280 Expansion Enclosure To The A-Side Of The Chain
Add a Second SC280 Expansion Enclosure to the A-Side of the Chain Connect the expansion enclosure to one side of the chain at a time to maintain drive availability. Turn on the expansion enclosure being added. When the drives spin up, make sure that the front panel and power status LEDs show normal operation. -
Page 158: Add A Second Sc280 Expansion Enclosure To The B-Side Of The Chain
Figure 142. Connect the A-Side Cables to the New Expansion Enclosure Storage system Storage controller 1 Storage controller 2 Expansion enclosure 1 New expansion enclosure (2) Add a Second SC280 Expansion Enclosure to the B-Side of the Chain Connect an expansion enclosure to one side of the chain at a time to maintain drive availability. Disconnect the B-side cable (shown in blue) from the expansion enclosure: right EMM, port B. - Page 159 Figure 143. Disconnect the B-Side Cable from the Expansion Enclosure Storage system Storage controller 1 Storage controller 2 Expansion enclosure 1 New expansion enclosure (2) Connect the B-side cable that was disconnected in the previous step to the new expansion enclosure (2): right EMM, port C.
-
Page 160: Label The Back-End Cables
Figure 144. Connect B Side Cables to the New Expansion Enclosure Storage system Storage controller 1 Storage controller 2 Expansion enclosure 1 New expansion enclosure (2) Label the Back-End Cables Label the back-end cables that interconnect the storage controllers or label the back-end cables that connect the storage system to the expansion enclosures. -
Page 161: Removing An Expansion Enclosure From A Chain Currently In Service
CAUTION: Before removing an expansion enclosure, make sure that your data is backed up. Use the Dell Storage Manager Client to connect to the Storage Center. Release the disks in the expansion enclosure. -
Page 162: Release The Disks In The Expansion Enclosure
Reconnect the B-side cables to exclude the expansion enclosure from the chain. Release the Disks in the Expansion Enclosure Use the Dell Storage Manager Client to release the disks in an expansion enclosure before removing the expansion enclosure. About this task Releasing disks causes all of the data to move off the disks. - Page 163 Figure 147. Disconnecting the A-Side Cables from the Expansion Enclosure Storage system Storage controller 1 Storage controller 2 Expansion enclosure 1 Expansion enclosure 2 Connect the A-side cable to expansion enclosure 2: top EMM, port A. Figure 148. Reconnecting the A-Side Cable to the Remaining Expansion Enclosure Storage system Storage controller 1 Storage controller 2...
-
Page 164: Disconnect The Sc200/Sc220 Expansion Enclosure From The B-Side Of The Chain
Expansion enclosure 2 Disconnect the SC200/SC220 Expansion Enclosure from the B-Side of the Chain Disconnect the B-side cables from the expansion enclosure that you want to remove. Disconnect the B-side cable (shown in blue) from expansion enclosure 1: bottom EMM, port A. The A-side cables continue to carry I/O while the B-side is disconnected. -
Page 165: Removing An Sc280 Expansion Enclosure From A Chain Currently In Service
CAUTION: Before removing an expansion enclosure, make sure that your data is backed up. Use the Dell Storage Manager Client to connect to the Storage Center. Release the disks in the expansion enclosure. -
Page 166: Release The Disks In The Expansion Enclosure
Release the Disks in the Expansion Enclosure Use the Dell Storage Manager Client to release the disks in an expansion enclosure before removing the expansion enclosure. About this task Releasing disks causes all of the data to move off the disks. - Page 167 Figure 151. Disconnecting the A-Side Cables from the Expansion Enclosure Storage system Storage controller 1 Storage controller 2 Expansion enclosure Connect the A-side cable to storage controller 2: port B. Figure 152. Connecting the A-Side Cable to Storage Controller 2 Storage system Storage controller 1 Storage controller 2...
-
Page 168: Disconnect The Sc280 Expansion Enclosure From The B-Side Of The Chain
Disconnect the SC280 Expansion Enclosure from the B-Side of the Chain Disconnect the B-side chain from the expansion enclosure. Disconnect the B-side cable (shown in blue) from the expansion enclosure: right EMM, port B. The A-side cable continues to carry I/O while the B-side is disconnected. Remove the B-side cable between storage controller 2: port A and the expansion enclosure: right EMM, port C. - Page 169 Figure 154. Expansion Enclosure Disconnected from the B-Side Cables Storage system Storage controller 1 Storage controller 2 Disconnected expansion enclosure Adding or Removing an Expansion Enclosure...
- Page 170 Adding or Removing an Expansion Enclosure...
-
Page 171: B Hba Server Settings
Storage Center. Settings by HBA Manufacturer Storage Center has been tested to work with servers using Dell, Emulex, and Qlogic HBA cards. NOTE: Emulex and Qlogic HBA cards require additional configuration to improve the connection speeds between the server and the Storage Center. -
Page 172: Qlogic Hba Cards
NodeTimeOut QueueDepth Topology NOTE: For more information regarding the compatibility of an HBA card, see the Dell Storage Compatibility Matrix. For more information about Emulex, see http://www.emulex.com. QLogic HBA Cards Qlogic manufactures HBA cards for iSCSI, Fibre Channel, and FCoE connections. -
Page 173: Settings By Server Operating System
/etc directory. When finished, save the file and reboot the server. The following code provides an example: defaults { user_friendly_names no replace_wwid_whitespace yes dev_loss_tmo 30 NOTE: The default value for the dev_loss_tmo timeout setting is 30; however, Dell recommends that the default is set to 60. HBA Server Settings... -
Page 174: Hp-Ux 11I
HP-UX version 11.21 and earlier does not require changes, however, a Cisco fabric with Persistent FCID enabled is required to survive Dell Storage Center storage system failover or port rebalance. HP-UX version 11.31 works best with Storage Center when Agile Addressing is enabled. With HP-UX version 11.31, Storage Center requires that Agile Addressing be enabled for proper failover of Storage... -
Page 175: Microsoft Mpio Settings
Microsoft MPIO Settings The following settings are recommended for Microsoft Windows Servers with MPIO installed. Recommended MPIO Registry Settings Use the following Registry Editor location to configure the MPIO registry settings. H_Key_Local_Machine/System/CurrentControlSet/Services/mpio/Parameters Table 22. MPIO Registry Settings Field Setting PDORemovePeriod PathRecoveryInterval UseCustomPathRecoveryInterval Recommended iSCSI Initiator Settings... -
Page 176: Version 5.X
Version 5.x Configure these timeout values for servers running RHEL version 5.x. The settings vary based on the manufacturer of the HBA card. Add one of these settings to the end of the file /etc/modprobe.conf based on the manufacturer of the HBA card. -
Page 177: Suse Linux
SuSE Linux Timeout values determine the time a server waits before destroying a connection after losing connectivity. With a single-path configuration that value should be set to 60 seconds to allow the WWN of the failed port to transfer to a port on the other storage system. With a multipath configuration the timeout value should be set to 5 seconds because the ports will fail over immediately. - Page 178 HBA Server Settings...
-
Page 179: C Iscsi Settings
Jumbo Frames and Flow Control Some switches have limited buffer sizes and can support either jumbo frames or flow control, but cannot support both at the same time. If you must choose between the two features, Dell recommends choosing flow control. -
Page 180: Other Iscsi Settings
• QLogic 4010 series cards do not support jumbo frames. Perform the following steps in the Dell Storage Manager Client to display the model number of an iSCSI I/O card: Use the Dell Storage Manager Client to connect to the Storage Center. - Page 181 Setting iSCSI Best Practice • Disable multicast at the switch level for all iSCSI VLANs. Set multicast storm control to enabled (if available) when multicast cannot be disabled. iSCSI Settings...
- Page 182 iSCSI Settings...
-
Page 183: D Troubleshooting Storage Center Deployment
Troubleshooting Storage Center Deployment This section contains troubleshooting steps for common Storage Center deployment issues. Troubleshooting the Serial Connection to a Storage Controller Table 25. Troubleshooting Communication with a Storage Controller Issue Possible Reason Solution • Disconnect and reconnect Unable to connect to a storage Communication problems. -
Page 184: Troubleshooting Storage Center Licenses
Make sure that all the Storage (could be old license file). attempt to apply the license file Center setup steps are followed Contact Dell Technical Support before the storage controllers in order and try again. for a new license file.