LG LRY-517 Owner's Manual
Vcr & dvd recorder
Hide thumbs
Also See for LRY-517:
- Owner's manual (62 pages) ,
- Specifications (2 pages) ,
- Specifications (2 pages)

Related Manuals for LG LRY-517


Summary of Contents for LG LRY-517
- Page 1 VCR & DVD RECORDER OWNER’S MANUAL MODEL: LRY-517 Before connecting, operating or adjusting this product, please read this owner’s manual carefully and completely.
- Page 2 REGULATORY INFORMATION: FCC Part 15 CAUTION This epuipment has been tested and found to comply RISK OF ELECTRIC SHOCK with the limits for a Class B digital device, pursuant to DO NOT OPEN Part 15 of the FCC Rules. These limits are designed to provide reasonable protection against harmful interfer- ence when the product is operated in a residential CAUTION: THESE SERVICING INSTRUC-...
-
Page 3: Important Safety Instructions
IMPORTANT SAFETY INSTRUCTIONS CAUTION: PLEASE READ AND OBSERVE ALL WARNINGS AND INSTRUCTIONS IN THIS OWNER’S MANUAL. AND THOSE MARKED ON THE PRODUCT. RETAIN THIS BOOKLET FOR FUTURE REFERENCE. This product has been designed and manufactured to assure personal safety. Improper use can result in electric shock or fire hazard. - Page 4 INTRODUCTION • Set Password • Country Code Safety Precautions RECORD 25-26 IMPORTANT SAFETY INSTRUCTIONS • Disc Record Mode Table of Contents • VCR Record Mode Overview 6-11 • DV Record Audio Recordable Discs • Auto Chapter Playable Discs DISC 26-28 Disc-related terms •...
- Page 5 Notes on MP3/WMA Recordings Deleting a Title Copying MP3/WMA file(s) If the disc has already been finalized on the disc to Memory Card Using the Title List menu (+RW) Erasing MP3/WMA file(s) or folder(s) Using the Chapter List menu (+RW) from the Memory Card Using the Title List menu (+R) Programmed Playback with Audio CD...
-
Page 6: About The Symbol Display
Introduction About the Symbol Display To ensure proper use of this product, please read this owner’s manual carefully and retain for future refer- “ ” may appear on your TV display during opera- ence. tion and indicates that the function is not permitted by this unit or the disc. -
Page 7: Recordable And Playable Discs
Recordable and Playable Discs DVD-RW (Digital Video Disc - ReWritable): DVD-RW discs can be formatted for VR mode recording or Video mode recording. These Discs can be recorded on repeatedly. Recordings can be erased, then you can record again on the same Disc. [VR mode] Recordings can be extensively edited Playable only on VR mode compatible players (after finalization) -
Page 8: Playable Discs
Playable Discs DVD (8 cm / 12 cm disc) Discs such as movies that can be purchased or rented Video CD (VCD) (8 cm / 12 cm disc) VIDEO CDs or CD-Rs/CD-RWs in VIDEO CD/Super VIDEO CD format Audio CD (8 cm / 12 cm disc) Music CDs or CD-Rs/CD-RWs in music CD format that can be purchased CD-R/CD-RW (8 cm / 12 cm disc) CD-R/CD-RW... -
Page 9: Disc-Related Terms
Disc-related terms PBC: Playback Control (Video CD only) Playback control is available for Video CD (VCD) ver- sion 2.0 disc formats. PBC allows you to interact with DVD ±R / DVD ±RW the system via menus, search functions, or other typi- DVD -R and DVD +R are two different standards for cal computer-like operations. - Page 10 Notes on MP3/WMA Recordings Notes on MP3/WMA Recordings About MP3 • Depending upon the size and number of JPEG files, it could take a long time for the DVD+VCR • An MP3 file is audio data compressed by to read the disc’s contents. If you don’t see an on- using the MPEG1 audio layer-3 file-coding screen display after several minutes, some of the scheme.
-
Page 11: Card Useable On This Unit
Card useable on this unit Maintenance and Service Memory card capacity Refer to the information in this chapter before con- Compact Flash Card (CF) tacting a service technician. Micro Drive (MD) Secure Digital Card (SD) Handling the Unit Multi Media Card (MMC) •... -
Page 12: Front Panel
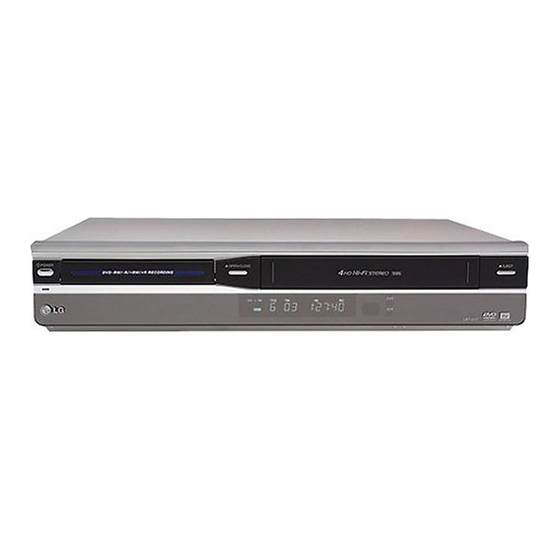
Front Panel j kl mn o p POWER button and indicator DVD/VCR indicator Switches the VCR/DVD Recorder ON and OFF. Indicates the active DVD or VCR deck. Lights green when the VCR/DVD Recorder is DVD/VCR turned on. Toggles control between the DVD deck and the Disc Tray (DVD deck) VCR deck. -
Page 13: Function Display Window
Function Display Window PRG TTL VR TV Hi-Fi SVCD M.CARD Indicates the type of disc loaded. Indicates that TV mode is active. SVCD Indicates current chapter or track number Indicates when Memory Card is M.CARD activated. Indicates that a DVD to VCR (or VCR to DVD) dubbing is in progress. -
Page 14: Remote Control
Remote Control RANDOM - VCR: Rewinds/Advances the tape during the STOP mode, for fast Plays tracks in random order. reverse/ forward picture search. REC MODE Selects the recording mode: - DVD : SP, LP, EP or XP. CHP ADD - VCR : SP or SLP. Inserts a chapter marker when playing/ recording. -
Page 15: Rear Panel
Rear Panel c d e f ANT.IN AUDIO OUT (Left/Right) Connect the VHF/UHF/CATV antenna to this Connect to a TV or other equipment with audio terminal. inputs. AC Power Cord RF. OUT Plug into the power source. Connect to a TV with RF coaxial inputs. AV 1 IN (VIDEO IN /AUDIO IN (Left/Right)) OPTICAL (DIGITAL AUDIO OUT jack) Connect the audio/video output of an external... - Page 16 Connecting an Antenna To view or record a CATV channel Connecting an Antenna or Cable TV or Cable TV 1 Tune the TV to the VCR/DVD Recorder output channel (CH 3 or 4). a Antenna 2 Set the VCR/DVD Recorder channel selector to the cable output channel.
- Page 17 RF coaxial connection Component Video / Progressive Scan Connect the RF.OUT jack on the VCR/DVD Recorder connection to the antenna in jack on the TV using the supplied If your television is a high-definition or “digital ready” 75-ohm Coaxial Cable (R). television, you may take advantage of the VCR/DVD Recorder’s progressive scan output for the highest video resolution possible.
-
Page 18: To Vcr/Dvd Recorder
Connecting to an amplifier equipped with two chan- nel digital stereo (PCM) or to an Audio/Video receiv- er equipped with a multi-channel decoder (Dolby Digital™, MPEG 2, or DTS) 1. Connect one of the VCR/DVD Recorder’s DIGI- TAL AUDIO OUT jacks ( OPTICAL O, COAXIAL X) to the corresponding in jack on your amplifier. -
Page 19: General Operation
Initial Settings 1 Select the “Auto Channel Set” option. Initial Settings 2 Press B to move to the third level. “Start” icon is highlighted. In this menu system, there are several ways to cus- tomize the settings provided. Most menus consist of 3 Press ENTER to begin the channel search. -
Page 20: Progressive Scan
Clock Set TV Aspect 1 Select the “Clock Set” option. 4:3 Letter Box: Select when a standard 4:3 TV is connected. 2 Press B to move to the third level. Displays theatrical images with masking bars Auto above and below the picture. The Auto option is set at the factory. -
Page 21: Factory Setting
Power Save Mode Disc Menu/Audio/Subtitle Set Power Save Mode to On to place your DVD/VCR Original: Refers to the original language in which Recorder into an economic power save mode. the disc was recorded. Other: To select another language, press number buttons then ENTER to enter the corresponding Tuning Band 4-digit number according to the language code list... - Page 22 Sample Freq. (Frequency) LOCK (Parental Control) If your receiver or amplifier is NOT capable of han- Movie Rating dling 96 kHz signals, select 48 kHz. When this choice is made, this unit automatically converts any 96 kHz Some movies contain scenes that may not be suit- signals to 48 kHz so your system can decode them.
-
Page 23: Movie Rating
Set Password RECORD You can enter or change password. Disc Record Mode 1. Select “Set Password” on the LOCK menu then You can set the picture quality for DVD recording; XP press B. (High quality), SP (Standard quality), LP (Low quali- ty), EP (Extend quality). - Page 24 Auto Chapter Disc Finalize During recording, chapter markers are added auto- Finalizing ‘fixes’ the recordings in place so that the matically at fixed intervals. You can set this interval to disc can be played on a regular DVD player or com- 5 minutes or 10 minutes.
- Page 25 Disc Label • PAUSE/STEP (X): Deletes the character to the right of the cursor position. Use the Disc Label feature to enter a name for the • SKIP (. / >): Moves the cursor left or disc. This name appears when you load the disc and right.
- Page 27 On-Screen Display Displaying OSD While Watching TV On-Screen Display While watching TV, press DISPLAY to display/ You can display various information about the disc or remove the on-screen display. tape loaded on-screen. Some items can be changed using the menu. Indicates channel Indicates disc type.
-
Page 28: Frame-By-Frame Playback
Playback VCR T ape Playback Search VCR T ape Playback This function lets you visually search for a tape sec- Press VCR button to select the device to be operated. tion in either direction: forward and reverse. During the high-speed picture search modes, the audio is Basic Instructions muted and horizontal lines (noise bars) appear. -
Page 29: General Features
Counter Memory Function Use the number buttons to select the track you This feature is useful if there is a section of tape you want to view and press RETURN to return to the want to view immediately after recording or if you menu screen. - Page 30 Slow Motion Marker Search Video (VR/Video/RW??) To enter a Marker 1. Press BACKWARD (m) or FORWARD (M) during pause mode. You can start playback from up to nine memorized points. To enter a marker, press MARKER at the 2 Use the BACKWARD (m) or FORWARD (M) desired point on the disc.
- Page 31 Still Picture and Frame-by-Frame Playback Repeat A-B Video Video To repeat a sequence. 1. Press PAUSE/STEP (X) during playback. Advance the picture frame-by-frame by pressing 1. Press A-B at your chosen starting point. PAUSE/STEP (X) repeatedly. “REPEAT A - ” appears briefly on the TV screen. 2.
- Page 32 Finding Locations on a Disc Changing the Audio Language You can directly access any point on a video CD Press AUDIO repeatedly during playback to hear a using this function within 95% of progress bar. Use different audio language or audio track. this function only while a video CD is playing.
-
Page 33: Playing A Divx Movie File
Playing a DivX Movie File Rename: Edits the file name. (HDD, Memory Card only) (page 39) Move: Moves the file(s) to another folder or Using this DVD/VCR Recorder you can play media. (HDD, Memory Card only) (page 39) DivX disc. Copy: Copies the file(s) to another folder or 1. - Page 34 Playing an Memory Card Playing an Memory Card You can play Photo and Music files in Memory Cards. 1. Insert a Memory Card until it fits into place. 2. Press MEMORY on the Remote Control in the Tuner mode. The Memory Card slot choice menu appears.
-
Page 35: Music Menu Options
Playing an Audio CD or • If you are in a file list and want to return to the Folder Playing an Audio CD or list, use the v/V to highlight and press ENTER to MP3/WMA Disc MP3/WMA Disc return to the previous menu screen. The VCR/DVD Recorder can play Audio CDs and Music menu options MP3/WMA files on CD-ROM, CD-R, CD-RW,... - Page 36 Audio CD and MP3 / WMA Disc Changing the Audio Channel Features Press AUDIO repeatedly to hear a different audio channel (stereo, left or right). Pause Random 1. Press PAUSE/STEP (X) during playback. 1. Press RANDOM during playback. Random 2. To return to playback, press PLAY (N) or press Playback begins immediately and “Random”...
- Page 37 Audio CD and MP3 / WMA Disc Search Features 1. Press BACKWARD or FORWARD during playback. Pause 2. Press BACKWARD or FORWARD repeatedly to select the required speed: 1. Press PAUSE/STEP (X) during playback. m, ,, mm (backward) or 2. To return to playback, press PLAY (N) or press M, <, MM (forward).
- Page 38 Programmed Playback Play: Playback begins in the Programmed Playback Play order in which you programmed the tracks from the selected track. Move The program function enables you to store your Move: Moves the track(s) to favourite tracks from any disc in the player memory. Delete change the program order.
- Page 39 Changing the order of Program List Tips: • You can view TV channel or video input source by 1 Select the track you wish to move on the Program pressing RETURN. If you want to return to the Photo- List then press ENTER. CD, press LIST/DISC MENU.
- Page 40 Still picture Notes • If you select a folder on the disc to copy, the sub-folders Use PAUSE/STEP (X) while showing a picture to in the folder will not be copied. pause mode. • You must insert a memory card in the VCR/DVD recorder to use this function.
- Page 41 Recording Basic Recording from a TV Instant T imer Recording Basic Recording from a TV Instant T imer Recording Follow the instructions below to record a TV program. Instant Timer Recording allows you to make a Recording starts immediately and continues until the recording easily of a preset length without using the disc or tape is full or you stop the recording.
-
Page 42: Watching Another
To record one TV program while 3 Press ENTER to save the program. The Timer Record List will appear. watching another 4 Press RETURN (O) to exit the Timer Record 1 Press TV/VCR to select the TV mode during List. recording. -
Page 43: Timer Recording Troubleshooting
Timer Recording Troubleshooting Dubbing from DVD to VCR Dubbing from DVD to VCR Even though the timer is set, the recorder will not You can copy the contents of a DVD to a VHS tape record when: using the DUBBING (or DUB) button. •... -
Page 44: Recording From External Components
Dubbing from VCR to DVD Recording from External Dubbing from VCR to DVD Components You can copy the contents of a VHS tape to a DVD±R or DVD±RW using the DUBBING (DUB) but- You can record from an external component, such as ton. -
Page 45: What Is Dv
What is DV? DV-Related Messages Using DV, also known as i.LINK, you can connect a You may see the following messages appear on your DV-equipped camcorder to this recorder using a sin- TV screen when using the DV IN jack. gle DV cable for input and output of audio, video, data and control signals. -
Page 46: Using The Title List-Original Menu
Editing itle List and Chapter List Note: itle List and Chapter List To switch between the Title List-Original and Title Menu Menu List-Playlist menu, press LIST/DISC MENU repeated- ly. The Original and Playlist heading at the top of the Using the Title List-Original menu screen indicate which mode you are in. -
Page 47: Using The Title List-Playlist Menu
Using the Title List-Playlist Menu 3 Use v / V to select “Chapter” from Title List- Playlist options then press ENTER. Chapter List-Playlist menu appears on the TV screen. 1 Press LIST/DISC MENU repeatedly to display the Title List-Playlist menu. Chapter List TITLE 1 Playlist... -
Page 48: Deleting A Title Video
2 Use v / V to choose a title then press ENTER. If the disc has already been finalized Title List options appears on the left side of the You will see a screen as shown below: Title List display. 3 Use v / V to select an option then press ENTER to confirm. -
Page 49: Using The Title List Menu
4 Press RETURN (O) repeatedly to exit Title List Using the Title List menu menu. The Title List is where you can see the all recorded T i p titles, and where you can delete titles and make other Press DISPLAY to display more detailed title information for changes to the Original content of the disc. - Page 50 4 Press RETURN (O) repeatedly to exit the Title Using the Title List menu List menu. The Title List is where you build and edit your Press DISPLAY to display more detailed title information for Playlist, and where you can delete titles and make selected title.
-
Page 51: Changing Title Thumbnails
itle and Chapter Editing Changing Title Thumbnails itle and Chapter Editing Thumb. Edits you make to the Original content changes the actual content of the disc. For example, if you delete Each title displayed in the Title List menu is repre- a title or chapter from the Original content (Title or sented by a thumbnail picture taken from the start of Chapter), that title or chapter is deleted from the disc,... - Page 52 Adding Additional Titles/Chapters to Making a New Playlist the Playlist Use this function to add an Original title or chapter to the Playlist. When you do this, the whole title or You can add an Original title or chapter to add to a chapter is put into the Playlist (you can delete bits Playlist title even if it is already registered.
- Page 53 Deleting a Title/Chapter 2 Use v V b B to choose a title you want to delete then press ENTER. The options appears on the left side of the menu. 3 Select ‘Delete Part’ from the options on the menu. When you erase a title or chapter from the Playlist e.g., If you select “Delete Part”...
- Page 54 Naming a Title Combining Two Chapters Into One Video You can name Original and Playlist titles independ- Use this function to combine two adjacent Playlist or ently. Original chapters into one. 1 On the Title List menu, use v V b B to choose the 1 On the Chapter List menu, select the second title you want to name then press ENTER.
- Page 55 Moving a Playlist Chapter Protect a Title Use this function to re-arrange the playing order of Use this function to protect accidental recording, edit- Playlist chapters on the Title List-Playlist menu. ing or deleting of the title. 1 Press LIST/DISC MENU repeatedly to display 1 Press LIST/DISC MENU to display Title List Title List-Playlist menu.
-
Page 56: Divide One Title Into Two
2 Select “Divide” from the Title List menu options Hide a Title/Chapter and press ENTER. Title Edit-Divide menu appears and goes into Use this function to hide a title/chapter on the Title STOP mode. “Divide” option is highlighted. List or Chapter List menu. 1 On the Title List or Chapter List menu, Current picture use v V b B to choose a title or chapter you want to... -
Page 57: Overwrite Recording
Overwrite Recording Playing Your Recordings on Other DVD Players (Finalizing a Disc) To overwrite a new video recording to a previously recorded title, follow these steps. This feature is not Most regular DVD players can play finalized discs available on DVD+R, which always record at the end recorded in Video mode, finalized DVD+R or of the Disc. - Page 58 Controlling other TVs with the remote You can control the sound level, input source, and power switch of non-LG TVs as well. If your TV is list- ed in the table below, set the appropriate manufactur- er code. 1. While holding down TV POWER button, press the number buttons to select the manufacturer code for your TV (Refer to table on the right column).
-
Page 59: Language Codes
Reference Language Codes Use this list to input your desired language for the following initial settings: Disc Audio, Disc Subtitle, Disc Menu. Language Code Language Code Language Code Language Code Abkhazian 6566 Fiji 7074 Lingala 7678 Singhalese 8373 Afar 6565 Finnish 7073 Lithuanian... - Page 60 roubleshooting roubleshooting Check the following guide for the possible cause of a problem before contacting service. Cause Correction Symptom No power. The power cord is disconnected. Plug the power cord into the wall out- let securely. The power is on, but DVD or VCR button is not switched Refer to page 6.
- Page 61 Cause Correction Symptom An unplayable disc is inserted. Insert a playable disc. (Check the disc The DVD+VCR does type and Regional code.) not start playback. The disc is placed upside down. Place the disc with the playback side down. The disc is not placed within the Place the disc on the disc tray correctly guide.
- Page 62 Cause Correction Symptom Antenna or cables are loose. Tighten connections or replace cable. Picture or sound of broadcasting channel is Wrong Tuning Band is selected in the Try “Tuning Band Select” options; see weak or missing. VCR/DVD Recorder Setup menu. page 20 for details.
- Page 63 Specifications Specifications General Power requirements AC 120V, 60 Hz Power consumption Dimensions (approx.) 430 X 78.5 X 354 mm (16.9 x 3.1 x 13.9 inches) (w x h x d) Mass (approx.) 5.6 kg (12.32 lbs) Operating temperature 5˚C to 35˚C (41˚F to 95˚F) Operating humidity 5 % to 90 % Signal system...
- Page 64 DVD Specifications Laser system Semiconductor laser, wavelength 650 nm Frequency response DVD (PCM 48 kHz): 8 Hz to 22 kHz, CD: 8 Hz to 20 kHz Signal-to-noise ratio More than 95dB Harmonic distortion Less than 0.008% Dynamic range More than 90 dB Inputs ANTENNA IN Antenna or CATV input, 75 ohms...