Bosch INDEGO 400 CONNECT Installation Manual
Hide thumbs
Also See for INDEGO 400 CONNECT:
- Original instructions manual (398 pages) ,
- Installation manual (13 pages) ,
- Firmware update instruction (2 pages)

Related Manuals for Bosch INDEGO 400 CONNECT


Summary of Contents for Bosch INDEGO 400 CONNECT
- Page 1 Indego 350/400 Indego 350/400 Connect Installation guide GB / DE / FR / NL / IT / ES / PT Home made by you.
- Page 2 GB | English DE | Deutsch FR | Français NL | Nederlands IT | Italiano ES | Español PT | Português...
- Page 3 Indego 350/400 Indego 350/400 Connect Installation guide English Home made by you. Table of contents Know your Indego If you prefer you can watch our installation video by Lawn preparation scanning the QR code here: Docking station placement Power connection Perimeter wire layout Screen settings and mapping your lawn Your Indego is intelligent...
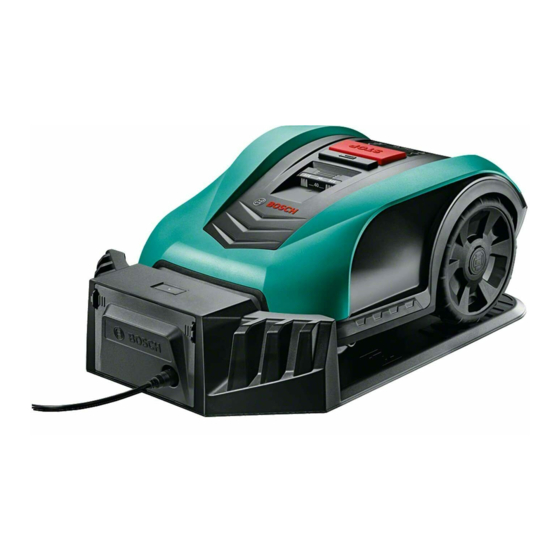
- Page 4 Know your Indego Docking station Docking station rating label Red terminal Black terminal Charging socket Areas for docking screws Top of Indego House symbol Docking station tubing Stop button Charging pins (contacts) Display Dock indicator Rating label Garden symbol Anti theft sticker Mower ‘On’...
-
Page 5: Lawn Preparation
Lawn preparation First you will need to prepare the lawn. This is a key step Cut the main area for a successful installation. Please have a close look at of the lawn your lawn and any objects inside it. to 40 mm. Remove foreign objects from the cutting area. -
Page 6: De | Deutsch
Determine the best place to position your docking station, station charging pins point left where your Indego will return on its own to get charged. (so you can read the Bosch logo whilst standing outside the lawn area). Separate the mower from the docking station. - Page 7 Power connection Switch the Indego on. The isolator switch is located at the back left of the mower. Please note, if the mower is not We advise powering the docking station now so when you turned on, it will not charge. At this point, nothing will be shown on the display.
-
Page 8: Fr | Français
Feed the perimeter wire Strip carefully Perimeter wire layout through the tubing on the docking station as 10–15 mm of insulation off the wire. indicated by the arrow on the docking station, until it appears on the other side. This part of the installation will most likely take you the longest amount of time. But we will take you through it step by step. -
Page 9: Indego
Perimeter wire layout Marking permanent objects that are at least 75 cm from the perimeter wire (1.2). Mark out permanent objects you do not want Lay the perimeter wire around the lawn area the mower to run over, e.g. roots, ponds, rocks. This will prevent your Indego colliding with and objects (4.9). - Page 10 If you have purchased an Indego Connect you can finish your installation by setting up your account and completing the final steps through the Bosch Smart Gardening app – download now by scanning the QR code here: Select time and date.
-
Page 11: Your Indego Is Intelligent
Your Indego is intelligent How your Indego cuts efficiently. Logicut Intelligent Cutting – To mow your Indego ▶ learns the shape of the cutting area it is working in ▶ learns the location of the objects within it: trees, flower beds, ponds, etc. (only those objects that are marked out during installation are learnt) How your Indego learns the lawn shape. - Page 12 Indego 350/400 Indego 350/400 Connect Installationsanleitung Deutsch Home made by you. Inhaltsverzeichnis Wissenswertes zu Ihrem Indego Gerne können Sie den QR-Code einscannen und sich unser Vorbereitende Maßnahmen vor dem Mähen Installationsvideo anschauen: Installation der Ladestation Stromanschluss Verlegung des Begrenzungskabels Display-Einstellungen Indego –...
- Page 13 Wissenswertes zu Ihrem Indego Ladestation Typenschild Rote Klemme Schwarze Klemme Ladeanschluss Aussparungen für die Geräteoberseite Befestigungsschrauben Indikator „Hausseite“ Stopp-Taste Kabelkanalführung Display Begrenzungsdraht Produktaufkleber Ladekontakte Anti-Diebstahlaufkleber Kontrollleuchte Einschalt-Kontrollleuchte Indikator „Gartenseite“ Schnitthöhen-Einstelltaste QR-Code B (Indego 350 Connect/400 Connect) Antriebsräder Auffahrsensor mit Aufprallschutz Ladekontakte Schnitthöhen-Entsperrtaste Die Installation Ihres Indego erfolgt in fünf Schritten.
- Page 14 Vorbereitende Maßnahmen Zu Beginn sind einige Vorbereitungen für die Rasenfläche, Wenn nötig, kürzen Sie die die der Indego mähen soll, durchzuführen. Das ist Grund- zu bearbeitende Rasenfläche voraussetzung für eine erfolgreiche Installation. auf maximal 40 mm. Bitte werfen Sie einen Blick auf die Rasenfläche und entfernen Sie alle möglichen Hindernisse.
- Page 15 Richtiges Platzieren der Ladestation Die Ladestation sollte immer am Rand der Rasenfläche positioniert werden. Dabei ist es wichtig, dass die beiden Ladekontakte der Ladestation aus Bestimmen Sie den optimalen Platz für die Positionierung der Ladestation, Sicht des Anwenders, der auf der zu welcher der Mäher zum Laden selbständig zurückkehrt.
- Page 16 Anschluss ans Stromnetz Einschalten des Indego. Der Hauptschalter befindet sich hinten links unter dem Mäher. Bitte beachten Sie, dass der Mäher nicht lädt, Wir empfehlen an dieser Stelle, die Ladestation an das Stromnetz anzuschließen, solange er nicht eingeschaltet ist. Das Display bleibt in diesem Fall dunkel.
-
Page 17: Verlegung Des Begrenzungskabels
Durch den Kabelkanal Zirka 10–15 mm Verlegung des Begrenzungskabels unterhalb der Ladestation führen, bis es am am Kabelende abisolieren. anderen Ende wieder erscheint. Dieser Teil der Installation, das Kabelverlegen, wird Sie wahrscheinlich am längsten beanspruchen. Das Begrenzungskabel muss rund um die Rasenfläche gelegt werden, um vorzugeben, wo der Mähroboter mähen soll und wo nicht. - Page 18 Verlegung des Begrenzungskabels Permanentes Aussparen von Hinder- nissen, die mindestens 75 cm vom Begrenzungsdraht entfernt sind (1.2). Grenzen Sie Hindernisse aus, über die der Mäher nicht Verlegen Sie das Begrenzungskabel rund um die zu mähende Rasenfläche fahren soll, wie z.B. Blumenbeete, Gartenteiche oder gleichartige Hindernisse.
-
Page 19: Display-Einstellungen
Download Falls Sie einen Indego Connect gekauft haben, können Sie die Installation abschließen, indem Sie Ihren Account in der Bosch Smart Gardening App anlegen und dort die letzten Schritte der Installation durchführen – laden Sie die App jetzt herunter, indem Sie den QR-Code hier scannen: Einstellung von Zeit und Datum. - Page 20 Intelligentes Mähen mit Bosch Logicut Warum Ihr Indego effizient mäht und arbeitet. Während der ersten 2–3 kompletten Mähvorgänge lernt Ihr Indego: ▶ die Form und Besonderheiten Ihrer Rasenfläche kennen ▶ die Lage und Position der ausgesparten Hindernisse auf der Rasenfläche kennen (Bäume, Blumenbeete, Teiche etc.)
- Page 21 Indego 350/400 Indego 350/400 Connect Guide d’installation Français Home made by you. Table des matières Connaissez votre Indego Si vous préférez, vous pouvez regarder la vidéo d’installation Préparation de la pelouse en scannant le QR code suivant : Placement de la station d’accueil Branchements Disposition du câble périphérique Réglages écran...
- Page 22 Connaissez votre Indego Station d’accueil (la base) Etiquette notification station d’accueil Borne rouge Borne noire Le dessus de l’Indego Prise électrique Trous pour vis de fixation Bouton Stop Logo « maison » Écran Tube Notifications Epingles de charge Autocollant anti-vol Voyant base Indicateur «...
- Page 23 Préparation de la pelouse Vous devez préalablement préparer votre pelouse. Tondre la zone C’est l’une des étapes clés pour une installation réussite. principale Veuillez à inspecter votre pelouse et tous objets présents à 40 mm. dessus. Enlevez tous les objets présents dans la zone de coupe.
- Page 24 Placement de la station d’accueil La station d’accueil de votre Indego doit être placée sur un côté de la pelouse, au niveau de l’herbe préalablement tondu à son minimum. Il est important que les pointes d’épingle de la station d’accueil Déterminer la meilleur place pour positionner la station montrent la gauche d’accueil, où...
- Page 25 Connection de l’alimentation Allumez l’Indego. Le bouton est situé à l’arrière, à gauche, sous de la tondeuse. Notez, que si la tondeuse n’est pas Nous conseillons de faire fonctionner la station d’accueil dès maintenant allumé, elle ne chargera pas. Du coup, rien ne s’affichera sur l’écran HMI.
- Page 26 Faites passer le câble Dénudez soigneusement Disposition du câble périphérique périphérique par le tuyau 10-15 mm aux extrémités du fil. situé sous la station d’accueil comme indiqué par la flèche, jusqu’à ce qu’il apparaisse de l’autre côté. C’est la partie d’installation qui vous prendra très probablement le plus de temps. Mais nous vous expliquerons la démarche étape par étape.
- Page 27 Disposition du câble périphérique La délimitation des obstacles doit être à au moins 75 cm du câble périphérique (1.2). Délimitez les obstacles permanents que vous Disposer le câble périphérique autour de la zone à tondre ne voulez pas que la tondeuse écrase par exemple des racines, des étangs, des roches.
- Page 28 La tondeuse ne marchera pas sans votre PIN. Si vous possédez une tondeuse non-connect et que vous avez perdu votre code PIN personnel, vous devrez contacter Bosch (voir « le Service après-vente et le Service D’ap- Amusez-vous à observer votre plication » les coordonnées sont dans le manuel). Nous recommandons d’enregistrer votre tondeuse dans «...
- Page 29 Votre Indego est intelligente La coupe intelligente Logicut - Comment votre Indego coupe efficacement ? Comment tond votre Indego ▶ Elle apprend la forme de la zone de coupe dans laquelle elle évolue ▶ Elle apprend l’emplacement des obstacles : les arbres, des parterres, des étangs etc (seul les obstacles définis pendant l’installation sont enregistrés).
- Page 30 Indego 350/400 Indego 350/400 Connect Installatiegids Nederlands Home made by you. Inhoudsopgave Ken uw Indego Bij voorkeur kunt u onze installatievideo bekijken door de Tuin voorbereiding volgende QR-code te scannen: Basisstation plaatsen Stroomaansluiting Begrenzingsdraad uitleggen Scherminstellingen Uw Indego is intelligent...
- Page 31 Ken uw Indego Basisstation Basisstation beoordelingslabel Rode terminal Zwarte terminal Oplaadaansluiting Ruimte voor stationsschroeven Bovenkant van Indego Huissymbool Basisstation buis Handmatige Stop-knop Oplaad pinnen (contacten) Display Huisindicator Beoordelingslabel Tuinsymbool Anti-diefstalsticker Maaier ‚aan‘ indicator Hoogte van de maaiknop QR Code „B“ (Indego 350 Connect/400 Connect) Wielaandrijving Bumper...
- Page 32 Gazon voorbereiding Allereerst is het belangrijk om uw gazon goed voor Maai het belangrijkste te bereiden. Dit is erg belangrijk voor een succesvolle gebied van uw gazon installatie. Werp een korte blik op uw gazon en tot een hoogte van 40 mm. eventuele voorwerpen die erin staan.
- Page 33 Indego zelf kan terugkeren om op te laden. basisstation naar links wijzen (zodat u het Bosch logo kunt lezen terwijl u buiten het tuingebied staat). Haal de maaier uit het basisstation. Plaats het basisstation op een vlakke ondergrond.
- Page 34 Stroomaansluiting Zet de Indego aan. De isolatorschakelaar bevindt zich aan de linker achterzijde van de maaier. Let op: als de maaier niet Wij adviseren om het basisstation direct op te laden. Wanneer de is ingeschakeld, zal deze niet opladen. Op dit punt, wordt er nog niets weergegeven op de HMI display.
- Page 35 Sluit de begrenzingsdraad aan Strip zorgvuldig Begrenzingsdraad leggen via de buis van het basisstation zoals aangegeven, 10 – 15 mm isolatie van de draad. tot deze aan de andere zijde verschijnt. Dit installatiedeel neemt waarschijnlijk het meeste tijd in beslag. Maar we zullen u er stap voor stap doorheen begeleiden.
- Page 36 Begrenzingsdraad leggen Het markeren van permanente objecten die ten minste 75 cm van de begrenzingsdraad (1,2) liggen. Leg de begrenzingsdraad rond het gazon Markeer de permanente objecten die u niet wilt dat de maaier maait, zoals bijvoorbeeld en objecten (4.9). Begin vanaf het basisstation tegen de klok in. Dit is belangrijk, wortels, vijvers, rotsen.
- Page 37 Indien u een Indego Connect heeft aangekocht kunt u uw installatie beëindigen door uw account aan te maken en de laatste stappen in de Bosch Smart Gardening App te voltooien – download nu hier en scan de QR code. Selecteer een datum en tijd.
- Page 38 Uw Indego is intelligent Logicut Intelligent Cutting – Hoe uw Indego efficiënt maait. Om te maaien, ▶ registreert uw Indego de vorm van het maai-gebied waar het in werkt ▶ registreert uw Indego de locatie van de objecten daarbinnen: bomen, bloembedden, vijvers enz.
- Page 39 Indego 350/400 Indego 350/400 Connect Guida di installazione Italiano Home made by you. Indice Impari a conoscere il suo Indego Se preferisce guardare il nostro video su come fare lʼinstallazione, Preparazione del prato faccia la scansione del codice QR: Posizionamento della stazione di ricarica Collegamento alla presa di rete Schema posizionamento cavo perimetrale Settaggio schermo...
- Page 40 Impari a conoscere il suo Indego Stazione di ricarica Etichetta dati stazione di ricarica Terminale di colore rosso Terminale di colore nero Connettore per ricarica Parte superiore Fori per viti di fissaggio piastra di Indego stazione di ricarica Simbolo raffigurante la casa Tasto di arresto Foro per passaggio filo Display...
- Page 41 Preparazione del prato Prima di tutto va preparato il prato, passo fondamentale Tagli il prato ad per unʼinstallazione corretta. Osservi attentamente il suo unʼaltezza giardino e gli oggetti che si trovano al suo interno. di 40 mm. Rimuova gli oggetti estranei dallʼarea di taglio.
- Page 42 Determini il punto migliore dove posizionare la stazione la stazione siano rivolti verso sinistra di ricarica, a cui il suo Indego tornerà per ricaricarsi. (in questo modo potrà leggere il logo Bosch stando al di fuori dell’area di prato). Separi lʼapparecchio dalla stazione di ricarica.
- Page 43 Connessione alla rete Accenda Indego. Lʼinterruttore è posizionato nella parte posteriore sinistra. Eʼ importante notare che, Consigliamo di accendere ora la stazione di servizio così che quando se il rasaerba non è acceso, non si ricaricherà. A questo punto non apparirà nulla sulla inter- lei avrà...
- Page 44 Faccia passare il cavo perimetrale Spelli con cura Disposizione del filo perimetrale attraverso il tubo nella parte inferiore della stazione 10 –15 mm di rivestimento dal cavo. di ricarica, come indicato dalla freccia sulla stazione stessa, fino a farlo uscire dalla parte opposta. Questa parte dellʼinstallazione sarà...
- Page 45 Disposizione del filo perimetrale Come delimitare oggetti permanenti che sono distan- ti almeno 75 cm dal filo perimetrale (1.2). Disponga il filo perimetrale attorno all’area da tagliare Delimiti oggetti permanenti dove non vuole che passi il rasaerba come per es. radici, rocce, e agli oggetti (4.9).
- Page 46 Download Se ha acquistato un Indego Connect può completarne l’installazione configurando il suo account e il prodotto tramite l’applicazione Bosch Smart Gardening – la scarichi ora scannerizzando il QR code che trova qui. Selezione di ora e data. Settaggio dello schermo...
- Page 47 Il suo Indego è intelligente Il Taglio Intelligente Logicut – come il suo Indego taglia il prato in modo efficiente. Per tagliare Indego ▶ apprende la forma dellʼarea di taglio nella quale lavora; ▶ apprende la dislocazione degli oggetti al suo interno: alberi, aiuole di fiori, ecc.
- Page 48 Indego 350/400 Indego 350/400 Connect Guía de instalación Español Home made by you. Indice de contenidos Conoce tu Indego Si lo prefieres puedes ver cómo instalarlo escaneando Prepara tu jardín el código QR aquí: Colocación de la base de carga Conectar a la red Disposición del cable perimetral Ajustes de pantalla...
- Page 49 Conoce tu Indego Base de carga Etiqueta de identificación de la base de carga Terminal rojo Terminal negro Toma de red Parte superior del Indego Zona para los tornillos de la base Botón de parada Símbolo de la casa Display Riel de la base de carga Etiqueta de identificación Contactos para carga (pins)
- Page 50 Prepara tu jardín Primero necesitarás preparar el jardín. Esto es funda- Corta la hierba hasta mental para una instalación correcta. Echa un vistazo al una altura jardín y a los objetos situados en su interior. de 40 mm. Quita objetos extraños del área de corte.
- Page 51 Elige el mejor lugar para colocar tu base de carga, base señalen a la izquierda a la cuál Indego volverá para poder recargarse. (por lo que podrás leer el logo Bosch mientras estás fuera del área de corte). Separa el cortacésped de la base de carga.
- Page 52 Conector de red Enciende el Indego. El interruptor de aislamiento está situado en la parte inferior izquierda del cortacésped. Ten en Te aconsejamos conectar la base de carga ahora, así tu cortacésped estará cuenta que si el cortacésped no está encendido no cargará.
- Page 53 Coloca el cable perimetral Pela cuidadosamente Disposición del cable perimetral a través del riel de la base de carga según 10–15 mm de cable. indica la flecha situada en la base, hasta que aparezca por el otro lado. Esta es la parte de la instalación que más tiempo te llevará. Pero te indicaremos cómo hacerlo paso a paso.
- Page 54 Disposición del cable perimetral Cablea objetos que estén al menos a 75 cm del perímetro del jardín (1.2). Rodea objetos permanentes con los que no Coloca el cable en el perímetro del área de corte quieres que choque el cortacésped: raíces, fuentes, piedras.
- Page 55 Download Si has comprado un Indego Connect puedes terminar tu instalación creando tu cuenta y completando los últimos pasos a través de la app Bosch Smart Gardening – descárgatela ahora escaneando el código QR aquí: Selecciona día y hora. Ajustes de pantalla y Mapeado de césped...
- Page 56 Tu Indego es inteligente. Corte inteligente Logicut – Cómo corta tu Indego de forma eficiente. Para segar, tu Indego ▶ aprende la forma del área de césped que va a cortar ▶ aprende la ubicación de los objetos en el jardín: árboles, parterres, es- tanque, etc.
- Page 57 Indego 350/400 Indego 350/400 Connect Guia de instalação Português Home made by you. Índice Conheça o seu Indego Se você prefere, pode ver o nosso video de instalação Prepare o seu jardim escaneando o código QR aquí: Colocação da estação de carregamento Conexão à...
- Page 58 Conheça o seu Indego Estação de ancoragem Etiqueta de classificação da estação de ancoragem Terminal vermelho Terminal preto Parte superior Tomada de carga do Indego Áreas para ancorar parafusos Símbolo da casa Botão de stop Tubos da estação de Display ancoragem Etiqueta de classificação Contatos para carga (pins)
- Page 59 Prepare o seu jardim Primeiro tem que preparar a sua relva. Isto é um passo Corte a zona principal fundamental para uma instalação correta. Por favor olhe da relva atentamente à relva e quaisquer objetos nela. à 40 mm. Retire objetos estranhos da área de cortar.
- Page 60 Escolha o melhor lugar para colocar a estação de carga da estação de carregamento carregamento à qual Indego voltará para recarregar. apontem à esquerda (para poder leer o logo Bosch encontrando-se fora da relva). Separe o corta-relvas da estação de carregamento. Coloque a estação a nível do chão.
- Page 61 Conexão à rede Ligue o Indego. O interruptor de isolamento está situado na parte inferior esquerda do corta-relvas. Não se esqueça que Aconselhamos conectar a estação de carregamento agora para se o Indego não está ligado, não pode carregar. Neste momento, ainda não aparecerá...
- Page 62 Pase o cabo de perímetro Tire com cuidado Disposição do cabo de perímetro através dos tubos da estação de carregamento, 10-15 mm de isolamento do cabo. conforme indicado pela seta na estação, até que ele saia do outro lado. Esta é a parte da instalação que provavelmente demorará mais tempo. Mas mostra- remos-lhe como fazer-lo passo a passo.
- Page 63 Disposição do cabo de perímetro A marcação de objetos per- manentes que estejam pelo menos à 75 cm do cabo de perímetro (1.2). Coloque o cabo de perímetro ao redor da área da relva Marque objetos permanentes com os que não quiser que o seu corta-relvas choque p.ex.
- Page 64 O corta-relvas não funciona sem o seu PIN. Se você possui um modelo não-Connect e você perdeu o seu código PIN pessoal, você terá que entrar em contato com a Bosch (ver dados de contacto do „Serviço Pós- Desfrute ver o Indego cortar Venda“ no manual).
- Page 65 O seu Indego é inteligente. Como o seu Indego corta de maneira eficiente: Corte inteligente Logicut – Para cortar a relva, Indego ▶ aprende a forma da área de cortar ▶ aprende a localização dos objetos dentro dela: árvores, canteiros de flores, lagos etc.