Table of Contents
Advertisement
Advertisement
Table of Contents

Related Manuals for LG Signature AM501YWM1


Summary of Contents for LG Signature AM501YWM1
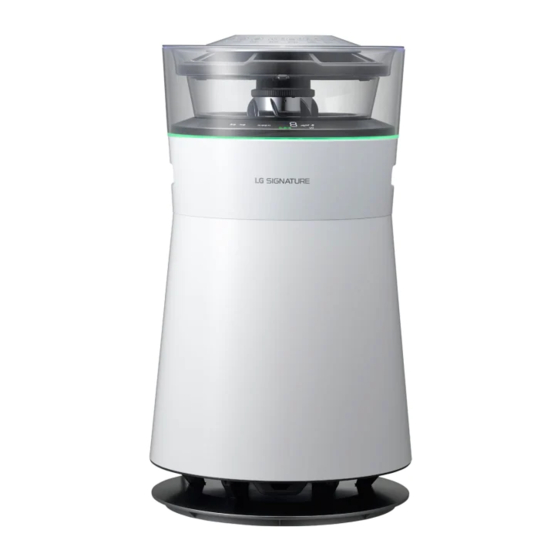
- Page 1 Owner's Manual Air Purifier & Humidifier Read this owner's manual thoroughly before operating the appliance and keep it handy for reference at all times. www.LGSIGNATURE.com MFL69596002 Copyright © 2017 LG Electronics. All Rights Reserved. UG_enUS_esXL.indb 1 2017-05-25 1:51:40...
- Page 2 UG_enUS_esXL.indb 2 2017-05-25 1:51:40...
-
Page 3: Table Of Contents
Table of Contents The images in this owner's manual may be different from the product's actual components and accessories, which are subject to change by the manufacturer without prior notice for product improvement purposes. Important Safety Instructions ...04 Smart Functions ........25 Installing the Application ........ -
Page 4: Important Safety Instructions
Important Safety Instructions READ AND SAVE THESE INSTRUCTIONS. This guide contains many important safety messages. Always read and obey all safety messages. This is the safety alert symbol. It alerts you to safety messages that inform you of hazards that can kill or hurt you or others, or cause damage to the product. - Page 5 DISPOSAL • If the product is submerged in water, stop using the • Dispose of all packaging materials promptly and keep product and contact an LG Electronics Customer them out of the reach of children. Information Center for service. • In the event of a gas leak (propane/LPG), ensure adequate ventilation and contact an authorized service center before resuming use.
- Page 6 Caution To reduce the risk of fire, electric shock, or personal injury when using the product, follow basic safety precautions, including the following: INSTALLATION • Use the filter only for its intended purpose. • Do not use detergents, cosmetics, chemicals, air •...
-
Page 7: Unpacking
Unpacking Parts Air purifier and humidifier Manual del propietario Remote controller / Ultra-fine cloth Owner's Manual battery (CR2025, 1 EA) • The appearance or components of the product may differ depending on the model. UG_enUS_esXL.indb 7 2017-05-25 1:51:42... -
Page 8: Removing Packing Materials
Removing Packing Materials Remote Control Setup Unpack the product and remove any packing tape or protective vinyl before using the product. Remove the remote controller's battery tray by Take the product out of the box and remove the pushing the release on the left of the tray and pulling out. - Page 9 Warning • A button/Coin-type battery is used in the remote control of the product. • Do not swallow the battery. Otherwise, it may cause serious damage, including damage to your organs. • If you swallow the battery, you may suffer organ damage within 2 hours.
-
Page 10: Installation
Installation Transporting or Moving the Installing the Product Product Caution Caution Install the product on a strong, level surface. Installing the product on a weak or tilted surface may cause noise and Transport the product in a well-secured and upright vibration or tipping, resulting in injury. -
Page 11: Operation
Operation Product Overview Front View Top cover (control panel and water level Smart Diagnosis™ speaker indicator light) Used when troubleshooting product malfunctions or Change product settings or check water level. failures. Refer to Smart Diagnosis™ on page 27. Easy-fill water bucket inlet Remote controller sensor panel Easily add water to the water bucket. -
Page 12: Back View
Back View Note Humidity sensor • Product will not work without the filters in place. Detects humidity level. • Close outside doors and windows during use, if possible. To avoid high carbon dioxide levels, do not use for long PM1.0 (super ultra-fine dust) sensor periods in a tightly enclosed space. - Page 13 Control Panel and Water Level Indicator Light button Start/Stop button Turns the air quality indicator light on/off. Starts or stops operation. Humidity button Mode button Sets the desired humidity level. Sets the operating mode. (The humidity level can be set in 5% increments.) •...
- Page 14 Air quality monitoring function is ON. Hygiene drying function is ON. Turbo display (Refer to page 22.) ON/OFF timer is activated using the LG Smart ThinQ application. Top cover is not properly mounted. The deodorizing Black Filter needs to be replaced.
-
Page 15: Remote Controller
Purify → Humid Purify → Note Silent. • To purchase a replacement remote controller, visit a nearby LG service center. Turbo button • Pressing multiple buttons at the same time may cause Quickly purifies the air. the remote to malfunction. -
Page 16: Purify Mode
Purify Mode Humid Purify Mode This mode cleans and freshens indoor air. This mode improves indoor air using the humidifier and the air purifier. Press the Start/Stop button on the machine or the remote controller. Fill the water bucket before starting Humid Purify mode. •... -
Page 17: Silent Mode
Silent Mode Note • The default fan speed is Auto. Auto mode automatically This mode minimizes noise during air purification. adjusts the fan speed depending on the indoor air quality. Press Start/Stop to start operating, then press the Mode • The current fan speed appears in the status display button to select Silent mode. -
Page 18: Checking Air Quality
Checking Air Quality Turning Air Quality Indicator Light On/Off The overall air quality is indicated by color in the status display panel and the air quality indicator light. While the product is operating, press the Light button to turn the overall air quality light on or off. Understanding Overall Air Quality The overall air quality is indicated using four levels, each using a different color. - Page 19 EPA. • The PM1.0 density is displayed in the same manner as the PM2.5 density and is based on LG Electronics standards. • The PM10 and PM2.5 densities displayed by the product could differ from the EPA forecast and from densities measured by other products or devices.
-
Page 20: Setting The Humidity
Setting the Humidity Using Air Quality Monitoring Function You can select the desired humidity level when the product is operating in Humid Purify mode. Turn on the Air Quality Monitoring function to continuously measure and display the indoor air quality even when the product is turned off. -
Page 21: Off Timer
Off Timer Control Lock Use the Off Timer button to set the product to Sleep mode The Control Lock function locks all the control panel and automatically turn off after a set number of hours. buttons, including the Power button, to prevent accidental operation by children or others. -
Page 22: Hygiene Drying Function
Hygiene Drying Function Counter Reset Function The Hygiene Drying function is turned on by default. After After replacing the deodorizing Black Filter, reset the usage Humid Purify mode is used, the Hygiene Drying function time counter. runs the fan for 1 – 1 ½ hours to dry the water bucket filters •... -
Page 23: Filling The Water Bucket
Filling the Water Bucket Pouring Water into the Water Bucket You can pour the water into the water bucket directly or through the Easy Fill Inlet. If you want to add a large amount of water at once, pour the water into the water bucket directly. -
Page 24: Emptying The Water Bucket
Emptying the Water Bucket To empty the water bucket, turn off and unplug the product. Remove the top cover and lift out the water bucket. Place the bucket on a waterproof surface. Remove the top and side water bucket filters from the bucket. Tilt the bucket to empty it. -
Page 25: Smart Functions
The email address you enter during registration becomes product usage information. Diagnosis can be done right your ID. from the application or with the help of the LG Customer Information Center. Settings Change product settings and set up alerts when settings change. - Page 26 Wireless LAN module Specifications are not included and must be installed before using the Model LCW-003 LG Smart ThinQ application. Frequency Range 2412 MHz to 2462 MHz • You can contact your ISP (internet service provider) to purchase and install a wireless AP. If you purchase IEEE 802.11b: 17.56 dBm...
-
Page 27: Smart Diagnosis
This equipment complies with FCC radiation exposure limits using the LG Smart ThinQ application or via your telephone set forth for an uncontrolled environment. This transmitter to the LG Customer Information Center. - Page 28 If you need further assistance in troubleshooting the able to assist you in using the information transmitted appliance, call an LG Customer Information Center at the for analysis. number on the back cover of this manual.
-
Page 29: Maintenance
• Failure to perform regular maintenance may result in mold or bacterial growth and odor. • To replace any of the filters, call an LG Customer Information Center. • Calls for service caused by dirty filters are not covered by the warranty and will be charged to the user. -
Page 30: Cleaning The Exterior
Cleaning the Exterior Status Display Panel Error Codes The following error codes may be displayed on the status Clean the product's exterior with the ultra-fine cloth display panel. provided as an accessory. Error Code Action • Properly mount the top cover on the main body. - Page 31 • Do not use steel wool or abrasive pads to clean the water Water bucket bucket. • A new ultra-fine cloth can be purchased through the LG Electronics Customer Information Center. Rinse the inside and outside of the water bucket with clean water.
- Page 32 Intensive Cleaning of Water Bucket Caution Filters • If any detergent residue remains on the filter, it may cause sudsing or odor during operation. Dissolve baking soda in water and soak the water bucket filters in the solution for 30 minutes. •...
-
Page 33: Cleaning The Air Purifier Filters
Put the top cover back on. Place out of direct sunlight and allow to dry completely. • Align the top cover so that its contact connectors meet the contact connectors on the body of the product. Contact connector (inside) Reassemble the ultra fine filter (pre-filter) in the filter tray and insert the tray in the main body. - Page 34 Cleaning the PM 1.0 Black Filter Place a new deodorizing Black Filter in the filter tray. • Be sure to align the slots on the bottom of the Press the filter tray release button to open the filter deodorizing Black Filter with the tabs on the filter tray.
-
Page 35: Cleaning The Dust Sensor
Soak the filter in clean water and then rinse under Place the deodorizing Black Filter on top of the PM 1.0 running water to make sure no detergent residue Black Filter, aligning its slots with the tabs on the top remains. -
Page 36: Cleaning The Watering Engine
Insert the filter tray into the product. Lift up and remove the Watering Engine™ from the water bucket. Note Only use water to clean the sensor. Use of anything else may cause product failure. Clean the Watering Engine™. Cleaning the Watering •... - Page 37 Run in air purifier mode for an hour or more on a sunny day. • This will help to remove moisture and mold from inside the product. Turn off and unplug the appliance. Cover the appliance with a dust sheet to prevent dust, bugs, or foreign objects from getting into it, and store it in a dry, shady spot.
-
Page 38: Before Calling For Service
Before Calling for Service If you experience problems with the appliance, checking the following chart before calling for service may save you time and money. Problem Possible Causes Solution • Correctly insert plug into outlet. Product is not working. Power cord is unplugged. •... - Page 39 Problem Possible Causes Solution • If the odor is very strong, the air purifier may not be able to remove it. Try moving the air purifier to a • Clean the sensor. different room. The overall air quality • Unplug the product, wait for 1 minute, then indicator lamp stays plug the product in again.
- Page 40 Problem Possible Causes Solution Water bucket filters are not • Properly assemble the top and side water assembled properly. bucket filters in the water bucket. The water bucket filters are dirty • Clean the water bucket filters. See page or clogged. The water bucket level does not change during The Watering Engine™'s holes...
- Page 41 Problem Possible Causes Solution • This is the smell of activated carbon The product is new and recently (charcoal). It should dissipate after 1 – 2 installed. weeks of use and is not harmful to humans. • Product performance may suffer if used Product is used in smoky or to replace a range hood or vent.
-
Page 42: Warranty (Usa)
Should the LG Air Purifier fail due to a defect in materials or workmanship under normal home use, during the warranty period set forth below, LG will at its option repair or replace the product. This limited warranty is valid only to the original retail purchaser of the product and applies only when purchased and used within the United States, including U.S. - Page 43 TO OBTAIN WARRANTY SERVICE AND ADDITIONAL INFORMATION For additional product information, visit the LG website at http://www.lg.com For assistance using this product or to schedule service, contact LG Electronics at 1-800-243-0000 (US). For further assistance, write: LG Electronics, 201 James Record Road, Huntsville, Alabama 35813 UG_enUS_esXL.indb 43...
- Page 44 Memo UG_enUS_esXL.indb 44 2017-05-25 1:52:05...
- Page 45 UG_enUS_esXL.indb 48 2017-05-25 1:52:25...