
Related Manuals for Fujitsu AS*7A


Summary of Contents for Fujitsu AS*7A
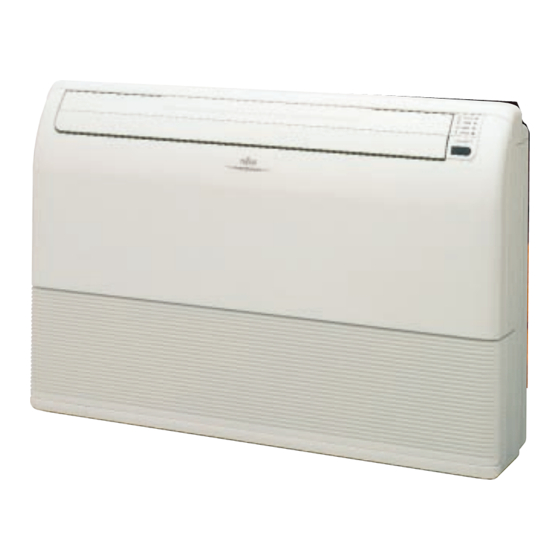
- Page 1 WALL MOUNTED TYPE AND FLOOR / CEILING UNIVERSAL TYPE AIR CONDITIONER T E C H N I C A L M A N U A L...
-
Page 2: Table Of Contents
CONTENTS 1. FEATURES ..........1.1 MODEL IDENTIFICATION . -
Page 3: Features
1. FEATURES 1.1 MODEL IDENTIFICATION This list applies to new models since June 1997. Example INDOOR UNIT ∗ TYPE DESTINATION COOLING/ FUNCTION CONTROL SHOWING COLOR MARKET REGIONS HEATING RANK TYPE METHOD MINOR (REMOTE CONTROL) CHANGES BTU/h(kW) AS: WALL G: 220-240V 50Hz 7: 7,000 (2.1) A: COOLING... -
Page 4: Application Model
1.2 APPLICATION MODEL 1.2.1 COMPACT SII, MII & LI SERIES FOR 7,000 TO 17,000 BTU/h CLASSIFICATION INDOOR UNIT OUTDOOR UNIT ∗ ∗ 7ASC-W 7ASC ∗ ∗ Cooling 7ASCCW 7ASCC ∗ ∗ 7,000 BTU/h 7ASD-W 7ASD ∗ ∗ SII-SERIES 7RSC-W 7RSC ∗... - Page 5 CLASSIFICATION INDOOR UNIT OUTDOOR UNIT ∗ ∗ 12ASE-W 12ASE ∗ ∗ 12ASF-W 12ASF ∗ ∗ 12ASG 12ASG ∗ ∗ 12FSA-W 12FSA ∗ ∗ 12ASECW 12ASEC ∗ ∗ 12ASFCW 12ASFC ∗ ∗ 12ASGCW 12ASGC ∗ ∗ 12ASHCW 12ASHC ∗ ∗ 12FSACW 12FSAC ∗...
- Page 6 1.2.2 WALL MOUNTED LARGE AS-SERIES FOR 20,000 TO 30,000 BTU/h INDOOR UNIT CLASSIFICATION Wireless Wireless Wireless OUTDOOR UNIT (Handy/ (Handy) (Wall fixing) Wall fixing universal) ∗ 20AW ∗ ∗ ∗ ∗ 20AS 20AZ ∗ Cooling 20AW 20AG 20AN (ASC-502B) (AOC-502B) 20,000 BTU/h ∗...
-
Page 7: Features Of Each Model
1.3 FEATURES OF EACH MODEL COMPACT SII -type COMPACT MII -type Wall mounted AS 20 30,000 BTU/h -type FLOOR/CEILING AB 14 24,000 BTU/h -type ITEM Cooling Reverse Cooling Reverse Cooling Reverse Cooling Reverse Cooling Reverse Cooling Reverse only cycle only cycle only cycle... - Page 8 1.3.1 WIRELESS REMOTE CONTROL UNIT (Handy type) q SLEEP button Rear Side w MASTER CONTROL button !2 TIME ADJUST button e SET TEMP./SET TIME buttons ( !3 ACL button (located inside battery compartment) r Signal Transmitter !4 TEST RUN button t TIMER button •...
- Page 9 Remote Control Unit Display !7 Remote Control Unit Display !8 Transmit Indicator !9 Clock Display CLOCK TIMER RESET @0 Operating Mode Display ON SLEEP °C AUTO AUTO @1 Timer Mode Display COOL HIGH HIGH D R Y M E D F A N L O W @2 Fan Speed Display...
- Page 10 1.3.2 WIRELESS REMOTE CONTROL UNIT ( Wall fixing type ) Inside of battery cover q SLEEP button !4 TIME ADJUST button w MASTER CONTROL button !5 ACL button e SET TIME buttons ( (located inside battery compartment) r SET TEMP. buttons ( !6 TEST RUN button t Signal Transmitter •...
- Page 11 1.3.3 WIRELESS REMOTE CONTROL UNIT q SLEEP button w MASTER CONTROL button e SET TEMP./SET TIME buttons ( r Signal Transmitter t TIMER button y FAN CONTROL button u START/STOP button i Battery compartment lid Inside of the battery compartment lid o AIRFLOW DIRECTION button !0 ENERGY SAVE button !1 CODE CHANGE (Slide Switch)
-
Page 12: Automatic Operation
1.3.4 AUTOMATIC OPERATION COOLING MODEL : This applies to the COMPACT type SII and MII. • Depending on the room temperature at the time operation Actual Room Operating Mode Thermostat Setting begins, the operating mode will be switched automatically Temperature (standard setting) as ahown in the accompanying table. -
Page 13: Auto Changeover Operation
1.3.5 AUTO CHANGEOVER OPERATION HEAT & COOL MODEL (Reverse cycle) • When AUTO CHANGEOVER operation is selected, the air conditioner selects the appropriate operation mode (Cooling or Heating) in response to your room's temperature. • When AUTO CHANGEOVER operation first selected, the fan will operate at very low speed for about one minute, during which time the unit detects the room conditions and selects the proper operating mode. -
Page 14: Fan Operation
1.3.9 FAN OPERATION • Use to circulate the air throughout your room. 1.3.10 AUTO FAN SPEED • When the FAN CONTROL switch is set to the AUTO position, the optimum fan speed will be selected automatically in accor- dance with room temperature and other conditions. •... -
Page 15: Off Timer
1.3.11 OFF TIMER When the timer reaches the set time, the air conditioner will be turned off. 1.3.12 SLEEP TIMER OPERATION During Heating operation [HEAT & COOL MODEL (Reverse cycle) only ] : When the SLEEP timer is set, the thermostat setting is SLEEP timer setting automatically lowered 1°C every thirty minutes. - Page 16 During Cooling/Dry operation : The thermostat temperature setting increases by 1°C as ENERGY SAVE setting soon as the ENERGY SAVE button is pressed, and then increases by another 1°C after one hour has passed. 1 hour ENERGY Afterwards, energy consumption is saved by continuing to SAVE ON cool or dry at a thermostat temperature of 2°C more than that set.
- Page 17 1.3.16 HORIZONTAL AIR DIRECTION ADJUSTMENT Each time the button is pressed, the air direction range will change as follows: The Remote Controller's display does not change. RIGHT/LEFT Air Direction Louvers RIGHT/LEFT Air Direction Louvers • Use the air direction adjustments within the ranges shown above. UNIVERSAL TYPE WALL MOUNTED TYPE 1.3.17...
- Page 18 1.3.18 HORIZONTAL AIRFLOW SWING OPERATION • The range of swing is relative to the currently set airflow direction. Airflow direction set Rang e of swin g q to t (All range) q to e w to r e to t q to t (All range) •...
-
Page 19: Printed Wiring Board Settings
1.3.22 COOLING OPERATION EVEN AT A LOW OUTDOOR TEMPERATURE Cooling operation is possible down to 0°C. 1.3.23 MOLD PREVENTION FILTER The air filter are specially treated with a mold inhibiting compound. This stops mold and mildew from forming inside the indoor unit. 1.3.24 AIR PURIFYING FILTER (OPTIONAL) The electrostatic filter removes dust and minute particles to purify the air in a room. - Page 20 Auto - Restart Enable (default) Disconnect Auto - Restart Disable Connect Remote - Controller Code-A (default) Connect Connect Remote - Controller Code-B Disconnect Connect Remote - Controller Code-C Connect Disconnect Remote - Controller Code-D Disconnect Disconnect Confirm the remote controller's "CODE CHANGE Switch" selection and printed wiring board setting.
-
Page 21: Specifications
2. SPECIFICATIONS 2.1 COMPACT S & L SERIES 7A, 7R, 9A, 9R, 12A, 12R, 14A, 14R, 17A, 17R) 2.1.1 7A / AO 7A, AS 7R / AO WALL MOUNTED TYPE COMPACT TYPE SII -CHASSIS (7,000 BTU/h) MODEL Indoor unit Outdoor unit Power Source [ V ] 220 - 240... - Page 22 2.1.2 9A, 9R, 12A, 12R, 14A, 14R, 17A, 17R / AO 9A, 9R, 12A, 12R, 14A, 14R, 17A, 17R WALL MOUNTED TYPE COMPACT TYPE MII - CHASSIS (9,000/17,000 BTU/h) MODEL Indoor unit 17AB 17RB 17AN 17RN Outdoor unit Power Source 220 - 240 220 - 240 220 - 240...
- Page 23 2.1.3 ASQ9A, 9R, 12A, 12R / AOQ9A, 9R, 12A, 12R WALL MOUNTED TYPE COMPACT TYPE MII - CHASSIS MODEL Indoor unit ASQ9ASB-W ASQ9RSB-W ASQ12ASB-W ASQ12RAB-W Outdoor unit AOQ9ANB AOQ9RSB AOQ12ASB AOQ12RSB Power Source Phase-Cycles -[Hz] 1 - 50 1 - 50 1 - 50 1 - 50 Capacity...
-
Page 24: Wall Mounted Large As-Series (As 20A, 20R, 24A, 24R, 30A, 30R)
2.2 WALL MOUNTED LARGE AS-SERIES (AS 20A, 20R, 24A, 24R, 30A, 30R) 2.2.1 20A, 20R, 24A, 24R, 30A, 30R WALL MOUNTED TYPE (WIRELESS) MODEL Indoor unit 20AZ 20RZ 24AB 24RZ 30AB 30RB Outdoor unit 5.55 - 5.70 5.55 - 5.70 6.75 - 6.85 6.70 - 6.80 8.05 - 8.20... - Page 25 2.2.2 20A, 20R, 24A, 24R (Nontropicalized models) WALL MOUNTED TYPE (WIRELESS) MODEL Indoor unit Outdoor unit 20AN 20RM 24AN 24RM 5.80 - 5.90 5.55 - 5.70 6.75 - 6.85 6.70 - 6.80 Cooling 19,800 - 20,100 19,000 - 19,500 23,000 - 23,400 22,900 - 23,200 BTU/h Capacity...
- Page 26 2.2.3 ASB20A, 20R, 24A, 24R, 30A, 30R WALL MOUNTED TYPE (WIRELESS) MODEL Indoor unit ASB20A ASB20R ASB24A ASB24R ASB30A ASB30R Outdoor unit AOB20A AOB20R AOB24A AOB24R AOB30A AOB30R W(SSA) 4,500 4,500 5,700 5,700 6,700 6,700 Cooling 19,500 19,500 24,000 24,000 30,000 30,000 BTU/h...
- Page 27 2.2.2 ASC-502B, ASC-602B WALL MOUNTED TYPE (WIRELESS) ASC-502B ASC-602B MODEL Indoor unit Outdoor unit AOC-502B AOC-602B 5,000 6,000 kcal/h Cooling 19,850 23,820 BTU/h Capacity — — kcal/h Heating — — BTU/h Power source - 60Hz / 220V 2,280 2,600 Total input Cooling watts —...
-
Page 28: Universal Ab-Series (Ab 14A, 14R, 18A, 18R, 24A, 24R)
2.3 UNIVERSAL AB-SERIES (AB 14A, 14R, 18A, 18R, 24A, 24R) 2.3.1 14A, 14R, 18A, 18R, 24A, 24R FLOOR / CEILING UNIVERSAL TYPE MODEL Indoor unit Outdoor unit 18AZ 18RZ 24AB 24RZ 4.00 - 4.10 3.95 - 4.05 5.30- 5.40 5.20 - 5.30 6.55 - 6.65 6.50 - 6.60 Cooling... - Page 29 2.3.2 18A, 18R, 24A, 24R (Nontropicalized models) FLOOR / CEILING UNIVERSAL TYPE MODEL Indoor unit Outdoor unit 18AN 18RM 24AN 24RM 5.3 - 5.4 5.2 - 5.3 6.55 - 6.75 6.7 - 6.8 Cooling 18,100 - 18,400 17,700 - 18,100 22,400 - 23,000 22,900 - 23,200 BTU/h...
- Page 30 2.3.3 ABB24A, ABB24R FLOOR / CEILING UNIVERSAL TYPE MODEL ABB24A ABB24R Cooling 5,300 5,300 Capacity Heating — 7,100 Power source 1 ~ 220V 60Hz 3,100 3,100 Cooling Total input watts — 2,650 Heating 14.6 14.6 Total Cooling ampacity — 12.5 Heating 1.71 1.71...
-
Page 31: Outline And Dimensions
3. OUTLINE AND DIMENSIONS 3.1 MODELS : AS 7A, 7R 3.1.1 INDOOR UNIT Unit : mm (inch) 790 (31-3/32") 808 (31-13/16") 170 (6-11/16") 3.1.2 OUTDOOR UNIT 650 (25-19/32") – 30 –... -
Page 32: Models : As
3.2 MODELS : AS 9A, 9R, 12A , 12R 3.2.1 INDOOR UNIT Unit : mm (inch) 815 (32-3/32") 175 (6-57/64") 176 (6-15/16") 3.2.2 OUTDOOR UNIT 500 (19-11/16") 98 (3-27/32") 250 (9-27/32") 695 (27-3/8") 290 (11-13/32") – 31 –... -
Page 33: Models : As 14A, 14R
3.3 MODELS : AS 14A, 14R 3.3.1 INDOOR UNIT Unit : mm (inch) 900 (35 - 7/16") 172 (6 - 49/64") 3.3.2 OUTDOOR UNIT 250 (9 - 27/32") 750 (29 - 17/32") 540 (21 - 17/64") 285 (11 - 7/32") –... -
Page 34: Models : As 17A, 17R
3.4 MODELS : AS 17A, 17R 3.4.1 INDOOR UNIT Unit : mm (inch) 900 (35 - 7/16") 172 (6 - 49/64") 3.4.2 OUTDOOR UNIT 336 (13-1/4" ) 840 ( 33-1/16" ) 804 (31-21/32" ) – 33 –... -
Page 35: Models : As 20A, 20R, 24A, 24R, 30A, 30R, Asc-502B, Asc-602B
3.5 MODELS : AS 20A, 20R, 24A, 24R, 30A, 30R, ASC-502B, ASC-602B 3.5.1 INDOOR UNIT Unit : mm (inch) 1,250 (49-7/32" ) (7-11/16" ) 660 (25-31/32") 720 (28-11/32") 660 (25-31/32") 5 (3/16" ) 720 (28-11/32") C on n ect i ng G as 15.88 (5/8") p i pe... - Page 36 3.5.2 OUTDOOR UNIT Unit : mm (inch) Models : AO 20A, 20R, 24A , 24R, AOC-502B, AOC-602B 336 (13-1/4" ) 840 ( 33-1/16" ) 804 (31-21/32" ) Models : AO 30A, 30R (13-25/32" ) 900 (35-7/16") 930 (36-39/64") 19 (3/4" ) (31-21/32"...
-
Page 37: Models : As 14A, 14R, 18A, 18R, 24A, 24R
3.6 MODELS : AS 14A, 14R, 18A, 18R, 24A, 24R 3.6.1 INDOOR UNIT Unit : mm (inch) 199 (7-27/32") 990 (38-31/32") [Rear View] 500 (19-11/16") 900 (35-7/16") – 36 –... - Page 38 3.6.2 OUTDOOR UNIT Unit : mm (inch) Models : AO 18A, 18R, 24A , 24R 336 (13-1/4" ) 840 ( 33-1/16" ) 804 (31-21/32" ) Models : AO 14A, 14R 750 (29-17/32") 493 (19-13/32") 250 (9-27/32") 540 (21-1/4") 285 (11-7/32") ( Mounting bolt pitch ) –...
-
Page 39: Data
4. DATA 4.1 PERFORMANCE CURVE 4.1.1 MODEL : COMPACT SII, MII & LI (AS 14A, AS 14R) SERIES Indoor Cooling DB/WB (˚C) 31/22 29/21.5 27/19 25/17.5 23/16 21/14.5 19/12.5 Indoor DB/WB (˚C) 31/22 29/21.5 27/19 25/17.5 23/16 21/14.5 19/12.5 20 21 45 46 Outdoor DB( ˚C) - Page 40 4.1.2 17A, 20A, 24A (50Hz models) Cooling Indoor DB/WB 29/21˚C 29/19 27/19 25/19 23/19 23/17 29/21˚C 29/19 27/19 25/19 23/19 23/17 Tropicalized models Outdoor DB (˚C) Nontropicalized models 4.1.3 30A (50Hz models) Cooling 29/21 29/19 Indoor 27/19 DB/WB 25/19 23/19 29/21˚C 23/17 29/19...
- Page 41 4.1.4 17R, 20R, 24R (50Hz models) Cooling 29/21 29/19 Indoor 27/19 DB/WB 25/19 23/19 29/21˚C 23/17 29/19 27/19 25/19 23/19 23/17 29/21˚C 29/19 27/19 25/19 23/19 29/19 27/19 23/17 25/19 23/17 29/21 23/19 Tropicalized models Lower limit of AS 17R Nontropicalized models Heating Indoor...
- Page 42 4.1.5 ASB20R, ASB24R, ASB30R (60Hz models) Cooling Indoor DB/WB 29/21˚C 29/19 27/19 25/19 23/19 23/17 29/21˚C 29/19 27/19 25/19 23/19 23/17 Outdoor DB (˚C) Heating Indoor 15˚C 20˚C 25˚C 25˚C 20˚C 15˚C Outdoor DB (˚C) RH=85% – 41 –...
- Page 43 4.1.6 ASB20A, ASB24A, ASB30A (60Hz models) Cooling Indoor DB/WB 29/21˚C 29/19 27/19 25/19 23/19 23/17 29/21˚C 29/19 27/19 25/19 23/19 23/17 Outdoor DB (˚C) 4.1.7 ASC-502B, ASC-602B (60Hz models) Cooling Indoor DB/WB 29/21˚C 27/19.5 27/19 25/19 23/19 23/17 29/21˚C 27/19.5 27/19 25/19 23/19...
- Page 44 4.1.8 14R (50Hz models) Cooling Indoor DB/WB 29/21˚C 27/19.5 27/19 25/19 23/19 23/17 29/21˚C 27/19.5 27/19 25/19 23/19 23/17 Outdoor DB (˚C) Heating Indoor 15˚C 20˚C 25˚C 25˚C 20˚C 15˚C Outdoor DB (˚C) RH=85% – 43 –...
- Page 45 4.1.9 18R, AB 24R (50Hz models) Cooling 29/21 29/19 Indoor 27/19 DB/WB 25/19 23/19 29/21˚C 23/17 29/19 27/19 25/19 23/19 23/17 29/21˚C 29/19 27/19 25/19 23/19 29/19 27/19 23/17 25/19 23/17 29/21 23/19 Tropicalized models Outdoor DB (˚C) Nontropicalized models Heating Indoor 15˚C...
- Page 46 4.1.10 18A, AB 24A (50Hz models) Cooling Indoor DB/WB 29/21˚C 29/19 27/19 25/19 23/19 23/17 29/21˚C 29/19 27/19 25/19 23/19 23/17 Tropicalized models Outdoor DB (˚C) Nontropicalized models 4.1.11 14A (50Hz models) Cooling Indoor DB/WB 29/21˚C 27/19.5 27/19 25/19 23/19 23/17 29/21˚C 27/19.5...
- Page 47 4.1.12 ABB24A (60Hz models) Cooling Indoor DB/WB 29/21˚C 29/19 27/19 25/19 23/19 23/17 29/21˚C 29/19 27/19 25/19 23/19 23/17 Outdoor DB (˚C) – 46 –...
- Page 48 4.1.13 ABB24R (60Hz models) Cooling Indoor DB/WB 29/21˚C 29/19 27/19 25/19 23/19 23/17 29/21˚C 29/19 27/19 25/19 23/19 23/17 Outdoor DB (˚C) Heating Indoor 15˚C 20˚C 25˚C 25˚C 20˚C 15˚C Outdoor DB (˚C) RH=85% – 47 –...
-
Page 49: Tempterature Range
4.2 TEMPERATURE RANGE TEMPERATURE RANGE MODELS INDOOR UNIT OUTDOOR UNIT ∗ COOL ∗ Approx. 18°C to 32°C Approx. 18°C to 43°C ∗ ∗ Approx. 18°C to 32°C Approx. 18°C to 43°C COOL ∗ ∗ Approx. 16°C to 30°C Approx. -5°C to 21°C HEAT ∗... -
Page 50: Refrigerant Charging
4.3 REFRIGERANT CHARGING 4.3.1 COMPACT SII & MII SERIES Additional Pipe length 16ft (5m) 23ft (7m) 33ft (10m) 49ft (15m) refrigerant Models ∗ ∗ 7A, AS ADDITIONAL ∗ ∗ None 160g 9A, AS REFRIGERANT ∗ ∗ 12A, AS Note: When the piping is longer than 5m, additional charging is necessary. ASY12ASG, ASM, AST12ASH, ASA12ASF LI SERIES AS14A, 14R... - Page 51 4.3.2 WALL MOUNTED LARGE AS-SERIES Additional Pipe length refrigerant 16ft (5m) 33ft (10m) 49ft (15m) 66ft (20m) 82ft (25m) 98ft (30m) Models g/m(oz/ft) ∗ 1,320g 1,380g 1,440g 1,500g 20A/ ∗ 20AZ (46.6 oz) (48.7 oz) (50.8 oz) (52.9 oz) (0.13 oz) 1,350g 1,410g 1,470g...
- Page 52 4.3.3 FLOOR / CEILING UNIVERSAL AB-SERIES Additional Pipe length refrigerant 16ft (5m) 33ft (10m) 49ft (15m) 66ft (20m) Models g/m (oz/ft) ∗ 14A/ 1,000g 1,150g ∗ 14AN (35.2 oz) (40.5 oz) (0.32 oz) ∗ 1,050g 1,200g 14R/ ∗ 14RN (36.9 oz) (42.2 oz) (0.32 oz) ∗...
-
Page 53: Air Velocity Distribution
4.4 AIR VELOCITY DISTRIBUTION 4.4.1 AIR DISCHARGE ANGLE AS : WALL MOUNTED Horizontal Center Vertical AB : UNDER CEILING Upward Center Downward Upward Center AB : FLOOR CONSOLE Forward – 52 –... - Page 54 4.4.2 COMPACT SII SERIES MODELS : AS 7A, 7R Unit: m/s Fig. 3.4.2-1 TOP VIEW Note : FLOW CONTROL PANEL : Horiz. Fan speed : Hi LOUVER : Center Operation : FAN Voltage : 240V Unit: m/s L ou v er :R i gh t Fig.
- Page 55 4.4.3 LI SERIES MODELS : 9A, 9R, 12A, 12R, AS 14A, 14R, 17A, 17R Unit: m/s Fig. 3.4.3-1 TOP VIEW Note : FLOW CONTROL PANEL : Horiz. Fan speed : Hi LOUVER : Center Operation : FAN Voltage : 240V Unit: m/s L ouv e r :R i gh t Fig.
- Page 56 4.4.4 AIR VELOCITY DISTRIBUTION MODELS : AS 20A, AS 20R, ASC-502B (50, 60Hz models) Condition Fan speed : High Operation mode : Fan Voltage : 240V 220V (60Hz model) Unit: m/s Fig. 4.4.4-1 TOP VIEW FLOW CONTROL PANEL : Horiz. 0.25 LOUVER : Center Unit: m/s...
- Page 57 4.4.5 AIR VELOCITY DISTRIBUTION MODELS : AS 24A, AS 24R, ASC-602B (50, 60Hz models) Condition Fan speed : High Operation mode : Fan Voltage : 240V 220V Unit: m/s (60Hz model) Fig. 4.4.5-1 TOP VIEW 0.25 FLOW CONTROL PANEL : Horiz. LOUVER : Center Unit: m/s 0.25...
- Page 58 4.4.6 AIR VELOCITY DISTRIBUTION MODELS : AS 30A, AS 30R (50, 60Hz models) Condition Fan speed : High Operation mode : Fan Voltage : 240V 220V Unit: m/s (60Hz model) Fig. 4.4.6-1 TOP VIEW 0.25 FLOW CONTROL PANEL : Horiz. LOUVER : Center Unit: m/s 0.25...
- Page 59 4.4.7 AIR VELOCITY DISTRIBUTION MODEL : AB 14 (FLOOR CONSOLE) Unit: m/s Fig. 4.4.7-1 TOP VIEW VERTICAL : Forward 0.25 HORIZONTAL : Center Unit: m/s Note : 0.25 The location of vertical louvers is HORIZONTAL: Right shown on page 52. Fig.
- Page 60 4.4.8 AIR VELOCITY DISTRIBUTION MODEL : AB 14 (UNDER CEILING) Unit: m/s Fig. 4.4.8-1 TOP VIEW 0.25 VERTICAL : Upward HORIZONTAL : Center Unit: m/s Note : 0.25 The location of vertical louvers is HORIZONTAL: Right shown on page 52. Fig.
- Page 61 4.4.9 AIR VELOCITY DISTRIBUTION MODEL : AB 18 (FLOOR CONSOLE) Unit: m/s Fig. 4.4.9-1 TOP VIEW VERTICAL : Forward 0.25 HORIZONTAL : Center Unit: m/s Note : 0.25 The location of vertical louvers is shown on page 52. Fig. 4.4.9-2 HORIZONTAL: Right TOP VIEW Condition...
- Page 62 4.4.10 AIR VELOCITY DISTRIBUTION MODEL : AB 18 (UNDER CEILING) Unit: m/s Fig. 4.4.10-1 TOP VIEW 0.25 VERTICAL : Upward HORIZONTAL : Center Unit: m/s Note : 0.25 The location of vertical louvers is Fig. 4.4.10-2 shown on page 52. HORIZONTAL: Right TOP VIEW VERTICAL : Upward...
- Page 63 4.4.11 AIR VELOCITY DISTRIBUTION MODEL : AB 24 (FLOOR CONSOLE) Unit: m/s Fig. 4.4.11-1 TOP VIEW 0.25 VERTICAL : Forward HORIZONTAL : Center Unit: m/s Note : 0.25 The location of vertical louvers is shown on page 52. HORIZONTAL: Right Fig.
- Page 64 4.4.12 AIR VELOCITY DISTRIBUTION MODEL : AB 24 (UNDER CEILING) Unit: m/s Fig. 4.4.12-1 TOP VIEW 0.25 VERTICAL : Upward HORIZONTAL : Center Unit: m/s Note : 0.25 The location of vertical louvers is shown on page 52. HORIZONTAL: Right Fig.
-
Page 65: Noise Level Measurement
4.5 NOISE LEVEL MEASUREMENT 4.5.1 NOISE LEVEL CHECK POINTS WALL MOUNTED TYPE UNIVERSAL TYPE (1) INDOOR UNIT (1) INDOOR UNIT UNDER CEILING TYPE 0.8 m 0.8 m 1.0 m 1.0 m (1) INDOOR UNIT FLOOR CONSOLE TYPE (2) OUTDOOR UNIT (2) OUTDOOR UNIT 1.0 m –... - Page 66 4.5.2 NOISE LEVEL CURVE COMPACT SII SERIES MODELS : AS 7A, 7R INDOOR UNIT Mode : Cool High 240V / 50Hz 1000 2000 4000 8000 Octave band center frequency (Hz) OUTDOOR UNIT Mode : Cool 240V / 50Hz Model : AS 7A 1000 2000 4000...
- Page 67 4.5.3 NOISE LEVEL CURVE COMPACT SII SERIES MODELS : AS 9A, 9R, 12A, 12R, 14A, 14R, 17A, 17R INDOOR UNIT Mode : Cool 240V / 50Hz High 1000 2000 4000 8000 Octave band center frequency (Hz) OUTDOOR UNIT Mode : Cool 240V / 50Hz Model : AO 9A AO 12A...
- Page 68 4.5.4 NOISE LEVEL CURVE WALL MOUNTED LARGE TYPE INDOOR UNIT SIDE OUTDOOR UNIT SIDE AS 20A, AS 20R (50Hz models) AO 17A, AO 20A, AO 20R ASS20A, ASS20R, ASC-502B (60Hz models) High 1000 2000 4000 8000 1000 2000 4000 8000 Octave band center frequency (Hz) Octave band center frequency (Hz) AS 24A, AS 24R (50Hz models)
- Page 69 4.5.5 NOISE LEVEL CURVE FLOOR / CEILING UNIVERSAL TYPE INDOOR UNIT SIDE OUTDOOR UNIT SIDE AB 24A, AB 24R AO 24A, AO 24R High 1000 2000 4000 8000 1000 2000 4000 8000 Octave band center frequency (Hz) Octave band center frequency (Hz) AB 18A, AB 18R AO 18A, AO 18R High...
-
Page 70: Diagrams
5. DIAGRAM 5.1 REFRIGERANT SYSTEM DIAGRAM 5.1.1 COMPACT SII SERIES Models : AS 7A / AO INDOOR UNIT OUTDOOR UNIT Capillary tube Refrigerant pipe ø 6.35mm(1/4") 2-Way valve Strainer Evaporator Condenser Refrigerant pipe ø 9.53mm(3/8") 3-Way valve Charging valve Compressor Models : AS 7R / AO INDOOR UNIT... - Page 71 5.1.2 COMPACT MII SERIES Models : AS 9A / AO INDOOR UNIT OUTDOOR UNIT Capillary tube Refrigerant pipe ø 6.35mm(1/4") 2-Way valve Strainer Evaporator Condenser Refrigerant pipe ø 9.53mm(3/8") 3-Way valve Charging valve Compressor Models : AS 9R / AO INDOOR UNIT OUTDOOR UNIT Capillary tube...
- Page 72 Models : AS 12A / AO INDOOR UNIT OUTDOOR UNIT Capillary tube Refrigerant pipe ø 6.35mm(1/4") 2-Way valve Strainer Evaporator Condenser Refrigerant pipe ø 12.7mm(1/2") 3-Way valve Charging valve Compressor Models : AS 12R / AO INDOOR UNIT OUTDOOR UNIT Capillary tube Capillary tube for heating...
- Page 73 Models : AS 14A / AO INDOOR UNIT OUTDOOR UNIT Charging valve Refrigerant pipe Suction pipe ø 6.35mm(1/4") 3-Way valve Condenser Evaporator Compressor Strainer Capillary tube 2-Way valve Refrigerant pipe ø 12.7mm(1/2") Models : AS 14R / AO INDOOR UNIT OUTDOOR UNIT Charging valve Coupling...
- Page 74 Models : AS 17A / AO 17AB INDOOR UNIT OUTDOOR UNIT Capillary tube Refrigerant pipe Distributor ø 6.35mm(1/4") Dryer Evaporator Condenser Muffler Refrigerant pipe ø 12.7mm(1/2") Charging valve Compressor Models : AS 17R / AO 17RB INDOOR UNIT OUTDOOR UNIT Capillary tube Refrigerant pipe Distributor...
- Page 75 Models : AS 17A / AO 17AN INDOOR UNIT OUTDOOR UNIT Capillary tube Refrigerant pipe Distributor ø 6.35mm(1/4") Dryer Evaporator Condenser Refrigerant pipe ø 12.7mm(1/2") Charging valve Compressor Models : AS 17R / AO 17RN INDOOR UNIT OUTDOOR UNIT Refrigerant pipe Distributor ø...
- Page 76 Models : AS 20A / AO 20AN INDOOR UNIT OUTDOOR UNIT Capillary tube Refrigerant pipe Distributor ø 9.53mm(3/8") Dryer Evaporator Condenser Refrigerant pipe ø 15.88mm(5/8") Charging valve Compressor Models : AS 20R / AO 20RM INDOOR UNIT OUTDOOR UNIT Capillary tube Refrigerant pipe Distributor ø...
- Page 77 Models : AS 24A / AO 24AN INDOOR UNIT OUTDOOR UNIT Capillary tube Refrigerant pipe Distributor ø 9.53mm(3/8") Dryer Evaporator Condenser Refrigerant pipe ø 15.88mm(5/8") Charging valve Compressor Models : AS 24R / AO 24RM INDOOR UNIT OUTDOOR UNIT Capillary tube Refrigerant pipe Distributor ø...
- Page 78 Models : AS 30A / AO INDOOR UNIT OUTDOOR UNIT Capillary tube Refrigerant pipe ø 9.53mm(3/8") Distributor Compressor Condenser Evaporator Refrigerant pipe ø 15.88mm(5/8") Charging valve Models : AS 30R / AO INDOOR UNIT OUTDOOR UNIT Capillary tube Refrigerant pipe Distributor ø...
- Page 79 Models : ASC-502B / AOC-502B INDOOR UNIT OUTDOOR UNIT Capillary tube Refrigerant pipe Distributor ø 9.53mm(3/8") Dryer Evaporator Condenser Muffler Refrigerant pipe ø 15.88mm(5/8") Charging valve Compressor Models : ASC-602B / AOC-602B INDOOR UNIT OUTDOOR UNIT OUTDOOR UNIT Capillary tube Refrigerant pipe Distributor ø...
- Page 80 5.1.4 FLOOR / CEILING UNIVERSAL TYPE Models : AB 24A / AO INDOOR UNIT OUTDOOR UNIT Capillary tube Refrigerant pipe Distributor ø 9.53mm(3/8") Dryer Evaporator Condenser Muffler Refrigerant pipe ø 15.88mm(5/8") Charging valve Compressor Models : AB 24R / AO 24RZ INDOOR UNIT OUTDOOR UNIT...
- Page 81 Models : AB 24A / AO 24AN INDOOR UNIT OUTDOOR UNIT Capillary tube Refrigerant pipe Distributor ø 9.53mm(3/8") Dryer Evaporator Condenser Refrigerant pipe ø 15.88mm(5/8") Charging valve Compressor Models : AB 24R / AO 24RM INDOOR UNIT OUTDOOR UNIT Capillary tube Refrigerant pipe Distributor ø...
- Page 82 Models : AB 18A / AO 18AZ INDOOR UNIT OUTDOOR UNIT Capillary tube Refrigerant pipe Distributor ø 9.53mm(3/8") Dryer Evaporator Condenser Muffler Refrigerant pipe ø 15.88mm(5/8") Charging valve Compressor Models : AB 18R / AO 18RZ INDOOR UNIT OUTDOOR UNIT Capillary tube Refrigerant pipe Distributor...
- Page 83 Models : AB 18A / AO 18AN INDOOR UNIT OUTDOOR UNIT Capillary tube Refrigerant pipe ø 9.53mm(3/8") Distributor Dryer Evaporator Condenser Refrigerant pipe ø 15.88mm(5/8") Charging valve Compressor Models : AB 18R / AO 18RM INDOOR UNIT OUTDOOR UNIT Capillary tube Refrigerant pipe Distributor ø...
- Page 84 Models : AB 14A / AO INDOOR UNIT OUTDOOR UNIT 3-Way valve Refrigerant pipe Suction pipe ø 12.7mm(1/2") Charging valve Condenser Evaporator Compressor Strainer Capillary tube 2-Way valve Refrigerant pipe ø 6.35mm(1/4") Models : AB 14R / AO INDOOR UNIT OUTDOOR UNIT Coupling Muffler...
-
Page 85: Circut Diagram
5.2 CIRCUIT DIAGRAM 5.2.1 COMPACT SII SERIES Models : AS 7A / AO BLACK BLACK THERMISTOR(ROOM TEMP.) GRAY GRAY TEST THERMISTOR 3 4 5 (PIPE TEMP.) LOUVER MOTOR BLACK WHITE CN201 GRAY PURPLE PURPLE BLUE FAN MOTOR BLUE GREEN CAPACITOR YELLOW ORANGE FAN MOTOR... - Page 86 Models : AS 7R / AO BLACK BLACK THERMISTOR(ROOM TEMP.) GRAY GRAY TEST THERMISTOR 3 4 5 (PIPE TEMP.) LOUVER MOTOR BLACK WHITE CN201 GRAY PURPLE PURPLE BLUE BLUE GREEN YELLOW ORANGE ORANGE BROWN FAN MOTOR CAPACITOR WHITE WHITE BROWN BLACK 3 4 5 6 7 FOUR WAY...
- Page 87 5.2.2 COMPACT MII SERIES Models : AS 9A / AO TRANSFORMER DISPLAY BOARD THERMAL FUSE FAN MOTOR 3 4 5 6 7 GRAY BLACK BLACK GRAY YELLOW WHITE WHITE 3 4 5 3 4 5 6 7 BLUE 3 4 5 3 4 5 6 7 WHITE CN103 CN104...
- Page 88 Models : AS 12A / AO TRANSFORMER DISPLAY BOARD THERMAL FUSE FAN MOTOR 3 4 5 6 7 GRAY BLACK BLACK GRAY YELLOW WHITE WHITE 3 4 5 3 4 5 6 7 BLUE 3 4 5 3 4 5 6 7 WHITE CN103 CN104 CN102...
- Page 89 5.2.3 COMPACT LI SERIES Models : AS 14A / AO TRANSFORMER DISPLAY BOARD THERMAL FUSE FAN MOTOR 3 4 5 6 7 GRAY BLACK BLACK GRAY YELLOW WHITE WHITE 3 4 5 3 4 5 6 7 BLUE 3 4 5 3 4 5 6 7 WHITE CN103 CN104...
- Page 90 Models : AS 14A / AO THERMAL PROTECTOR WHITE WHITE GRAY DISPLAY BOARD GRAY THERMAL FUSE WHITE 1 2 3 4 5 6 7 BLACK MOTOR ORANGE TRANSFORMER 1 2 3 4 5 1 2 3 4 5 BLACK BLUE 1 2 3 1 2 3 4 5 6 7 WHITE...
- Page 91 Models : AS 17A / AO 17AN THERMAL PROTECTOR WHITE WHITE GRAY WHITE DISPLAY BOARD GRAY THERMAL FUSE 1 2 3 4 5 6 7 BLACK MOTOR ORANGE TRANSFORMER 1 2 3 4 5 1 2 3 4 5 BLUE WHITE 1 2 3 1 2 3 4 5 6 7...
- Page 92 Models : AS 20A / AO 20AN Models : 24A / AO 24AN FAN MOTOR CAPACITOR FAN MOTOR GREEN/YELLOW DISPLAY BOARD GREEN/YELLOW TERMINAL BLACK CN13 WHITE BLACK WHITE GRAY CONTROL BOARD GRAY BLACK BLACK CN11 CN10 MAIN RELAY 3 2 1 STEP MOTOR STEP MOTOR (LEFT/RIGHT)
- Page 93 5.2.4 WALL MOUNTED LARGE TYPE Models : AS 20A / AO 20AZ (except ASC-502B / AOC-502B and ASC-602B / AOC-602B) Models : 24A / AO 24AB GREEN/YELLOW GREEN / YELLOW MOTOR DISPLAY BOARD GREEN / YELLOW 5 4 3 WHITE 5 4 3 5 4 3 CN13...
- Page 94 Models : ASC-502B / AOC-502B Models : ASC-602B / AOC-602B GREEN/YELLOW GREEN/YELLOW GREEN/YELLOW MOTOR DISPLAY BOARD WHITE CN13 GRAY CONTROL BOARD BLACK GRAY WHITE BLACK BLACK CN11 CN10 MAIN RELAY STEP MOTOR STEP MOTOR (UP/DOWN) (LEFT/RIGHT) INDOOR UNIT OUTDOOR UNIT TERMINAL 1(N) WHITE...
- Page 95 Models : AS 20R / AO Models : 24R / AO (except “ASB” model) GREEN / YELLOW MOTOR DISPLAY BOARD GREEN / YELLOW 5 4 3 WHITE 5 4 3 5 4 3 CN13 GRAY CONTROL BOARD GRAY BLACK WHITE BLACK BLACK CN11...
- Page 96 Models : ASB24R / AOB24R GREEN/YELLOW GREEN/YELLOW GREEN/YELLOW MOTOR DISPLAY BOARD WHITE CN13 GRAY BLACK CONTROL BOARD GRAY WHITE BLACK BLACK CN11 CN10 MAIN RELAY STEP MOTOR STEP MOTOR (LEFT/RIGHT) (UP/DOWN) INDOOR UNIT OUTDOOR UNIT TERMINAL 1(N) BLACK WHITE BLACK FAN MOTOR CAPACITOR COMPRESSOR...
- Page 97 Models : AS 30A / AO (except "ASB" model ) FAN MOTOR GREEN / YELLOW CAPACITOR GREEN / YELLOW MOTOR DISPLAY BOARD CN201 TERMINAL 5 4 3 BLACK WHITE 5 4 3 5 4 3 CN13 GRAY CONTROL BOARD GRAY BLACK WHITE BLACK...
- Page 98 Models : ASB30A / AOB30A GREEN/YELLOW GREEN/YELLOW GREEN/YELLOW MOTOR DISPLAY BOARD 5 4 3 WHITE 5 4 3 5 4 3 CN13 GRAY CONTROL BOARD BLACK GRAY WHITE BLACK BLACK CN11 CN10 5 4 3 5 4 3 MAIN RELAY STEP MOTOR STEP MOTOR (LEFT/RIGHT)
- Page 99 Models : AS 30R / AO (except "ASB" model ) GREEN / YELLOW FAN MOTOR FAN MOTOR CAPACITOR GREEN / YELLOW DISPLAY BOARD CN201 5 4 3 BLACK WHITE 5 4 3 5 4 3 CN13 GRAY CONTROL BOARD BLACK GRAY WHITE Use T3.
- Page 100 Models : ASB30R / AOB30R GREEN/YELLOW GREEN/YELLOW GREEN/YELLOW MOTOR DISPLAY BOARD WHITE CN13 GRAY CONTROL BOARD BLACK GRAY WHITE BLACK BLACK CN11 CN10 MAIN RELAY STEP MOTOR STEP MOTOR (LEFT/RIGHT) (UP/DOWN) INDOOR UNIT OUTDOOR UNIT THERMAL PROTECTOR CONNECTOR COMPRESSOR INTERNAL OVERLOAD PROTECTOR FAN MOTOR...
- Page 101 5.2.5 FLOOR / CEILING UNIVERSAL TYPE Models : AB 18A / AO 18AN THERMISTOR(ROOM TEMP.) Models : 24A / AO 24AN THERMISTOR(PIPE TEMP.) FAN MOTOR CAPACITOR WHITE CN201 WHITE BROWN STEP MOTOR ORANGE (UP/DOWN) YELLOW BROWN WHITE BLUE ORANGE PURPLE CONTROL BOARD YELLOW GRAY...
- Page 102 Models : AB 14A / AO 14AN THERMISTOR(ROOM TEMP.) Models : 18A / AO 18AZ Models : 24A / AO 24AB THERMISTOR(PIPE TEMP.) FAN MOTOR CAPACITOR WHITE CN201 WHITE BROWN ORANGE STEP MOTOR (UP/DOWN) YELLOW BROWN WHITE BLUE ORANGE PURPLE CONTROL BOARD YELLOW GRAY...
- Page 103 THERMISTOR(ROOM TEMP.) Models : AB 18R / AO THERMISTOR(PIPE TEMP.) Models : 24R / AO FAN MOTOR CAPACITOR WHITE CN201 WHITE BROWN ORANGE STEP MOTOR (UP/DOWN) YELLOW BROWN WHITE BLUE ORANGE PURPLE CONTROL BOARD YELLOW GRAY WHITE STEP MOTOR (LEFT/RIGHT) BLUE BROWN FAN MOTOR...
- Page 104 THERMISTOR(ROOM TEMP.) Models : AB 14R / AO THERMISTOR(PIPE TEMP.) Models : ABB24R / AOB24R FAN MOTOR CAPACITOR WHITE CN201 WHITE BROWN ORANGE STEP MOTOR (UP/DOWN) YELLOW BROWN WHITE BLUE ORANGE PURPLE CONTROL BOARD YELLOW GRAY WHITE STEP MOTOR (LEFT/RIGHT) BLUE BROWN FAN MOTOR...
-
Page 105: Controller Circuit Diagram Ez Number List
5.3 CONTROLLER CIRCUIT DIAGRAM EZ NUMBER LIST CONTROLLER PCB MODEL CONTROL BOX ASSY P. C. BOARD ASSY CIRCUIT DIAGRAM COMPACT S TYPE AS - SERIES EZ-096KWSE-C A-ASY7ASC-06 ASY 7A EZ-096KWSE ASY 7R EZ-096JHSE EZ-096JHSE-C A-ASY7RSC-07 CONTROLLER PCB MODEL CONTROL BOX ASSY P. - Page 106 CONTROLLER PCB MODEL CONTROL BOX ASSY P. C. BOARD ASSY CIRCUIT DIAGRAM TYPE AS - SERIES ASY 14ASE EZ-096EWSE EZ-095GWSE-C A-EZ-096BWSE ASY 14ASF EZ-0982WSE A-ASY17ASF-W-07 EZ-09707WSE-C AST 14ASH EZ-0984WSE A-ASY17ASF-W-07 ASY 14RSE EZ-096AHSE EZ-095RHSE-C A-EZ-0966HSE ASY 14RSF EZ-0981HSE EZ-0981HSE-C A-EZ-09705HSE EZ-0982HSE EZ-0982HSE-C A-EZ-09705HSE...
- Page 107 CONTROLLER PCB MODEL CONTROL BOX ASSY P. C. BOARD ASSY CIRCUIT DIAGRAM -SERIES ASY 20/24AS ASY 20/24AW EZ-096JWSE A-EZ-096JWSE ASY 20/24AGA ASY 20/24AGD ASY 20/24AGB EZ-096HWSE A-EZ-096HWSE ASY 20/24AGC AST 20/24AGA EZ-0968WSE A-EZ-0968WSE AST 20/24AS EZ-0968WSE-F AST 20AGB EZ-096HWSE A-EZ-096HWSE AST 24AGC ASY/T 30A EZ-096HWSE...
- Page 108 CONTROLLER PCB MODEL CONTROL BOX ASSY P. C. BOARD ASSY CIRCUIT DIAGRAM -SERIES A-EZ-0989WSE ABY 14AG EZ-0989WSE ABY 14AS/AW EZ-0975WSE A-EZ-0975WSE ABY 18AS EZ-0972WSE A-EZ-0972WSE ABY 18AW ABY 18AGA EZ-0987WSE A-EZ-0987WSE ABY 18AGB EZ-0993WSE A-EZ-0993WSE ABY 18AGC EZ-0985WSE-F ABY 24AS EZ-0970WSE A-EZ-0970WSE ABY 24AW...
-
Page 109: Controller Pcb Circuit Diagram
5.4 CONTROLLER PRINTED CIRCUIT BOARD CIRCUIT DIAGRAM 5.4.1 COMPACT SII SERIES Model : AS POWER TRANSFORMER CONTROLLER PCB ASSY POWER SUPPLY PCB ASSY 1.0K <1/10W> MB89625R-SH-378 EVQ PFE 04R <1/10W> PKM13EPY-4000 <1/10W> DTC124EK MANUAL AUTO FAN MOTOR 1.2K S3P-VH <F> 100K <1/2W>... - Page 110 5.4.2 COMPACT MII SERIES Models : AS 9A, 12A POWER TRANSFORMER CONTROLLER PCB ASSEMBLY POWER SUPPLY PCB ASSY I C 1 <1/10W> 1.0K NB89625R-SH-277 EVQ PFE 04R PKM13EPY-4000 DTC124EK <1/10W> <1/10W> MANUAL AUTO FAN MOTOR <F> S3P-VH 1.2K 100K <1/2W> <1/10W>...
- Page 111 Models : AS 9R, 12R POWER TRANSFORMER CONTROLLER PCB ASSEMBLY POWER SUPPLY PCB ASSY 1.0K 1.0K <1/10W> MB89625R-SH-295 EVQ PFE 04R PKM13EPY-4000 <1/10W> <1/10W> DTC124EK MANUAL AUTO FAN MOTOR 1.2K <F> 100K S3P-VH <1/2W> <1/10W> CN101-1 (BLK) CN7-1 (RED) <1/10W> RESET <1/10W>...
- Page 112 Models : AS 14A, 17A CONTROLLER PCB ASSEMBLY (MAIN PCB) EZ-095GWSE-C (GM-6805) STEP MOTOR PINK MODEL CHANGING YELLOW CODE ORANGE INDICATOR PCB REMOTE CONTROL CUSTOM CODE EZ-030HSE-D BLUE AUTO CHANGE OVER HEATING TEMPERATURE TIMER CORRECTION 1 HEATING TEMPERATURE CORRECTION 2 AUTO RESTART OPERATE MULTI / SINGLE...
- Page 113 CONTROLLER PCB ASSEMBLY (MAIN PCB) EZ–0960HSE – C (GM-6844) Models : AS 14R, 17R (RED) STEP MOTOR (PNK) Model changing code (YEL) (ORG) INDICATOR PCB Remote control custom code EZ–030HSE–D (BLU) Auto change over (BLU) TIMER Heating temp. correction 1 (WHT) Heating temp.
- Page 114 5.4.3 WALL MOUNTED LARGE TYPE Models : AS 20A, 24A, ASS30A, ACS-7502, ACS-7602 R15-R17 5V CN8 B2B-XASK-1-A 10K <1/10W>X3 CONTOROLLER PCB ASSY ROOM TEMPERATURE THERMISTOR CN8-1 BLACK R18 1K <1/10W> AUTORESTART CHANGER CN8-2 BLACK 4700P <2W> THERMAL FUSE R19 1K <1/10W> B2B-XAKK-1-A 1000P 10/25V...
- Page 115 Model : AS R15-R17 B2B-XASK-1-A CONTROLLER PCB ASSY ROOM TEMPERATURE THERMISTOR 10K<1/10W> x 3 CN8-1 BLACK AUTO RESTART CHANGER R18 1K <1/10W> CN8-2 BLACK 4700P R19 1K <1/10W> B2B-XAKK-1-A <2W> THERMAL FUSE 220K CUSTOM CODE CHANGER CN7-1 GRAY R20 1K <1/10W> 1000P 10/25V 10.0K (1%)
- Page 116 Models : AS 20R, 24R, ASB30R R15-R17 CONTROLLER PCB ASSY B2B-XASK-1-A 10K<1/10W> x 3 ROOM TEMPERATURE THERMISTOR CN8-1 BLACK AUTORESTART CHANGER R18 1K <1/10W> CN8-2 BLACK 4700P R19 1K <1/10W> B2B-XAKK-1-A <2W> THERMAL FUSE 220K PIPE TEMPERATURE THERMISTOR CUSTOM CODE CHANGER CN7-1 GRAY R20 1K <1/10W>...
- Page 117 Model : AS 5V CN8 R15-R17 CONTROLLER PCB ASSY B2B-XASK-1-A ROOM TEMPERATURE THERMISTOR 10K<1/10W> x 3 CN8-1 BLACK R18 1K <1/10W> AUTO RESTART CHANGER CN8-2 BLACK 4700P R19 1K <1/10W> B2B-XAKK-1-A THERMAL FUSE <2W> 220K CN7-1 GRAY PIPE TEMPERATURE THERMISTOR CUSTOM CODE CHANGER R20 1K <1/10W>...
- Page 118 5.4.4 FLOOR / CEILING UNIVERSAL TYPE Models : AB 14A, 18A, 24A R15-R17 B2B-XASK-1-A CONTROLLER PCB ASSY 10K<1/10W> x 3 ROOM TEMPERATURE THERMISTOR CNB-1 BLACK AUTO RESTART CHANGER R18 1K <1/10W> CNB-2 BLACK 4700P R19 1K <1/10W> B2B-XAKK-1-A <2W> 220K CUSTOM CODE CHANGER CN7-1 GRAY...
- Page 119 Models : AB 14A, 18A, 24R R15-R17 ROOM TEMPERATURE THERMISTOR CONTROLLER PCB ASSY B2B-XASK-1-A 10K<1/10W> x 3 CN8-1 BLACK AUTO RESTART CHANGER R18 1K <1/10W> CN8-2 BLACK 4700P R19 1K <1/10W> <2W> B2B-XAKK-1-A 220K CUSTOM CODE CHANGER CN7-1 GRAY GRAY R20 1K <1/10W>...
-
Page 120: Remote Controller Circuit Diagram
5.5 REMOTE CONTROL UNIT CIRCUIT DIAGRAM 5.5.1 COMPACT SII SERIES Model : AS – 119 –... - Page 121 Model : AS – 120 –...
- Page 122 5.5.2 COMPACT MII SERIES Models : AS Models : – 121 –...
- Page 123 Models : AS Models : – 122 –...
- Page 124 5.5.3 COMPACT MII SERIES Models : AS Models : – 123 –...
- Page 125 Models : AS Models : – 124 –...
- Page 126 5.5.4 WALL MOUNTED LARGE TYPE AND FLOOR/CEILING UNIVERSAL TYPE REMOTE CONTROL UNIT CIRCUIT DIAGRAM ( HANDY TYPE ) Models : AS 20A, 24A, 30A Models : 14A, 18A, 24A – 125 –...
- Page 127 Models : AS 20R, 24R, 30R Models : 14R, 18R, 24R – 126 –...
- Page 128 REMOTE CONTROL UNIT CIRCUIT DIAGRAM (WALL FIXING TYPE) Models : AS 20A, 24A, 30A Models : 14A, 18A, 24A – 127 –...
- Page 129 Models : AS 20R, 24R, 30R Models : 14R, 18R, 24R – 128 –...
-
Page 130: Installation Instructions
6. INSTALLATION INSTRUCTIONS 6.1 SPLIT TYPE ROOM AIR CONDITIONER SPLIT TYPE AIR CONDITIONER INSTALLATION MANUAL Models : ASY20AGB-W, ASY20AGC-W, ASY24AGB-W, AST20AGB-W For authorized service personnel only. (1) For the room air conditioner to operate satisfactorily, install it as outlined in this installation manual. - Page 131 Decide the mounting position with the customer as 2. OUTDOOR UNIT follows: (1) If possible, do not install the unit where it will be exposed to direct sunlight. (If necessary, install a 1. INDOOR UNIT blind that does not interfere with the air flow.) (1) Install the indoor unit level on a strong wall which is (2) Do not install the unit where a strong wind blows or not subject to vibration.
- Page 132 Fig. 3 INDOOR UNIT OUTDOOR UNIT 5/8” (15.88 mm) dia. 3/8” (9.53 mm) dia. – 131 –...
-
Page 133: Standard Accessories
STANDARD ACCESSORIES ELECTRICAL REQUIREMENT The following installation accessories are supplied. Electric wire size and fuse capacity: Use them as required. INDOOR UNIT ACCESSORIES Table 1 20,000 BTU/h 24,000 BTU/h Name and Shape Q’ty class class Wall hook bracket For indoor unit Connection cord installation... - Page 134 • Fasten the wall hook bracket to the wall with 6 or more 1. INSTALLING THE WALL HOOK BRACKET screws and anchor bolts through the holes near the outer edge of the bracket. Removing the wall hook bracket • Do not install the wall hook bracket at only one place Remove the wall hook bracket in the following order: or at an angle.
- Page 135 2. CUTTING THE HOLE IN THE WALL FOR THE [q Rear piping, w Right piping, e Bottom pip- CONNECTING PIPING ing] • Install the indoor unit piping in the direction of the wall hole and bind the drain hose and pipe together with vinyl tape.
- Page 136 • For left piping and left rear piping, preset the end of 2. INDOOR UNIT WIRING the pipe to the dimensions shown in Fig. 14 from the mark on the wall hook bracket and form the connec- tion pipe. (1) Match the terminal block numbers •...
- Page 137 (6) Fasten the connection cord with a cord clamp. 1. LIMITATION OF REFRIGERANT PIPING LENGTH (7) Fasten the terminal cover with the screw. [Cooling model] Table 2 (3) Remove the cord clamp. Max length (L) 20 m (66 ft) (4) Process the end of the connection cords to the Max height difference (H) 8 m (20 ft) dimensions shown in Fig.
- Page 138 4. CONNECTION (1) Install the outdoor unit wall cap (supplied with the Fig. 25 connecting pipe optional installation set or procured at the site) to the wall pipe. Blank cap (2) Connect the outdoor unit and indoor unit piping. Hexagon (3) After matching the center of the flare surface and Outdoor unit wrench...
- Page 139 7. OUTDOOR UNIT WIRING Cooling model Terminal Control box board (1) Before starting work, check that Earth wire power is not being supplied to (Connection cord) indoor unit and the outdoor unit. Earth wire (Power cord) (2) Match the terminal block numbers Cord holder and connection cord colors with those of the indoor unit side.
- Page 140 8. FINISHING Check that: • The top and bottom hooks are hooked firmly and (1) Insulate between pipes. the indoor unit does not move to the front and rear or left and right. • For rear, right, and bottom piping, overlap the connection pipe heat insulation and indoor unit •...
- Page 141 9. POWER Installing the under covers (1) Installing under cover A (Fig. 36) Hook the two pipe bracket hooks to the two holes in the back of under cover A. (1) The rated voltage of this product is 220-240 V A.C. 50 Hz. While pulling the left side of under cover A for- ward about 1 cm (at this time, hole hook q so (2) Before turning on the verify that the...
- Page 142 CHECK ITEMS 10. TEST RUNNING (1) INDOOR UNIT • Press the remote control unit test run button while (1) Is operation of each button on the remote con- the air conditioner is running. trol unit normal? • At the end of test running, press the remote control (2) Does each lamp light normally? unit start/stop button.
- Page 143 2. FRONT PANEL REMOVAL 1. REMOTE CONTROL UNIT HOLDER INSTALLATION (1) Remove the four tapping screws. • Install the remote control unit so that the front is fac- (2) Remove the front panel by lifting the bottom of the ing the photocell.(Fig. 42) front panel upward.
- Page 144 2. REMOTE CONTROL UNIT CODE SWITCHING Fig. 44 Indoor unit Printed circuit board AUTORESTART REMOCON 2 REMOCON 1 Remote control unit ACL button Remote control unit signal selector switch A B C D Confirm the remote control unit signal selector switch selection and the printed circuit board setting.
-
Page 145: Floor Console/Under Ceiling Dual Type
6.2 FLOOR CONSOLE/UNDER CEILING DUAL TYPE SPLIT TYPE AIR CONDITIONER INSTALLATION MANUAL Models : ABT18AGA-W, ABT24AGA-W, ABT24RGA-W, ABY18AGA-W, ABY18RGA-W, ABY24AGA-W, ABY24RGA-W For authorized service personnel only. (1) For the room air conditioner to operate satisfactorily, install it as outlined in this installation manual. - Page 146 Fig. 1 SELECTING THE MOUNTING POSITION • Floor console Install at a place that can withstand the weight of the indoor and outdoor units Left Right and install positively so that the units will not topple or fall. (1) Do not install where there is the 12"...
-
Page 147: Indoor Unit Accessories
STANDARD PARTS The following installation parts are furnished. OUTDOOR UNIT ACCESSORIES Use them as required. Name and Shape Q’ty Application INDOOR UNIT ACCESSORIES Hexagon wrench For air purge Name and Shape Q’ty Application Pipe (drain) For outdoor unit drain Cover plate piping work (left) (Heat &... - Page 148 2. OUTDOOR UNIT Fig. 2 (1) Install the unit where it will not be tilted by more than 5° (2) When installing the outdoor unit where it may exposed to strong wind, fasten it securely. (1) If possible, do not install the unit where it will exposed to direct sunlight.
- Page 149 When the directions are selected, drill a 4” (10 cm) dia. INSTALLATION PROCEDURE hole on the wall so that the hole is tilted downward toward the outdoor for smooth water flow. When the Install the air conditioner as follows: pipe is led out from the rear, make a hole in Fig. 6, at the position shown.
- Page 150 Be sure to arrange the drain hose so that it is leveled lower than the drain hose connecting port of the indoor unit. Install the drain hose at the rear; it should not be installed on the top or Fig. 10 right side.
- Page 151 3. INSTALLING BRACKETS Fig. 20 Remove the hole cover. Install the brackets with nuts, washers and spring washers (Fig. 17). Fig.17 Arrange the drain hose Drain hose lower than this portion. When drain hose is arranged backward. Secure the drain hose with the VT wire (Fig.21). Spring washer Bracket Special nut...
- Page 152 3. CONNECTION PIPES 4. CONNECTING THE PIPING (1) Indoor unit side 1. FLARE PROCESSING Centering the pipe against port on the indoor unit, (1) Cut the connection pipe with pipe cutters so that the turn the flare nut with your hand (Fig. 26). pipe is not deformed.
- Page 153 (2) Outdoor unit side (3) Disconnect the service hoses and fit the cap to the charging valve (Tightening torque : 70 to 90 kgf • Tighten the flare nut of the connection pipe at the cm). outdoor unit valve connector. The tightening method is the same as that as at the indoor side.
- Page 154 7. HOW TO CONNECT WIRING TO THE TERMINALS 8. ELECTRICAL REQUIREMENT Electric wire size and fuse capacity: A. For solid core wiring (or F-cable) Table 4 (1) Cut the wire and with a wire cutter or wire-cut- ting pliers, then strip the insulation to about 18,000 BTU/h 24,000 BTU/h 15/16”...
- Page 155 Fig. 34 (4) Wiring Electric component box [Heat & Cool model (Reverse cycle)] 1) Remove the cord clamp. 2) Process the end of the connection cords to the dimensions shown in Fig. 37. 3) Connect the end of the connection cord fully into the terminal block.
- Page 156 (5) Floor console/Under ceiling select switch Fig. 41 1) The electrical circuits for this were set for use as a Heat & Cool model Cooling model ceiling type at the factory. (Reverse cycle) Connection cord Connection cord 2) The following changes must be made to the set- Green/Yellow tings if the unit is to be used as a floor type.
- Page 157 2. REMOTE CONTROL UNIT CODE SWITCHING 11. REMOTE CONTROL UNIT INSTALLATION Fig. 42 (1) Check that the indoor unit correctly receives the signal from the remote control unit, then install the remote Indoor unit control unit holder. Printed circuit board (2) Select the remote control unit holder selection site by paying careful atten- tion to the following:...
- Page 158 12. TEST RUNNING Table 6 Press the remote control unit test run button while the Error display Error contents air conditioner is running. 0.5 sec 0.5 sec At the end of test running, press the remote control Two quick OPERATION flashes unit start-stop button.
- Page 159 (2) Join the cover plates (right) and mount with screws (2) Insert the hinges on the bottom of the intake grille (Fig. 47). into the holes in the base assembly. Then mount the arms to the three areas on the top of the intake grille Fig.
- Page 160 0108J-911-1896 August 2001 Printed in Japan...