
Related Manuals for JVC KW-V820BT


Summary of Contents for JVC KW-V820BT
-
Page 1: Instruction Manual
KW-V820BT MONITOR WITH DVD RECEIVER INSTRUCTION MANUAL © 2016 JVC KENWOOD Corporation B5A-1051-00 b (KN) -
Page 2: Table Of Contents
[ ] indicates the buttons/selectable items on the touch panel. Indication language: English indications are used for the purpose of explanation. You can select the indication language from the <SETUP> menu. (Page 61) Updated information (the latest Instruction Manual, system updates, new functions, etc.) is available from <http://www.jvc.net/cs/car/>. - Page 3 Do not expose the monitor to direct sunlight. safety. exempt RSS standard(s). Do not operate the touch panel using a ball-point JVC KENWOOD Corporation Operation is subject to the following two conditions: pen or similar tool with a sharp tip. 2967-3, ISHIKAWA-MACHI, HACHIOJI-SHI, TOKYO,...
-
Page 4: Initial Settings
INITIAL SETTINGS [Camera] Configure settings for the Display the <User Interface> screen. Initial setup connected rear view camera. (Page 35) When you power on the unit for the first time, the [OEM Configure settings for the initial setting screen appears. SETUP] connected ADS adapter. -
Page 5: Basics
BASICS INITIAL SETTINGS 3 HOME/ (Voice) button To adjust the clock manually (when selecting Component names and functions Displays the Home screen. (Press) (Page 7) [Manual] on the <Clock> window) Activates the voice control function. (Hold) V Caution on the volume setting: Display the <Clock Adjust>... -
Page 6: Common Operations
BASICS To attenuate the sound Turning on/off the AV source Common operations On the source control screen: You can activate the AV function by selecting a Turning on the power source on the Home screen. Turning off the power To restore the sound: Touch [ (Hold) To select a source not displayed on the Home Turning off the screen... -
Page 7: Common Screen Operations
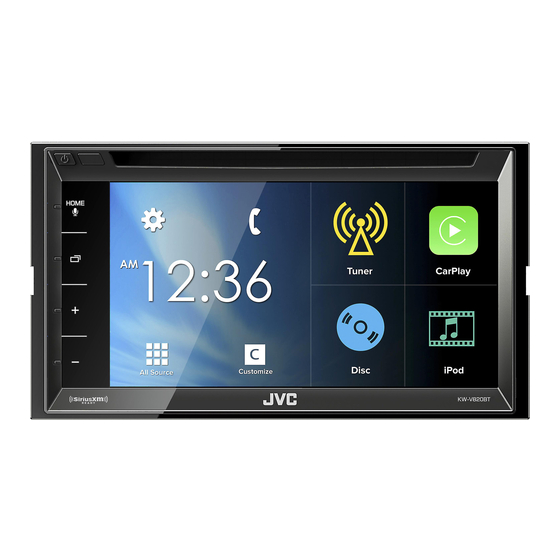
BASICS Gesture control on the source control screen: Home screen descriptions Common screen operations You can also control playback by moving your finger You can select playback sources, display setting Touch screen operations on the touch panel as follows (for some sources, the screens, or display information on the Home screen. - Page 8 BASICS 6 Short-cut source selection buttons/the indicators Source/option selection screen Source control screen descriptions for the current source descriptions You can perform source playback operations on the Each time you touch [ ] or [ ], the items source control screen. You can display all playback sources and options on shown in this area change.
- Page 9 BASICS <SETUP> screen descriptions List screen descriptions Playback operations during video playback You can change the detailed settings. (Page 60) During audio/video source playback, you can select the desired item easily from the list. 1 Selects a previous chapter/track/item. 2 Displays the source control screen while playing a video.
-
Page 10: Selecting The Playback Source/Option
BASICS [Apple CarPlay] Selecting the playback source on the Home Selecting the playback source/ Switches to the Apple CarPlay screen option screen from the connected iPod touch/iPhone. (Pages 22) Display the source/option selection screen. [Tuner] Switches to the radio broadcast. On the Home screen: (Page 24) [BT Audio]... -
Page 11: Using The Pop-Up Short-Cut Menu
BASICS Selecting the playback source on the source Customizing the source/option Using the pop-up short-cut menu control screen selection screen Display source selection buttons by touching [ ]/ While displaying the source control screen, you can You can arrange the items to display on the source/ [ ] on the source control screen (Page 8), then jump to another screen from the pop-up short-cut option selection screen. -
Page 12: Discs
DISCS Ejecting a disc Playing a disc Playback operations On the source control screen: If a disc does not have a disc menu, all tracks on When the operation buttons are it will be played repeatedly until you change the not displayed on the screen, touch source or eject the disc. - Page 13 DISCS Operation buttons For audio playback Operation buttons Available buttons on the screen and operations Available buttons on the screen and operations differ depending on the type of disc/file being differ depending on the type of disc/file being played back. played back.
- Page 14 DISCS To search in the folder containing the current Selecting a folder/track on the list Activating PBC (Playback Control) track function (for VCD only) To search all folders/tracks in a disc While playing a VCD with PBC... Display the folder/track list. Select an item.
- Page 15 DISCS Available buttons on the screen and Video menu operations (except for Selecting playback mode operations differ depending on the type of VCD) disc/file being played back. You can display the video menu screen during video [TOP] Displays the top menu. playback.
-
Page 16: Usb
DISCS Setting items Connecting a USB device Settings for DVD playback [Menu Select the initial disc menu language. You can connect a USB mass storage class device Language]* (Initial: English) (Page 74) such as a USB memory, Digital Audio Player, etc. to [Subtitle Select the initial subtitle language the unit. - Page 17 Starts/pauses playback. [IW] Playback information Playback operations The information displayed on the screen differs Selects a folder. depending on the type of file being played back. Starts the slide show when a picture When the operation buttons are 1 Playback mode (See below.) is displayed.
- Page 18 From <Folder List>: Selecting a track in a list Select the folder, then the item in the selected To search all folders/tracks in a USB device folder. Display the list. Select the desired track. To search in the folder containing the current Proceed until you select the desired track.
-
Page 19: Ipod/Iphone
iPod/iPhone Selecting the connection method Select the connection method of iPod/ Preparation iPhone for <APP Connection select>. Display the <SETUP> screen. Connecting iPod/iPhone On the Home screen: For details about connecting iPod/iPhone, see page 68. For playable iPod/iPhone types, see page 73. Connect your iPod/iPhone according to your purpose or the type of iPod/iPhone. - Page 20 iPod/iPhone Operation buttons Playback operations Available buttons on the screen and operations differ depending on the type of file being played When the operation buttons are back. not displayed on the screen, touch Displays the track list of the category the area shown on the illustration.
- Page 21 iPod/iPhone To search in the folder containing the current Selecting an audio track from the list Select the desired track. track Proceed until you select the desired track. To search all tracks in iPod/iPhone For details about the list operation, see Display the list.
-
Page 22: Apps-Apple Carplay
APPS—Apple CarPlay You can use an App of the connected iPod touch/ [Automotive Select [ON] to use Apple Although the service area is expanding, CarPlay iPhone/Android on this unit. Mirroring] CarPlay. service is NOT available in some markets. You can use an App on the following sources: [CarPlay Sidebar] Select the position of the Please check the latest information concerning –... - Page 23 APPS—Apple CarPlay Operation buttons and available Apps on the home screen of CarPlay You can use the Apps of the connected iPhone. The items displayed and the language used on the screen differ depending on the connected device. 1 Application buttons Starts the application.
-
Page 24: Tuner
Tuner Operation buttons To display all available operation buttons, touch Listening to the radio [ ] to display the other operation button window. [AUTO1]/ Changes the seek mode. Each time Indications and buttons on the source [AUTO2]/ you touch the button, the seek * Appears only when FM is selected as the band. - Page 25 Tuner Manual presetting Selecting a preset station from the list FM RBDS features Tune in to a station you want to preset. Searching for FM RBDS programs—PTY (Page 24) Search Display the preset list. You can search for your favorite programs being broadcast by selecting the PTY code.
-
Page 26: Siriusxm® Satellite Radio
SiriusXM® Satellite Radio Tuner Only SiriusXM® brings you more of what you love Activating/deactivating TI Standby Listening to the SiriusXM® Satellite to listen to, all in one place. Get over 140 channels, Reception Radio including commercial-free music plus the best You can receive traffic information even while sports, news, talk, comedy and entertainment. - Page 27 SiriusXM® Satellite Radio Operation buttons Selecting a channel on the category/ Selecting a channel [SEEK1]/ Changes the seek mode. channel list Select a channel by specifying a [SEEK2] SEEK1: Skip to another available You can obtain information on channels or select a channel.
- Page 28 SiriusXM® Satellite Radio Selecting a preset channel Presetting channels Display the preset list. Storing channels in the memory You can preset 6 channels for each band. Tune in to a channel you want to preset. (Page 27) Display the preset list. Select a preset channel.
- Page 29 SiriusXM® Satellite Radio Replaying content from a list of recorded data on Replaying content Replay a program basis—Instant Replay list Display the Replay mode screen. You can pause, rewind and replay content from the Display the <Instant Replay List> screen. currently tuned channel.
- Page 30 SiriusXM® Satellite Radio SmartFavorites TuneStart™ TuneScan User stored channels (P1 to P6) of current band are When you select a SmartFavorites channel, you can When you activate TuneScan™, you will hear 6 recognized as SmartFavorites channels. SiriusXM listen to the current song from the beginning. seconds of the songs, which have not been listened Connect Vehicle Tuner automatically buffers their to, from each of the music channel presets on the...
- Page 31 SiriusXM® Satellite Radio TuneMix™ TuneMix™ plays a unique blend of songs from your preset music channels from the current SiriusXM preset band, allowing you to build a custom channel from as few as 2 to as many as 6 music channels. You can even skip songs you do not want to hear.
- Page 32 SiriusXM® Satellite Radio Enter the four-digit code (1), and then Setting reception restrictions confirm (2). Setting the parental control You can limit access to SiriusXM channels, such as those with mature content. Setting/changing the parental code The initial setting is “0000.” Changing the code does not change the [Parental Control]/[Parental Lock Channel Selection] settings.
- Page 33 SiriusXM® Satellite Radio Activating/deactivating the parental control Selecting the channels to lock—Parental Lock Select [ON] for channels you want to You can set the parental control feature to lock Channel Selection activate parental lock for. any SiriusXM channel(s) or automatically lock all This parental control option allows you to pick channels classified as “mature”...
- Page 34 SiriusXM® Satellite Radio Skipping unwanted channels Select [ON] for channels you want to skip. Resetting the SiriusXM Satellite Radio settings If you do not want to receive some channels, you can skip them. You can reset the SiriusXM Satellite Radio settings you set up and restore the default settings.
-
Page 35: Other External Components
OTHER EXTERNAL COMPONENTS Adjusting the parking guidelines Configure the camera settings. Using a rear view camera Install the rear view camera in the appropriate To connect a rear view camera, see page 69. position according to the instructions supplied To use a rear view camera, a REVERSE lead with the rear view camera. -
Page 36: Using External Audio/Video Players-Av-In
OTHER EXTERNAL COMPONENTS To display the picture from the rear view camera Displaying the picture from the rear Using external audio/video manually view camera players—AV-IN Display the pop-up short-cut menu. The rear view screen is displayed when you shift the gear to the reverse (R) position. -
Page 37: Using Ads Adapter Features
OTHER EXTERNAL COMPONENTS Select ADS adapter features on the source/ Available items with ADS adapter Using ADS adapter features option selection screen. [Vehicle Info] Displays information about the tire By connecting the ADS adapter (commercially pressure. available) to the iDatalink terminal (Page69), this [Radar Displays information about unit can access the satellite radio source provided... -
Page 38: Bluetooth
BLUETOOTH Registering and connecting a new Information for using Bluetooth® Connecting Bluetooth devices Bluetooth device devices Activating/deactivating the Bluetooth When you connect a Bluetooth device to the unit for function the first time, pair the unit and the device. Pairing When you use the Bluetooth device, activate the allows Bluetooth devices to communicate with each Bluetooth function on the unit. - Page 39 When <Auto Pairing> is set to [ON], iOS devices Bluetooth 2.0: with A2DP or SPP: Determine usage as (such as iPhone) are automatically paired when Select the unit (“KW-V820BT”) on your an audio player or a device with Apps connected via USB. (Page 47) Bluetooth device.
- Page 40 BLUETOOTH Connecting/disconnecting a paired Select the device you want to connect/ Deleting a paired Bluetooth device Bluetooth device disconnect. Display the <Select Device> screen. (See Two devices can be connected simultaneously. the far left column.) Display the <Device Remove> screen. Display the <SETUP>...
- Page 41 BLUETOOTH Changing the PIN code Change the device name of the unit Using a Bluetooth mobile phone displayed on the paired device Display the <Bluetooth Setup> screen. Receiving a call (Page 40) Display the <Bluetooth Setup> screen. When a call comes in... (Page 40) Display the PIN code input screen.
- Page 42 BLUETOOTH Ending a call Adjusting the volume during a call/ Switching between handsfree mode echo cancel level/noise reduction and phone mode While talking... volume While talking... Display the <Speech Quality> window. While talking... Each time you touch the button, the talking method is switched ( : handsfree mode / : phone...
- Page 43 BLUETOOTH Switching between two connected Sending dial tone during a call Making a call devices You can send dial tone during a call using the DTMF Display the phone control screen. (Dual Tone Multi Frequency) function. When two devices are connected, you can change On the Home screen: the device to use.
- Page 44 BLUETOOTH From the call history ( missed calls/ If the initial character is a number, touch [1] From the preset list received calls/ dialed calls) and then select the number. Display the preset list (1), then select the target to Display the call history list (1), then select the target Touch [ ] to delete the last entry.
- Page 45 BLUETOOTH Voice dialing Presetting phone numbers Select a method to add a phone number to Available only when the connected mobile phone preset list, then register the number to the You can preset up to 10 phone numbers. has a voice recognition system. preset list.
- Page 46 BLUETOOTH To delete contact from the phonebook Editing phonebook Start transferring the phonebook. Display the <Edit Phonebook> window. To transfer the phonebook If the connected Bluetooth mobile phone is (See the far left column.) compatible with Phone Book Access Profile (PBAP), Display the <Delete Phonebook>...
- Page 47 BLUETOOTH Setting items Settings for Bluetooth mobile Using the Bluetooth audio player <Bluetooth HF/ Select the speakers used for phone Audio> Bluetooth (both phone and audio To connect a new device, see page 38. You can change various settings for using Bluetooth player).
- Page 48 BLUETOOTH Operation buttons Selecting a track from the list Switching the Bluetooth audio player Available buttons on the screen and operations Display the music list screen. Display the Bluetooth device selection differ depending on the connected device. window. Displays the other operation button window.
-
Page 49: Settings
SETTINGS <iPhone Select this to use Apps with Display the <AV> screen. Settings for using applications of Bluetooth> iPod/iPhone connected via iPod/iPhone/Android Bluetooth. <iPhone USB> Select this to use Apps with Before using applications of iPod/iPhone/Android, iPod/iPhone connected using select the device to use and connection method. KS-U62 (optional accessory) or Preparation: 30-pin to USB cable (accessory... -
Page 50: Selecting Different Sources For The Front And Rear Monitors-Zone Control
SETTINGS When [Zone Control] is set to [Dual Zone], Select the source for front and rear, and Selecting different sources for the the following operations/performances are not adjust the volume for the rear source. front and rear monitors—Zone available. Control –... -
Page 51: Sound Adjustment-Audio
SETTINGS Display the <Speaker Select> screen. Display the <X’over> screen (1), select Sound adjustment—Audio the speaker type (2), then adjust the You can adjust the various audio settings on the crossover frequency of the selected <Audio> screen. speaker (3). You cannot change the <Audio> settings screen in the following situations: –... - Page 52 SETTINGS Storing your own adjustments—Adjusting the To apply the adjusted equalizer to all playback Using the sound equalization sound precisely source, touch [ALL SRC] on the <Graphic The adjustment is memorized for each source until Equalizer> screen, then touch [OK] to confirm. Display the <Graphic Equalizer>...
- Page 53 SETTINGS Adjusting the Digital Time Alignment (DTA) Setting the listening position Touch [Level] (1), then adjust the output Make fine adjustments to the delay time of volume for each speaker (2). You can adjust the sound effects according to your the speaker output to create a more suitable listening position.
- Page 54 SETTINGS Localizing the sound image—Front Touch [Delay] (1), then adjust the sound Touch [Level] (1), then adjust the output Focus image precisely (2). volume for each speaker (2). You can localize the sound image in front of the selected seat. Display the <Position/DTA>...
- Page 55 SETTINGS Adjusting the volume balance Adjusting the volume output according to different sources Display the <Audio> screen. (Page 51) You can adjust and store the auto-adjustment Display the <Fader/Balance> screen. volume level for each source. The volume level will automatically increase or decrease when you change the source.
-
Page 56: Adjustment For Video Playback
SETTINGS <K2>* Restores the sound lost due Adjusting the sound effect Adjustment for video playback to audio compression to a Display the <Audio> screen. (Page 51) realistic sound. Display the pop-up short-cut menu. OFF/ON (Initial) Display the <Sound Effect> screen. <Sound Virtually makes the sound Response>... -
Page 57: Changing The Display Design
SETTINGS <Backlight> Adjusts the brightness of the Select a panel color. Changing the display design backlight. (−4 to +4) Customizing the panel color <Contrast> Adjusts the contrast. (−4 to +4) <Black> Adjusts the blackness. (−4 to Display the <SETUP> screen. On the Home screen: <Brightness>... - Page 58 SETTINGS Customizing the background Storing your favorite image for the Rotate the image if necessary (1), then background confirm the selection (2). Display the <Display> screen. (Page 57) You can set your favorite image stored on the Display the <Background> screen. connected USB device.
-
Page 59: Customizing The System Settings
SETTINGS Select an option. Locking the settings Customizing the system settings You can lock the settings for <Audio> to prevent Memorizing/recalling the settings them from being changed. You can memorize the settings changed in Display the <Special> screen. (See the far the <Audio>... -
Page 60: Setting Menu Items-Setup
SETTINGS Adjusting the touch position Display the <Touch Panel Adjust> screen. Setting menu items—SETUP You can adjust the touch position on the touch Displaying the <SETUP> menu screen panel if the position touched and the operation performed do not match. On the Home screen: Display the <SETUP>... - Page 61 SETTINGS [Language Select] <AV> setting screen <Display> setting screen Select the text language used for on-screen [APP/iPod SETUP] [Dimmer] information. APP Connection select: Select the device and ON: Activates dimmer. American English (en) (Initial)/British English (en)/ connection method. (Page 49) OFF: Cancels. Nederlands (nl)/Français (fr)/Deutsch (de)/ iPod Connection: Select the connection method SYNC (Initial): Dims the screen and button Italiano (it)/Español (es)/(ar) ...
- Page 62 SETTINGS <Camera> setting screen <Special> setting screen <Bluetooth> setting screen [R-CAM Interruption] [DEMO] [Bluetooth] ON (Initial): Displays the picture from the rear view ON (Initial): Activates the demonstration on the ON (Initial): Activates the Bluetooth function of camera when you shift the gear to the reverse (R) screen.
-
Page 63: Remote Controller
REMOTE CONTROLLER V Caution: Preparation Keep the battery out of reach of children and in original package until ready to use. Dispose of Removing the battery sheet used batteries promptly. If swallowed contact Pull the battery sheet out from the remote controller physician immediately. - Page 64 REMOTE CONTROLLER Searching for an item directly Operations using the remote ANGLE Not used for this unit. Tuner frequency controller (RM-RK258) Changes the aspect ratio. 1 Press DIRECT to enter the search mode. To check the current aspect ratio ASPECT 2 Press number buttons to enter a frequency.
-
Page 65: Connection/Installation
CONNECTION/INSTALLATION If your car’s ignition does not have an ACC This unit has a cooling fan to decrease the Before installing the unit position, connect the ignition wires to a power internal temperature. Do not mount the unit V WARNING source that can be turned on and off with the in a place where the cooling fan of the unit is ignition key. - Page 66 CONNECTION/INSTALLATION Installation procedure Installing the unit To prevent a short circuit, remove the key Installing the unit using the mounting · from the ignition and disconnect the bracket removed from the car battery. 2 or 3 Make the proper input and output wire Car Bracket connections for each unit.
-
Page 67: Connecting Wires To Terminals
CONNECTION/INSTALLATION Connection Connecting wires to terminals If no connections are made, do not let the cable come VIDEO OUT Connect GPS antenna (5). (Page 70) Page 69 out from the tab. REAR VIEW CAMERA Page 69 Page 69 Connect the USB extension cable (4). (Page 68) Page 69 Page 69 Connect SiriusXM Connect Vehicle Tuner (commercially available). - Page 68 CONNECTION/INSTALLATION Connecting the USB extension cable Connecting an iPod/iPhone iPod/iPhone (Lightning connector Connect the USB extension cable (4) to connect a Connect the USB extension cable (4) beforehand. models) (commercially USB device/iPod/iPhone. (See the left column.) available) USB device iPod/iPhone (30-pin connector models) 1.0 m (commercially available)
- Page 69 CONNECTION/INSTALLATION Connecting external amplifiers for 3 way Connecting external components Connecting microphone for Bluetooth speakers system Connect the microphone (7) to the MIC terminal. VIDEO OUT To install the microphone, peel off the adhesive REAR VIEW CAMERA tape, fix it on the installation position, then adjust the direction of the microphone to face the driver.
- Page 70 CONNECTION/INSTALLATION Depending on the type of car, reception of the Connecting the GPS antenna GPS satellite signals might not be possible with an Connect the GPS antenna (5) to the GPS terminal. internal installation. To install the GPS antenna, fix the metal plate Install this GPS antenna in an area away from any (6) firmly on the dashboard, then place the GPS antennas that are used with CB radios or satellite...
-
Page 71: References
REFERENCES To keep discs clean Maintenance More information Dirty discs may not play correctly. Caution on cleaning the unit File playback If a disc does become dirty, wipe it with a soft cloth Do not use any solvent (for example, thinner, Playing MPEG1/MPEG2 files in a straight line from the center to the edge. - Page 72 REFERENCES Playing MP3/WMA/WAV/AAC-LC/FLAC/Vorbis This unit can show ID3 Tag Version Disc playback files 1.0/1.1/2.2/2.3/2.4 (for MP3). Playable disc types This unit can play back files with the extension This unit can also show WMA/AAC/FLAC/Vorbis Disc type Recording format, code <.mp3>, <.wma>, <.wav>, <.m4a>, <.flac> Comment Tag.
- Page 73 REFERENCES Unplayable discs Electrostatic shock at connecting a USB device USB playback Unplayable disc types and formats are as follows: may cause abnormal playback of the device. In this Playable files on a USB device – DVD-Audio/DVD-ROM/DVD-VR discs case, disconnect the USB device then reset this This unit can play the following types of files –...
- Page 74 REFERENCES For some iPod/iPhone models, the performance Language codes (for DVD language selection) may be abnormal or unstable during operation. In Afar Galician Maori Somali this case, disconnect the iPod/iPhone device, then Abkhazian Guarani Macedonian Albanian check its condition. Afrikaans Gujarati Malayalam Serbian...
-
Page 75: Error Message List
REFERENCES “Cannot play this file.”: “SXM No Signal”: Error message list Check whether the file is compatible with this unit. Make sure the SiriusXM Satellite Radio antenna is (Page 71) mounted outside the vehicle. Move the vehicle to If an error occurs while using the unit, a message an area with a clear view of the sky. -
Page 76: Troubleshooting
REFERENCES “Channel Locked” Discs The selected channel has been locked by the Recordable/Rewritable discs cannot be played “Reading” does not disappear from the screen. parental controls. Enter the unlock code when you back. Turn the power off and on again. are asked. - Page 77 REFERENCES The iPod/iPhone not compatible with CarPlay Apple CarPlay The Bluetooth device does not detect the unit. cannot be connected via Bluetooth. Search from the Bluetooth device again. Desired source (“Apple CarPlay”) is not displayed Select [ON] for [Automotive Mirroring] on the on the Home screen.
-
Page 78: Specifications
REFERENCES Dynamic Range 91 dB (DVD-Video 96 kHz) Bluetooth section Specifications Disc Format DVD-Video/VIDEO-CD/CD- Technology Bluetooth V3.0 Monitor section DA/DVD-R/DVD-RW/DVD+R/ Frequency 2.402 GHz to 2.480 GHz DVD+RW Picture Size (W × H) Output Power +4 dBm (MAX), 0 dBm (AVE), Sampling Frequency 6.2 inches (diagonal) wide Power Class 2... - Page 79 REFERENCES FM tuner section Audio section General Frequency Range (200 kHz) Maximum Power Output Operating Voltage 87.9 MHz to 107.9 MHz 50 W × 4 14.4 V (10.5 V to 16 V allowable) Usable Sensitivity (S/N: 30 dB Dev 22.5 kHz) Full Bandwidth Power (Front &...
- Page 80 Bluetooth SIG, PATENT PORTFOLIO LICENSE FOR THE PERSONAL Manufactured under license from Dolby Inc. and any use of such marks by JVC KENWOOD AND NONCOMMERCIAL USE OF A CONSUMER Laboratories. Dolby and the double-D symbol are Corporation is under license.
- Page 81 REFERENCES THIS SOFTWARE IS PROVIDED BY THE COPYRIGHT THIS SOFTWARE IS PROVIDED BY THE COPYRIGHT THIS SOFTWARE IS PROVIDED BY THE COPYRIGHT HOLDERS AND CONTRIBUTORS “AS IS” AND ANY HOLDERS AND CONTRIBUTORS “AS IS’’ AND ANY HOLDERS AND CONTRIBUTORS “AS IS’’ AND ANY EXPRESS OR IMPLIED WARRANTIES, INCLUDING, EXPRESS OR IMPLIED WARRANTIES, INCLUDING, EXPRESS OR IMPLIED WARRANTIES, INCLUDING,...
- Page 82 0516EHHMDWJEIN...
- Page 84 Target firmware versions Target models 3. Check the version. ➜ Updated versions Ver 1.6.0008.0700 or earlier KW-V820BT ➜ 2.5.0008.0700 ⁄ • For how to check your firmware version, refer to “Checking the Firmware Version”. Work Flow Step 1. Download the firmware files, and copy them to USB memory.