Panasonic DMP-BDT120 Operating Instructions Manual
Hide thumbs
Also See for DMP-BDT120:
- Operating instructions manual (136 pages) ,
- Operating instructions manual (44 pages)
Table of Contents
Advertisement
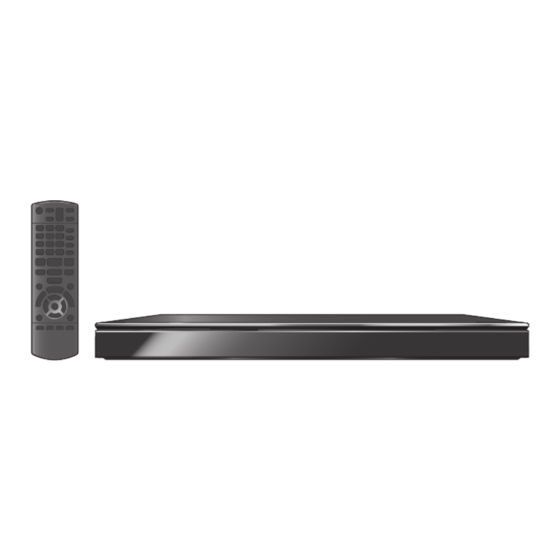
Unless otherwise indicated, illustrations in these operating instructions are of DMP-BDT220.
Thank you for purchasing this product.
For optimum performance and safety, please read these instructions carefully.
Please keep this manual for future reference.
Region management information
BD-Video
This unit can play BD-Video discs supporting the
region code "B".
Example:
Model number suffix "EB" denotes UK model.
EB
Operating Instructions
Blu-ray Disc
Model No. DMP-BDT220
DVD-Video
This unit can play DVD-Video discs supporting
the region number "2" or "ALL".
Example:
2
Player
TM
DMP-BDT120
2
3
ALL
5
VQT3V62
Advertisement
Table of Contents

Related Manuals for Panasonic DMP-BDT120


Summary of Contents for Panasonic DMP-BDT120
-
Page 1: Operating Instructions
Operating Instructions Blu-ray Disc Player Model No. DMP-BDT220 DMP-BDT120 Unless otherwise indicated, illustrations in these operating instructions are of DMP-BDT220. Thank you for purchasing this product. For optimum performance and safety, please read these instructions carefully. Please keep this manual for future reference. -
Page 2: Safety Precautions
Safety precautions Getting started CAUTION Unit WARNING ≥ This unit utilizes a laser. Use of controls or adjustments or performance of procedures other than those specified Unit herein may result in hazardous radiation exposure. To reduce the risk of fire, electric shock or product damage, ≥... -
Page 3: Table Of Contents
Caution for AC Mains Table of contents Lead Getting started For your safety, please read the following text carefully. This appliance is supplied with a moulded three pin mains Safety precautions ..... . . 2 plug for your safety and convenience. -
Page 4: Accessories
≥ Do not use AC mains lead with other equipment. Germany, please consult your Panasonic ∫ Using the remote control dealer for advice. ≥ This lens cleaner is sold as specific for DIGA, Insert so the poles (i and j) match those in the but can be used on this unit as well. -
Page 5: Playable Media
Playable media Device Disc markings Device types Contents format BD-Video Video BD-RE Video, JPEG, MPO BD-R Video, DivX , MKV ® DVD-Video Video DVD-R Video, AVCHD, DivX ® MKV, JPEG, MPO, FLAC, MP3, WAV DVD-R DL DVD-RW Video, AVCHD — +R/+RW/+R DL Music CD Music [CD-DA]... -
Page 6: Usb Device
Resolution Audio and DTS-HD Master Audio) ∫ BD-RE, BD-R adopted in BD-Video. Discs recorded in DR mode using Panasonic ≥ If “Dolby D/Dolby D +/Dolby TrueHD” is set to Blu-ray Disc recorders may not play back the “PCM”, the maximum possible number of Dolby audio etc., correctly. -
Page 7: Control Reference Guide
Control reference guide Turn the unit on and off TV operation buttons ( You can operate the TV through the unit’s remote control. [Í TV] : Turn the television on and off [AV] : Switch the input select [i j VOL] : Adjust the volume Select title numbers, etc./Enter numbers or characters Cancel... -
Page 8: Step 1 : Connecting To A Tv
≥ Use the High Speed HDMI cables. Non-HDMI-compliant cables cannot be utilized. It is recommended that you use Panasonic’s HDMI cable. When outputting 1080p signal, please use HDMI cables 5.0 meters or less. Recommended part number (High Speed HDMI Cable): RP-CDHS15 (1.5 m), RP-CDHS30 (3.0 m), RP-CDHS50 (5.0 m), etc. -
Page 9: Step 2 : Connecting To An Amplifier/Receiver
STEP 2 : Connecting to an amplifier/receiver Perform either one of the following connections in accordance with your amplifier/receiver input terminal. HDMI AV OUT HDMI cable HDMI cable HDMI OUT HDMI IN HDMI IN (ARC) (ARC) Amplifier/receiver ≥ Set “Digital Audio Output” ( 27). -
Page 10: Step 3 : Connecting To The Network
Wireless router, etc. Internet ≥ For up-to-date compatibility information on your wireless router, refer to http://panasonic.jp/support/global/cs/ (This site is in English only.) ≥ The unit is not compatible with public wireless LAN services (Hotspot etc.) provided in airports, stations, cafes, etc. -
Page 11: Step 5 : Settings
≥ You can perform this setup anytime by selecting “Easy ∫ “Wired” connection Setting” in the Setup menu. ( ≥ If this unit is connected to a Panasonic TV (VIERA) Follow the on-screen instructions to apply your supporting HDAVI Control 2 or later via an HDMI cable, connection settings. -
Page 12: Firmware Updates
Firmware updates facilitates settings relating to the connection and security of wireless LAN devices. Occasionally, Panasonic may release updated 1 Press WPS button or corresponding button of firmware for this unit that may add or improve the the wireless router until the lamp starts way a feature operates. -
Page 13: Step 6 : Reprogramming The Remote Control
STEP 6 : Reprogramming the remote control For other Panasonic products If you have more than one Panasonic player/ recorder and the remote control operates both products at once, you will need to change the remote control code to prevent this occurrence. -
Page 14: Inserting Or Removing Media
≥ When removing the SD card, press the centre of the card and pull it straight out. Photos Setup Music ≥ If you connect a Panasonic product with a USB connection cable, the setup screen may be Videos displayed on the connected equipment. For Register... -
Page 15: Multi User Mode
For more details, refer to Select Icon If the Communication Camera is the following website. http://panasonic.jp/support/global/cs/ connected, you can shoot and (This site is in English only.) personalize your photo. ≥ You can also select a photo in recording media as an icon. -
Page 16: Playback
Playback Pause Press [;PAUSE]. Insert the media. ≥ Press [;PAUSE] again or [1PLAY] to restart Playback starts depending on the media. play. Select the item to play and press [OK]. Repeat this procedure if necessary. Search/Slow-motion Search While playing, press [SEARCH6] or ≥... -
Page 17: Show The Status Messages
Displaying menus and Enjoying 3D video and photos playback information Preparation Connect 3D compatible TV to an HDMI AV OUT Show top menu/pop-up menu terminal of this unit using a High Speed HDMI Cable. ( 8, 9) Press [TOP MENU] or [POP-UP MENU]. ≥... - Page 18 Slideshow Play a slideshow of photos and make various settings during the playback. Insert the media. Select “Photos”. Select an item and press the green button. The following items can be set. Start the slideshow. Start You can display still pictures in Slideshow the selected folder one by one at a constant interval.
-
Page 19: Enjoying Network Service
≥ Network connection ( discontinued either temporarily or permanently without notice. Therefore, Panasonic will make no warranty for the ≥ Network setting ( content or the continuity of the services. ≥ All features of websites or content of the service may not To enjoy video communication (ex. -
Page 20: Home Network Feature
You can also enjoy viewing the video and photos Select the equipment and press [OK]. recorded in Panasonic DLNA compatible recorders (DIGA). Select the item to play and press [OK]. Refer to our website about the sales area, etc. - Page 21 For more details, refer to the following website and the Media Controller (DMC) to play back contents operating instructions for each of the equipment. from DLNA server on the Renderer (this unit). http://panasonic.jp/support/global/cs/ (This site is in English only.) Possible applications: ≥ [BDT220]...
-
Page 22: Viera Link "Hdavi Control
Panasonic When the unit is connected to a Panasonic TV TV (VIERA) or other device under (VIERA) that supports HDAVI Control 2 or later “HDAVI Control”. -
Page 23: Option Menu
Option menu ∫ Repeat Play Settings (Only when the elapsed time is being displayed A variety of playback operations and settings can on the unit’s display.) be performed from this menu. Select the item that you want to repeat. Available options differ depending on the playing ≥... - Page 24 ∫ Control Panel ∫ Chroma Process Display the Control Panel. The high-resolution processing of HDMI chroma Playing back while using VIERA Link, etc. signals produces a high-resolution picture with e.g., rich picture quality. ∫ Detail Clarity EXIT The picture is sharp and detailed. ∫...
-
Page 25: Sound Settings
Sound Settings 3D Settings These settings are also displayed by pressing ∫ Sound Effects *1, *2 Select the sound effect. ≥ Night Surround : ∫ Signal Format Enjoy a movie with powerful sound even when the volume is kept low at night. The audio is set Original Keep original picture format. -
Page 26: Setup Menu
Setup menu ∫ HDMI Output Press [OK] to show the following settings: Change the unit’s settings if necessary. The settings remain intact even if you switch the unit HDMI Video Format to standby. The items supported by the connected devices Some items in the Setup menu are common to are indicated on the screen as “¢”. - Page 27 ∫ Still Mode BD-Video Secondary Audio Select whether or not to mix the primary and Select the type of picture shown when you pause secondary audio (including the button click playback. sound). Automatically selects the type If “Off” is selected, the unit outputs the primary Automatic of picture shown.
-
Page 28: Reference
∫ Audio Delay Language Synchronization between picture and sound is corrected by adjusting the delay time of the audio ∫ Soundtrack Preference output. Choose the language for audio. ≥ If “Original” is selected, the original language of each disc will be selected. ≥... - Page 29 Website. a greater risk of reception interference. This http://panasonic.jp/support/global/cs/ can cause the connection speed to drop or (This site is in English only.) become unstable. Remote Device Settings (...
- Page 30 Registration Type ∫ TV Settings Press [OK] to show the following settings: Allow connection to all the Automatic equipment that is TV Aspect accessing this unit. Set to match the type of television connected. Set the permission of the When connected to a 4:3 aspect television and connection individually for Manual playing 16:9 ratio image:...
- Page 31 DivX Video-on-Demand (VOD) content. Change the remote control code if other ∫ Default Settings Panasonic products react to this remote control. This returns all values in the Setup menu and the Option menu to the default settings, except for some settings of network, ratings, remote control code, language, etc.
-
Page 32: Troubleshooting Guide
Troubleshooting guide Reference General operation Before requesting service, please perform the To return to the factory preset. following checks. If the problem remains unresolved, consult Select “Yes” in “Default Settings” in the Setup your dealer for instructions. menu. ( Do you have the latest firmware installed? To return all settings to the factory preset. - Page 33 You have forgotten your ratings password. The unit and television are using different You want to cancel the ratings level. video systems. The ratings level returns to the factory preset. 1 While the unit is on, press and hold [OK], the 1 While the unit is on, press and hold [OK], the yellow button and the blue button on the yellow button and the blue button on the...
- Page 34 Video is not output in high-definition. Audio Confirm that “HDMI Video Format” in the Setup menu is set properly. ( Cannot switch audio. When connecting an amplifier/receiver using 3D video is not output. an OPTICAL terminal or an HDMI terminal, Change the settings as required by the you cannot switch the audio if “Digital Audio connected TV format.
- Page 35 Playback Network I can’t connect to the network. Disc cannot be played. Confirm the network connection and settings. The disc is dirty. ( 10, 11, 29) Still pictures (JPEG) do not play back Check the operating instructions for each normally. device and connect accordingly.
-
Page 36: Messages
Messages On the unit’s display The following messages or service numbers may appear on the TV or unit’s display. The unit fails to operate properly. Press [Í/I] On the television on the main unit for 3 seconds to switch the unit to standby, then switch back on. -
Page 37: Restriction On Use Of Unauthorized Copied Content
or F Restriction on use of (“ ” stands for a number.) There is something unusual. unauthorized copied content Check the unit using the troubleshooting guide. If the service number remains This unit adopts the following technology for displayed, do the following. copyright protection. -
Page 38: Supplemental Information
Supplemental information ∫ TV code list ∫ Language code list Brand TV Code Brand TV Code Language Code Language Code Language Code Rhaeto-Romance: Abkhazian 6566 Gujarati: 7185 Panasonic 01/02/03/04 Afar: 6565 Hausa: 7265 8277 AIWA NOBLEX Afrikaans: 6570 Hebrew: 7387... -
Page 39: Specifications
Specifications File format Signal system PAL/NTSC File format Extension Reference Operating temperature i5 oC to i35 oC This unit supports ID3 range tags, but only titles, artist “.MP3”, “.mp3” Operating humidity 10 % to 80 % RH (no names and album names range condensation) can be displayed. -
Page 40: Precautions Of Wireless Lan Connection
Customers can download a copy of the original DoC to our R&TTE products from our DoC server: http://www.doc.panasonic.de Contact in the EU: Panasonic Services Europe, a Division of Panasonic Marketing Europe GmbH, Panasonic Testing Centre, Winsbergring 15, 22525 Hamburg, Germany This product is intended to be used in the following countries. - Page 41 “AVCHD”, “AVCHD 3D”, “AVCHD Progressive” and “AVCHD 3D/Progressive” are trademarks of Panasonic Corporation and Sony Corporation. Java is a registered trademark of Oracle and/or its affiliates. Manufactured under license from Dolby Laboratories. Dolby and the double-D symbol are trademarks of Dolby Laboratories.
- Page 42 MERCHANTABILITY or FITNESS FOR A PARTICULAR PURPOSE. At least three (3) years from delivery of products, Panasonic will give to any third party who contacts us at the contact information provided below, for a charge no more than our cost of physically performing source code distribution, a complete machine-readable copy of the corresponding source code covered under GPL v2/LGPL v2.1.
- Page 43 Information for Users on Collection and Disposal of Old Equipment and used Batteries These symbols on the products, packaging, and/or accompanying documents mean that used electrical and electronic products and batteries should not be mixed with general household waste. For proper treatment, recovery and recycling of old products and used batteries, please take them to applicable collection points, in accordance with your national legislation and the Directives 2002/96/EC and 2006/66/EC.
- Page 44 ≥ Or go on line through our Internet Accessory ordering application at www.pas-europe.com. ≥ Most major credit and debit cards accepted. ≥ All enquiries transactions and distribution facilities are provided directly by Panasonic UK. ≥ It couldn’t be simpler! ≥ Also available through our Internet is direct shopping for a wide range of finished products. Take a browse on our website for further details.