Pioneer avh-4200nex Owner's Manual
Dvd rds av receiver
Hide thumbs
Also See for avh-4200nex:
- Owner's manual (244 pages) ,
- System firmware update instructions (8 pages)
Table of Contents

Related Manuals for Pioneer avh-4200nex


Summary of Contents for Pioneer avh-4200nex
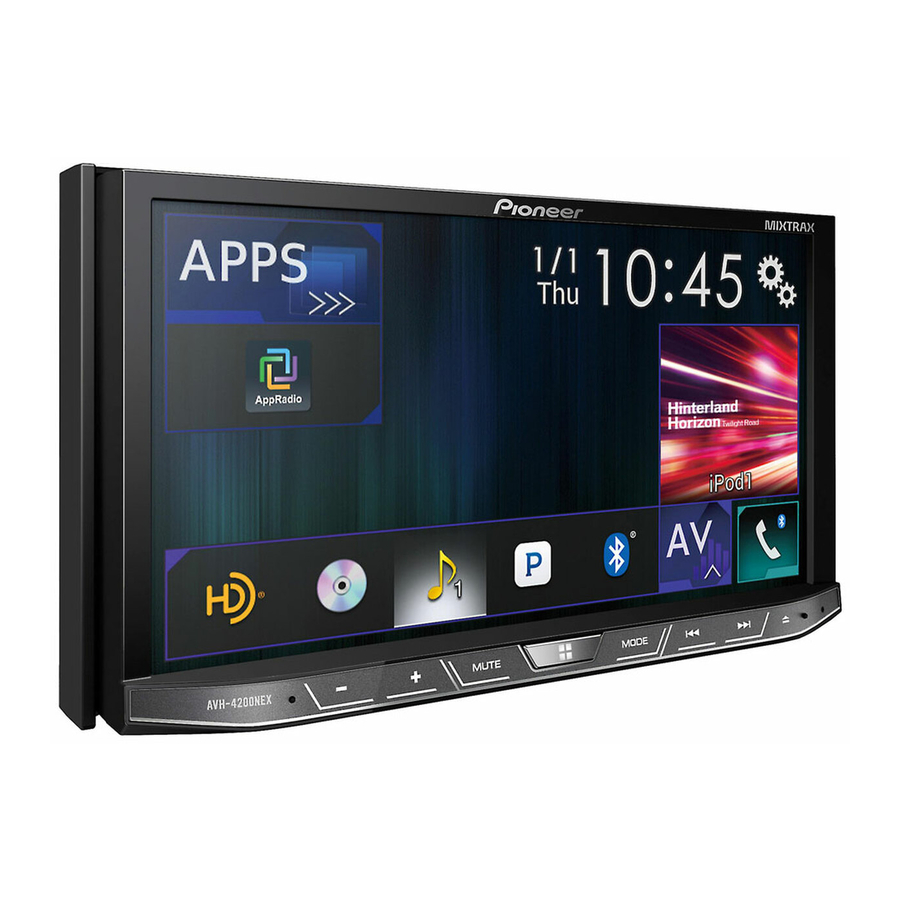
- Page 1 AVH-4200NEX DVD RDS AV RECEIVER Important (Serial number) The serial number is located on the bottom of this unit. For your own security and Owner’s Manual convenience, be sure to record this number on the enclosed warranty card.
-
Page 2: Table Of Contents
Contents ■ Registering your Bluetooth devices ....13 Starting procedure (for USB/SD) ....26 Thank you for buying this Pioneer product. SiriusXM Satellite ® Connecting a registered Bluetooth device Operations common to all file types ....26 Please read through these instructions so you Radio ........37... - Page 3 Contents Displaying the “System” setting screen ..45 Creating a shortcut ........54 Handling and care of discs ......70 Setting Bluetooth audio source activation ..45 Selecting a shortcut ........54 Playable discs ..........70 Setting the ever scroll ........45 Removing a shortcut ........54 Detailed information for playable media ..71 ■...
-
Page 4: Precaution
OF PROCEDURES OTHER THAN THOSE SPECIFIED HEREIN Alteration or modifications carried out without MODEL NO. : AVH-4200NEX MAY RESULT IN HAZARDOUS RADIATION EXPOSURE. appropriate authorization may invalidate the user’s right Contains FCC ID : RKXFC6000TS CAUTION: to operate the equipment. -
Page 5: Important Safety Information
Certain functions (such as viewing of video image and certain driver to watch video images while driving. nearest authorized Pioneer Service Station. Do not use this touch panel key operations) offered by this product could be product in this condition because doing so may result in a... -
Page 6: Rear View Camera
Pioneer accepts no liability for damages, costs or expenses Prior to using this product for the first time after installation. If this product fails to operate properly. -
Page 7: Use And Care Of The Remote Control
Precaution Basic operation Meanings of Symbols Used in This Checking part names and CAUTION Manual Remove the battery if the remote control is not used for a functions month or longer. There is a danger of explosion if the battery is incorrectly This indicates to touch an appropriate soft key replaced. -
Page 8: Remote Control
Basic operation being written to USB/SD. Press to return to the previous track (chapter) MUTE TRK ( Doing so may cause the data to become corrupted. or go to the next track (chapter). MENU Press to display the DVD menu during DVD ... -
Page 9: Attaching The Front Panel
Basic operation Ejecting a disc Attaching the front panel CAUTION Do not open or close the LCD panel by force. It may cause 1 Press the button. 1 Slide the front panel into the top of the product a malfunction. and push it into place. -
Page 10: On First-Time Startup
Basic operation Plugging and unplugging a USB stor- age device p This product may not achieve optimum performance with some USB storage devices. p Connection via a USB hub is not possible. p A USB cable is required for connection. 1 Pull out the plug from the USB port of the USB cable. -
Page 11: How To Use The Screens
Basic operation How to use the screens Application menu screen Time and date setting screen Setting menu screen Top menu screen Application operation screen AV operation screen Phone menu screen Favorite source icons AV source selection screen... -
Page 12: Supported Av Source
Basic operation Source on the source list p By pressing the button on any screen you can display the top menu screen. p The character string “APPS” is replaced with “Apple 1 Display the source list. CarPlay” when Apple CarPlay is running. ... -
Page 13: Operating List Screens
Basic operation Bluetooth ® connection Operating list screens Operating the on-screen keyboard Displaying the “Bluetooth” screen 1 Press the button. 2 Touch , and then Registering your Bluetooth devices 1 Activate the Bluetooth wireless technology on your devices. 1 Touching an item on the list allows you to narrow down the options and proceed to the next operation. -
Page 14: Connecting A Registered Bluetooth Device Manually
® Bluetooth connection Switching visibility Updating Bluetooth software Setting Bluetooth device auto connection This function sets whether or not to make this product visible to This function is used to update this product with the latest the other device. Bluetooth software. For details on Bluetooth software and updat- This function connects the last connected Bluetooth device to The default setting is “On”. -
Page 15: Hands-Free Phoning
Hands-free phoning 4 Touch the desired entry on the list to make a Displaying the phone menu call. screen The dial screen appears and dialing starts. Using the preset dial lists 1 Press the button. 2 Touch Registering a phone number Making a phone call You can easily store up to six phone numbers per device as presets. -
Page 16: Minimizing The Dial Confirmation Screen
Hands-free phoning Registration and connection Minimizing the dial confirma- 1 Touch to turn private mode on or Cellular phone operations vary depending on the type of cel- off. tion screen lular phone. Refer to the instruction manual that came with your cellular phone for detailed instructions. -
Page 17: Setup For Ipod / Iphone Or Smartphone
Setup for iPod / iPhone or smartphone When using an iPod / iPhone or a smartphone with this product, iPod / iPhone compatibility configure the settings of this product according to the device to be connected. This product supports only the following iPod / iPhone models This section describes the settings required for each device. -
Page 18: Information On The Connections And Functions For Each Device
Setup for iPod / iPhone or smartphone Information on the connections and functions for each device The settings and cables required for connecting each device, and the available sources are as follows. iPod / iPhone with a 30-pin connector Device connection method When connecting via Bluetooth When connecting via CD-IU201V (sold When connecting via CD-IU201S (sold... - Page 19 Setup for iPod / iPhone or smartphone Android device Device connection method When connecting via Bluetooth When connecting via CD-MU200 (sold When connecting via CD-AH200 (sold separately) separately) Smartphone Setup Device Others Others Others Connection Bluetooth USB2 HDMI Android Auto —...
-
Page 20: Hd Radio
™ HD Radio AM band Switches the text display between Analog AM the main channel and sub channels. Displays the preset channel list. Analog AM Digital AM Select an item on the list ("1" to "6") to switch to the preset channel. FM band Selects the FM1, FM2, FM3 Analog FM... -
Page 21: Starting Procedure
HD Radio ™ Disc Tuning into strong frequencies Local seek tuning allows you to only tune into those radio sta- Audio source screen 1 tions with sufficiently strong signals. Visual information related to content being played on your HD The default setting is “Off”. Radio receiver, such as Album Art, historical photographs, still p This setting is available only when “HD Radio”... - Page 22 Disc Video source screen 2 Plays tracks in random order. Hides the touch panel keys. This function is available for music CD. To display again the keys, touch anywhere on the screen. : Does not play tracks in random order. Performs frame-by-frame playback.
-
Page 23: Starting Procedure
Disc Searching for the part you Video source screen 2 Switches the subtitle/audio language. Refer to Switching the subtitle/audio language on want to play page 23 Displays the DVD menu keypad. p For DVD-Videos, you can select [Title], [Chapter] or [10Key]. ... -
Page 24: Operating The Dvd Menu Using Touch Panel Keys
Compressed files Disc Operating the DVD menu using Audio source screen 1 (Example: USB) Plays files in random order. touch panel keys : Does not play files in random order. If items on the DVD menu appear, the touch panel keys may : Plays all files within the repeat range in overlay them. - Page 25 Compressed files Video source screen (Example: Disc) Hides the touch panel keys. Hides the touch panel keys. To display again the keys, touch To display again the keys, touch anywhere on the screen. anywhere on the screen. Rotates the displayed picture 90°...
-
Page 26: Starting Procedure (For Disc)
Compressed files Switches the media file type. Still image screen Refer to Switching the media file type on page Switches the subtitle/audio language. p This function is available only for compressed 3 Touch [USB] or [SD]. video files stored on a disc. p Play back is performed in order of folder numbers. -
Page 27: Video File Operations
Compressed files iPod 2 Touch the “Tag” tab. Still image file operations Audio source screen 1 3 Touch the desired category to display the file list. Setting the slideshow interval 4 Touch the item. JPEG files can be viewed as a slideshow on this product. In this Refine the item until the desired song title or file name is dis- setting, the interval between each image can be set. -
Page 28: Connecting Your Ipod
iPod Displays the link search screen. Changes the audiobook speed. Hides the touch panel keys. Refer to Selecting a song from the list related to To display again the keys, touch the song currently playing (link search) on page : Normal playback anywhere on the screen. -
Page 29: Starting Procedure
iPod Refer to Selecting the video for the rear display on page p This function is not available when using iPod function with Playing back songs similar to the cur- an iPhone 6 Plus, iPhone 6, iPhone 5s, iPhone 5c, iPhone 5, rent song or iPod touch (5th generation). -
Page 30: Appradio Mode
The AppRadio app is launched. are not available depending on the type of PIONEER IS NOT RESPONSIBLE AND DISCLAIMS device. 5 Touch [OK] on the screen of this product. LIABILITY FOR THIRD PARTY (NON-PIONEER) APPS... -
Page 31: Using The Keyboard (For Iphone Users)
AppRadio Mode 3 Touch [AppRadio Video Adjustment]. 3 Adjusts the application audio volume. Using the keyboard (for iPhone p The App volume is not displayed when the right tab is 4 Touch [OK]. users) selected. 5 Touch to adjust the line to fit p You cannot adjust the volume of the main sound on the screen. -
Page 32: Apple Carplay
Apple CarPlay allows access to applications other than those listed, subject to limitations while driving. PIONEER IS NOT RESPONSIBLE AND DISCLAIMS LIABILITY FOR THIRD PARTY (NON-PIONEER) APPS 2 Touch [Driving Position]. AND CONTENT, INCLUDING WITHOUT LIMITATION ANY 3 Touch the item. -
Page 33: Android Auto
Android Auto allows access to applications other than those listed, subject to limitations while driving. PIONEER IS NOT RESPONSIBLE AND DISCLAIMS 2 Touch [Driving Position]. LIABILITY FOR THIRD PARTY (NON-PIONEER) APPS 3 Touch the item. AND CONTENT, INCLUDING WITHOUT LIMITATION ANY ... -
Page 34: Adjusting The Volume
™ ® Android Auto Pandora Adjusting the volume Gives a “Thumbs Down” to Displays the preset station list. the playing track and skips Select an item on the list ("1" to "6") to You can adjust the guidance volume and alert sound volume to the next track. -
Page 35: Using Pandora
You can use the Pandora service by connecting an iPhone Important via USB, Bluetooth, or HDMI and Bluetooth. Requirements to access Pandora using Pioneer car audio/ Refer to iPhone with 30-pin connector on page 61 video Refer to iPhone with Lightning connector on page 61 ... -
Page 36: Bluetooth Audio Player
Bluetooth audio player — A2DP and AVRCP (Audio/Video Remote Control Profile): 2 Touch a file or a folder on the list to play back. Playback screen 1 Playing back, pausing, selecting songs, etc., are possible. p Depending on the Bluetooth audio player connected to this product, some functions may not be available. -
Page 37: Siriusxm
SiriusXM ® Satellite Radio Memorizes the current channel content information Recalls the preset channel stored to for the alert function. Switches to the time bar display Refer to Memorizing the current contents on page a key from memory. (Replay™ mode). Stores the current broadcast Stores song information to an iPod. -
Page 38: Subscribing To The Siriusxm Satellite Radio Service
® SiriusXM Satellite Radio Subscribing to the SiriusXM Displaying the “SiriusXM Satellite Radio service Settings” screen 1 Select SiriusXM as the source. 1 Display the “System” setting screen. Refer to Starting procedure on page 37 Using TuneScan ™ You should be able to tune in to Channel 1. If you cannot get Channel 1, ensure that your SiriusXM Connect Vehicle Tuner is When you activate the TuneScan feature, you will hear a few... -
Page 39: Checking The Update Traffic And Weather Information
SiriusXM ® Satellite Radio Setting of priorities Locking the channel Using SportsFlash ™ If you set numerous favorite teams, you can receive alerts for up SportsFlash will notify you when a big play happens during a ™ 1 Display the “SiriusXM Settings” screen. to five favorite teams in the order in which data are received. -
Page 40: Selecting Teams For Game Alert
® SiriusXM Satellite Radio HDMI source Touch [Delete All] to delete all items memorized Setting Featured Band Update to the alert list. Hides the touch panel keys. Message To display again the keys, touch If you touch and hold the list item, you can delete You can set whether to be notified when the featured seasonal the item from the list. -
Page 41: Aux Source
AUX source AV input Hides the touch panel keys. Hides the touch panel keys. To display again the keys, touch To display again the keys, touch anywhere on the screen. anywhere on the screen. 5 Touch [AUX]. Setting the video signal When you connect this product to an AUX equipment, select the suitable video signal setting. -
Page 42: Starting Procedure (For Camera)
AV input MIXTRAX 5 Touch [AV]. Exits the MIXTRAX screen. Specifies the BPM. Starting procedure (for camera) Displays the LinkGate screen. You can display the image output by the camera connected to Touch the desired item. Songs video input. related to the selected item are ... -
Page 43: Starting Procedure
MIXTRAX iDatalink Starting procedure Displays the Vehicle Information screen. 1 Insert the SD memory card into the SD card slot or plug the USB storage device into the Displays the Gauges screen. 2 Touch [AV Source Settings]. USB connector. Refer to Inserting and ejecting an SD memory card on page 3 Touch [MIXTRAX Settings]. -
Page 44: Starting Procedure
iDatalink your Maestro RR module. 3 Install the vehicle/head unit specific firmware on your iDatalink Maestro module. For details, please refer to iDatalink Maestro website. Limitations: 4 Connect this product to iDatalink Maestro, and The iDatalink list screen can be scrolled up or down by then install this product to the vehicle. -
Page 45: Displaying The Setting Screen For Idatalink
iDatalink System settings This product features a function that automatically switches to Displaying the “System” set- the full-screen image of the rear view camera installed on your ting screen vehicle, when the shift lever is in the REVERSE (R) position. Camera View mode also allows you to check what is behind you while driving. -
Page 46: Setting The Second Camera
System settings 1 Display the “System” setting screen. 3 Touch [Parking Assist Guide] to switch “On” or p Touch / / / / to adjust the guidelines if Refer to Displaying the “System” setting screen on page “Off”. necessary. Touch [Default] to reset the settings. Adjusting the parking assist Setting the second camera 2 Touch [Camera settings]. -
Page 47: Setting The Demo Mode
System settings Refer to Setting the second camera on page 46 Refer to Displaying the “System” setting screen on page Adjusting the response posi- 1 Display the “System” setting screen. tions of the touch panel (touch 2 Touch [Dimmer Settings]. ... -
Page 48: Adjusting The Picture
System settings 3 Touch [Dimmer Duration]. dimmer function. These are switched automatically depend- 3 Set the external storage device to this product. ing on whether the dimmer function is on or off. Refer to Inserting and ejecting an SD memory card on page 4 Drag the cursors to set the dimmer duration. -
Page 49: Audio Adjustments
Audio adjustments Displaying the “Audio” setting Adjusting source levels Adjusting the cutoff frequency screen value SLA (source level adjustment) lets you adjust the volume level of each source to prevent radical changes in volume when switch- You can adjust the cutoff frequency value of each speaker. ing between sources. -
Page 50: Adjusting The Speaker Output Levels Finely
Audio adjustments 5 Touch [<] or [>] to input the distance between p If you trail a finger across the bars of multiple equalizer Adjusting the speaker output bands, the equalizer curve settings will be set to the value of the selected speaker and the listening position. -
Page 51: Performing Auto Eq
Audio adjustments Theme menu power to car phones or cellular phones in the vehicle, or 2 Fix the microphone for acoustical measurement Displaying the “Theme” setting remove them in advance. Surrounding sounds may prevent (sold separately) in the center of the headrest screen correct measurement of the vehicle’s acoustics. -
Page 52: Setting The Illumination Color
Theme menu Refer to Displaying the “Theme” setting screen on page 51 The set color will be recalled from the memory the next time you Changing to the splash screen stored touch the same key. 3 Touch [Background]. on the external storage device 4 Touch Selecting the theme color CAUTION... -
Page 53: Video Settings
Theme menu Video settings 2 Display the “Theme” screen. Setting up the video player Setting the aspect ratio Refer to Displaying the “Theme” setting screen on page 51 There are two kinds of displays. A wide screen display has a This setting is available only when “Disc”... -
Page 54: Automatic Playback Of Dvds
Video settings Favorite menu p The lower the level is set, the tighter the restriction is p Make a note of the code as you will need it when you deregis- Registering your favorite menu items in shortcuts allows you to applied. -
Page 55: Other Functions
Other functions 1 Display the “System” setting screen. Setting the time and date Refer to Displaying the “System” setting screen on page 1 Touch the current time on the screen. 2 Touch [AV Source Settings]. 2 Touch one of the items to adjust. 3 Touch [Tag Forwarding] to select the USB port 3 Touch to set the correct time and... -
Page 56: Setting The Anti-Theft Function
, and then touch and If you forgot your password, contact the nearest authorized Theme Settings hold Pioneer Service Station. Bluetooth Settings Refer to Setting the password on page 56. 5 Touch [Restore]. 3 Touch [Clear Password]. -
Page 57: Your New Product And This Manual
This product cannot be installed in a vehicle without ACC circuit (fuse holder, fuse resistor or filter, etc.) may (accessory) position on the ignition switch. Pioneer does not recommend that you install this fail to work properly. product yourself. This product is designed for ... -
Page 58: Notice For The Blue/White Lead
Notice for the blue/white lead 9 RGB cable (supplied with Navigation system) To lighting switch terminal. a Pioneer navigation system 6 Black (ground) When the ignition switch is turned on (ACC ON), a control signal Please contact your dealer to inquire about the connectable To vehicle (metal) body. -
Page 59: Speaker Leads
Connection Speaker leads Power amp (sold separately) 1 To power supply 2 Power cord 1 System remote control 3 Left Connect to Blue/white cable (max. 300 mA 12 V DC). 4 Right 2 Power amp (sold separately) 5 Front speaker 3 Connect with RCA cable (sold separately) 6 Rear speaker 4 Rear outputs (REAR OUTPUT) 15 cm (5-7/8 in.) -
Page 60: Connecting An Ipod / Iphone Or An Android Device
Connection Connecting an iPod / iPhone or an Android device Find your device and the function you want to operate from the list below, and refer to the page for the connection. p Depending on the device, some functions may not be available. iPhone (5, 5c, 5s, 6, 6 Plus)/iPod touch (5th generation) iPod (audio) Refer to Connecting via the USB port (iPhone) on page 61... -
Page 61: Iphone And Smartphone
Connection iPhone and smartphone Connecting via the HDMI port iPhone with 30-pin connector (iPhone) For details on how to connect an external device using a Connecting via the AUX input separately sold cable, refer to the manual for the cable. ... -
Page 62: Android Device
Connection For details on how to connect an external device using a Android device Connecting via the MHL port separately sold cable, refer to the manual for the cable. (Android device) Connecting via the HDMI port Securing the High Speed HDMI Cable ®... -
Page 63: External Video Component
Connection p Some appropriate settings are required to use other view Using an AUX input CAUTION cameras. The screen image may appear reversed. Refer to Setting the rear view camera on page 45 With the rear view camera you can keep an eye on trailers, or back into a tight parking spot. -
Page 64: Rear Display
Connection Installation Rear display Precautions before installation CAUTION L : Left audio (White) Never install this product in places where, or in a manner R : Right audio (Red) that: V : Video (Yellow) Could injure the driver or passengers if the vehicle G : Ground stops suddenly. -
Page 65: Installation Using The Screw Holes On The Side Of This Product
Installation Use either the truss head screws (5 mm × 8 mm) or flush Places close to a heater, vent or air conditioner. Installing the microphone Places exposed to direct sunlight, such as on top of the surface screws (5 mm × 9 mm), depending on the shape of the dashboard. -
Page 66: Installation On The Steering Column
If a solution to your problem cannot column be found here, contact your dealer or the nearest authorized Adjusting the microphone Pioneer service facility. angle 1 Detach the microphone base from the micro- Common problems phone clip by sliding the microphone base The microphone angle can be adjusted. -
Page 67: Error Messages
A black screen is displayed. your dealer or an authorized Pioneer Service Station for While operating an application, the application was ended assistance. on the smartphone side. - Page 68 — Disconnect the cable from the iPod. Once the iPod’s main — Clear the alert list. tact your dealer or the nearest authorized Pioneer service menu is displayed, reconnect the iPod and reset it. center for assistance.
-
Page 69: Itunes Tagging
Appendix Unplayable Disc Unplayable File USB1 was disconnected for device protection. Do not re- This type of disc cannot be played on this product. This type of file cannot be played on this product. insert this USB memory into the unit. Press reset to restart —... -
Page 70: Ambient Conditions For Playing A Disc
Read the precautions for discs before using them. above action, please contact your dealer or an authorized iPod full. Tags not transferred. Pioneer Service Station. Memory used for tag information on the iPod is full. Ambient conditions for playing a disc ... -
Page 71: Detailed Information For Playable Media
Appendix Playback of discs recorded on a computer may not be pos- sible, depending on the recording device, writing software, their settings, and other environmental factors. Please record with the correct format. (For details, please contact manufacturer of media, recorders, or writing software.) ... -
Page 72: Media Compatibility Chart
Appendix This product is not compatible with the Multi Media Card The subtitle file must be stored in the same folder as the Maximum playback time of audio file stored on an external (MMC). DivX file. storage device (USB, SD): 7.5 h (450 m inutes) ... -
Page 73: Divx Compatibility
Appendix Bit rate: 5 kbps to 320 kbps (CBR), VBR Maximum playback time: 150 m inutes Files with high transfer rates may not be played back cor- Sampling frequency: 8 kHz to 48 kHz rectly. The standard transfer rate is 4 Mbps for CDs and .mov 10.08 Mbps for DVDs. -
Page 74: Bluetooth
OF THE POSSIBILITY OF SUCH DAMAGE. connected iPod devices DivX Pioneer accepts no responsibility for data lost from an iPod, even if that data is lost while using this product. Please back up your iPod data regularly. Do not leave the iPod in direct sunlight for extended amounts of time. -
Page 75: Using App-Based Connected Content
Content application(s) or service by its provider. Pioneer is not liable for any issues that may arise from incorrect or flawed app-based content. The content and functionality of the supported applications are the responsibility of the App providers. -
Page 76: Mhl
Copyright Law. The LCD screen is exposed in order to increase its visibility nearest authorized Pioneer Service Station. within the vehicle. Please do not press strongly on it as this Notice regarding DVD-Video may damage it. - Page 77 Appendix HPF: MPEG4 video decoding format ...Simple Profile, Advanced Simple CEA2006 Specifications Frequency ..50 Hz /63 Hz /80 Hz /100 Hz /125 Hz /160 Hz /200 Hz Profile (except GMC) Slope ......... –6 dB /oct, –12 dB /oct, –18 dB /oct JPEG decoding format .............JPEG Subwoofer (mono): Frequency ..