HP 9000 rp4440 Maintenance Manual
Hide thumbs
Also See for 9000 rp4440:
- Upgrade manual (59 pages) ,
- User's & service manual (288 pages) ,
- Service manual (246 pages)

Related Manuals for HP 9000 rp4440


Summary of Contents for HP 9000 rp4440
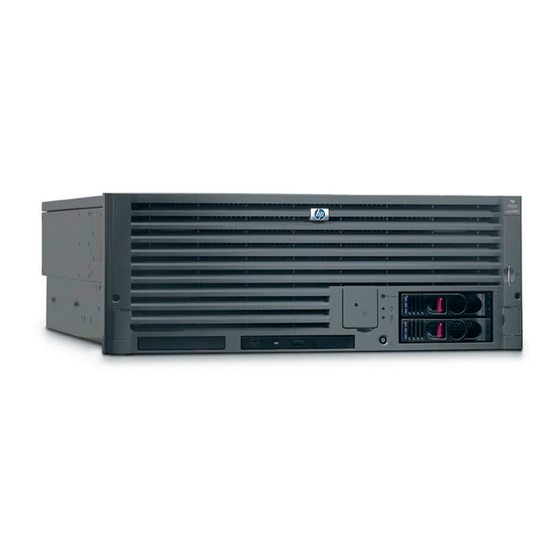
- Page 1 9000 rp4440 Maintenance Guide Regulatory Model Number: RSVLA-0201 Manufacturing Part Number: rp4440_maint July 2004 U.S.A. © Copyright 2004 Hewlett-Packard Development Company, L.P..
-
Page 2: Legal Notices
Adobe and Acrobat are trademarks of Adobe Systems Incorporated. HP-UX Release 10.20 and later and HP-UX Release 11.00 and later (in both 32 and 64-bit configurations) on all HP 9000 computers are Open Group UNIX 95 branded products. Itanium is a trademark or registered trademark of Intel Corporation or its subsidiaries in the United States and other countries. -
Page 3: Table Of Contents
Contents 1. About This Document What’s in This Document ............. . 9 Typographical Conventions . - Page 4 Contents Replacing the Top Cover............. 42 System Battery.
- Page 5 Contents DVD Drive ............... . 103 Removing a DVD Drive .
- Page 6 Contents...
- Page 7 Figure 4-2. Rackless hp 9000 rp4440 Server ........
- Page 8 Figures Figure 4-39. DVD Drive Removal and Replacement ........104 Figure 4-40.
-
Page 9: About This Document
About This Document This document provides maintenance information for the hp 9000 rp4440 Server, Regulatory Model Number: RSVLA-0201. The document printing date and part number indicate the document’s current edition. The printing date will change when a new edition is printed. Minor changes may be made at reprint without changing the printing date. -
Page 10: Related Documents
Related Documents Related Documents The HP Server Documentation CD-ROM has been provided with your server. It contains the User documentation set for the server, including localized versions of key documents. Included on the CD-ROM are the Site Preparation, Installation, and Operations guides, which contain installation and in-depth troubleshooting information. -
Page 11: Configuring The Server
Introduction This chapter provides information about interface connections, configuring the server management processor (MP), and booting the HP Server. Core I/O Connections Each hp 9000 rp4440 Server core I/O includes: • Two USB ports • One UDMA-100 IDE port (40-pin IDE connector) •... -
Page 12: Management Processor (Mp)
The management processor also provides a virtual front panel that can be used to monitor the front panel LEDs from a remote location. The management processor is available whenever the system is connected to a power source, even if the hp 9000 rp4440 Server main power switch is in the off position. - Page 13 Configuring the Server Management Processor (MP) • None (transmit) If the terminal is a PC using Reflection 1, check or change these communications settings by performing the following steps: Step 1. From the Reflection 1 main screen, pull down the connection menu and select Connection Setup. Step 2.
-
Page 14: Configuring Management Processor Lan Information
Configuring the Server Management Processor (MP) Interacting with the Management Processor To interact with the management processor, perform the following steps: On initial system installation, the MP has two default user accounts. They are: NOTE 1. Administrator level user; login=Admin, password=Admin (both are case sensitive). 2. - Page 15 Configuring the Server Management Processor (MP) The value in the “IP address” field is set at the factory. The customer must provide NOTE the actual management processor LAN IP address. Step 3. The screen displays the default values and asks if you want to modify them. It is good practice to write down the information, as it may be required for future troubleshooting.
-
Page 16: Management Processor Commands
Configuring the Server Management Processor (MP) The LC Command Screen LC commands: MP:CM> lc -ip 127.0.0.1 -host uninitialized -mask 255.255.255.0 -gate 127.0.0.1 -web 2003 New LAN Configuration (* modified value): * IP Address: 127.0.0.1 * MP Host Name: uninitialized * Subnet Mask: 255.255.255.0 * Gateway Address: 127.0.0.1 Link State: Auto Negotiate * Web Console Port Number: 2023... - Page 17 Configuring the Server Management Processor (MP) Table 2-1 Management Processor Commands and Descriptions (Continued) Command Description MP firmware upgrade Display help for menu or command System information Modify MP inactivity timers LAN configuration Locater LED control LAN status Return to main menu Modem reset Modem status Remote power control...
-
Page 18: Booting The Server
Configuring the Server Booting the Server Booting the Server To boot the server, press the power switch located to the left of the front panel LEDs. NOTE If the front bezel is attached and in the closed position, you will need to open the small door on the front bezel to gain access to the power switch. -
Page 19: Troubleshooting
HP Server and observe all safety precautions. To troubleshoot your system you must be familiar with the HP-UX operating system and be able to start and stop testing processes. You should also be familiar with Support Tools Manager (STM), which runs in HP-UX, and the Offline Diagnostics Environment (ODE). -
Page 20: Operating System Will Boot
Less than 1 second Hard shutdown More than 1 second but Not used. This selection initiates E-buzzer less than 5 seconds functions that are not supported in the hp 9000 rp4440 servers More than 5 seconds Hard shutdown Power on—OS shut down... -
Page 21: Troubleshooting Using Online Support Tools
You can use diagnostics to thoroughly test a device and isolate failures down to the suspected Field Replaceable Unit (FRU). For complete documentation on how to access and use STM go to http://docs.hp.com. Under Topics menu go to Diagnostics and look for Support Tools Manager. -
Page 22: Event Monitoring Service
• Peripheral status monitor • Memory monitor EMS comes with your HP-UX operating system. To bring up the event monitoring main menu, execute the following command at the shell prompt: /etc/opt/resmon/lbin/monconfig From the list of main menu selections, choose: (E) Enable Monitoring Management Processor The management processor (MP) interface provides diagnostic and configuration capabilities. - Page 23 Troubleshooting Troubleshooting Using Online Support Tools Step 5. For a complete explanation of the management processor and all commands, refer to the Utilities chapter of the hp9000 rp4440 Server Operations Guide. System Event Logs (SEL) To access the system event logs perform the following steps: Step 1.
- Page 24 Troubleshooting Troubleshooting Using Online Support Tools First entry Last entry Jump to entry number View mode configuration (text, keyword, hex) Display this Help menu Ctrl-B Quit and return to the Main Menu Step 4. Select v, then t to change the display to text mode: Display Mode Configuration: H - Hex mode Current ->...
-
Page 25: Troubleshooting Using Offline Support Tools
Troubleshooting Troubleshooting Using Offline Support Tools Troubleshooting Using Offline Support Tools You can use the Support Plus CD to troubleshoot your hp 9000 rp4440 Server by accessing the offline diagnostic environment ODE. Offline Diagnostic Environment (ODE) ODE is used to evaluate specific hardware components via a command line interface. To access ODE from your Support Plus CD, perform the following steps: Step 1. -
Page 26: Disk And I/O Path Logging
Some failures result in I/O path logging. These paths help to indicate the source of the error and may be included in the error message or logged into console or event logs. The following table describes the disk drive and PCI slot paths for your HP Server. Table 3-3... -
Page 27: Troubleshooting Using Led Indicators
Troubleshooting Using LED Indicators Troubleshooting Using LED Indicators Your hp 9000 rp4440 Server has LED indicators located on the front control panel and an internal QuickFind diagnostic panel that you can use to determine what repair action is required. Front Control Panel LEDs The front control panel LEDs show you the system status at a glance. - Page 28 Troubleshooting Troubleshooting Using LED Indicators Table 3-6 Front Control Panel LED Definitions (Continued) LED/ State Flash Rate Color Description Button Thermal Steady Green Green: Thermal OK Thermal Warning Flashing at Yellow Flashing Yellow: Thermal warning 1 Hz Locator Active Flashing at Blue Flashing Blue: System locator LED may be LED/Button...
-
Page 29: Quickfind Diagnostic Panel Leds
Troubleshooting Troubleshooting Using LED Indicators QuickFind Diagnostic Panel LEDs The QuickFind diagnostic panel is located under the top cover and is attached to the top of the power supply cage. The following definitions describe the status of the various LEDs and what is wrong with the indicated component. -
Page 30: Figure 3-2. Quickfind Diagnostic Label
Troubleshooting Troubleshooting Using LED Indicators Table 3-7 QuickFind Diagnostic Panel LED Definitions (Continued) Item LED 0 LED 1 LED 2 LED 3 Details Check Event An event has occurred that requires attention Figure 3-2 QuickFind Diagnostic Label Processor Subsystem I/O VRM CPU VRM Memory 0 Memory 1... -
Page 31: I/O Baseboard Led Indicators
Troubleshooting Troubleshooting Using LED Indicators I/O Baseboard LED Indicators Various LEDs, sensors, and reset or attention buttons are found on the I/O baseboard. Figure 3-3 I/O Baseboard LEDs, Buttons, and Sensors Battery 3.3 VSB Power Reset Button 12V VRM LED PCI Attention LED 6X PCI Attention... -
Page 32: Memory Extender Boards
Troubleshooting Troubleshooting Using LED Indicators Table 3-8 I/O Baseboard LEDs, Buttons, and Sensors LED/Button Color Status Condition 12V VRM Power Green 12V VRM is functioning 5V VRM Power Green 5V VRM is functioning 3.3V VRM Power Green 3.3V VRM is functioning MP Heartbeat Green Blinking... -
Page 33: Figure 3-4. 32 Dimm Memory Extender Board Leds
Troubleshooting Troubleshooting Using LED Indicators The 16 DIMM memory extender board has one condition LED on each of the 2 VRMs. If either condition VRM LED is on, there is a problem with that VRM. You must replace the entire extender board in this case; the VRMs are not Field Replaceable Units (FRUs). -
Page 34: Figure 3-5. 16 Dimm Memory Extender Board Leds
Troubleshooting Troubleshooting Using LED Indicators Figure 3-5 16 DIMM Memory Extender Board LEDs VRM LEDs Table 3-10 16 DIMM Memory Extender Board Color Status Condition Action Green VRM is bad Replace memory extender board Status Chapter 3... -
Page 35: Removing And Replacing Components
Accessing a Rack Mounted Server The hp 9000 rp4440 Server is designed to be rack mounted. The following procedure explains how to gain access to your HP Server that is mounted in an approved rack. For rack installation instructions, review the document titled Installation Guide, Mid-Weight Slide Kit, 5065-7291. -
Page 36: Extend The Server From The Rack
Removing and Replacing Components Accessing a Rack Mounted Server Extend the Server from the Rack Ensure that there is enough area (Approximately 1.5 meters [4.5 ft.]) to fully extend the server NOTE out the front and work on it. To extend the server from the rack, perform the following steps: Step 1. -
Page 37: Accessing A Rackless Server
Accessing a Rackless Server The hp 9000 rp4440 Server is also designed to be rackless. You do not need to remove the tubular stand from the HP Server to gain access to internal components. The front bezel, front cover, and top cover may be removed with the tubular stand attached to the HP Server. -
Page 38: Front Bezel
Removing and Replacing Components Front Bezel Front Bezel The server does not have to be turned off to remove the front bezel. Opening the control panel door provides access to the following components: • Power switch • System LEDs Figure 4-3 Removing and Replacing the Front Bezel Removing the Front Bezel To remove the front bezel, perform the following step:... -
Page 39: Front And Top Covers
Serious injury may result if this warning is not observed. Step 1. If rack mounted, slide the HP Server out from the rack until it stops. (Refer to the hp9000 rp4440 Installation Guide for additional information.) Step 2. -
Page 40: Replacing The Front Cover
Step 1. Align the tabs at the rear of the front cover with the corresponding slots in the chassis and fully seat the tabs into the slots. Step 2. Tighten the four thumbscrews securely. Step 3. Replace the front bezel. Step 4. If rack mounted, slide the HP Server into the rack until it stops. Chapter 4... -
Page 41: Figure 4-5 Removing And Replacing The Top Cover
Removing and Replacing Components Front and Top Covers Figure 4-5 Removing and Replacing the Top Cover Thumbscrews Chapter 4... -
Page 42: Removing The Top Cover
Removing the Top Cover To remove the top cover, perform the following steps: Step 1. If rack mounted, slide the HP Server out from the rack until it stops. (Refer to the hp9000 rp4440 Installation Guide for additional information.) Step 2. Loosen the two captive thumbscrews that hold the top cover in place. -
Page 43: System Battery
Before changing your battery, save all boot configuration settings. These values will need to be reset after changing your battery. Step 1. If rack mounted, slide the HP Server out from the rack until it stops. (Refer to the hp9000 rp4440 Installation Guide for additional information.) Step 2. -
Page 44: Figure 4-6 Battery Location On I/O Baseboard
Removing and Replacing Components System Battery Figure 4-6 Battery Location on I/O Baseboard Battery Chapter 4... -
Page 45: Memory Extender Board
Removing a Memory Extender Board To remove a memory extender board, perform the following steps: Step 1. If rack mounted, slide the HP Server out from the rack until it stops. (Refer to the hp9000 rp4440 Installation Guide for additional information.) -
Page 46: Figure 4-7 Memory Extender Board Latches
Removing and Replacing Components Memory Extender Board Figure 4-7 Memory Extender Board Latches Figure 4-8 Memory Extender Board Chapter 4... -
Page 47: Replacing A Memory Extender Board
Step 4. Push the extraction levers inward to the locked position in order to plug in the memory extender board into the midplane riser board. Step 5. Replace the front cover. Step 6. Replace the front bezel. Step 7. If rack mounted, slide the HP Server into the rack until it stops. Chapter 4... -
Page 48: System Memory Dimms
Removing System Memory DIMMs To remove system memory, perform the following steps: Step 1. If rack mounted, slide the HP Server out from the rack until it stops. (Refer to the hp9000 rp4440 Installation Guide for additional information.) NOTE If desired, the processor extender board may be removed without removing the HP Server from the rack. - Page 49 Removing and Replacing Components System Memory DIMMs Supported DIMM Sizes Supported DIMM sizes are 256 MB, 512 MB, 1 GB, 2 GB. Dissimilar DIMM sizes may be used across the entire extender board but all four DIMMs in each quad must match. For cooling purposes, DIMM fillers must be used in some unused slots.
- Page 50 Removing and Replacing Components System Memory DIMMs Table 4-2 DIMM Filler Requirements for 32 DIMM Extender Board 32 DIMM Extender Board DIMMs Loaded Fillers required 4 DIMMs in quad 0 12 fillers total: 2 fillers in quads 1, 3, 4, 5, 6, and 7 (quad 2 remains unfilled) 8 DIMMs in quads 0 and 1 8 fillers total:...
-
Page 51: Figure 4-9 16 Dimm Extender Board Slot Ids
Removing and Replacing Components System Memory DIMMs Figure 4-9 16 DIMM Extender Board Slot IDs Figure 4-10 32 DIMM Extender Board Slot IDs Chapter 4... -
Page 52: Figure 4-11 Inserting Dimm Into Extender Board Slot
Step 3. Replace the memory extender board. Step 4. Replace the top cover. Step 5. Replace the front bezel. Step 6. If rack mounted, slide the HP Server into the rack until it stops. Figure 4-11 Inserting DIMM into Extender Board Slot... -
Page 53: Processor Extender Board
Removing the Processor Extender Board To remove the processor extender board, perform the following steps: Step 1. If rack mounted, slide the HP Server out from the rack until it stops. (Refer to the hp9000 rp4440 Installation Guide for additional information.) -
Page 54: Figure 4-12 Processor Extender Board
Removing and Replacing Components Processor Extender Board Step 5. Pull out on the extraction levers to unplug the processor extender board from the socket located on the midplane riser board. Figure 4-12 Processor Extender Board Chapter 4... -
Page 55: Figure 4-13 Settings For Pa Risc/Ipf Dipswitch
Removing and Replacing Components Processor Extender Board Figure 4-13 Settings for PA RISC/IPF Dipswitch Itanium PA RISC Setting Setting Chapter 4... -
Page 56: Replacing The Processor Extender Board
Step 4. Push the extraction levers inward to the locked position in order to fully seat the processor extender board into the socket on the midplane riser board. Step 5. Replace the front cover. Step 6. Replace the front bezel. Step 7. If rack mounted, slide the HP Server into the rack until it stops. Chapter 4... -
Page 57: Processors
Removing and Replacing Components Processors Processors Processors are located on the top and bottom surfaces of the processor extender board. WARNING Ensure that the system is powered down and all power sources have been disconnected from the server prior to removing or replacing a processor. Voltages are present at various locations within the server whenever an AC power source is connected. -
Page 58: Removing A Processor
Removing a Processor To remove a processor on the processor extender board, perform the following steps: Step 1. If rack mounted, slide the HP Server out from the rack until it stops. (Refer to the hp9000 rp4440 Installation Guide for additional information.) Step 2. -
Page 59: Replacing A Processor
Figure 4-17, “Installing Processor on Extender Board,” for a complete understanding of this process. Step 1. If rack mounted, slide the HP Server out from the rack until it stops. (Refer to the hp9000 rp4440 Installation Guide for additional information.) Step 2. -
Page 60: Figure 4-15 Processor Cable Placed Correctly
Removing and Replacing Components Processors Figure 4-15 Processor Cable Placed Correctly Heatsink Cable is placed correctly and is under the heatsink Protective Plastic Sleeve Sheet Metal Frame Figure 4-16 Processor Cable Placed Incorrectly Heatsink Cable is placed incorrectly and is pinched between the heatsink and the extender board frame Protective Plastic Sleeve... - Page 61 Removing and Replacing Components Processors Do not tighten the other 4 shoulder screws until you have first hand-tightened the 2 CAUTION knurled thumbscrews. Step 11. Using a CPU install tool (Torx T15 driver), tighten the 4 remaining T15 shoulder screws until they just bottom out.
-
Page 62: Figure 4-17. Installing Processor On Extender Board
Removing and Replacing Components Processors Figure 4-17 Installing Processor on Extender Board Tightening sequence for 4-shoulder screws is 1, 2, 3, 4. DO NOT OVERTIGHTEN! See Step 7. 2-knurled Thumb- TCPU Install Tool screws (Torx-T15) tighten shoulder screws and thumbscrews 2.5 mm Allen Power cable (Protected by plastic sleeve) -
Page 63: Hot-Swap Chassis Fan Unit
Hot-Swap Chassis Fan Unit There are three hot-swap chassis fan units in the HP Server. Fan units 0, 1, and 2 are in the center of the chassis spanning the full chassis width. Fan units 0 and 1 are interchangeable and are in the left and center positions. -
Page 64: Removing A Hot-Swap Chassis Fan Unit
Hot-Swap I/O Chassis Fans Removal and Replacement To remove a hot-swap chassis fan unit, perform the following steps: Step 1. If rack mounted, slide the HP Server out from the rack until it stops. (Refer to the hp9000 rp4440 Installation Guide for additional information.) Step 2. -
Page 65: Figure 4-19 Hot-Swap Power Supply Chassis Fan Removal And Replacement
Removing and Replacing Components Hot-Swap Chassis Fan Unit Figure 4-19 Hot-Swap Power Supply Chassis Fan Removal and Replacement Chapter 4... -
Page 66: Replacing A Hot-Swap Chassis Fan Unit
When the fan is functioning normally, the LED is off • When the fan fails, the LED is lit Step 4. Replace the top cover. Step 5. Replace the front bezel. Step 6. If rack mounted, slide the HP Server into the rack until it stops. Chapter 4... -
Page 67: I/O Baseboard Assembly
CAUTION values will need to be reset after replacing your I/O baseboard assembly. Step 1. If rack mounted, slide the HP Server out from the rack until it stops. (Refer to the hp9000 rp4440 Installation Guide for additional information.) Step 2. Remove the top cover. (Refer to “Front and Top Covers” on page 39.) Step 3. - Page 68 If you are going to replace the I/O board with a new board, remove the cover from the NOTE VGA port at the rear of the I/O board and save it to put on VGA port of the new board. This VGA graphics port is not supported on your hp 9000 rp4440 Server. Chapter 4...
-
Page 69: Figure 4-20 I/O Board Locking Lever
Removing and Replacing Components I/O Baseboard Assembly Figure 4-20 I/O Board Locking Lever OPEN CLOSE Chapter 4... -
Page 70: Replacing The I/O Baseboard Assembly
Figure 4-22 on page 72. Remember to replace the VGA port cover on the new board that you saved when removing the old I/O board. This VGA graphics port is not supported on your hp 9000 rp4440 Server. Chapter 4... - Page 71 Removing and Replacing Components I/O Baseboard Assembly Step 2. With the I/O board flush against the midplane riser board socket, push down firmly on the locking lever until the I/O baseboard plugs all the way into the midplane riser board socket and the locking lever clicks into place on the chassis wall.
-
Page 72: Figure 4-22 S5102 Dipswitch
Removing and Replacing Components I/O Baseboard Assembly Step 8. If rack mounted, slide the HP Server into the rack until it stops. Figure 4-22 S5102 Dipswitch Bit 1-OFF S5102 Chapter 4... -
Page 73: Removing And Replacing Pci/Pci-X Cards
NOTE of your HP Server. PCI slots 1 and 2 are dedicated for use by the core I/O cards. The core I/O functions are shared between two cards; a SCSI HBA card which must be located in slot 1, and a Gigabit Ethernet LAN which must be located in slot 2. -
Page 74: Removing A Pci/Pci-X Card
PCI cards in a different location might require system reconfiguration and could cause boot failure. Step 1. If rack mounted, slide the HP Server out from the rack until it stops. (Refer to the hp9000 rp4440 Installation Guide for additional information.) Step 2. -
Page 75: Figure 4-24 Pci-X Card Latch Opening Sequence
Removing and Replacing Components Removing and Replacing PCI/PCI-X Cards Step 3. Disconnect all external and internal cables attached to the PCI card in the side service bay. Step 4. Turn the PCI/PCI-X card latch on the chassis to ~45 degrees CW to free up the manual retention latch (MRL). -
Page 76: Replacing A Pci Card
Removing and Replacing Components Removing and Replacing PCI/PCI-X Cards Figure 4-25 OLX Divider PCI-X Card PCI-X Card Latch Latch (open (closed position) position) Manual Retention Latch (closed position) Manual Retention Latch (open position) Power LED Light Pipe Attention Button Attention LED Light Pipe Replacing a PCI Card To replace a PCI card, perform the following steps:... - Page 77 Step 5. If the PCI/PCI-X card is full size, close the slider gate bracket to secure the card. See Figure 4-26 on page 78. Step 6. Reconnect all internal and external cables to the PCI/PCI-X card. Step 7. Replace the top cover. Step 8. Slide the HP Server all the way back into the rack until it stops. Chapter 4...
-
Page 78: Figure 4-26 Pci/Pci-X Card Installation
Removing and Replacing Components Removing and Replacing PCI/PCI-X Cards Step 9. Turn on power by plugging in AC power cords to power supply unit(s). Figure 4-26 PCI/PCI-X Card Installation Chapter 4... -
Page 79: Figure 4-27 Pci-X Card Latch Closing Sequence
Removing and Replacing Components Removing and Replacing PCI/PCI-X Cards Figure 4-27 PCI-X Card Latch Closing Sequence Chapter 4... -
Page 80: Figure 4-28 Slider Gate Bracket
Removing and Replacing Components Removing and Replacing PCI/PCI-X Cards Figure 4-28 Slider Gate Bracket CLOSED OPEN Chapter 4... -
Page 81: Olx Dividers
Removing and Replacing Components OLX Dividers OLX Dividers OLX dividers are located on the I/O baseboard, between the PCI cards. Six OLX dividers provide short circuit protection to the hot-plug PCI accessory boards by preventing inadvertent contact between boards during the replacement or addition of a board. -
Page 82: Figure 4-29. Olx Divider Removal And Replacement
Removing and Replacing Components OLX Dividers Observe all ESD safety precautions before attempting this procedure. Failure to follow ESD CAUTION safety precautions could result in damage to the server. Figure 4-29 OLX Divider Removal and Replacement Manual Retention Latch Locking Tabs Chapter 4... -
Page 83: Figure 4-30 Olx Slider Gate Bracket
Removing and Replacing Components OLX Dividers Figure 4-30 OLX Slider Gate Bracket CLOSED OPEN Chapter 4... -
Page 84: Removing An Olx Divider
The OLX divider rack is attached to the I/O baseboard with 4 Torx T15 fasteners. Step 1. If rack mounted, slide the HP Server out from the rack until it stops. (Refer to the hp9000 rp4440 Installation Guide for additional information.) Step 2. -
Page 85: Voltage Regulator Modules (Vrm)
Removing and Replacing Components Voltage Regulator Modules (VRM) Voltage Regulator Modules (VRM) The server contains 3 VRMs that are located on the I/O baseboard. Each is labeled with one of the following voltages: • 3.3 volts • 5.0 volts • 12.0 volts VRMs must be inserted into the slot with the corresponding voltage. -
Page 86: Removing A Voltage Regulator Module (Vrm)
Removing and Replacing Components Voltage Regulator Modules (VRM) Observe all ESD safety precautions before attempting this procedure. Failure to follow ESD CAUTION safety precautions could result in damage to the server. Figure 4-31 VRM Board Remove and Replace 12V VRM 3.3V VRM 5V VRM Removing a Voltage Regulator Module (VRM) -
Page 87: Replacing A Voltage Regulator Module (Vrm)
Removing and Replacing Components Voltage Regulator Modules (VRM) Replacing a Voltage Regulator Module (VRM) To replace a VRM, perform the following steps: Step 1. Push the VRM straight into the slot until it stops, then push in the two locking tabs on either side of the slot to lock the VRM into position. -
Page 88: Hot-Plug Disk Drives
One additional hot-plug disk drive may be added to your HP Server in slot 2. Always use low profile disk drives (1.0" height) in your hp 9000 rp4440 Server. See Figure 4-32, “Disk Drive Installation in Slots 1 and 2.”... -
Page 89: Figure 4-32. Disk Drive Installation In Slots 1 And 2
Removing and Replacing Components Hot-Plug Disk Drives Step 3. The hot-plug disk drive is now correctly installed. Figure 4-32 Disk Drive Installation in Slots 1 and 2 Slot 2-SCSI ID 1 Slot 1-SCSI ID 0 Figure 4-33 Disk Drive Installation in Slot 2 Chapter 4... -
Page 90: Figure 4-34. Volume Filler Installation In Slot 2
Removing and Replacing Components Hot-Plug Disk Drives Figure 4-34 Volume Filler Installation in Slot 2 Chapter 4... -
Page 91: Scsi Backplane Board
Failure to properly complete the steps in this procedure will result in erratic system behavior CAUTION or system failure. For assistance with this procedure contact your local HP Authorized Service Provider. Observe all ESD safety precautions before attempting this procedure. Failure to follow ESD safety precautions could result in damage to the server. -
Page 92: Removing The Scsi Backplane
Removing the SCSI Backplane To remove the SCSI backplane, perform the following steps: Step 1. If rack mounted, slide the HP Server out from the rack until it stops. (Refer to the hp9000 rp4440 Installation Guide for additional information.) Step 2. Remove the front bezel. (Refer to “Front Bezel” on page 38.) Step 3. -
Page 93: Replacing The Scsi Backplane
Step 5. Replace the processor extender board. Step 6. Replace the memory extender board. Step 7. Replace the front cover. Step 8. Replace the front bezel. Step 9. If rack mounted, slide the HP Server back into the rack until it stops. Chapter 4... -
Page 94: Midplane Riser Board
Removing the Midplane Riser Board To remove the midplane riser board, perform the following steps: Step 1. If rack mounted, slide the HP Server out from the rack until it stops. (Refer to the hp9000 rp4440 Installation Guide for additional information.) Step 2. -
Page 95: Figure 4-36 Midplane Riser Board
Removing and Replacing Components Midplane Riser Board Step 12. Using a Torx #15 driver, remove the five Torx screws attaching the midplane riser board to the chassis. Step 13. Grasp the top edge of the midplane riser board and lift straight up to release it from the keyway slots on the chassis. -
Page 96: Replacing The Midplane Riser Board
Step 9. Replace the processor extender board. Step 10. Replace the memory extender board. Step 11. Replace the front and top covers. Step 12. Replace the front bezel. Step 13. If rack mounted, slide the HP Server back into the rack until it stops. Chapter 4... -
Page 97: Hot-Swap Power Supplies
Hot-Swap Power Supplies The hp 9000 rp4440 Server has two hot-swap power supply units (PSU). These PSUs are located at the rear of the HP Server. The supported configuration of the HP Server requires a minimum of one PSU be installed. -
Page 98: Removing A Hot-Swap Power Supply
Be careful when removing the hot-swap power supply. It is heavier than it appears. Step 1. If rack mounted, slide the HP Server back out of the rack until it stops. (Refer to the hp9000 rp4440 Installation Guide for additional information.) Step 2. -
Page 99: Figure 4-37 Hot-Swap Power Supply Removal And Replacement
Removing and Replacing Components Hot-Swap Power Supplies Figure 4-37 Hot-Swap Power Supply Removal and Replacement Chapter 4... -
Page 100: Power Distribution Board
CAUTION Failure to properly complete the steps in this procedure will result in erratic system behavior or system failure. For assistance with this procedure contact your local HP Authorized Service Provider. Observe all ESD safety precautions before attempting this procedure. Failure to follow ESD safety precautions could result in damage to the server. -
Page 101: Removing The Power Distribution Board
Removing the Power Distribution Board To remove the power distribution board, perform the following steps: Step 1. If rack mounted, slide the HP Server out from the rack until it stops. (Refer to the hp9000 rp4440 Installation Guide for additional information.) Step 2. -
Page 102: Replacing The Power Distribution Board
Step 4. Replace the hot-swap power supply(s) into the chassis. Step 5. Replace the power supply fan unit into the chassis. Step 6. Replace the top cover. Step 7. If rack mounted, slide the HP Server back into the rack until it stops. Chapter 4... -
Page 103: Dvd Drive
CAUTION Failure to properly complete the steps in this procedure will result in erratic system behavior or system failure. For assistance with this procedure contact your local HP Authorized Service Provider. Observe all ESD safety precautions before attempting this procedure. Failure to follow ESD safety precautions could result in damage to the server. -
Page 104: Removing A Dvd Drive
Removing and Replacing Components DVD Drive Figure 4-39 DVD Drive Removal and Replacement Removing a DVD Drive To remove a DVD drive, perform the following steps: Step 1. Grasp the front of the DVD drive and squeeze in on the locking tab to release the drive. Step 2. -
Page 105: Dvd I/O Board
Failure to properly complete the steps in this procedure will result in erratic system behavior CAUTION or system failure. For assistance with this procedure contact your local HP Authorized Service Provider. Observe all ESD safety precautions before attempting this procedure. Failure to follow ESD safety precautions could result in damage to the server. -
Page 106: Figure 4-40 Dvd I/O Board Removal And Replacement
Removing and Replacing Components DVD I/O Board Figure 4-40 DVD I/O Board Removal and Replacement Cover DVD I/O Board Chapter 4... -
Page 107: Removing A Dvd I/O Board
Removing a DVD I/O Board To remove a DVD I/O board, perform the following steps: Step 1. If rack mounted, slide the HP Server out from the rack until it stops. (Refer to the hp9000 rp4440 Installation Guide for additional information.) Step 2. -
Page 108: Display Board
Failure to properly complete the steps in this procedure will result in erratic system behavior CAUTION or system failure. For assistance with this procedure contact your local HP Authorized Service Provider. Observe all ESD safety precautions before attempting this procedure. Failure to follow ESD safety precautions could result in damage to the server. -
Page 109: Figure 4-41 Display Board Removal And Replacement
Removing and Replacing Components Display Board Figure 4-41 Display Board Removal and Replacement Chapter 4... -
Page 110: Removing The Display Board
Removing the Display Board To remove the display board, perform the following steps: Step 1. If rack mounted, slide the HP Server out from the rack until it stops. (Refer to the hp9000 rp4440 Installation Guide for additional information.) Step 2. Remove the front bezel. (Refer to “Front Bezel” on page 38.) Step 3. -
Page 111: Quickfind Diagnostic Board
Failure to properly complete the steps in this procedure will result in erratic system behavior CAUTION or system failure. For assistance with this procedure contact your local HP Authorized Service Provider. Observe all ESD safety precautions before attempting this procedure. Failure to follow ESD safety precautions could result in damage to the server. -
Page 112: Figure 4-42 Quickfind Diagnostic Board Removal And Replacement
Removing and Replacing Components QuickFind Diagnostic Board Figure 4-42 QuickFind Diagnostic Board Removal and Replacement Cover QuickFind Diagnostic Board Chapter 4... -
Page 113: Removing The Quickfind Diagnostic Board
Removing the QuickFind Diagnostic Board To remove the QuickFind diagnostic board, perform the following steps: Step 1. If rack mounted, slide the HP Server out from the rack until it stops. (Refer to the hp9000 rp4440 Installation Guide for additional information.) Step 2. - Page 114 Removing and Replacing Components QuickFind Diagnostic Board Chapter 4...
-
Page 115: Parts Information
Parts Information Field Replaceable Parts (FRU) List The items in this list and the corresponding item numbers are the Field replaceable Units (FRUs) for the hp 9000 rp4440 Server. NOTE The item numbers listed below are used with the part illustrations in order to identify the nomenclature of the part. - Page 116 Parts Information Field Replaceable Parts (FRU) List Table A-1 Field Replaceable Parts (FRU) List (Continued) Part Part Number Item No. Description Number Replacement Exchange A6961-60009 PCA, QuickFind (visual) Diagnostic Board (includes A6961-67009 None plastic cover and label) A6961-60015 PCA, Power Distribution Board A6961-67015 None A6961-60013...
- Page 117 Parts Information Field Replaceable Parts (FRU) List Table A-1 Field Replaceable Parts (FRU) List (Continued) Part Part Number Item No. Description Number Replacement Exchange Rack Solutions 5069-3305 Rack Mount Hardware, Right (included with Left A6977-67001 None Bracket in kit) 5069-3306 Rack Mount Hardware, Left (included with Right A6977-67002 None...
- Page 118 Parts Information Field Replaceable Parts (FRU) List Appendix A...
-
Page 119: System I/O Board Switches And Jumpers
System I/O Board Switches and Jumpers The following descriptions are for reference only. Serial Number PCI-X Slot 8 DS0805 DS0806 S0801 PCI-X Slot 7 DS1810 DS1808 S1802 PCI-X Slot 6 DS1811 DS1813 S1803 PCI-X Slot 5 DS2807 DS2809 S2801 PCI-X Slot 4 DS2808 DS2806 S2802... - Page 120 System I/O Board Switches and Jumpers Table B-1 System I/O Board Indicators, Connectors, and Jumpers LED Indicators Connectors Jumpers Ref Des Function Ref Des Function Ref Des Function DS0907 Slot 8 Attn P2314 DHPC JTAFG P5704 AC Range-Off DS0805 Slot 8 Attn P4506 BMC DUART P5705...
- Page 121 System I/O Board Switches and Jumpers Table B-1 System I/O Board Indicators, Connectors, and Jumpers (Continued) LED Indicators Connectors Jumpers Ref Des Function Ref Des Function Ref Des Function DS2808 Slot 4 Attn P8204 ACPI Events DS2806 Slot 4 Power P8304 LPC Bus Header DS3916...
- Page 122 System I/O Board Switches and Jumpers Appendix B...
-
Page 123: Index
Index Accessing a Rack Mounted HP Server Hot-Swap Fan Accessing a Rackless HP Server I/O Baseboard Backplane, SCSI LEDs Remove Remove Replace Replace Battery, Replacement Bootring the Server Jumpers and Switches, System I/O Board Commands LEDs Control Panel Control Panel, Front, LEDs... - Page 124 QuickFind Diagnostic Board LEDs Voltage Regulator Module (VRM) Remove Remove Replace Replace Related Documents Remove and Replace Accessing a Rack Mounted HP Server Accessing a Rackless HP Server Battery Bezel, Front DIMMs Disk Drive, Hot-Plug Display Board DVD Drive DVD I/O Board...