Table of Contents
Advertisement
Quick Setup Guide
Start Here
Thank you for choosing Brother, your support is important to us and we value your business. Your Brother product
is engineered and manufactured to the highest standards to deliver reliable performance, day-in and day-out.
Please read the Product Safety Guide first, then read this Quick Setup Guide for the correct setup and installation
procedure. To view the Quick Setup Guide in other languages, please visit solutions.brother.com/manuals and
click Change Country (Language).
In USA:
To download other guides for this product, visit the Brother Solutions Center at solutions.brother.com/manuals and
select your model.
1
Unpack the machine and check the components
Waste Toner Box
(pre-installed)
Belt Unit
(pre-installed)
CD-ROM
Product Safety Guide
Drum Unit and Toner Cartridge Assemblies
(pre-installed)
(Black, Cyan, Magenta and Yellow)
AC Power Cord
Basic User's Guide
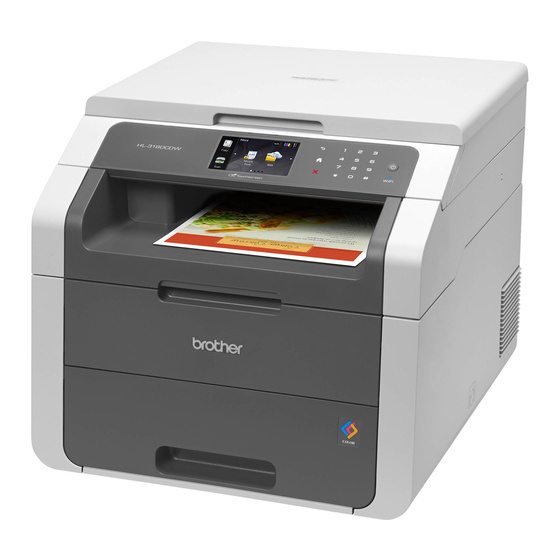
HL-3180CDW
Quick Setup Guide
USA/CAN Version 0
1
Advertisement
Table of Contents

Related Manuals for Brother HL-3180CDW


Summary of Contents for Brother HL-3180CDW
- Page 1 Start Here HL-3180CDW Thank you for choosing Brother, your support is important to us and we value your business. Your Brother product is engineered and manufactured to the highest standards to deliver reliable performance, day-in and day-out. Please read the Product Safety Guide first, then read this Quick Setup Guide for the correct setup and installation procedure.
- Page 2 WARNING indicates a potentially hazardous situation which, if not avoided, WARNING could result in death or serious injuries. CAUTION indicates a potentially hazardous situation which, if not avoided, may CAUTION result in minor or moderate injuries. WARNING • Plastic bags are used in the packing of your machine. Plastic bags are not toys. To avoid the danger of suffocation, keep these bags away from babies and children, and dispose of them correctly.
- Page 3 Remove the packing Take out all four drum and toner cartridge assemblies. material from the machine CAUTION CAUTION DO NOT eat the silica gel pack, please throw it away. If ingested, seek medical attention immediately. IMPORTANT DO NOT connect the AC power cord yet. Remove the packing tape from the outside of the machine, the silica gel pack on the support IMPORTANT...
- Page 4 Remove the orange packing piece from each Load paper in the paper drum and toner cartridge assembly. tray Pull the paper tray completely out of the machine. Using both hands, hold each drum and toner cartridge assembly level, and gently shake it from side to side several times to distribute the toner evenly inside the assembly.
-
Page 5: Connect The Power Cord
Load paper in the tray and make sure: Connect the power cord The paper is below the maximum paper mark (bbb) a. Overfilling the paper tray will cause paper jams. The side to be printed on is face down. ... -
Page 6: Set The Date And Time
Set the date and time Automatic Daylight Saving Time You can set the machine to change automatically for Press Daylight Saving Time. It will reset itself forward one hour in the spring and backward one hour in the fall. Press (Date &... -
Page 7: Choose Your Connection Type
, visit solutions.brother.com/windows, select your model, and select your operating system. • You can visit us at http://solutions.brother.com/ and click Downloads for the latest driver updates and utilities, or click FAQs & Troubleshooting for product support and answers to frequently-asked questions (FAQs). -
Page 8: Before You Install
If the language screen appears, choose your language. • The screens may differ depending on your operating system. NOTE • If the Brother screen does not appear NOTE automatically, go to Computer (My The CD-ROM includes Nuance™ PaperPort™ Computer). - Page 9 Windows 7 users: run the Installation and then connect the cable to your computer. Diagnostics located in (Start) > All Programs > Brother > HL-XXXX (where HL-XXXX is your model name). ® - For Windows 8 users: to run Installation...
- Page 10 Before you install Install MFL-Pro Suite Put the CD-ROM into your CD-ROM drive, and IMPORTANT then double-click the BROTHER icon on your For Mac OS X v10.6.7 or lower users: upgrade to desktop. Mac OS X v10.6.8, 10.7.x, 10.8.x. (For the latest drivers and information for the Mac OS X you are Double-click the Start Here OSX icon.
- Page 11 Macintosh Download and install Presto! PageManager When Presto! PageManager is installed, OCR capability is added to Brother ControlCenter2. You can easily scan, share and organize photos and documents using Presto! PageManager. On the Brother Support screen, click Presto! PageManager and follow the on-screen instructions.
-
Page 12: For Wireless Network Users
5. Press Yes for two seconds. NOTE • To achieve optimum results with normal everyday document printing, place the Brother machine as close to the wireless access point/router as possible, with minimal obstructions. Large objects and walls between the two devices and interference from other electronic devices can affect the data transfer speed of your documents. - Page 13 Please write down your wireless network settings in the area below. • If you need assistance during setup and want to contact Brother Customer Service, make sure you have your SSID and Network Key ready. We cannot assist you in locating this information.
- Page 14 IMPORTANT If you need assistance during setup and want to contact Brother Customer Service, make sure you have your SSID (Network Name) and Network Key ready. We cannot assist you in locating this information.
-
Page 15: Windows And Macintosh
• If the model name screen appears, choose your machine. If the language screen appears, choose your language. Choose Wireless Network Connection, and • If the Brother screen does not appear then click Next. automatically, go to Computer (My , go to d ®... - Page 16 For Wireless Network Users When the Firewall/AntiVirus detected screen Check Yes if you want to connect with the listed SSID. Click Next, and then go to k. appears, choose Change the Firewall port settings to enable network connection and continue with the installation. (Recommended) and click Next.
- Page 17 For Wireless Network Users Confirm the wireless network settings, and then click Next. The settings will be sent to your machine. NOTE • The settings will remain unchanged if you click Cancel. • To manually enter the IP address settings of your machine, click Change IP Address and enter the necessary IP address settings for your network.
- Page 18 For Wireless Network Users Manual setup from the control panel using the Setup Wizard ® (Windows , Macintosh and mobile devices) To connect your machine using the automatic Set up the wireless wireless mode, press Yes. (If you choose No (Manual), go to f to enter the Network Key.) settings When the Touchscreen instructs you to start...
- Page 19 For mobile device users, see the Advanced Network User's Guides for details on how to use your machine with your mobile device(s). To download the User’s Guide for the application you are using, visit the Brother Solutions Center at solutions.brother.com/manuals and select your model.
-
Page 20: Configure The Wireless Settings
Touchscreen will show the wireless signal strength of your wireless access point/router. Place the Brother machine within range of your WPS or AOSS™ access point/router. The To install the MFL-Pro Suite, continue to range may differ depending on your step 13. -
Page 21: Troubleshooting
Troubleshooting IMPORTANT If you need assistance during setup and want to contact Brother Customer Service, make sure you have your SSID (Network Name) and Network Key ready. We cannot assist you in locating this information. To find the wireless settings (SSID (Network Name) and Network Key)* 1. - Page 22 For Wireless Network Users Error Code Recommended Solutions The Authentication/Encryption methods used by the selected wireless access point/router are not supported by your machine. For infrastructure mode, change the authentication and encryption methods of the wireless access point/router. Your machine supports the following authentication methods WPA™, WPA2™, OPEN and Shared key.
- Page 23 For Wireless Network Users Error Code Recommended Solutions The machine cannot detect a wireless access point/router that has WPS or AOSS™ enabled. To configure your wireless settings using WPS or AOSS™, you must operate both your machine and the wireless access point/router. Confirm your wireless access point/router supports WPS or AOSS™...
-
Page 24: Entering Text
For Wireless Network Users Entering Text When you are setting certain menu selections, you may need to enter text into the machine. Press repeatedly to choose between letters, numbers and special characters. Press to change between upper case and lower case. Inserting spaces To enter a space, press Space. -
Page 25: Wireless Network
If the language screen appears, choose your language. NOTE • If the Brother screen does not appear ® If you are not using the Windows Firewall, see automatically, go to Computer (My the user’s guide for your software for... - Page 26 If you want to use more than five PCs with Nuance™ PaperPort™ 12SE installed, please purchase the Brother NL-5 pack which is a multiple PC license agreement pack for up to five additional users. To purchase the NL-5 pack, contact your authorized Brother dealer or contact Brother customer service.
- Page 27 Wireless Network ® Windows The installation is now Finish complete. NOTE ® • For Windows 8 users: if the Brother manuals included on the CD-ROM are in PDF format, ® ® ® use Adobe Reader to open them. If Adobe ®...
- Page 28 The installation screens appear one after another. If prompted, follow any on-screen instructions. Put the CD-ROM into your CD-ROM drive, and then double-click the BROTHER icon on your IMPORTANT desktop. DO NOT cancel any of the screens during the installation. It may take a few minutes for the Double-click the Start Here OSX icon.
- Page 29 Next. (OS X v10.8.x) When Presto! PageManager is installed, OCR capability is added to Brother ControlCenter2. You Select HL-XXXX CUPS driver from the Use can easily scan, share and organize photos and pop-up menu (where XXXX is your model documents using Presto! PageManager.
-
Page 30: For Network Users
Print the Network Configuration (web browser) Report The Brother print server is equipped with a web server You can print the Network Configuration Report to that allows you to monitor its status or change some confirm the current network settings. -
Page 31: Other Information
Press (Toner). and then click the drop-down list and select your model name (if not already selected). Click Use More Press Calibration. in the left navigation bar, and then click Brother Creative Center. Press Calibrate. Press Yes. Press Mac users can access Brother CreativeCenter at this web address: http://www.brother.com/creativecenter/... - Page 32 When the time comes to replace consumable items such as toner or drums, an error message will appear on your machine's Touchscreen. For more information about the consumables for your machine, visit us at http://www.brother.com/original/ or contact your local Brother reseller. NOTE The drum unit and toner cartridge are two separate parts.
- Page 33 The contents of this manual and the specifications of this product are subject to change without notice. Brother reserves the right to make changes without notice in the specifications and materials contained herein and shall not be responsible for any damages (including consequential) caused by reliance on the materials presented, including but not limited to typographical and other errors relating to the publication.