Table of Contents
Advertisement
Advertisement
Table of Contents

Related Manuals for Yamaha YZ250 2001


Summary of Contents for Yamaha YZ250 2001
- Page 1 Yamaha YZ250 Front Tire Repair...
-
Page 3: Table Of Contents
Table of Contents Table of Contents Contents ........................1 Table of Contents ................... iii Introduction ....................v Legend ...................... v Preparing Motorcycle for Repair............... 7 • 1.1 Clean Motorcycle ................7 • 1.2 Clean Work Space ................7 • 1.3 Prop Motorcycle on Stand .............. 7 •... - Page 4 Title Of Manual Prepare front Wheel ................. 11 2.4 Remove Tire from Rim ................12 Tools and Supplies Needed ..............12 Procedures ....................13 Removing Tire from Rim ................13 2.5 Inspection of Wheel Components ............14 Inspection of Inner Tube ................14 Inspection of Tire ..................
-
Page 5: Table Of Contents
Table of Contents Tools Needed ................... 29 How to Test PSI ..................30 Works Cited ....................31 Index ......................31... -
Page 7: Introduction
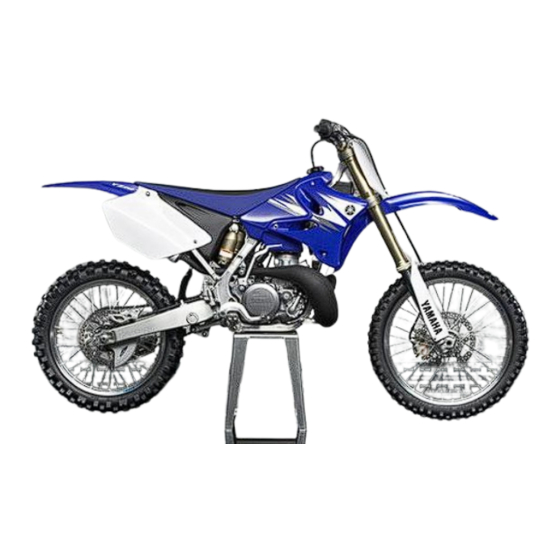
In this manual are techniques and added information on how to replace the front tire on a Yamaha, model YZ250, year 2001. This manual is to be used for its intended purpose and will not be a reasonable substitute for any other motorcycle. -
Page 9: Preparing Motorcycle For Repair
Preparing Motorcycle for Repair • 1.1 Clean Motorcycle • 1.2 Clean Work Space • 1.3 Prop Motorcycle on Stand • 1.4 Tools Required... -
Page 11: Chapter 1
Chapter I Chapter 1 1.1 Clean Your Motorcycle Cleaning your motorcycle prior to performing any maintenance is a crucial step which must not be overlooked. Attempting to work on your YZ250 without following this step could result in major damages. Rinse, Wash, and Dry ... -
Page 12: Clean Workspace
Title Of Manual 1.2 Clean Workspace Your workspace is an important environment which must be kept clean in order to work efficiently. Clear Debris Clearing away any clutter is a necessary step prior to working on your motorcycle to help prevent you from losing any parts. ... -
Page 13: Prop Motorcycle On Stand
Chapter I 1.3 Prop Motorcycle on Stand To remove the front tire from your motorcycle you must first place the dirt bike onto its stand. Different Stands Available There are many different stands available: Classic floor stand Foot Jack ... -
Page 15: Removal Of Front Wheel
Removal of Front Wheel... -
Page 17: Chapter 2
Chapter II Chapter 2 2.1 Loosen Fork Bolts Before removing the wheel from your YZ250 you must loosen the bolts squeezing the forks (front suspension) to the bolts. Tools Needed Socket set Procedures First locate the 8mm socket and attach it to the wrench. ... -
Page 18: Remove Axel And Wheel From Forks
Title Of Manual 2.2 Remove Axel and Wheel from Forks Warning: When removing the axel from the forks the wheel will drop directly toward the ground. This could cause injury. Be sure to remove any items away from under the wheel and if possible secure the wheel to keep it from falling. -
Page 19: Remove Wheel From Forks
Chapter II 2.3 Remove Wheel from Forks After removing the axel from the forks the wheel will be released. In order to properly remove the wheel from the forks you should follow these steps: Remove Axle and Spacers Ensure the axle and spacers are completely removed from both front forks. ... -
Page 20: Remove Tire From Rim
Title Of Manual 2.4 Remove Tire from Rim Warning! Removing the tire from the rim requires much strength and skill. Do not attempt to remove the tire without previous experience or help from a professional. Pinching may occur causing harm to you and or your tire. Tools and Supplies Needed ... -
Page 21: Procedures
Chapter II Procedures After preparing your front wheel for tire removal (see end of section 2.3) you must prepare your tools and supplies. First, locate and ready your tire irons. Then remove your valve stem using the valve stem remover tool. ... -
Page 22: Inspection Of Wheel Components
Title Of Manual 2.5 Inspection of Wheel Components The wheel components, inner tube, tire, and rim are all crucial parts that together help to maintain structural integrity of the dirt bike. It is vital that these parts be examined closely prior to reconstruction and before each ride. Inspection of Inner Tube ... -
Page 23: Inspecting The Rim
Chapter II Inspecting the Rim You should search for any signs of compromise in the rims structural integrity. Things to look for: Large indents where the rim and tire make contact Deep scratches or server scuffing of rim ... -
Page 25: Front Wheel Reassembly
Front Wheel Reassembly... -
Page 27: Chapter 3
Chapter III Chapter 3 3.1 Replace Inner Tube into Tire Warning! Place inner tube inside of the tire prior to placing the tire on the rim. DO NOT place inner tube on rim and then attempt to replace the tire. This could result in the tube being pinched and torn. -
Page 28: Procedures
Chapter III Title Of Manual • Socket Set Dish Soap Bowl of Water Procedures It is time to replace the tire onto its rim after placing the tube completely inside the tire (see previous section). Step1: Start by lubing the tire and rim with the soapy water to ease the process of replacing the tire. -
Page 29: Replace Wheel Between Forks
Chapter III Step5: Turn the wheel over so that the disc break is now facing up. Step6: Begin prying the other side of the tire onto the rim attempting to avoid pinching the tube. Step7: Once the tire has been put back onto the rim completely use your socket set to tighten the valve stem and rim lock nuts. -
Page 30: Procedures
Chapter III Title Of Manual Procedures The axle will need to be readily accessible when putting the front wheel back between the forks. Step1: Take the front wheel and slide the disc break into the gap of the caliper. ... -
Page 31: Procedures
Chapter III Procedures Locate the two bolts at the bottom of each fork directly next to the axle and ready your wrench and 8mm socket. Step1: Set your wrench to tighten. Step2: Tighten all four bolts to the ... -
Page 33: Testing Repair
Testing Repair... -
Page 35: Chapter 4
Chapter IV Chapter 4 4.1 Spin Test The spin test will tell you whether your front tire is off balance, the rim is bent, or if you reassembled something incorrectly. How to Perform the Spin Test Step1: To perform the test you must first make sure that your front tire is off of the ground. -
Page 36: Break Test
Chapter IV Title Of Manual 4.2 Break Test The break test will assure you that your front break is in working order. How to Perform the Break Test Step1: Start by performing the spin test Step1: To perform the test you must first make sure that your front tire is off of the ground. -
Page 37: Standing Test
Chapter IV 4.3 Standing Test The standing test will decide if your motorcycle can stand or if there was an error during reassembly. How to Perform the Standing Test Step1: Prepare a large empty area where you will stand your motorcycle ... -
Page 38: How To Test Psi
Chapter IV Title Of Manual How to Test PSI Testing the PSI of you dirt bike tire is very simple. Step1: Remove valve cap from valve stem. Step2: Firmly press your PSI gauge into the valve stem until the stick comes to a complete stop. -
Page 39: Works Cited
Tools, iii, iv, v, 7, 9, 10, 12, 19, 21, motorcycle, v, 3, 4, 5, 15, 29, 31 23, 29 PSI Test, iv, 29 Wash, iii, 3 repair, v Yamaha, v Rim, iv, 12, 14, 15, 16, 19 YZ250, v, 3, 9, 29 Rinse, iii, 3...