
Related Manuals for Poly Savi 8200 Series


Summary of Contents for Poly Savi 8200 Series
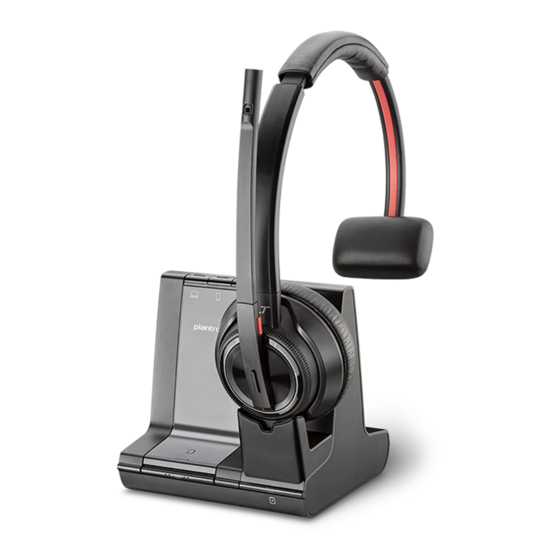
- Page 1 PLANTRONICS + POLYCOM. NOW TOGETHER AS Savi 8200 Series Wireless Headset System User Guide...
-
Page 2: Table Of Contents
Contents DECT Information DECT Enhanced Security Overview Base and Headset Basics Accessories Hook up your system Desk phone setup details Position Your Base Fit and charge Customize Your Headset Charge Your Headset Talk Time Headset Battery Status Pair your headset Auto Connect Feature Load software Plantronics Hub configurable settings... -
Page 3: Dect Information
Chaos Council in 2009. Plantronics Savi 8200 Series DECT products have been tested against and passed the DECT Forum security certification requirements and consequently have been granted 'DECT Forum security' logo certification. -
Page 4: Overview
Overview Base and Headset Basics Base 8 9 10 12 13 Power jack Computer button Handset lifter jack Mobile phone button Telephone interface cable jack Desk phone button USB port Incoming call ringer Desk phone speaking volume Bluetooth pairing button/LED Desk phone configuration switch Subscription button/LED Desk phone listening volume... -
Page 5: Accessories
Accessories Electronic hookswitch cable (EHS cable) Electronically and automatically answers/ends a desk phone call. Enables remote call control with your headset. HL10 lifter Automatically lifts handset and returns it to the cradle. Enables remote call control with your headset. -
Page 6: Hook Up Your System
Hook up your system Using the diagram, connect your headset system. Desk phone setup details Choose a desk phone setup A, B or C and connect cables. Desk phone (standard) • Connect one end of the telephone interface cable to the back of the base •... -
Page 7: Position Your Base
Desk phone + EHS cable (sold separately) See the user guide at plantronics.com/accessories for details. Desk phone + HL10 lifter (sold separately) See the user guide at plantronics.com/accessories for details. Position Your Base The minimum recommended separation between your desk phone and the base is 6 inches. The minimum recommended separation between the base and computer is 12 inches. -
Page 8: Fit And Charge
Fit and charge Customize Your Headset Optimize the comfort and fit of your headset. Adjust the Headband To adjust the headband, lengthen or shorten the band until it fits comfortably. Position the earcups so that the foam cushions sit comfortably over the center of your ears. Position the stabilizer T-bar above your ear, if applicable. -
Page 9: Pair Your Headset
Pair your headset To pair your base and mobile phone, first power on your headset. Press and hold the Bluetooth pairing button on the base for 4 seconds until the Bluetooth LED flashes red and blue. NOTE Your base and headset are automatically paired/subscribed. Go to Bluetooth settings on your mobile phone and select Savi. -
Page 10: Load Software
Load software Plantronics Hub for Windows/Mac is an invaluable headset tool. Download Plantronics Hub for Windows/Mac by visiting plantronics.com/software. Using Plantronics Hub, manage your headset settings. • Call control for softphones • Change headset language • Update firmware • Turn features on/off Plantronics Hub Feature Plantronics Hub tab... -
Page 11: The Basics
The basics Headset Controls Volume wheel Rotate volume wheel to adjust volume Call button Press to place, answer, end a call Mute button During a call, press to mute and unmute Headset LED Flashes when in use Power button Toggle on and off ANC (Active Noise Canceling) Toggle on and off Power on your headset To turn on the headset, slide the Power button on the bottom of the earcup to reveal green. -
Page 12: Change Your Default Phone Line
Change your default With the system idle, change your default phone line/audio channel by pressing and holding for 4 phone line seconds the desired base Audio button until it flashes green 4 times. Customizable in Plantronics Hub also. Get a dial tone To open an audio channel or get a dial tone, press the headset Call button for 1 second while the system is idle;... -
Page 13: Change Voice Prompt Language
conference call mode. View conference call status by going to Plantronics Hub About > Connections > Conferenced headsets. Join Savi headsets manually While on a call, press the base subscription button. The base subscription LED flashes yellow and green. For Savi 8200 headsets: Press the guest headset Call button for 4 seconds. -
Page 14: More Features
More Features Base Subscription Button The headset and base that came in the box are subscribed (connected) to each other. However, if you wish to use a new headset or need to restore subscription to your current headset (base subscription button is red), the units can be subscribed to each other by the following methods. The subscription button is below the Bluetooth button on the front of the base. - Page 15 NOTE If the base subscription LED goes solid red, after flashing red/green, the subscription attempt has failed and should be repeated. End Subscription If the base is in subscription mode and you want to stop the base from searching for a headset, press the subscription button again.
-
Page 16: Troubleshooting
Troubleshooting Headset My headset is unstable. When you wear the headset, the microphone should rest as close to your cheek as possible without touching. The microphone can be adjusted inward by the pivoting earpiece to optimize the position of the headset. See Position Your Headset. -
Page 17: Desk Phone
People I talk to can hear a buzz in Move the base further away from your phone. See Position Your the background. Base. If the base power supply is plugged into a power strip, plug it into the wall directly. Desk Phone The handset lifter is installed but Be sure the handset lifter power cord is firmly pushed into the... - Page 18 • Go to Start > Control Panel > Sounds and Audio Devices > Audio > Sound Playback and change the default setting from your Savi headset to your PC speakers. Click “OK” to confirm your change. For Windows Vista and Windows 7 systems •...
-
Page 19: Appendix
Appendix System Requirements Computer ® ® • Supported Operating Systems: Windows 7, Windows 8, 8.1 and Windows 10; Mac OS X El Capitan, Mac OS X Sierra, Mac OS X High Serra, Mac OS X 10.11 and Mac OS X 10.13, Mac OS X Mojave ®... -
Page 20: Support
Support NEED MORE HELP? plantronics.com/support habitatsoundscaping@plantronics.com Plantronics, Inc. Plantronics B.V. 345 Encinal Street Scorpius 171 Santa Cruz, CA 95060 2132 LR Hoofddorp United States Netherlands © ® 2019 Plantronics, Inc. The Bluetooth word mark and logos are registered trademarks owned by Bluetooth, SIG, Inc. and any use of such marks by Plantronics, Inc.