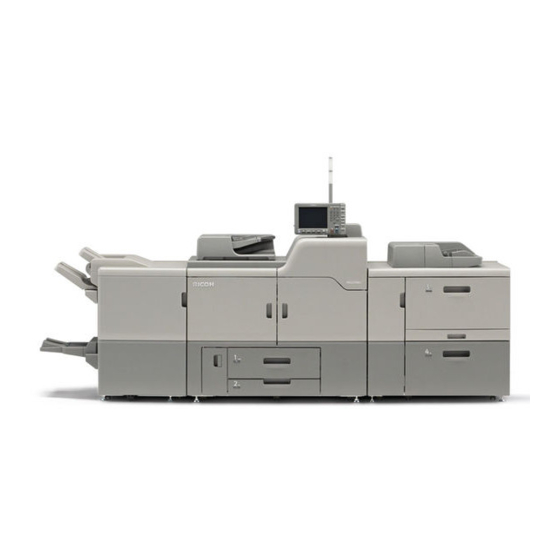
Ricoh Pro C7100 User Manual
Hide thumbs
Also See for Pro C7100:
- Operating instructions manual (212 pages) ,
- Starter manual (40 pages) ,
- Technical bulletin (82 pages)
Table of Contents
Advertisement
Quick Links
User Guide
What You Can Do with This Machine
Getting Started
Print
Web Image Monitor
Adding Paper and Toner
Troubleshooting
Information for This Machine
For information not in this manual, refer to
the HTML/PDF files on the supplied
CD-ROM.
For safe and correct use, be sure to read the Safety Information in
"Read This First" before using the machine.
Advertisement
Table of Contents

Related Manuals for Ricoh Pro C7100


Summary of Contents for Ricoh Pro C7100
- Page 1 User Guide What You Can Do with This Machine Getting Started Print Web Image Monitor Adding Paper and Toner Troubleshooting Information for This Machine For information not in this manual, refer to the HTML/PDF files on the supplied CD-ROM. For safe and correct use, be sure to read the Safety Information in "Read This First"...
-
Page 3: Table Of Contents
TABLE OF CONTENTS How to Read the Manuals..........................4 Symbols Used in the Manuals........................4 Model-Specific Information..........................5 Names of Major Features..........................6 1. What You Can Do with This Machine Searching by What You Want to Do........................7 Reducing My Costs............................7 Operating the Machine More Effectively.....................8 What You Can Do with This Machine.......................9 Customizing the [Home] Screen........................9... - Page 4 Displaying the Printer Driver Properties......................36 Standard Printing..............................37 When Using the PCL 6 Printer Driver......................37 Printing on Both Sides of Sheets........................38 When Using the PCL 6 Printer Driver......................38 Types of Two-sided Printing........................38 Combining Multiple Pages into Single Page....................39 When Using the PCL 6 Printer Driver......................39 Types of Combine Printing..........................
- Page 5 Disposing of Used Toner..........................95 Menu Items and Functions..........................97 6. Troubleshooting When a Status Icon Is Displayed........................101 When the Indicator Lamp for the [Check Status] Key Is Lit or Flashing............. 102 When the Machine Makes a Beeping Sound.....................104 When You Have Problems Operating the Machine...................105 Messages Displayed When You Use the Printer Function................112 Messages Displayed on the Control Panel When You Use the Printer Function........112 Messages Printed on the Error Logs or Reports When You Use the Printer Function......115...
-
Page 6: How To Read The Manuals
How to Read the Manuals Symbols Used in the Manuals This manual uses the following symbols: Indicates points to pay attention to when using the machine, and explanations of likely causes of paper misfeeds, damage to originals, or loss of data. Be sure to read these explanations. Indicates supplementary explanations of the machine's functions, and instructions on resolving user errors. -
Page 7: Model-Specific Information
Model-Specific Information This section explains how you can identify the region your machine belongs to. There is a label on the rear of the machine, located in the position shown below. The label contains details that identify the region your machine belongs to. Read the label. DER002 The following information is region-specific. -
Page 8: Names Of Major Features
Names of Major Features In this manual, major features of the machine are referred to as follows: • Auto Document Feeder • Multi Bypass Tray BY5010 Multi bypass tray (Tray A) • Wide Large Capacity Tray Wide LCT (in this manual, "wide LCT" refers to the three-tray wide LCT and the two-tray wide LCT) •... -
Page 9: What You Can Do With This Machine
1. What You Can Do with This Machine You can search for a description by what you want to do. Searching by What You Want to Do You can search for a procedure by what you want to do. Reducing My Costs BRL059S Checking how much paper is saved ([Information] screen) See "How to Use the [Information] Screen", Getting Started. -
Page 10: Operating The Machine More Effectively
1. What You Can Do with This Machine Operating the Machine More Effectively BQX139S Registering frequently-used printing settings to the printer driver See "Using One Click Presets", Print. Changing the initial settings of the printer driver to frequently-used printing settings See "Displaying the Printing Preferences Dialog Box", Print. -
Page 11: What You Can Do With This Machine
What You Can Do with This Machine What You Can Do with This Machine This section describes the features of this machine. Customizing the [Home] Screen The icons of each function are displayed on the [Home] screen. The contents displayed on the following screens differ depending on the machine. DER151 •... -
Page 12: Printing Data Using Various Functions
1. What You Can Do with This Machine Printing Data Using Various Functions CWW103 • This machine supports network and local connections. • You can print or delete print jobs stored on the machine's hard disk, which have been previously sent from computers using the printer driver. -
Page 13: Preventing Information Leakage (Security Functions)
What You Can Do with This Machine Preventing Information Leakage (Security Functions) CWW108 • You can protect documents from unauthorized access and stop them from being copied without permission. • You can control the use of the machine, as well as prevent machine settings from being changed without authorization. -
Page 14: Preventing Unauthorized Copying
1. What You Can Do with This Machine You can check which tray is running out of paper, register information in the Address Book, specify the network settings, configure and change the system settings, manage jobs, print the job history, and configure the authentication settings. - Page 15 What You Can Do with This Machine • For details about this function in the printer mode, see "Printing Documents That Are Not Authorized for Duplication", Print.
- Page 16 1. What You Can Do with This Machine...
-
Page 17: Getting Started
2. Getting Started This chapter describes how to start using this machine. Guide to Names and Functions of Components • Do not obstruct the machine's vents. Doing so risks fire caused by overheated internal components. Front and left view DER006 1. - Page 18 2. Getting Started 3. Control panel See page 21 "Guide to the Names and Functions of the Machine's Control Panel". 4. Front upper right cover Open to change toner cartridges. 5. Front right cover Open to remove paper jams. 6. Paper trays (Trays 1–2) Load paper here.
-
Page 19: Guide To Functions Of The Attention Light
Guide to Names and Functions of Components 1. Attention light See page 17 "Guide to Functions of the Attention Light". Rear and right view DER008 1. Vents Prevent overheating. 2. Earth leakage breaker Protects users from electric shock. For details about checking the earth leakage breaker, see "Checking the Earth Leakage Breakers", Maintenance and Specifications. - Page 20 2. Getting Started CUV121 The attention light notifies the user by light when there is a paper jam or no paper is left. The colors of the lamp and their meanings are as follows: Lamp Status The bottom lamp lights blue. Printing The bottom lamp flashes blue.
-
Page 21: Guide To Functions Of The Machine's Options
Guide to Functions of the Machine's Options Guide to Functions of the Machine's Options Guide to Functions of the Machine's External Options DER010 1. Booklet Finisher SR5060 Sorts, stacks, and staples multiple sheets of paper. The saddle stitch function can staple multiple sheets of paper in the center and fold them into booklets. - Page 22 2. Getting Started 5. Multi-folding unit Applies the following folds: Half Fold, Letter Fold-out, Letter Fold-in, Double Parallel Fold, Gate Fold, and Z- fold. 6. Interposer Inserts cover or slip sheets into printed paper. 7. Buffer pass unit Cools printed paper. 8.
-
Page 23: Guide To The Names And Functions Of The Machine's Control Panel
Guide to the Names and Functions of the Machine's Control Panel Guide to the Names and Functions of the Machine's Control Panel DER011 1. Display panel Displays keys for each function, operation status, or messages. See "How to Use the Screens on the Control Panel", Getting Started. - Page 24 2. Getting Started 3. Main power indicator The main power indicator goes on when you turn on the main power switch. 4. [Energy Saver] key Press to switch to and from Low Power mode or Sleep mode. See "Saving Energy", Getting Started. When the machine is in Low Power mode, the [Energy Saver] key is lit.
- Page 25 Guide to the Names and Functions of the Machine's Control Panel 18. [Home] key Press to display the [Home] screen. For details, see page 25 "How to Use the [Top] Screen and the [Home] Screen". 19. Screen brightness slider Adjusts display panel brightness. 20.
-
Page 26: Changing The Display Language
2. Getting Started Changing the Display Language You can change the language used on the display. English is set as default. Press the [Language] key until the language you want to display appears. DER048... -
Page 27: How To Use The [Top] Screen And The [Home] Screen
How to Use the [Top] Screen and the [Home] Screen How to Use the [Top] Screen and the [Home] Screen When you press the [Home] key just after the machine is turned on, the [Top] screen is displayed. Using the [Top] screen, you can check the job list, toner status, and paper status. The icons of each function are displayed on the [Home] screen. - Page 28 2. Getting Started [Home] screen DER024 1. Operational status and messages Displays operational status and messages. 2. [Job List] Press to display the [Job List] tab on the [Printer] screen. 3. Estimated time Indicated by the time estimated to complete the job at the top of the currently displayed job list. 4.
-
Page 29: Adding Icons To The [Home] Screen
How to Use the [Top] Screen and the [Home] Screen 11. Home screen image You can display an image on the [Home] screen, such as a corporate logo. To change the image, see "Displaying an Image on the [Home] Screen", Convenient Functions. 12. - Page 30 2. Getting Started Click [OK] four times. Adding icons to the [Home] screen using the User Tools In the following procedure, a shortcut icon is registered to the [Home] screen. Press the [User Tools] key. DER029 Press [Edit Home]. Press [Add Icon].
- Page 31 How to Use the [Top] Screen and the [Home] Screen Press the [Application] tab. Select the application you want to add. Specify the position where [Blank] is displayed. Press [OK]. Press the [User Tools] key. • Press on the upper-right corner of the screen to check the position on the simple screen.
-
Page 32: Turning On/Off The Power
2. Getting Started Turning On/Off the Power • Do not push the main power switch repeatedly. • When you push the main power switch, wait at least 10 seconds after it is confirmed that the main power indicator has lit up or gone out. •... - Page 33 Turning On/Off the Power • Do not turn off the power while the machine is in operation. • Do not hold down the main power switch while turning off the main power. Doing so forcibly turns off the machine's power and may damage the hard disk or memory and cause malfunctions. Open the main power switch cover, and then push the main power switch.
-
Page 34: Logging In The Machine
2. Getting Started Logging In the Machine When the Authentication Screen Is Displayed If Basic Authentication, Windows Authentication, or LDAP Authentication is active, the authentication screen appears on the display. The machine only becomes operable after entering your own Login User Name and Login Password. -
Page 35: Logging Out Using The Control Panel
Logging In the Machine Enter a Login Password, and then press [OK]. When the user is authenticated, the screen for the function you are using appears. Logging Out Using the Control Panel This section explains the procedure for logging out the machine when Basic Authentication, Windows Authentication, or LDAP Authentication is set. - Page 36 2. Getting Started...
-
Page 37: Print
3. Print This chapter describes frequently used printer functions and operations. For the information not included in this chapter, see Print on the supplied CD-ROM. Quick Install You can install the printer drivers easily from the CD-ROM provided with this machine. Using Quick Install, the PCL 6 printer driver is installed under network environment, and the Standard TCP/IP port will be set. -
Page 38: Displaying The Printer Driver Properties
3. Print Displaying the Printer Driver Properties This section explains how to open the printer driver properties from [Devices and Printers]. • Manage Printers permission is required to change the printer settings. Log on as an Administrators group member. • You cannot change the machine default settings for individual users. Settings made in the printer properties dialog box are applied to all users. -
Page 39: Standard Printing
Standard Printing Standard Printing • The default setting is two-sided printing. If you want to print on only one side, select [Off] for the two-sided printing setting. When Using the PCL 6 Printer Driver Click the WordPad menu button in the upper left corner of the window, and then click [Print]. -
Page 40: Printing On Both Sides Of Sheets
3. Print Printing on Both Sides of Sheets This section explains how to print on both sides of each page using the printer driver. • The types of paper that can be printed on both sides are as follows: • Plain, Recycled, Color, Letterhead, Preprinted, Prepunched, Black, Coated Paper: Gloss Print, Coated (Glossy), Coated (Matted), Synthetic, Textured When Using the PCL 6 Printer Driver Click the WordPad menu button in the upper left corner of the window, and then click... -
Page 41: Combining Multiple Pages Into Single Page
Combining Multiple Pages into Single Page Combining Multiple Pages into Single Page This section explains how to print multiple pages onto a single sheet. The combine printing function allows you to economize on paper by printing multiple sheets at reduced size onto a single sheet. When Using the PCL 6 Printer Driver Click the WordPad menu button in the upper left corner of the window, and then click [Print]. - Page 42 3. Print From Left to Right/Top to From Right to Left/Top to Orientation Bottom Bottom Landscape 4 Pages per Sheet Right, then Down Down, then Right Left, then Down Down, then Left...
-
Page 43: Printing On Envelopes
Printing on Envelopes Printing on Envelopes Configure the paper settings appropriately using both the printer driver and the control panel. • To print on envelopes, load them into the optional wide LCT or Tray A, and be sure to specify an appropriate paper type. - Page 44 3. Print In the [Select Printer] list, select the printer you want to use. Click [Preferences]. In the "Document Size:" list, select the envelope size. In the "Paper Type:" list, select [Envelope]. In the "Input Tray:" list, select the paper tray where the envelopes are loaded. Change any other print settings if necessary.
-
Page 45: Web Image Monitor
4. Web Image Monitor This chapter describes frequently used Web Image Monitor functions and operations. For the information not included in this chapter, see Connecting the Machine/ System Settings on the supplied CD-ROM or Web Image Monitor Help. Displaying Top Page This section explains the Top Page and how to display Web Image Monitor. - Page 46 4. Web Image Monitor 3. Refresh/Help (Refresh): Click at the upper right in the work area to update the machine information. Click the web browser's [Refresh] button to refresh the entire browser screen. (Help): Use Help to view or download Help file contents. 4.
-
Page 47: Adding Paper And Toner
5. Adding Paper and Toner This chapter describes how to load paper into the paper tray and recommended paper sizes and types. Loading Paper Precautions for Loading Paper • When loading paper, take care not to trap or injure your fingers. •... - Page 48 5. Adding Paper and Toner • If you load paper when only a few sheets of paper remain in the tray, multiple sheet feeding may occur. Remove any remaining paper, stack them with the new sheets of paper, and then fan the entire stack before loading it into the tray.
-
Page 49: Loading Paper Into Tray 1
Loading Paper Holding its shorter ends, flex the stack back and forth to create space between the sheets. Repeat this several times. CVA069 CVA070 Make sure there is space between the sheets. CVA071 Loading Paper into Tray 1 (mainly Europe and Asia) Tray 1 can hold A4 paper only. - Page 50 5. Adding Paper and Toner Tray 1 can hold 8 × 11 paper only. If you want to print on A4 from Tray 1, contact your service representative. • When paper loaded in the right side of Tray 1 runs out, paper on the left is automatically shifted to the right.
-
Page 51: Loading Paper Into The A3/11 × 17 Tray Unit
Loading Paper DER057 Carefully push the paper tray fully in. • You can load paper even if Tray 1 is in use. It is okay to pull out the left half of the tray while Tray 1 is in use. Loading Paper into the A3/11 ×... -
Page 52: Loading Paper Into Tray 2
5. Adding Paper and Toner Square the paper and load it print side down. Do not stack paper over the limit mark. DER059 Carefully push the paper tray fully in. Loading Paper into Tray 2 • Check the paper edges are aligned at the right side. •... - Page 53 Loading Paper DER061 Carefully push the paper tray fully in. • Various sizes of paper can be loaded in Tray 2 by adjusting the positions of side fences and end fence. For details, see "Changing the Paper Size in Tray 2", Paper Specifications and Adding Paper.
-
Page 54: Loading Paper Into The Multi Bypass Tray (Tray A)
5. Adding Paper and Toner DER068 Loading Paper into the Multi Bypass Tray (Tray A) Use the multi bypass tray (Tray A) to use transparencies, translucent paper, and paper that cannot be loaded in the paper trays. • The maximum number of sheets you can load at the same time depends on paper type. Do not stack paper over the limit mark. - Page 55 Loading Paper Set the end fence. DER070 1. End fence 2. Extender To remove the end fence, slide it to the right by pressing the stopper down. CWW312 Press the elevator switch on the multi bypass tray (Tray A). DER072 1.
-
Page 56: Loading Paper Into The Three-Tray Wide Large Capacity Tray
5. Adding Paper and Toner • Pull the extender out when loading A4 , 8 × 11 or larger sheets in the multi bypass tray (Tray A). • Letterhead paper must be loaded in a specific orientation. For details, see page 60 "Loading Orientation-fixed Paper or Two-sided Paper". -
Page 57: Loading Paper Into The Two-Tray Wide Large Capacity Tray
Loading Paper Check that paper in the paper tray is not being used, and then pull the tray carefully out until it stops. DER074 Load paper into the paper tray with print side up. Do not stack paper over the limit mark. DER075 Carefully push the paper tray fully in. - Page 58 5. Adding Paper and Toner • Check the paper edges are aligned at the left side. Check that paper in the paper tray is not being used, and then pull the tray carefully out until it stops. DER088 Load paper into the paper tray with print side up. Do not stack paper over the limit mark.
-
Page 59: Loading Paper Into The Interposer
Loading Paper Loading Paper into the Interposer • Do not place anything on top of or leave documents on the sensor. This may lead to the paper size not being correctly scanned or paper jams. While pressing the release lever, align the side fences with the paper size to be loaded. DER099 Load paper orderly. -
Page 60: Loading Cover Sheets Into The Interposer Of The Perfect Binder
5. Adding Paper and Toner Loading Cover Sheets into the Interposer of the Perfect Binder • The length/size of cover sheets depends on the thickness of the spine. • Load paper in the orientation. • Do not place anything on top of or leave documents on the sensor. This may lead to the paper size not being correctly detected or paper jams. - Page 61 Loading Paper 3. Length of cover sheet While lightly pinching the side fence, align it with the paper size to be loaded. CWW323 Load paper face up and neatly stacked. Do not stack paper over the limit mark. CWW324 • You cannot perfect bind a booklet if the thickness of the book block's spine exceeds 23 mm (0.9 inches).
-
Page 62: Loading Orientation-Fixed Paper Or Two-Sided Paper
5. Adding Paper and Toner Loading Orientation-fixed Paper or Two-sided Paper Orientation-fixed (top to bottom) or two-sided paper (for example, letterhead paper, punched paper, or copied paper) might not be printed correctly, depending on how the paper is placed. Specify [Auto Detect] or [On (Always)] for [Letterhead Setting] in [System] under the Printer Features menu, and then place the paper as shown below. - Page 63 Loading Paper facing the same direction, specify different input trays for one-sided and two-sided printing. Note also that two-sided printing must be disabled for the tray specified for one-sided printing. • For details about how to make two-sided prints, see "Printing on Both Sides of Sheets", Print.
-
Page 64: Recommended Paper
5. Adding Paper and Toner Recommended Paper Recommended Paper Sizes and Types This section describes recommended paper sizes and types. • If you use paper that curls, either because it is too dry or too damp, a staple clogging or paper jam may occur. - Page 65 Recommended Paper Paper type and weight Paper size Paper capacity 52.3–300.0g/m (14.0 lb. 1,000 sheets Bond–165.0 lb. Index) Paper Weight 1–Paper , B4 JIS , 11 × 17 , Weight 7 × 14 , 8 × 11 A3 , A4 , B4 JIS , 8 ×...
- Page 66 5. Adding Paper and Toner Paper type and weight Paper size Paper capacity 52.3–256.0g/m (14.0 lb. Select the paper size using the Tray 500 sheets Bond–141.0 lb. Index) Paper Settings menu: Paper Weight 1–Paper × 14 , 8 × 10 , 11 × 15 Weight 6 , 11 ×...
- Page 67 Recommended Paper Multi bypass tray (Tray A) Paper type and weight Paper size Paper capacity 52.3–216.0 g/m (14.0 lb. Paper sizes that can be detected 500 sheets Bond–79.9 lb. Cover) automatically: Paper Weight 1–Paper Weight 5 A3 , A4 , A5 , A6 , B4 JIS , B5 JIS , 11 ×...
- Page 68 5. Adding Paper and Toner Paper type and weight Paper size Paper capacity 52.3–216.0 g/m (14.0 lb. 500 sheets Bond–79.9 lb. Cover) Paper Weight 1–Paper B5 JIS , B6 JIS , 8 × 14 , Weight 5 × 13 , 8 ×...
- Page 69 Recommended Paper Paper type and weight Paper size Paper capacity Translucent paper A3 , A4 , B5 JIS 52.3–63.0 g/m (14.0–16.9 lb. Bond) Paper Weight 1 Transparencies × 11 163.1–216.0 g/m (60.1– 79.9 lb. Cover) Paper Weight 5 Tab stock A4 , 8 ×...
- Page 70 5. Adding Paper and Toner Three-tray wide LCT (Trays 3 and 5) Paper type and weight Paper size Paper capacity 52.3–256.0 g/m (14.0 lb. Paper sizes that can be detected 1,000 sheets Bond–141.0 lb. Index) automatically: Paper Weight 1–Paper Weight 6 A3 , A4 , A5 , B4 JIS ,...
- Page 71 Recommended Paper Paper type and weight Paper size Paper capacity 52.3–256.0 g/m (14.0 lb. Select the paper size using the 1,000 sheets Bond–141.0 lb. Index) Tray Paper Settings menu: Paper Weight 1–Paper Weight 6 , B5 JIS , B6 JIS ×...
- Page 72 5. Adding Paper and Toner Paper type and weight Paper size Paper capacity Coated: Glossy Paper sizes that can be detected – automatically: Coated: Matte 63.1–256.0 g/m (17.0 lb. Bond –141.0 lb. Index) A3 , A4 , A5 , B4 JIS , B5 JIS , 11 ×...
- Page 73 Recommended Paper Paper type and weight Paper size Paper capacity Coated: Glossy Custom size: – Coated: Matte 63.1–256.0 g/m (17.0 lb. Vertical: 139.7–330.2 mm Bond –141.0 lb. Index) Horizontal: 139.7–487.7 mm Paper Weight 2–Paper Weight 6 Vertical: 5.50–13.00 inches Horizontal: 5.50–19.20 inches Translucent paper A3 , A4 , B5 JIS...
- Page 74 5. Adding Paper and Toner *6 Sizes do not include flap sizes. Three-tray wide LCT (Tray 4) Paper type and weight Paper size Paper capacity 52.3–360.0 g/m (14.0 lb. Paper sizes that can be detected 2,000 sheets Bond–198.0 lb. Index) automatically: Paper Weight 1–Paper Weight 8...
- Page 75 Recommended Paper Paper type and weight Paper size Paper capacity 52.3–360.0 g/m (14.0 lb. Select the paper size using the 2,000 sheets Bond–198.0 lb. Index) Tray Paper Settings menu: Paper Weight 1–Paper Weight 8 , B5 JIS , B6 JIS ×...
- Page 76 5. Adding Paper and Toner Paper type and weight Paper size Paper capacity Coated: Glossy Paper sizes that can be detected – automatically: Coated: Matte 63.1–360.0 g/m (17.0 lb. Bond –198.0 lb. Index) A3 , A4 , A5 , B4 JIS , B5 JIS , 11 ×...
- Page 77 Recommended Paper Paper type and weight Paper size Paper capacity Coated: Glossy Custom size: – Coated: Matte 63.1–360.0 g/m (17.0 lb. Vertical: 139.7–330.2 mm Bond –198.0 lb. Index) Horizontal: 139.7–487.7 mm Paper Weight 2–Paper Weight 8 Vertical: 5.50–13.00 inches Horizontal: 5.50–19.20 inches Translucent paper A3 , A4 , B5 JIS...
- Page 78 5. Adding Paper and Toner *1 The postcard side fences are required to load paper that is between 100.0 and 139.2 mm (3.94 and 5.49 inches). *2 The maximum number of sheets you can set at once depends on the paper's thickness and condition. *3 The tab fence is required.
- Page 79 Recommended Paper Paper type and weight Paper size Paper capacity 52.3–360.0 g/m (14.0 lb. Select the paper size using the 2,400 sheets Bond–198.0 lb. Index) Tray Paper Settings menu: Paper Weight 1–Paper Weight 8 A6 , B5 JIS , B6 JIS , 8 ×...
- Page 80 5. Adding Paper and Toner Paper type and weight Paper size Paper capacity Coated: Glossy Paper sizes that can be detected – automatically: Coated: Matte 63.1–360.0 g/m (17.0 lb. Bond –198.0 lb. Index) A3 , A4 , A5 , B4 JIS , B5 JIS , 11 ×...
- Page 81 Recommended Paper Paper type and weight Paper size Paper capacity Coated: Glossy Custom size: – Coated: Matte 63.1–360.0 g/m (17.0 lb. Vertical: 139.7–330.2 mm Bond –198.0 lb. Index) Horizontal: 139.7–487.7 mm Paper Weight 2–Paper Weight 8 Vertical: 5.50–13.00 inches Horizontal: 5.50–19.20 inches Translucent paper A3 , A4 , B5 JIS...
- Page 82 5. Adding Paper and Toner *2 When paper whose horizontal length is 487.8 mm (19.20 inches) or more is specified, the maximum paper weight of the tray is Paper Weight 7. *3 When the banner sheet tray is installed, paper sizes are not detected automatically. *4 When the banner sheet tray is installed, you cannot select paper sizes.
- Page 83 Recommended Paper Paper type and weight Paper size Paper capacity 64.0–216.0 g/m (17.1 lb. Select the paper size using the 200 sheets × 2 Bond–79.9 lb. Cover) Tray Paper Settings menu: Paper Weight 2–Paper Weight 5 B5 JIS , 8 ×...
- Page 84 5. Adding Paper and Toner Interposer of the perfect binder Paper type and weight Paper size Paper capacity 90.0–300.0 g/m (24.1 lb. Paper sizes that can be 200 sheets (or up to 24 mm in Bond–165.0 lb. Index) detected automatically: height) ×...
- Page 85 Recommended Paper Paper thickness Paper Metric Bond paper Cover paper Index paper thickness Paper Weight 52.3–63.0 14.0–16.9 lb. 19.0–23.0 lb. 29.0–34.9 lb. Bond Cover Index 63.1–80.0 17.0–21.0 lb. 23.1–29.9 lb. 35.0–44.0 lb. Paper Weight 2 Bond Cover Index 80.1–105.0 21.1–28.0 lb. 30.0–38.9 lb.
- Page 86 5. Adding Paper and Toner of the paper, the machine may not detect a multi-sheet feed correctly. For details about Adjustment Settings for Operators, see "Adjustment Settings for Operators", Paper Settings. • Flatten out curled sheets before loading them. • The Adjust Paper Curl function might not be able to fully remove curl, depending on the type of paper and the direction of its grain.
- Page 87 Recommended Paper For details about the settings for using coated paper with custom paper, see "Registering a Custom Paper", Paper Settings. • When loading coated paper or glossy paper, always fan the paper before using it. • If a paper jam occurs or if the machine makes a strange noise when feeding stacks of coated paper, feed the coated paper one sheet at a time.
- Page 88 5. Adding Paper and Toner CDL081 Recommended envelopes For information about recommended envelopes, contact your local dealer. Storage of envelopes Keep envelopes stored in sealed plastic bags and remove only the quantity needed. Do not add envelopes during printing, as this might cause misfeeds. •...
-
Page 89: Registering A Custom Paper
Registering a Custom Paper Registering a Custom Paper You can register up to 100 custom papers. Check the product name, size, and type of your paper before registering it. Check that the size and type of your paper are compatible with the paper tray that you want to use. Tray compatibility depends on the paper's size and type. -
Page 90: Registering A Paper Whose Paper Name Is Not Displayed In The Paper Library
5. Adding Paper and Toner Press [Program to Custom Paper]. Press [Yes]. Press [Exit] twice. Press the [Paper Setting] key. You can also close the [Tray Paper Settings] screen by pressing [Exit]. • You can check and change the settings of the registered custom paper such as the paper size setting on the [Edit Custom Paper] screen. - Page 91 Registering a Custom Paper The selectable paper types are as follows: Plain, Gloss coated, Matte coated, Envelope, Light colored, Dark colored, Textured, and Black. Press the [Paper Setting] key. DER122 Press [Edit Custom Paper]. Press [Recall from Paper Library]. Select the most appropriate combination of type and weight for your paper. The list of paper types appears on the first and following pages in the paper library.
- Page 92 5. Adding Paper and Toner Manually specifying a paper's type and weight Press the [Paper Setting] key. DER122 Press [Edit Custom Paper]. Select a number that is [ Not Programd.]. Press [ Previous] or [ Next] to scroll through the list. Press [Change] for [Custom Paper Name].
-
Page 93: Registering A New Custom Paper By Modifying An Existing Paper
Registering a Custom Paper Specify other items, such as [Coated Paper Type], [Paper Color], [Prepunched or Not], [Textured or Not], [Apply Duplex], and [Apply Auto Paper Select] as necessary. If you change the [Coated Paper Type], [Paper Color], [Prepunched or Not], or [Textured or Not] and press [OK], a message appears to notify you that the [Advanced Settings] will be initialized. - Page 94 5. Adding Paper and Toner Press the [Paper Setting] key. DER122 Press [Edit Custom Paper]. Select a number that is [ Not Programd.]. Press [ Previous] or [ Next] to scroll through the list. Press [Use Another Custom Paper's Settings]. Select the custom paper whose settings you want to modify.
- Page 95 Registering a Custom Paper • For details about custom paper settings, see "Custom Paper Settings", Paper Settings. • For details about [Advanced Settings], contact your machine administrator.
-
Page 96: Adding Toner
5. Adding Paper and Toner Adding Toner This section explains precautions when adding toner and how to dispose of used toner. • Do not incinerate toner (new or used) or toner containers. Doing so risks burns. Toner will ignite on contact with naked flame. •... -
Page 97: Disposing Of Used Toner
Adding Toner • When removing jammed paper or replacing toner, avoid getting toner (new or used) on your clothing. If toner comes into contact with your clothing, wash the stained area with cold water. Hot water will set the toner into the fabric and make removing the stain impossible. •... - Page 98 5. Adding Paper and Toner Toner cannot be re-used. Pack used toner containers in the container's box or a bag to prevent the toner from leaking out of the container when you dispose of it. (mainly Europe and Asia) If you want to discard your used toner container, please contact your local sales office. If you discard it by yourself, treat it as general plastic waste material.
-
Page 99: Menu Items And Functions
Menu Items and Functions Menu Items and Functions All items in Adjustment Settings for Operators appear regardless of which of the machine's optional components are installed. If you change the settings of options that are not installed, the changes will have no effect. - Page 100 5. Adding Paper and Toner Machine: Maintenance For details about the following items, see "Machine: Maintenance", Paper Settings. Item Description 0505 Fusing Belt Smoothing Specify whether or not to automatically execute [For Setting Uneven Gloss (Short Time)] for fusing belt smoothing. 0506 Smooth Fusing Belt Remove vertical and horizontal lines from printouts.
- Page 101 Menu Items and Functions Item Description 0619 Adjust Folding Position for Adjust the horizontal position of the folding when using Booklet Booklet Finisher SR5060. 0621 Set Number of Folds for Specify the number of booklet folds to be performed Booklet when using Booklet Finisher SR5060.
- Page 102 5. Adding Paper and Toner Item Description 0804 Adjust Applying Binding Adjust the amount of binding glue for perfect binding. Glue Finishing: Stacker For details about the following items, see "Finishing: Stacker", Paper Settings. Item Description 0907 Maximum Stack Quantity Set the maximum number of sheets for the stacker tray.
-
Page 103: Troubleshooting
6. Troubleshooting This chapter describes basic troubleshooting procedures. When a Status Icon Is Displayed This section describes the status icons displayed when the machine requires the user to remove misfed paper, to add paper, or to perform other procedures. Status Icon Status : Paper Misfeed icon Appears when a paper misfeed occurs. -
Page 104: When The Indicator Lamp For The [Check Status] Key Is Lit Or Flashing
6. Troubleshooting When the Indicator Lamp for the [Check Status] Key Is Lit or Flashing If the indicator lamp for the [Check Status] key lights up or flashes, press the [Check Status] key to display the [Check Status] screen. Check the status of each function in the [Check Status] screen. [Check Status] screen DFG006 1. - Page 105 When the Indicator Lamp for the [Check Status] Key Is Lit or Flashing The following table explains problems that cause the indicator lamp for the [Check Status] key to light or flash. Problem Cause Solution Documents and reports do The paper output tray is full. Remove the prints from the tray.
-
Page 106: When The Machine Makes A Beeping Sound
6. Troubleshooting When the Machine Makes a Beeping Sound The following table describes the meaning of the various beep patterns that the machine issues to alert users about machine conditions. Beep pattern Meaning Cause Single short beep Panel/screen input A control panel or screen key was accepted. -
Page 107: When You Have Problems Operating The Machine
When You Have Problems Operating the Machine When You Have Problems Operating the Machine Problem Cause Solution The machine does not turn The AC power switch has Turn on the AC power switch. For not been turned on. details about the AC power switch, see "General Requirements", Maintenance and Specifications. - Page 108 6. Troubleshooting Problem Cause Solution An error message is still Paper is still jammed in the Remove the jammed paper by displayed, even if misfed tray. following the procedures displayed on paper is removed. the control panel. For details about removing jammed paper, see "Removing Jammed Paper", Troubleshooting.
- Page 109 When You Have Problems Operating the Machine Problem Cause Solution Misfeeds occur frequently. The tray's side or end fences • Remove the misfed paper. For may not be set properly. details about removing jammed paper, see "Removing Jammed Paper", Troubleshooting. •...
- Page 110 6. Troubleshooting Problem Cause Solution Misfeeds occur when The envelopes are curled. Make sure you fully flatten curled printing to envelopes. envelopes before you load them. Do not stack envelopes over the specified limit for the paper tray. If misfeeds still occur after the envelopes have been flattened, load envelopes on the tray one at a time and print them...
- Page 111 When You Have Problems Operating the Machine Problem Cause Solution Cannot print in duplex You have selected a paper In "Tray Paper Settings", select a paper mode. type that cannot be used for type that can be used for duplex duplex printing.
- Page 112 6. Troubleshooting Problem Cause Solution Paper delivered to the high Paper is curled. • When the paper is curled capacity stacker is curled, downward, select [Adjust causing it to not align Curl: Weak], [Adjust Curl: properly. Medium] or [Adjust Curl: Strong] under [Adjust Paper Curl] in "Adjustment Settings for Operators".
- Page 113 When You Have Problems Operating the Machine Fold Problems Causes Solutions Wrinkling occurs when Gate Wrinkling can occur if Gate When applying Gate Fold, Fold, Letter Fold-in, or Letter Fold, Letter Fold-in, or Letter Letter Fold-in, or Letter Fold-out Fold-out is applied. Fold-out is applied to B4 JIS to paper larger than A4, we (Japanese Industrial Standard)
-
Page 114: Messages Displayed When You Use The Printer Function
6. Troubleshooting Messages Displayed When You Use the Printer Function This section describes the principal messages that appear on the display panel, error logs or reports. If other messages appear, follow their instructions. Messages Displayed on the Control Panel When You Use the Printer Function •... - Page 115 Messages Displayed When You Use the Printer Function Message Cause Solution "Load following paper in n. The printer driver settings are Check that the printer driver settings To force print, select incorrect or the tray does not are correct, and then load paper of another tray and press contain paper of the size the size selected in the printer driver...
- Page 116 6. Troubleshooting Message Cause Solution "Perfect Binding is not Perfect Binding is not possible • Check the number of sheets. available with this No. of with the number of sheets that • Specify the proper number of sheets." you have specified. sheets.
-
Page 117: Messages Printed On The Error Logs Or Reports When You Use The Printer Function
Messages Displayed When You Use the Printer Function When using direct print from a memory storage device Message Cause Solution "Exceeded the limit value for • The size of the selected Files or groups of files larger than 1 GB total data size of the file exceeds 1 GB. - Page 118 6. Troubleshooting When print jobs are canceled Message Cause Solution "91: Error" Printing was canceled by the Check that the data is valid. auto job cancel function due to a command error. "A function which cannot be A print job was canceled Cancel the function(s) not available used with Fold mode was because a function(s) not...
- Page 119 Messages Displayed When You Use the Printer Function Message Cause Solution "Error occurred while The resolution is set to a On the printer driver, set the resolution processing an Unauthorized value less than 600 dpi to 600 dpi or higher, or cancel Copy Prevention job.
- Page 120 6. Troubleshooting Message Cause Solution "The selected paper size is Job reset is automatically Specify the correct paper size, and not supported. This job has performed if the specified then print the file again. been cancelled." paper size is incorrect. "The selected paper type is Job reset is automatically Specify the correct paper type, and...
- Page 121 Messages Displayed When You Use the Printer Function Message Cause Solution "Duplex Cancelled" Duplex printing was canceled. • Select an appropriate paper size for the duplex function. For details about paper, see "Specifications for the Main Unit", Maintenance and Specifications. •...
- Page 122 6. Troubleshooting Message Cause Solution "Perfect Binding is not available Perfect Binding is not possible • Check the number of with this number of sheets." with the number of sheets that sheets. you have specified. • Specify the proper number of sheets.
- Page 123 Messages Displayed When You Use the Printer Function When there is not enough free hard disk space Message Cause Solution "HDD Full" When you were printing Delete unneeded forms or fonts with the PostScript 3 printer registered on the machine. driver, the hard disk capacity for fonts and forms was exceeded.
- Page 124 6. Troubleshooting When the user lacks privileges to perform an operation Message Cause Solution "No response from the A timeout occurred while Check the status of the server. server. Authentication has connection to the server was failed." being established for LDAP authentication or Windows Authentication.
- Page 125 Messages Displayed When You Use the Printer Function Message Cause Solution "Information for user The user name for LDAP was For details about user authentication, authentication is already already registered in a see Security Guide. registered for another user." different server with a different ID, and a duplication of the user name occurred due to a switching...
- Page 126 6. Troubleshooting Message Cause Solution "Compressed Data Error." The printer detected corrupt • Check the connection between compressed data. the computer and the printer. • Check that the program you used to compress the data is functioning correctly. "Data Storage Error" You tried to print a Sample Contact your service representative.
- Page 127 Messages Displayed When You Use the Printer Function Message Cause Solution "I/O buffer overflow." An input buffer overflow • In [Printer Features], under [Host occurred. Interface], select [I/O Buffer], and then set the maximum buffer size to a larger value. •...
-
Page 128: When Other Messages Appear
6. Troubleshooting When Other Messages Appear Message Cause Solution "Following output tray is full. The output tray is full. • Remove paper from the output Remove paper." tray to resume printing. If paper is delivered to the finisher shift tray and you want to prevent paper from falling off the tray, press the [Stop] key to suspend printing,... -
Page 129: When The Home Screen Cannot Be Edited
When Other Messages Appear When the Home Screen Cannot Be Edited Message Cause Solution "The image data size is not The image data size is not For details about file size for shortcut valid. See the manual for valid. image, see "Displaying an Image on required data."... - Page 130 6. Troubleshooting...
-
Page 131: Information For This Machine
7. Information for This Machine This chapter describes environmental precautions and regulations. Information on Environmental Regulations ENERGY STAR Program ® ENERGY STAR Program Requirements for Imaging Equipment ® This company is a participant in the ENERGY STAR Program. This machine is compliant with the regulations specified by the ®... - Page 132 7. Information for This Machine • The default period the machine waits before entering Low Power mode is 15 minutes. This default time can be changed. Sleep mode • If this machine remains idle for a specified period or when the [Energy Saver] key is pressed, it enters Sleep mode to further reduce its electrical consumption.
-
Page 133: User Information On Electrical And Electronic Equipment (Mainly Europe)
Information on Environmental Regulations • The machine enters sleep mode directly in the following situations: • Low Power Mode Timer and Sleep Mode Timer are set to the same time • Sleep Mode Timer is set to a shorter time than Low Power Mode Timer •... -
Page 134: Environmental Advice For Users (Mainly Europe)
Toner and ink cartridge return program Toner and ink cartridge for recycling will be accepted free of charge from users in accordance with local regulations. For details about the return program, please refer to the Web page below or consult your service person. https://www.ricoh-return.com/... -
Page 135: Notes To Users In The State Of California (Notes To Users In Usa) (Mainly North America
Information on Environmental Regulations Energy efficiency The amount of electricity a machine consumes depends as much on its specifications as it does on the way you use it. The machine is designed to allow you to reduce electricity costs by switching to Ready mode after it prints the last page. - Page 136 7. Information for This Machine...
-
Page 137: Index
INDEX A3/11 × 17 tray unit........Fanning the paper..........20, 49 AC power switch........... Finisher..............Adjustment Settings for Operators....... Front left cover............Attention light............Front lower left cover..........Authentication screen..........Front right cover............. Auto document feeder..........Front upper right cover.......... Function keys............ - Page 138 Multi bypass tray (Tray A)....Start key..............6, 20, 52, 54 Multi-folding unit..........Status icon............6, 20 Stored Print............. Symbols..............Note for the battery and/or accumulator symbol................Notes to users in the state of California..... Tab sheet holder............Number keys............Three-tray wide large capacity tray....
- Page 139 © 2014...
- Page 140 M196-7513...