Advertisement
Table of Contents
Advertisement
Table of Contents

Related Manuals for Chicago Electric 69480


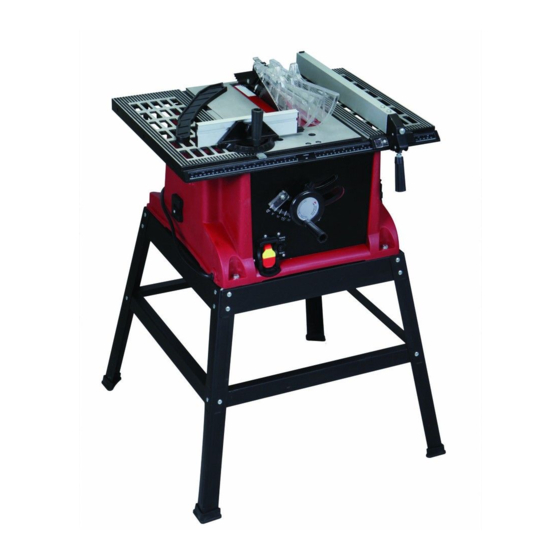
Summary of Contents for Chicago Electric 69480
- Page 2 Indicates a hazardous situation which, if not avoided, could result in death or serious injury. Indicates a hazardous situation which, if not avoided, could result in minor or moderate injury. Addresses practices not related to personal injury. Page 2 For technical questions, please call 1-888-866-5797. ITEM 69480...
-
Page 3: General Tool Safety Warnings
10. WEAR PROPER APPAREL. Do not wear loose clothing, gloves, neckties, rings, bracelets, or other jewelry which may get caught in moving parts. Nonslip footwear is recommended. Wear protective hair covering to contain long hair. ITEM 69480 For technical questions, please call 1-888-866-5797. Page 3... - Page 4 9. Do not use an adapter to connect 5. Use only 3-wire extension cords that this tool to a different outlet. have 3-prong grounding plugs and 3-pole receptacles that accept the tool’s plug. Page 4 For technical questions, please call 1-888-866-5797. ITEM 69480...
- Page 5 Riving Knife – A spreader mounted on the result in a risk of injury to persons. same mechanism as the blade. Generally 16. When servicing use only identical replacement parts. more effective than simple spreaders. ITEM 69480 For technical questions, please call 1-888-866-5797. Page 5...
-
Page 6: Vibration Safety
(California Health & Safety Code § 25249.5, et seq.) 7. To reduce vibration, maintain the tool as explained in this manual. If any abnormal vibration occurs, stop use immediately. SAVE THESE INSTrUcTIONS. Page 6 For technical questions, please call 1-888-866-5797. ITEM 69480... - Page 7 • Must be right (90°) angle, cut at 30°– 40° from the angle of 30°-40° the stick to keep hands out of the line of the blade. • The lower lip of the notch must be no longer than the workpiece is thick. ITEM 69480 For technical questions, please call 1-888-866-5797. Page 7...
- Page 8 4. Drill the holes straight down, large enough to allow your mounting hardware to fit. 5. Put the Saw in place and mount using the hardware mentioned above. Tighten all hardware securely before use. Page 8 For technical questions, please call 1-888-866-5797. ITEM 69480...
- Page 9 M4x10 Bolt (19), Ø4 Spring Washer (20) Secure the Plug Block (22) to Housing using the and Ø4 Flat Washer (3). See Figure C. ST4.2x14 Screws (4) and Ø4 Flat Washers (3). Figure c ITEM 69480 For technical questions, please call 1-888-866-5797. Page 9...
-
Page 10: Specifications
Max. Depth Cut 2-1/2 IN. @ 45° Arbor 5/8 IN. 216045 Functions Work Push Miter Pawls Blade Guard Fence Table Stick Gauge Fence Handle Switch Lock Knob Height Handle Stand sold separately Page 10 For technical questions, please call 1-888-866-5797. ITEM 69480... - Page 11 Lock Knob 8. Once the Blade is secured, adjust the (53) Riving Knife and install the Blade Guard. Height Handle (29) Figure G ITEM 69480 For technical questions, please call 1-888-866-5797. Page 11...
-
Page 12: Adjusting Riving Knife
Pawl Lock Pin (96) (101) 3. Pivot the Pawl Socket against the Riving Knife until the Pawl Knob snaps back into place. Riving Pawls Figure M Knife (88) (100, 104) Page 12 For technical questions, please call 1-888-866-5797. ITEM 69480... -
Page 13: Attaching Blade Guard
Table. See Figure Q. across wood grain (crosscutting). 2. Lower the Fence all the way onto the Table and lock in position by lowering the Fence Handle. ITEM 69480 For technical questions, please call 1-888-866-5797. Page 13... - Page 14 Handle (29) 2. When an angle is set, hold the Height Handle Figure T stationary with one hand and tighten the Lock Knob clockwise to lock the Saw Blade in position. Page 14 For technical questions, please call 1-888-866-5797. ITEM 69480...
-
Page 15: Work Piece And Work Area Set Up
The power cord must reach the work area with enough extra length to allow free movement while working. ITEM 69480 For technical questions, please call 1-888-866-5797. Page 15... -
Page 16: General Operating Instructions
6. To prevent accidents, turn off the Table parts a safe distance from the spinning Blade. Saw, remove the key and disconnect its power supply after use. Clean, then store the Saw indoors out of children’s reach. Page 16 For technical questions, please call 1-888-866-5797. ITEM 69480... - Page 17 You may use a mild detergent. Do not introduce water into the electric Adjustable motor through the motor vents. Figure X Stop Bolts 4. Once clean, lubricate all moving parts with a light oil. ITEM 69480 For technical questions, please call 1-888-866-5797. Page 17...
-
Page 18: Troubleshooting
4. Change the blade. 5. Table dirty. 5. Clean table with turpentine and steel wool. Follow all safety precautions whenever diagnosing or servicing the tool. Disconnect power supply before service. Page 18 For technical questions, please call 1-888-866-5797. ITEM 69480... - Page 19 Note: If product has no serial number, record month and year of purchase instead. Note: Some parts are listed and shown for illustration purposes only, and are not available individually as replacement parts. ITEM 69480 For technical questions, please call 1-888-866-5797. Page 19...
-
Page 20: Parts List
Connecting Hook Lid Lock Rotor M8x16 Bolt M4×10 Cross Screw 629 Bearing Lock Knob Table Insert Washer (Left) Motor Cover Ø6 Washer Table Insert Washer (Right) Lock Sleeve Fence Handle Page 20 For technical questions, please call 1-888-866-5797. ITEM 69480... -
Page 21: Assembly Diagram
Assembly Diagram ITEM 69480 For technical questions, please call 1-888-866-5797. Page 21... - Page 22 Assembly Diagram (continued) Page 22 For technical questions, please call 1-888-866-5797. ITEM 69480...
- Page 23 This warranty gives you specific legal rights and you may also have other rights which vary from state to state. ITEM 69480 For technical questions, please call 1-888-866-5797.
- Page 24 3491 Mission Oaks Blvd. • PO Box 6009 • Camarillo, CA 93011 • 1-888-866-5797...