Ricoh D5500 Read This First Manual
Ricoh interactive whiteboard read this first
Hide thumbs
Also See for D5500:
- Operating instructions manual (224 pages) ,
- User manual (48 pages) ,
- Quick start manual (24 pages)
Table of Contents
Advertisement
Quick Links
Read This First
Safety Information
Information for This Machine
Setting Up the Main Unit
Troubleshooting
For information not in the printed manual,
refer to the HTML/PDF files on the website.
Read this manual carefully before you use this machine and keep
it handy for future reference. For safe and correct use, be sure to
read the Safety Information in this manual before using the
machine.
Advertisement
Table of Contents

Related Manuals for Ricoh D5500


Summary of Contents for Ricoh D5500
- Page 1 Read This First Safety Information Information for This Machine Setting Up the Main Unit Troubleshooting For information not in the printed manual, refer to the HTML/PDF files on the website. Read this manual carefully before you use this machine and keep it handy for future reference.
-
Page 3: Table Of Contents
TABLE OF CONTENTS Introduction................................. 3 How to Read This Manual ..........................4 Symbols................................4 Disclaimer................................4 Notes................................4 About Operating Instructions..........................6 Checking the Contents of the Product....................... 7 Main Unit................................ 7 Pen................................... 7 1. Safety Information Safety During Operation............................9 Safety Precautions to Be Followed......................... 10 Environments Where the Machine Can Be Used..................10 Handling Power Cords and Power Cord Plugs..................11 Handling the Main Unit.......................... - Page 4 Starting and Stopping the Main Unit......................30 Start the Main Unit............................31 Stop the Main Unit............................31 Installing the Main Unit (When Installed by a Contractor)................33 Installation Precautions..........................33 Environmental Specifications........................35 Installation Space Requirements.........................35 Mounting the Pen Tray..........................37 Connecting the DVI Cable.......................... 38 Connecting the Power Cord........................39 4.
-
Page 5: Introduction
Introduction This manual contains detailed instructions and notes on the operation and use of this machine. For your safety and benefit, read this manual carefully before using the machine. Keep this manual in a handy place for quick reference. -
Page 6: How To Read This Manual
How to Read This Manual Symbols This manual uses the following symbols: Indicates points to pay attention to when using the machine. Indicates supplementary explanations of the machine’s functions, and instructions on resolving user errors. Indicates the names of keys on the machine's display or control panels. Indicates instructions in sheet form. - Page 7 The manufacturer shall not be responsible for any damage or expense that might result from the use of parts other than genuine parts from the manufacturer with your office products.
-
Page 8: About Operating Instructions
It also lists the detailed specifications of the product. You can download Operating Instructions from the Ricoh home page. http://www.ricoh.com/downloads/ • For details about how to install and use an optional Interactive Whiteboard Remote License, see... -
Page 9: Checking The Contents Of The Product
Checking the Contents of the Product This product consists of Interactive Whiteboard (hereafter "main unit") and Interactive Whiteboard Pen (hereafter "pen"). The following accessories are also included with the main unit and pen. Main Unit Accessories Usage Reference D-SUB 15 pin cable 1 Used to connect the main unit to a "Switch the Display Screen", computer. -
Page 11: Safety Information
1. Safety Information This chapter describes the safety precautions. Safety During Operation In this manual, the following important symbols are used: Indicates a potentially hazardous situation which, if instructions are not followed, could result in death or serious injury. Indicates a potentially hazardous situation which, if instructions are not followed, may result in minor or moderate injury or damage to property. -
Page 12: Safety Precautions To Be Followed
1. Safety Information Safety Precautions to Be Followed This section explains safety precautions that should always be followed when using this machine. Environments Where the Machine Can Be Used This section explains safety precautions about environments where the machine can be used. •... -
Page 13: Handling Power Cords And Power Cord Plugs
Safety Precautions to Be Followed • Do not place the product or use it in an environment where it might get wet such as from snow, rain, or being near water. Doing so could result in fire or electric shock. •... - Page 14 1. Safety Information • When using an extension cable or power strip, make sure the total power consumption of the connected devices does not exceed the power rating of the extension cable or power strip. If the total power consumption exceeds the specified power rating, the connected devices may heat up and cause a fire.
-
Page 15: Handling The Main Unit
Safety Precautions to Be Followed • Be sure to disconnect the power cord from the wall outlet at least once a year and check for the following: • The power cord's inner wires are exposed, broken, etc. • The power cord's coating has a crack or dent. •... - Page 16 1. Safety Information • Be sure to locate the machine as close as possible to a wall outlet. This will allow easy disconnection of the power cord in the event of an emergency. • If the machine emits smoke or odours, or if it behaves unusually, you must turn off its power immediately.
-
Page 17: Handling The Machine's Interior
Safety Precautions to Be Followed • Do not press the screen forcefully or subject it to shock. Doing so may result in damage, a malfunction, or injury. • Do not press the screen with a sharp object. Doing so may result in damage, a malfunction, or injury. -
Page 18: About The Batteries
1. Safety Information About the Batteries This section explains things that you should follow in regard to the batteries. • For safe operation, follow the warnings below regarding the batteries used in the pen. If you use the batteries incorrectly, it may result in fire or injury due to batteries leaking or exploding. •... -
Page 19: Handling The Stand
Safety Precautions to Be Followed • Contact your service representative if you need to lift the machine (such as when relocating it to another floor). Do not attempt to lift the machine without the assistance of your service representative. The machine will be damaged if it topples or is dropped, resulting in malfunction and risk of injury to users. - Page 20 1. Safety Information • Install the product so that the power cord and cables of the main unit do not get tangled or caught. If the cables get caught, they may become damaged, resulting in fire or electric shock. • After moving the stand, lock the caster stoppers. If you fail to lock the stoppers, the stand might unexpectedly move or fall down, resulting in an accident that causes damage to the stand or main unit •...
-
Page 21: Information For This Machine
This chapter describes laws and regulations related to this machine. Laws and Regulations CE Marking Traceability Information (For EU Countries Only) Manufacturer: Ricoh Co., Ltd. 3-6 Nakamagome 1-chome, Ohta-ku, Tokyo. 143-8555, Japan Importer: Ricoh Europe PLC 20 Triton Street, London. NW1 3BF, United Kingdom Overseas Affiliates and Noise Emission Information In accordance with TUV "GS Symbol"... -
Page 22: Note For The Battery And/Or Accumulator Symbol
2. Information for This Machine The symbol indicates that the product must not be treated as municipal waste. It must be disposed of separately via the appropriate return and collection systems available. By following these instructions you ensure that this product is treated correctly and help to reduce potential impacts on the environment and human health, which could otherwise result from inappropriate handling. -
Page 23: Notes To Usa Users Of Fcc Requirements
Laws and Regulations This symbol means that in the European Union, used batteries and accumulators should be disposed of separately from your household waste. In the EU, there are separate collection systems for not only used electrical and electronic products but also batteries and accumulators. - Page 24 2. Information for This Machine...
-
Page 25: Setting Up The Main Unit
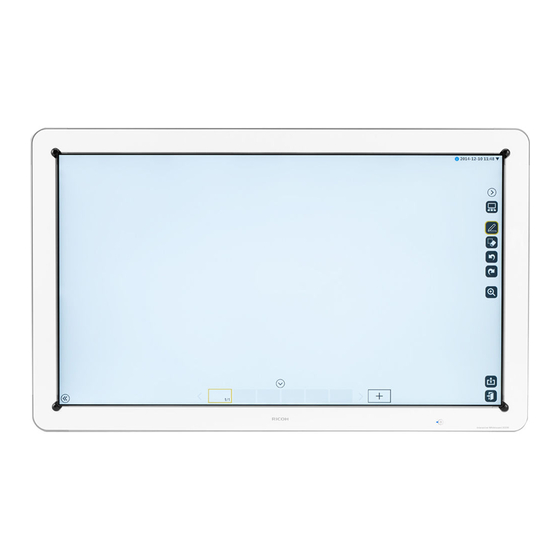
3. Setting Up the Main Unit This chapter explains how to install, start, and stop the product. Component Names and Functions Main Unit CUE030 1. Power indicator This indicator remains lit while the main unit is running. 2. Power button Starts and stops the main unit. - Page 26 3. Setting Up the Main Unit 6. Power cord connector The connector for the plug of the power cord. For details about how to connect the power cord, see page 39 "Connecting the Power Cord". Monitor unit CUE035 1. PIP button Selects the input from connected devices, such as a video conference system device.
- Page 27 Component Names and Functions Controller unit CUE036 1. Power indicator This power indicator remains lit while the controller is running. 2. HD access LED 3. USB ports (USB 3.0 Type A) This port is used to do the following: • Use a USB memory device to perform a firmware update or save a screen •...
-
Page 28: Pen
3. Setting Up the Main Unit CUE037 1. Pen nib The part used to touch the screen to write, draw, and select operations. When the nib becomes worn, replace it with a new one. 2. Battery cover 3. Power indicator Indicates the remaining amount of battery. -
Page 29: Moving The Main Unit
Moving the Main Unit Moving the Main Unit When moving a main unit mounted on the stand, follow the procedure below. • Make sure that two or more people move this product. Otherwise, it is likely that this product falls down or the main unit falls off so that an injury may result while the product is being assembled. - Page 30 3. Setting Up the Main Unit Make sure the main power switch of the main unit is turned off. CUE043 If the main power switch is turned on, turn it off. For details about how to turn the main power switch off, see page 31 "Stop the Main Unit".
- Page 31 Moving the Main Unit Failure to lock the stoppers may result in damage to the main unit, cause the main unit to tip over, or lead to injury. Connect the power cord to the main unit. For details about how to connect the power cord, see page 39 "Connecting the Power Cord". After the power cord is connected, the main unit is ready to start.
-
Page 32: Starting And Stopping The Main Unit
3. Setting Up the Main Unit Starting and Stopping the Main Unit The main unit is equipped with a main power switch and power button. We recommend normally leaving the main power switch on. If you intend to move the product or do not expect to use it for an extended period of time, turn the main power switch off. -
Page 33: Start The Main Unit
Starting and Stopping the Main Unit Start the Main Unit Turn the main power switch on. CUE048 Press the power button. CUE044 The whiteboard screen appears. Stop the Main Unit • Do not turn the main power switch off or remove the power cord while power is being supplied to the product. - Page 34 3. Setting Up the Main Unit Press the power button. CUE044 After the power indicator turns off, turn the main power switch off. CUE043...
-
Page 35: Installing The Main Unit (When Installed By A Contractor)
Installing the Main Unit (When Installed by a Contractor) Installing the Main Unit (When Installed by a Contractor) • When assembling the stand, mounting the main unit on a wall, or installing the main unit, make sure to contact your local dealer. Do not attempt to perform the installation by yourself. The main unit can be mounted on the dedicated stand or mounted on a wall. - Page 36 3. Setting Up the Main Unit • Keep the machine away from salt-bearing air and corrosive gases. Also, do not install the machine in places where chemical reactions are likely (laboratories, etc.), as doing so will cause the machine to malfunction. •...
-
Page 37: Environmental Specifications
Installing the Main Unit (When Installed by a Contractor) • When mounting the product on a wall or the ceiling, select a location (concrete wall or pillar) that can withstand four times the combined weight of the product and mounting bracket. •... - Page 38 3. Setting Up the Main Unit When mounting the main unit on the stand CUE046 1. Width : 150 cm (59.1 inches) or more 2. Height : 200 cm (78.7 inches) or more 3. Depth : 100 cm (39.4 inches) or more When mounting the main unit on a wall CUE047 1.
-
Page 39: Mounting The Pen Tray
Installing the Main Unit (When Installed by a Contractor) Mounting the Pen Tray • When mounting the pen tray, make sure to contact your local dealer. Do not attempt to perform the mounting by yourself. After assembly, install the pen tray on the display. The pen tray may be positioned at the left side, the center, or the right side of the lower part of the display. -
Page 40: Connecting The Dvi Cable
3. Setting Up the Main Unit Connecting the DVI Cable Make sure the main power switch of the main unit is turned off. CUE054 If the main power switch is turned on, turn it off. For details about how to turn the main power switch off, see page 31 "Stop the Main Unit". -
Page 41: Connecting The Power Cord
Installing the Main Unit (When Installed by a Contractor) Connecting the Power Cord Notes for users in North America • Connect the supplied 120V cable to the 120V power supply. Notes for users in EU and other areas • Connect the supplied 220-240V cable to the 220-240V power supply. •... - Page 42 3. Setting Up the Main Unit • Be sure to disconnect the plug from the wall outlet at least once a year and check for the following: • There are burn marks on the plug. • The prongs on the plug are deformed. •...
- Page 43 Installing the Main Unit (When Installed by a Contractor) • When performing maintenance on the machine, always disconnect the power cord from the wall outlet. Connect the power cord to the power cord connector on the main unit. CUE042 While the display is being set up using the stand, keep the power cord connected to the clamp.
- Page 44 3. Setting Up the Main Unit...
-
Page 45: Troubleshooting
4. Troubleshooting This chapter explains what to do when you cannot use the main unit. The Main Unit Does Not Start If the main unit does not start, perform the following procedure: Make sure the power cord is connected. See page 39 "Connecting the Power Cord". Make sure the main power switch is turned on. - Page 46 MEMO Y300-7503...
- Page 47 © 2012 Ricoh Co., Ltd.
- Page 48 Y300-7503...